Robot lamp
Robot Lamp
Hello! Today I will present a new carpentry project, decorative, functional and above all easy to make.
We will need the following materials and tools:
- Pine ribbon 3 cm wide x 3 cm high x 150 cm long
- Pine ribbon 3 cm wide x 6 cm high x 40 cm long
- Pine leaf of 0.5 cm wide x 10 cm high x 60 cm long
- Pine table of 8.5 cm wide x 10 cm high x 1 cm long
- Sealer for wood ready to use
- 2 sheets of sandpaper number 80
- 2 sheets of sandpaper number 120
- 6 screws 4 cm long 3 mm thick with its washers (2 each) and nuts
- 6 screws for drywall or 2 "wood
- Socket for 110 v bulb
- Bulb 110 v (I use one led of 6 w)
- 1, 5 meters of cable 2 x 12 awg
- Switch Plug
- Drill
- Wick 1/8 "
- Jig Saw

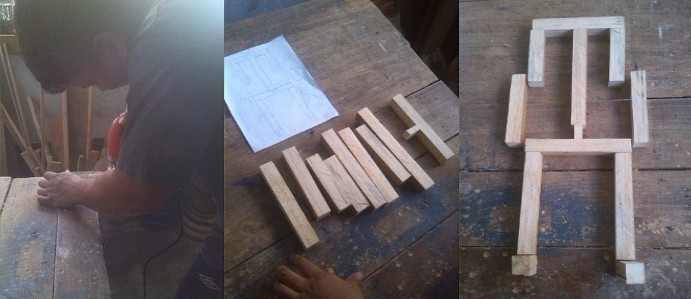
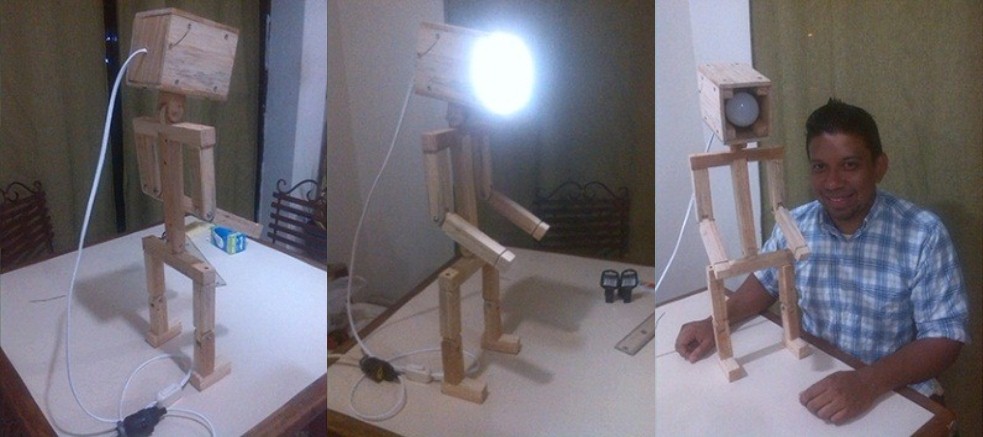
We start by cutting the pine ribbon 3 cm wide x 3 cm high x 150 cm long in what will be the body of the robot without including the section that supports the legs and the section that holds the head to those two parts we will cut them with the lath of 3 cm wide x 6 cm high x 40 cm long. I put a plan of the body parts of the robot. Always remember: Measure twice cut once!
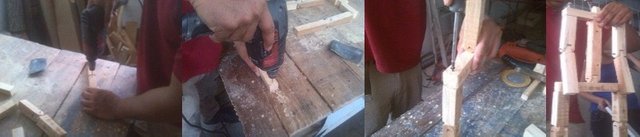
After cutting, we join the robot body by drilling with the drill and the 1/8 "wick and join with the 2" screws. I used screws for drywall to temporarily fix the body of the robot to verify that everything is fine before placing the screws with washer and final nut.
Proceed to cut the Pine Leaf 0.5 cm wide x 10 cm high x 60 cm long To assemble the head of the robot and in the same way we assemble it fixing it with screws for drywall. Having it cut, we join the sides and use the pine board of 8.5 cm wide x 10 cm high x 1 cm long as the back cover and proceed to fix the head to the body.
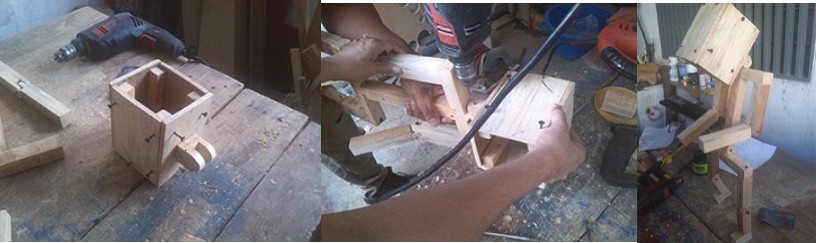
Having already cut and armed everything, we proceed to finally assemble the robot.
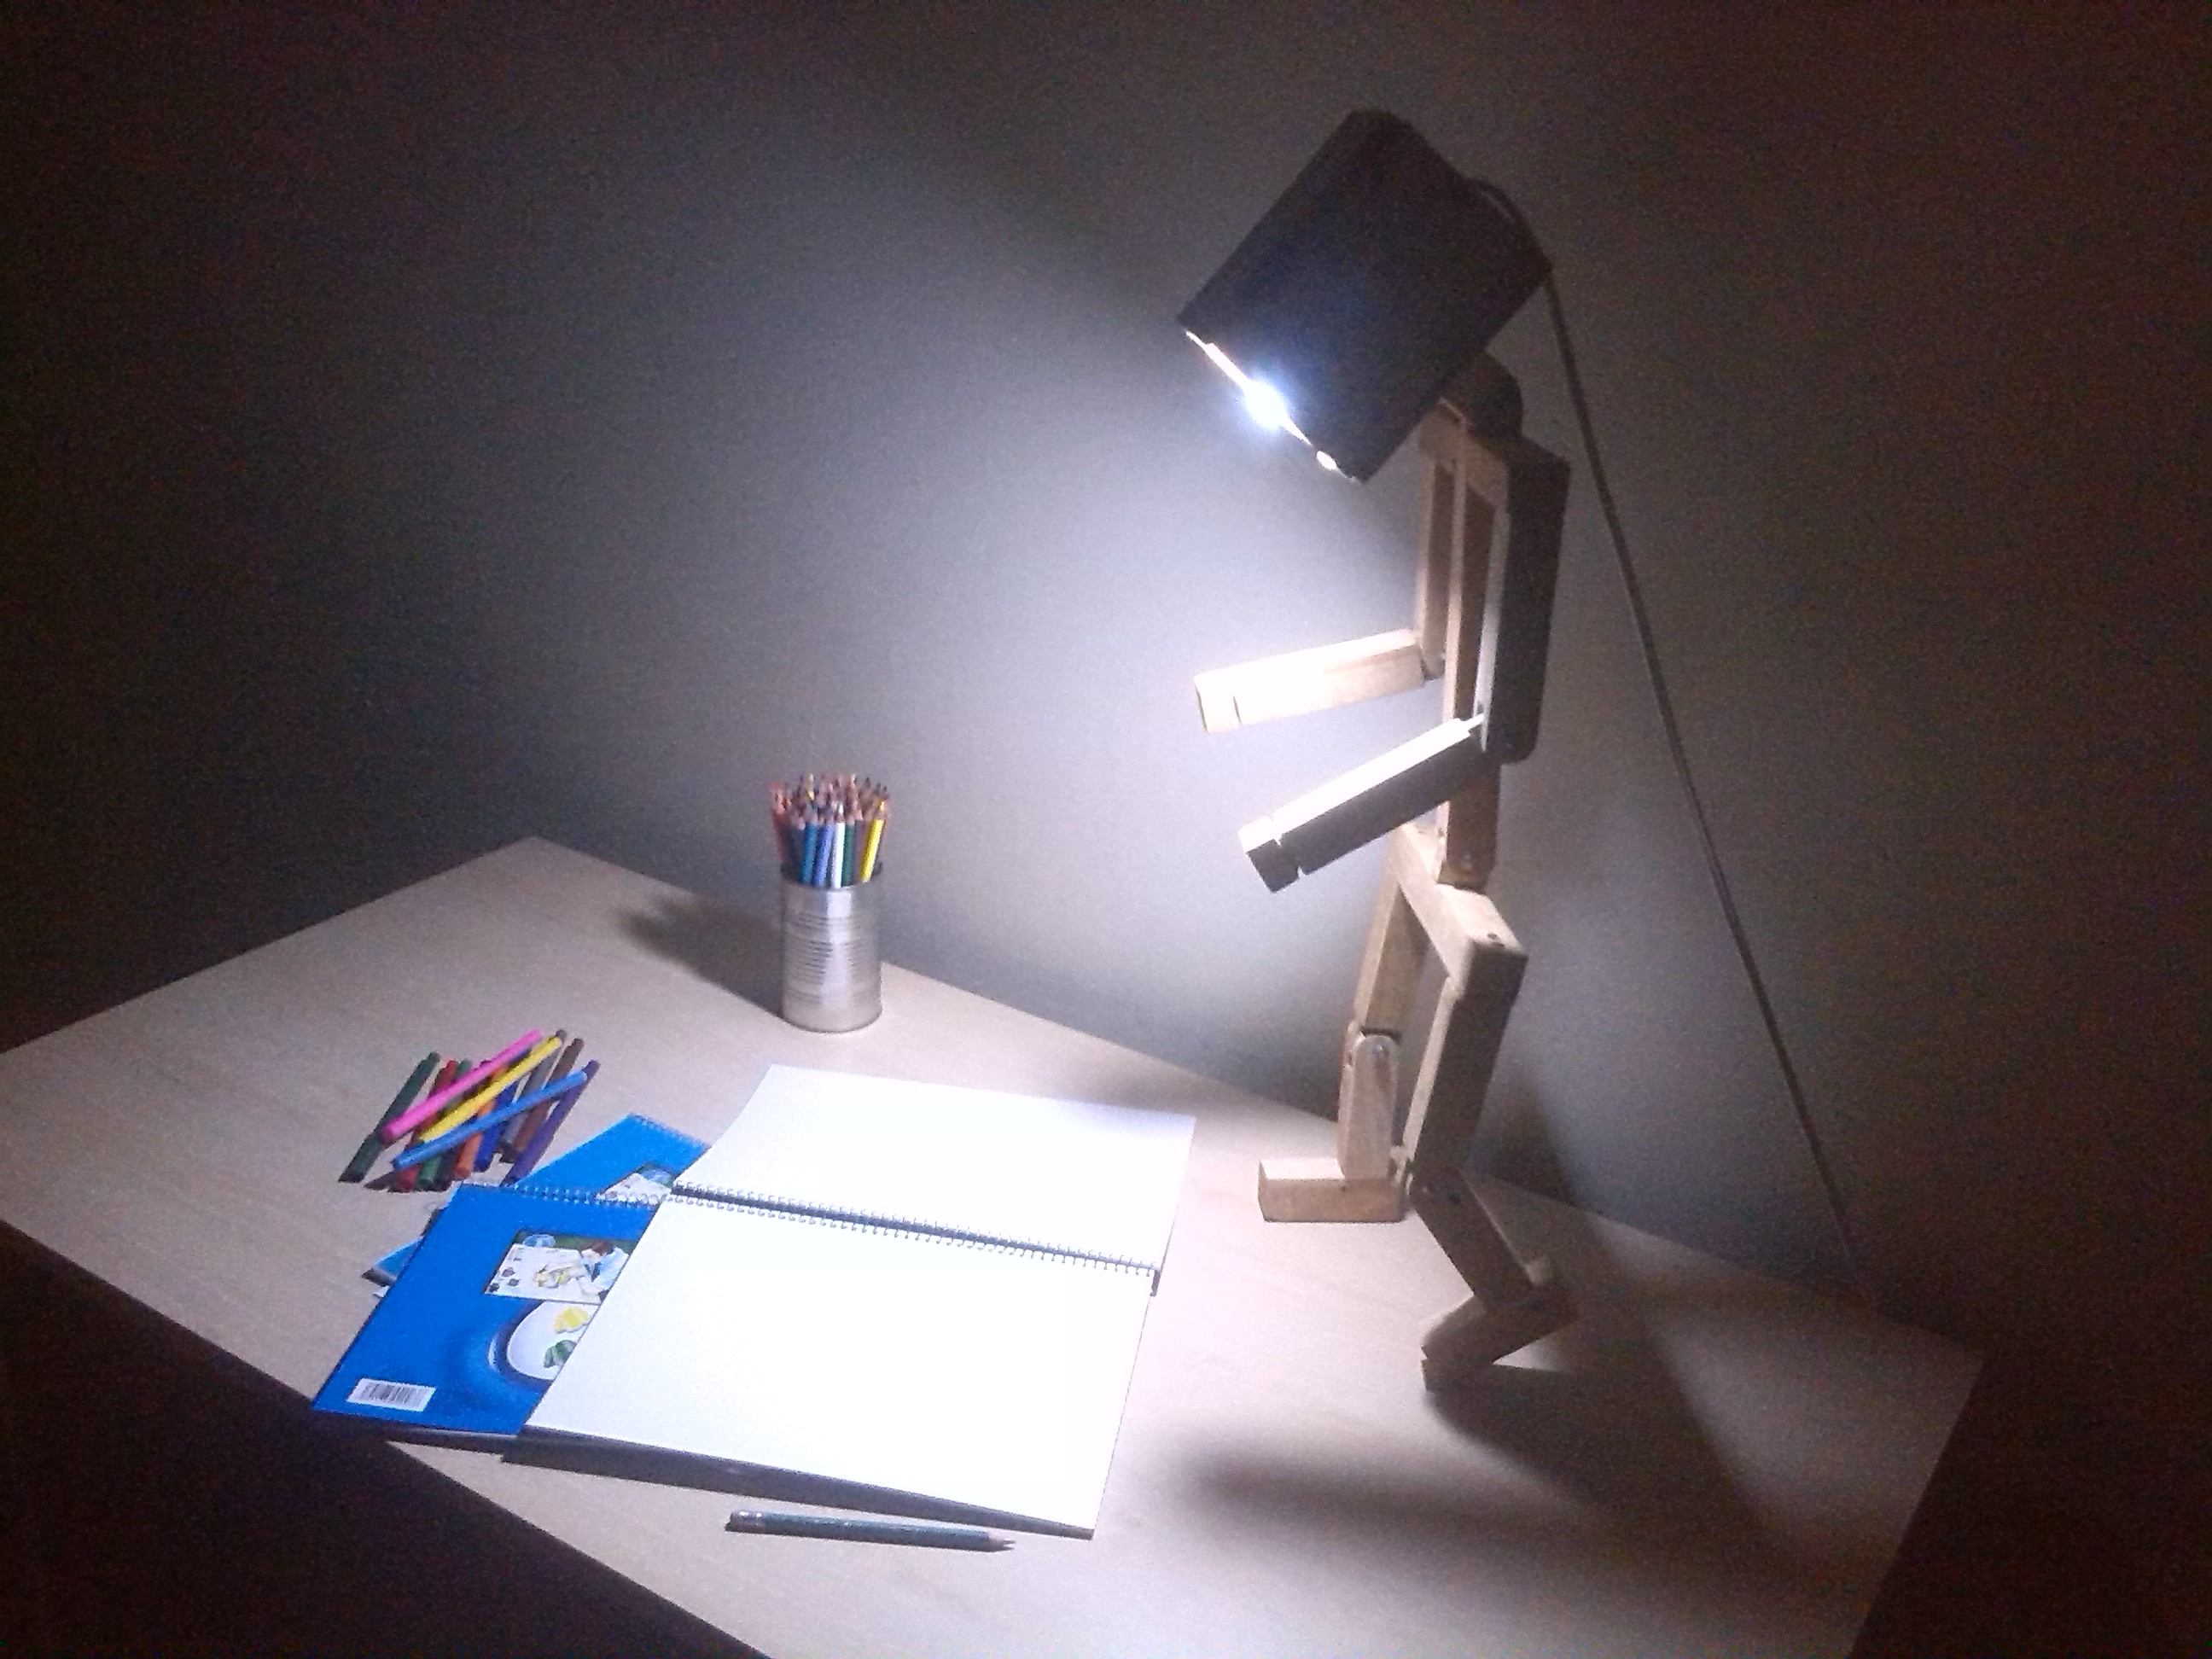
Now we go to the elaboration of the electric circuit for the light bulb with the cable, the plug, the switch and get out and we prove that it works well.
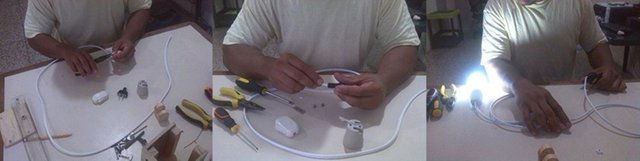
With the sandpaper number 80 and then the number 120 we sand all the pieces; We apply 3 coats of sealer waiting 30 minutes between each one to sand them. Then we set the circuit to the robot's head. And we assembled all the body.
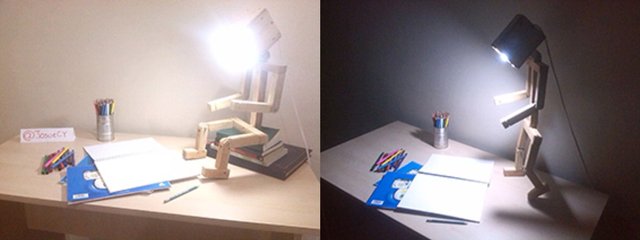
Ready! We already have a Robot table lamp articulated, decorative and functional !!
Do not forget to comment in case you have doubts or suggestions.


Really nice work!!
Thanks!!