How I hand color my Drypoints - A step by step post.
Hi all!
Today I wanted to show you another aspect of printmaking.
This is something that you can choose to do after you're done with the printing part, which usually is the last step.
Guessed what I'm talking about? Yes, it's Hand coloring!
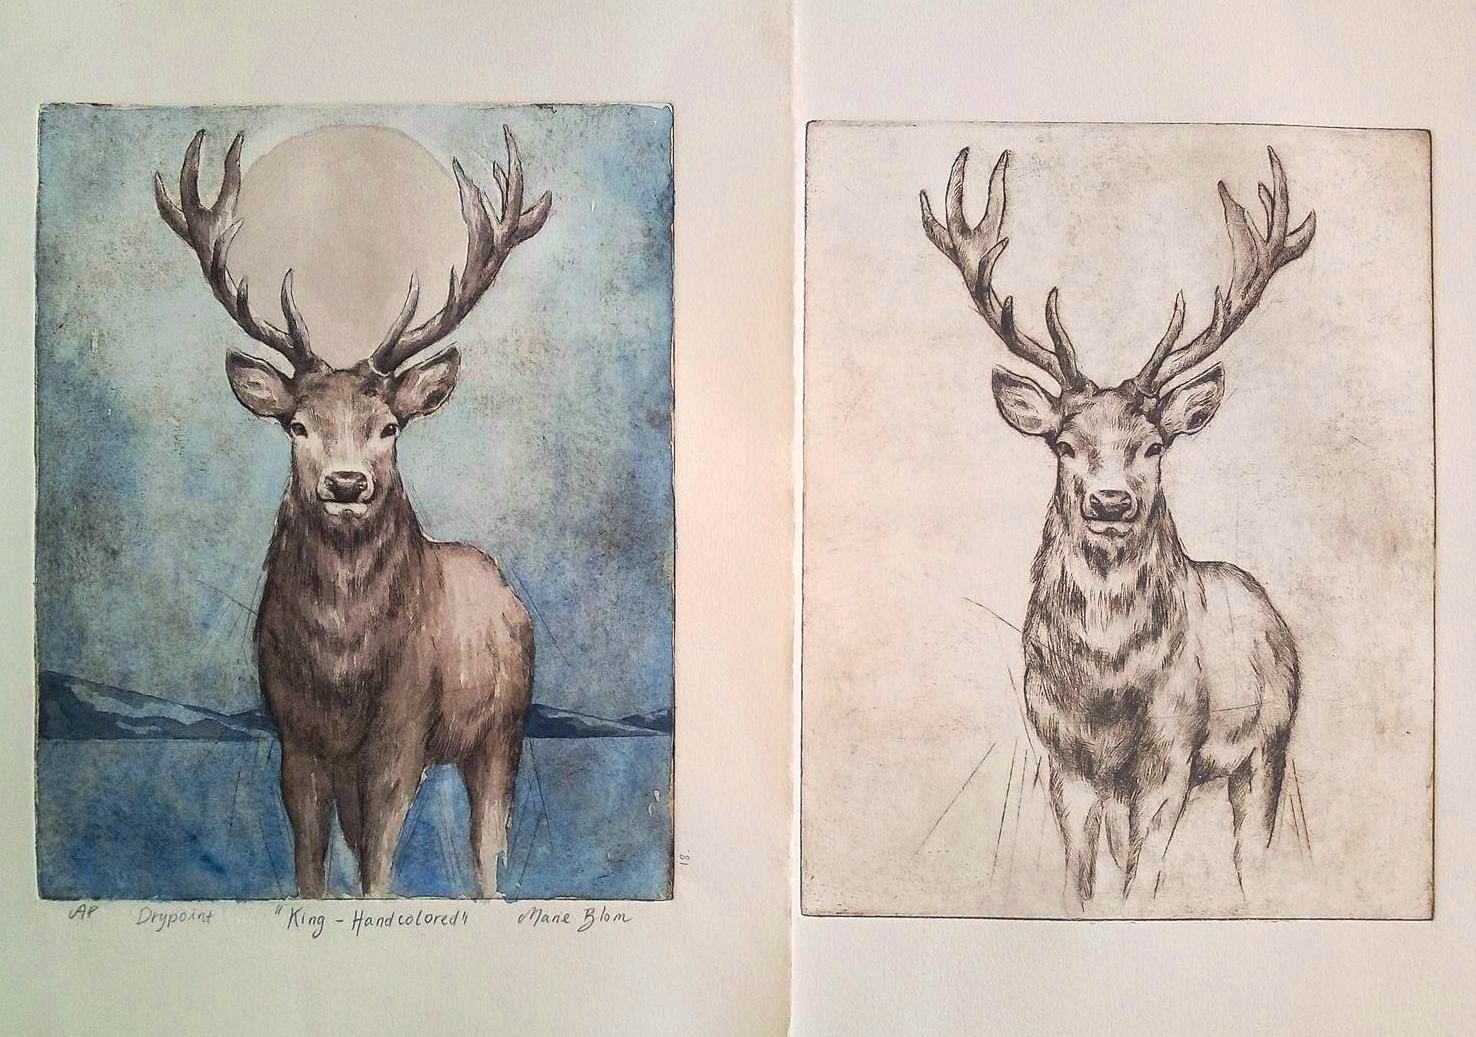
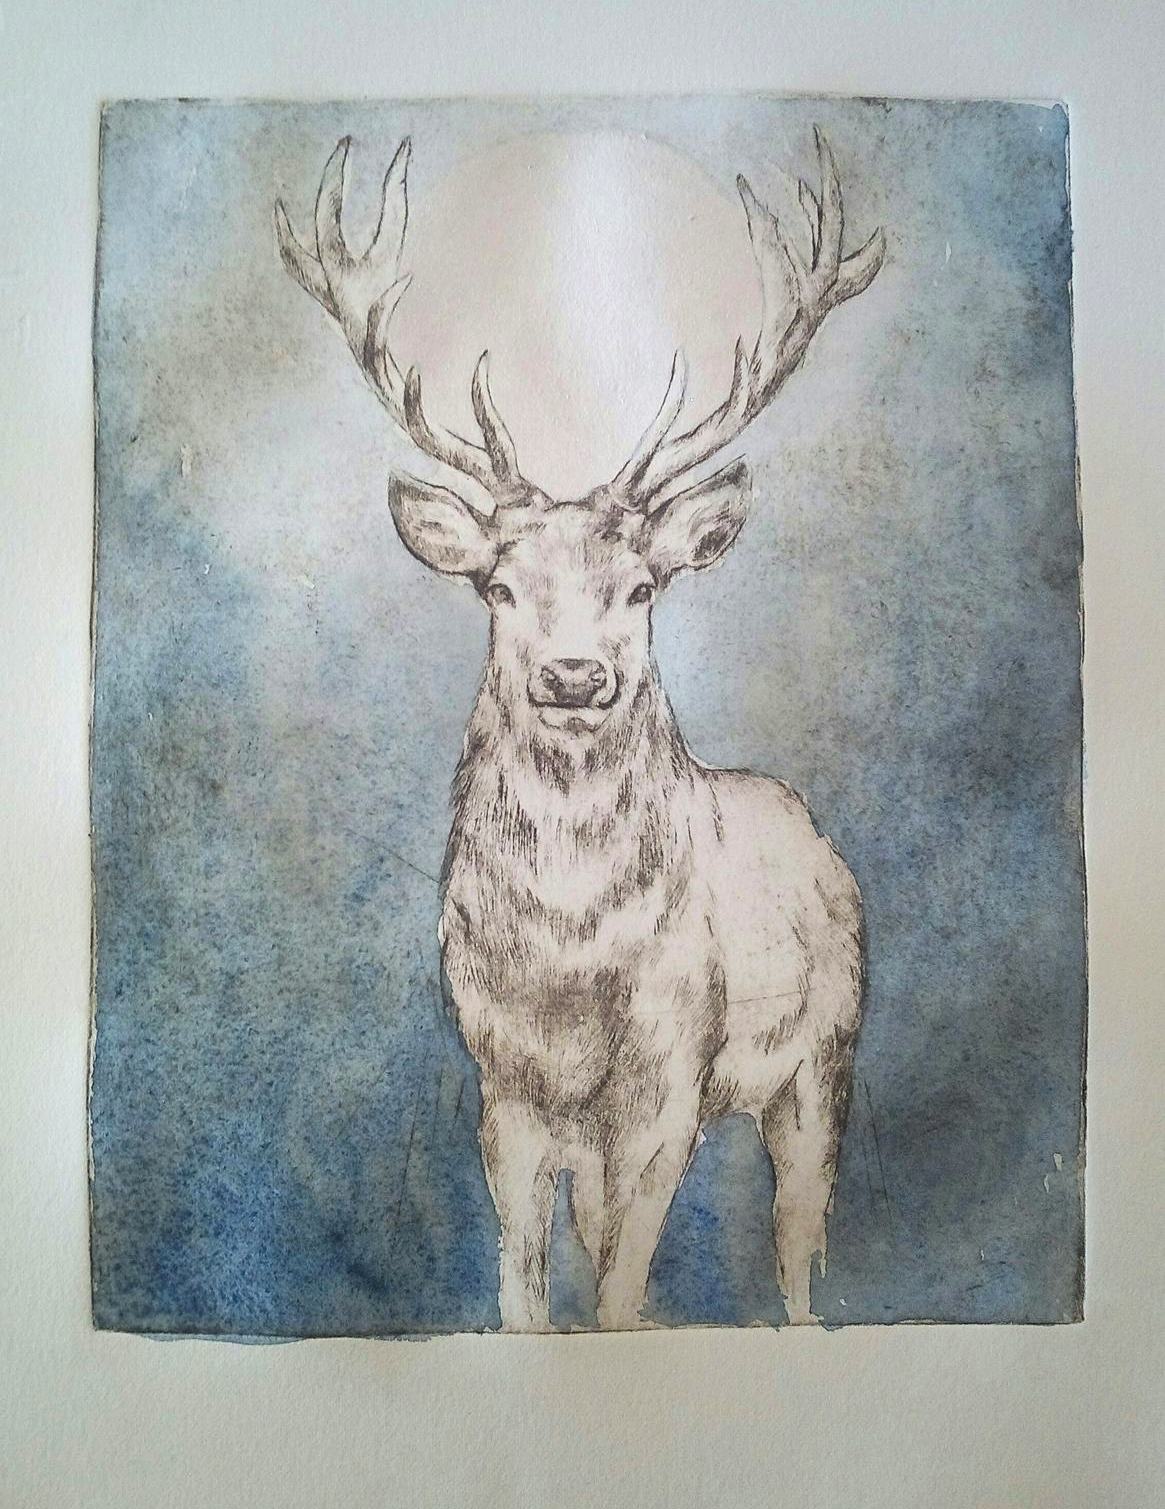
Hand colored drypoint print next to original print.
Hand coloring your prints can be a fun thing to do to a few selected copies in each individual edition you print as a special collecters item. It can also be a good way to ''save'' a print that you weren't all that happy with.
In my case I chose to handcolor this print because I wanted to explore background options and because this one print ened up coming out off the press with a poor inking job.
I like to hand color my prints with watercolor or gouache but you can also use ink or acrylic paint.
The reason I love to work with watercolors in particular is because yo can build up the layers and if you want you have the option of just going over the printed areas with thinner washes of color that doesn't entierly cover up the drypoint.
So let me show you how I went about this!
Step 1:
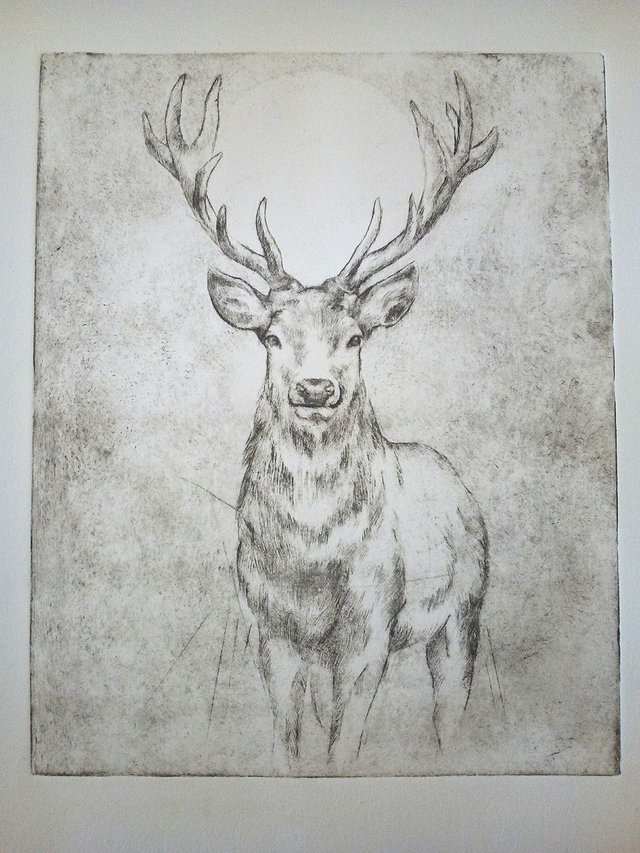
Here you see the print before I did anything to it. As you can see I haven' applied enough ink so the impression is quite weak..
Step2:
I knew I wanted a blue background to give the impression of the sky. It's quite invisible in the first photo, but there is actually a light circle behind the deers antlers. In my head I was envisioning this to be the moon.
I started out by going over the background around the moon and deer with a layer of water. Then I started to add in two different shades of of blue, one warmer and one cooler. I also knew that I wanted the blues to be lighter towards the moon and then darken gradually downwards.
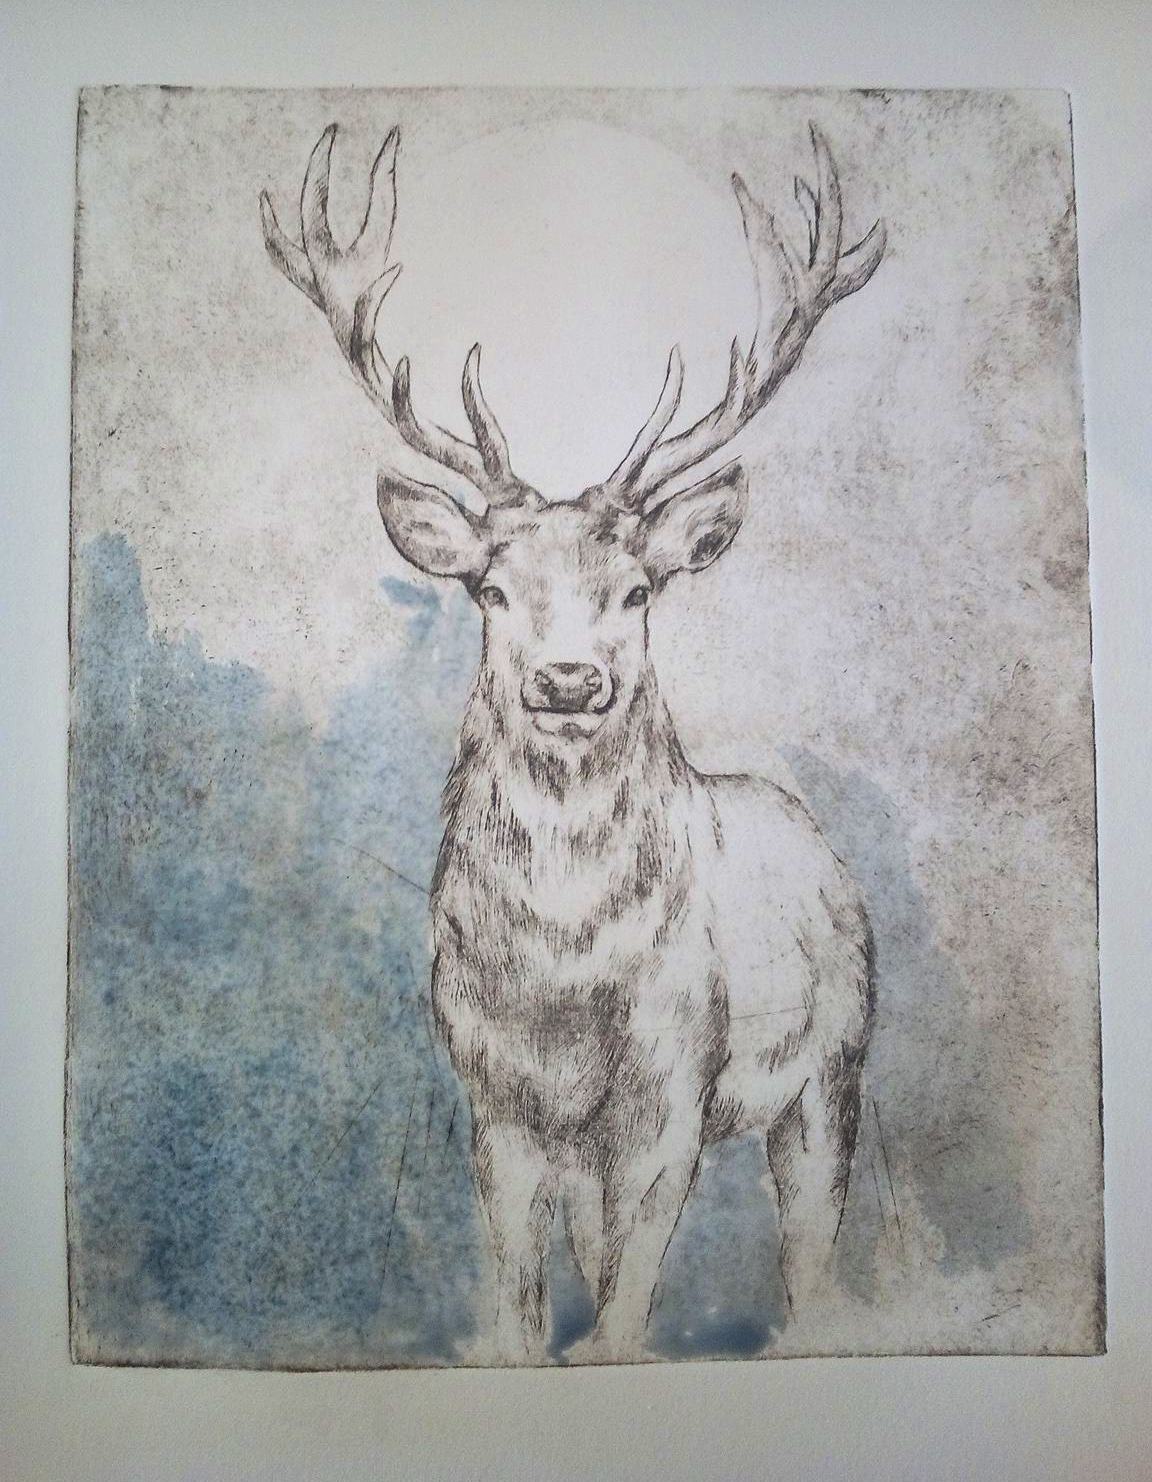
Step 3:
Here you can see the entire background put in. Right now it's still wet so I know that when it dries it will be a coule of shades lighter. This happens to watercolor when it dries, it lightens.
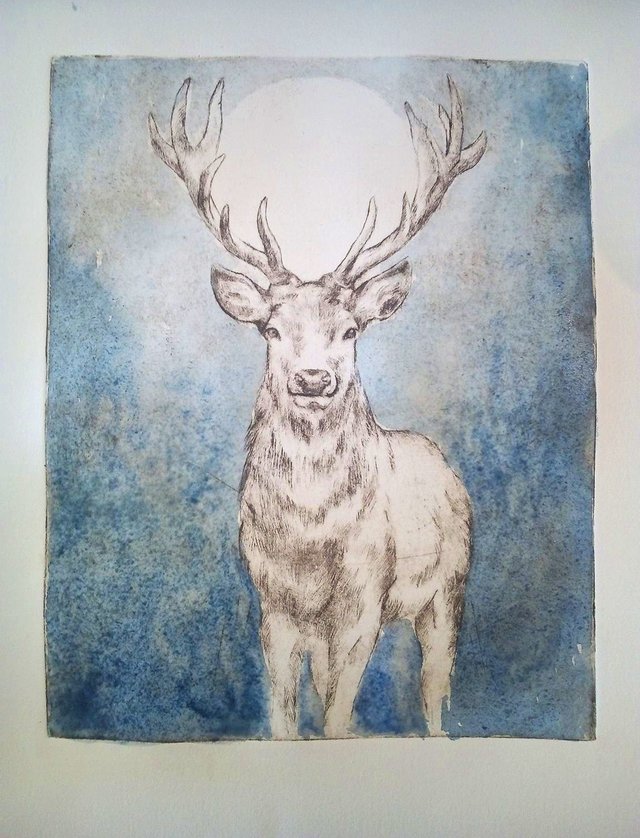
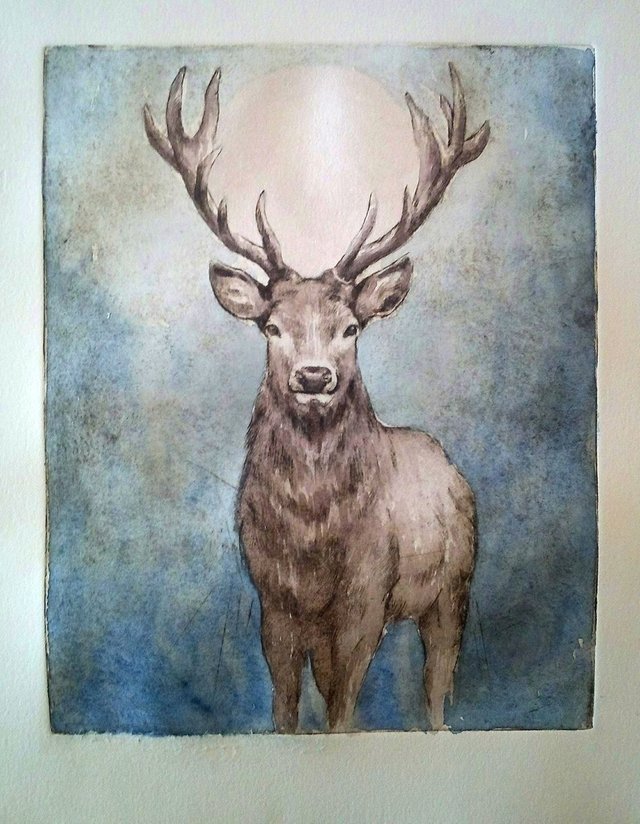
Step 4:
As you can see, now the background has dried and become quite a bit lighter. The next thing I did when the background had dried was paint the circle, the moon, behind the antlers. I knew I wanted to to make it pop and chose to add a watercolor paint called ''White Gold.'' It looks like a warm silver and when it is dry it becomes quite metallic. I really like to add a bit of sparcle when I hand paint my prints. It doesn't show yet, but later I will show you the effect it has in the right light.
Step 5:
Next is the deer. I really want it to stand out from the background, but I am starting out with lighter washes of color to build my way up to a stronger contrast.
Step 6:
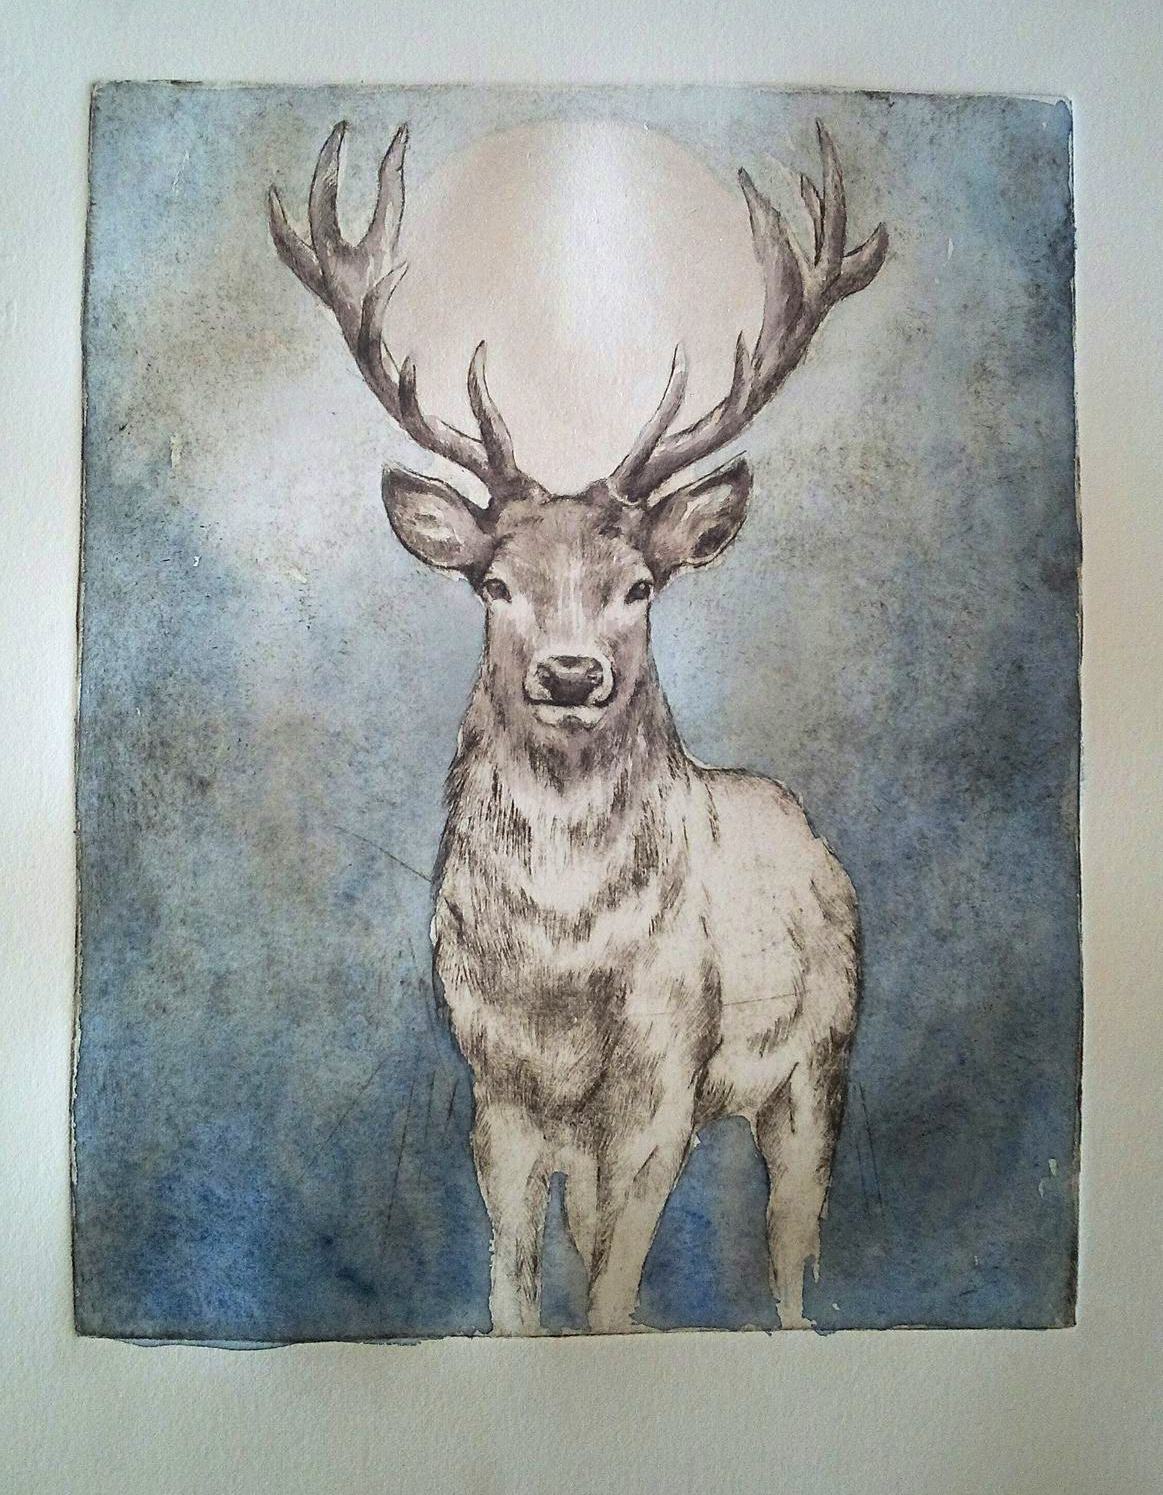
At this stage I have gone over parts of the deer, mainly the face and antlers, with a couple of washes of a cooler brown. I am now starting to get more of my desired effect. the next thing I will do is repeat this process in th e body.
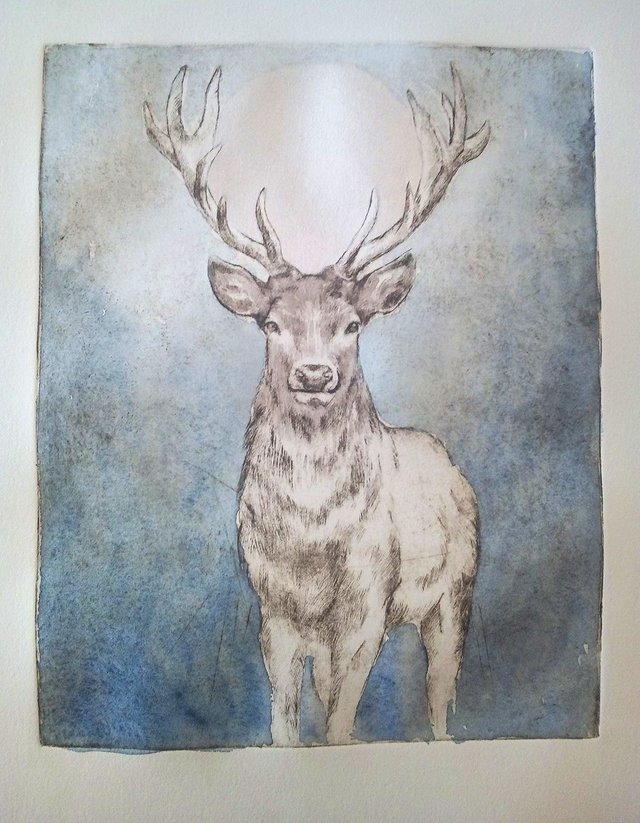
Step 7:
The deer is starting to come to a finish and now I have to decide on what to do with the backround. The thing is, I really want to add another element to my plate to create more a sence of space and atmospher around the deer but haven't been sure of what. In my head I was initially thinking of a woodland landscape, but as I was sitting there I suddenly started to think about the mountain plateaus of Norway and these abstract shapes depicting mountains came to mind.
Step 8:
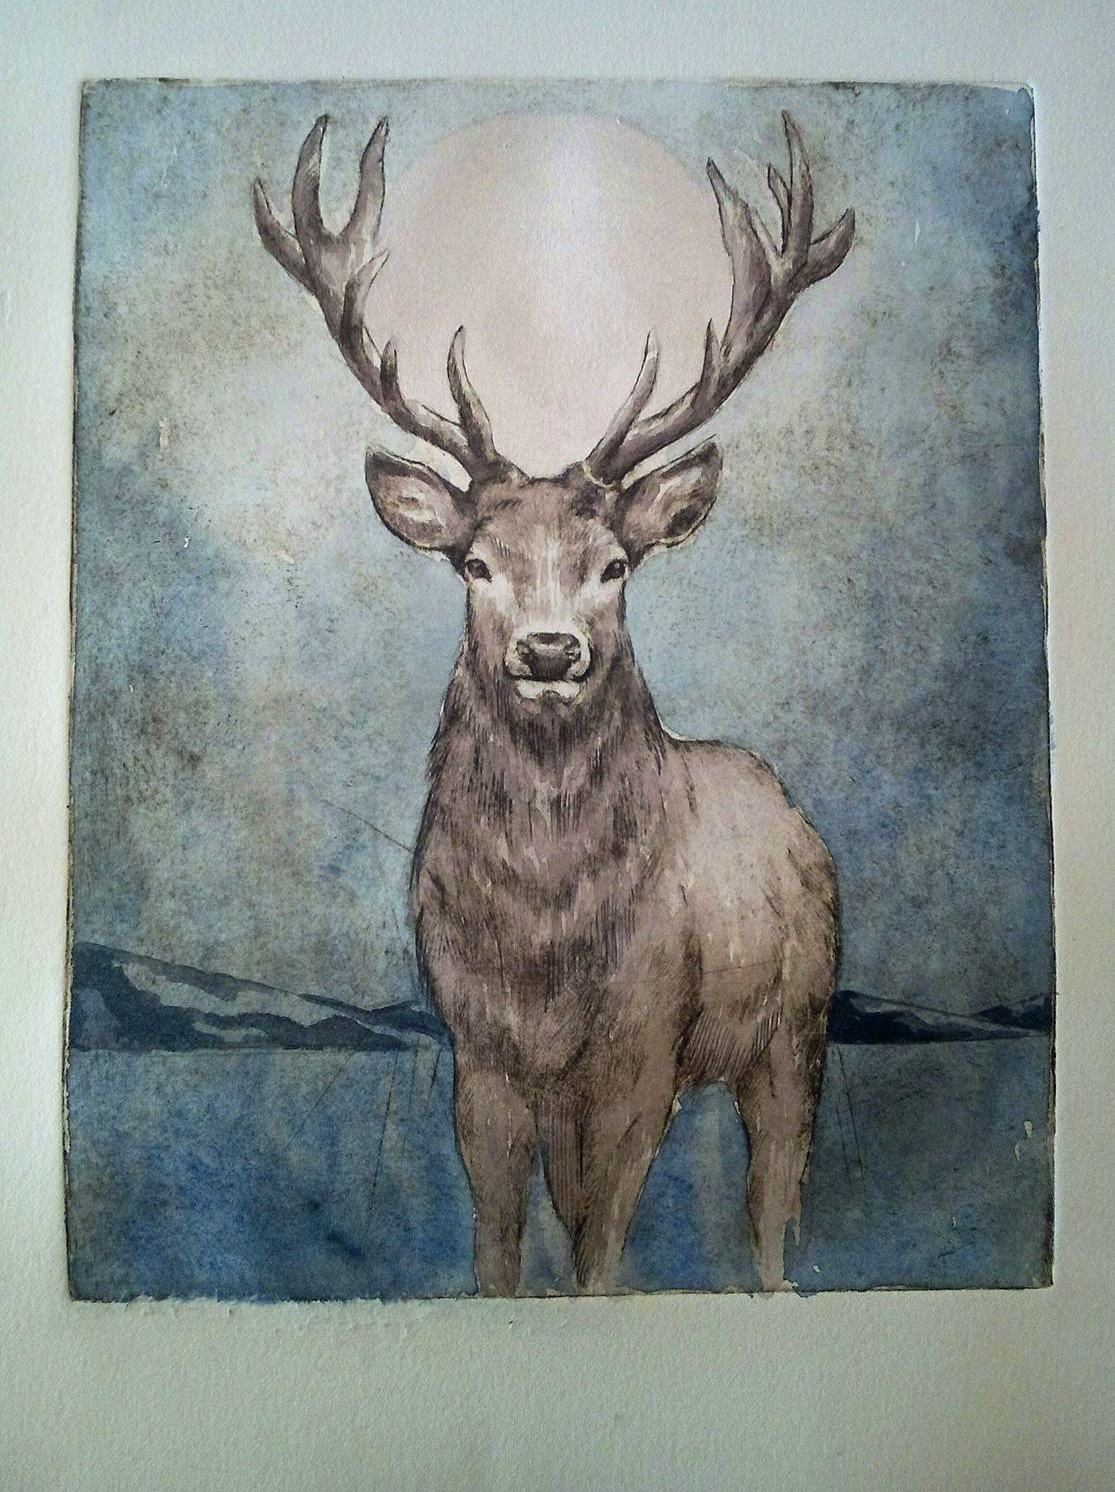
I added the abstracts mountain shapes and immediately liked them. They give a context without pulling attention away from the main character.
Step 9:
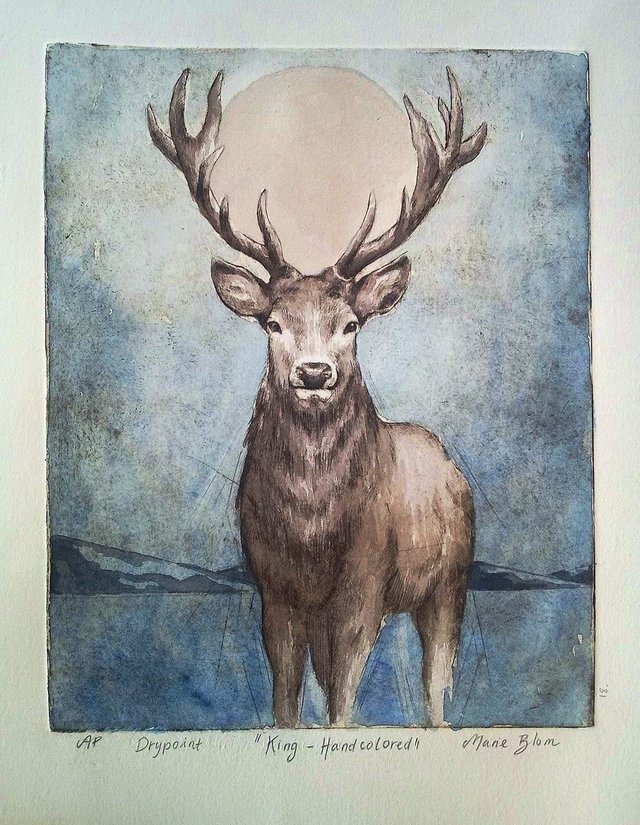
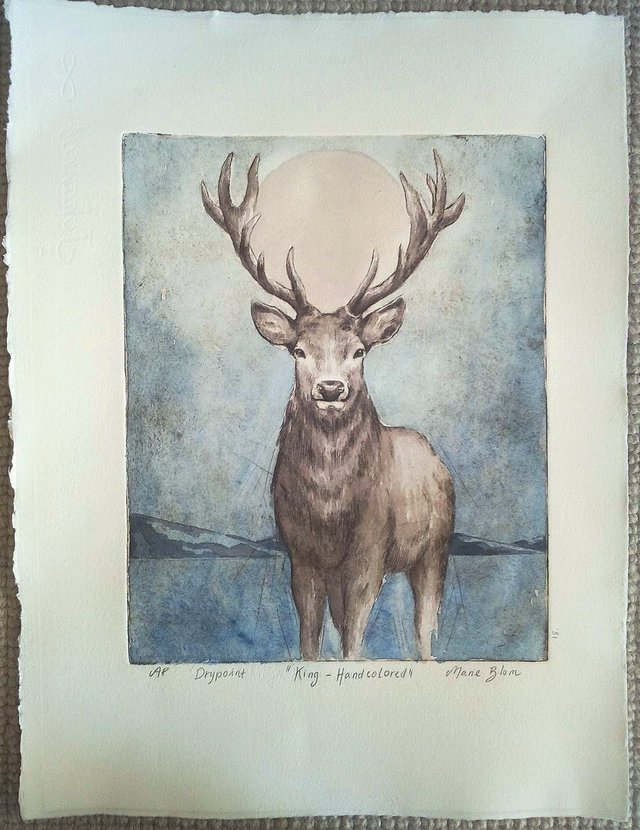
My last step was to add some darker values to the deer to give him more contrast and pull him more forward in the image. I quite like the way it turned out and I like that you can still see the engravings through the paint layers..
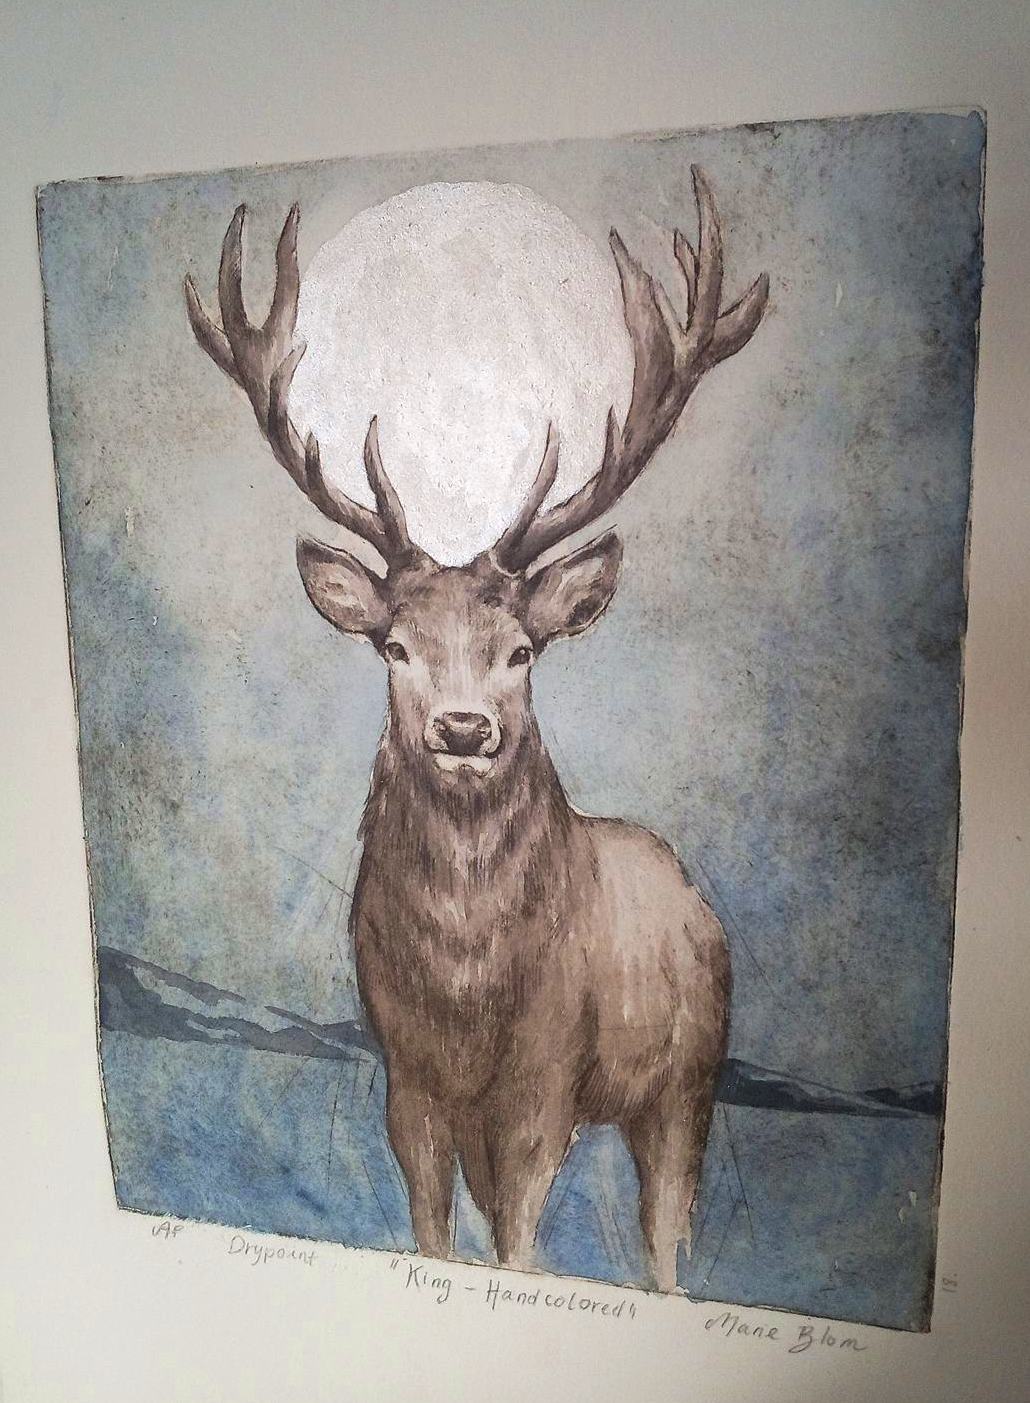
In this image you can see how the light is reflecting in the matallic paint...
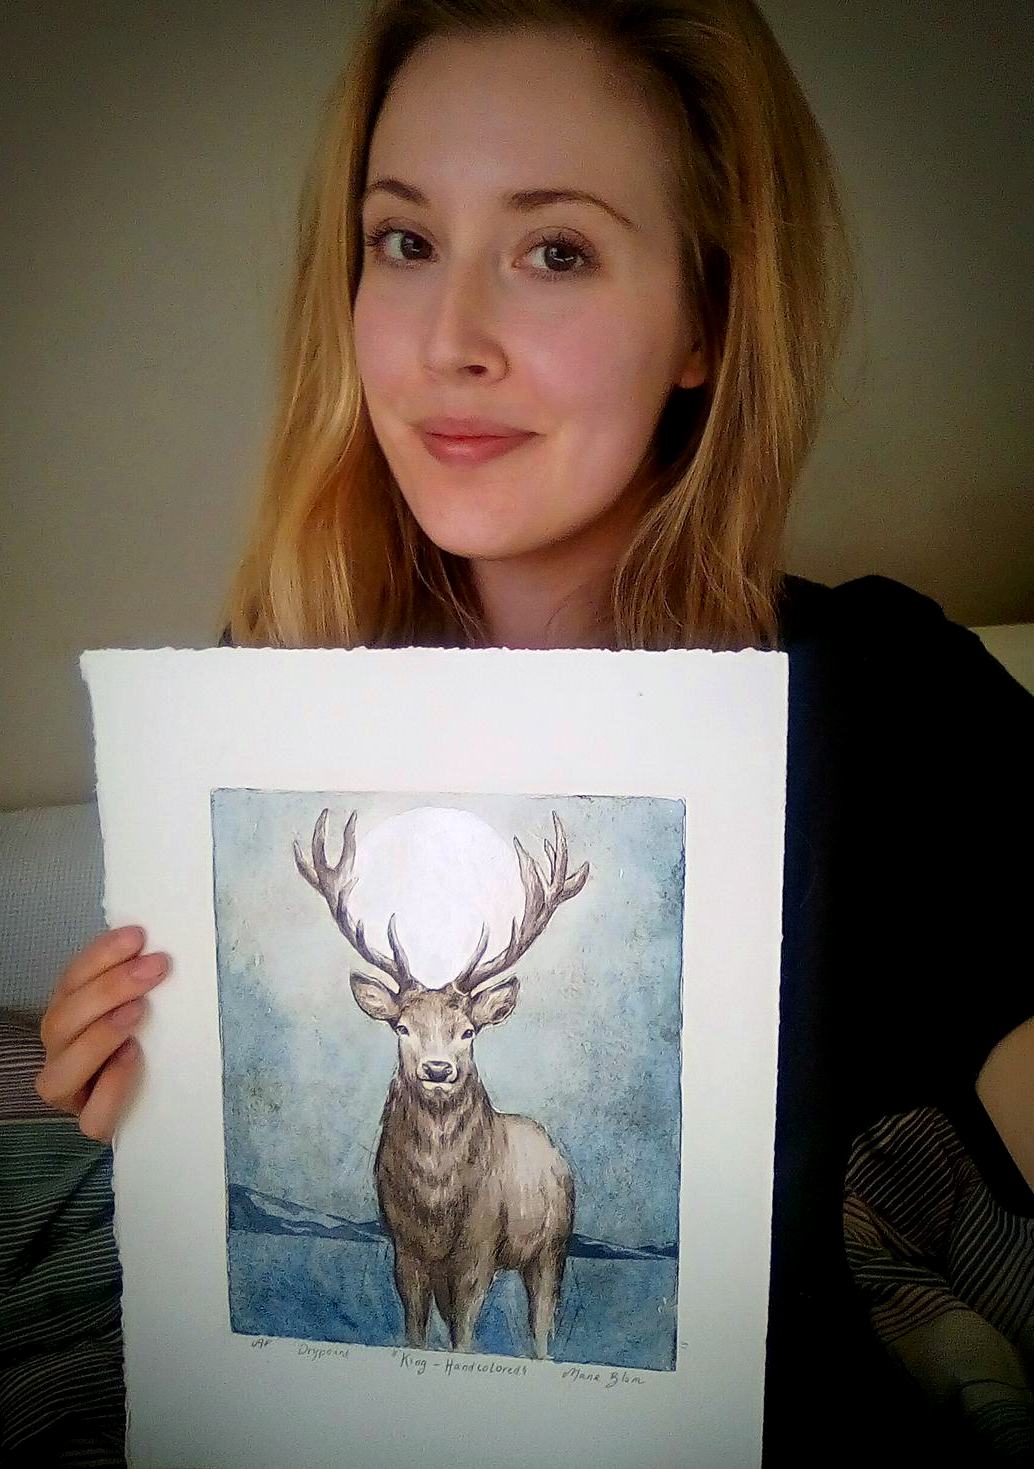
Me with the print. ;)
One of the main reasons I love hand coloring prints is becase it reminds me of when I was a kid and used to sit for hours with my coloring books.. Can anyone relate..? Hehe..
<3
What do you think?
Have you ever handcolored a print before?
Do you like the effect?
I hope you are all having a wonderful and creative day beautiful people!
<3
My website:
https://www.marieblomartist.com/
My instagram:
https://www.instagram.com/marieblomfineart/
GOOD JOB!!! I LIKE IT.
Thank you very much @artemacarre!! 😊
Beautiful! So interesting to see the finished effect! When I paint I think I am always in such a hurry to get to the finished painting that I rush everything!
Thank you @vtravels! 😄 Heheh, Yes, that can happen.. ;)
I love it!
Thank you @lindari! 😊
Great post! This makes me want to print some copies of my sketches and sort of color them differently.
Ah, so beautiful! The drypoint prints are really awesome on their own, but I especially love that you hand color one of each print. That metallic paint is a great touch - can't go wrong with a little something shiny! haha
My daughter is absolutely in love with deer, and I've been planning on painting one for her... I've had an outline sketched for ages but I have yet to actually touch it with paint. 😅
Beautiful work.
I'll be keeping an eye out for future posts.
Amazing! I just found you so am now following. I love finding new artists and we have such a good art community here.
I used to be primarly a printmaker. I now mainly work digitally, but I still play with screenprinting and monoprinting a bit in the Summer when I can stretch out in my summer studio and get a bit messy.
Wonderful work and I am also obsessed with deer/stag so I doubly love this piece :)
Hello! I liked the graphic version of the deer more. Did you come up with the story yourself?