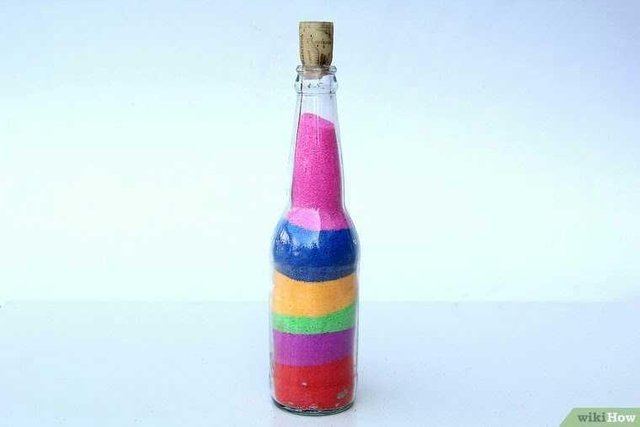
How To Make Sand Artwork
Sand artwork is a fun, inexpensive project, and the results can be showcased for years to come, be it homemade work for display at home or a way to spend the afternoon with the kids to explore their creativity. Empty flower vases or glass containers are your palette and rainbow colors of choice are available. The hardest part is determining the design!
Method 1 of 3:
Using Colored Sand
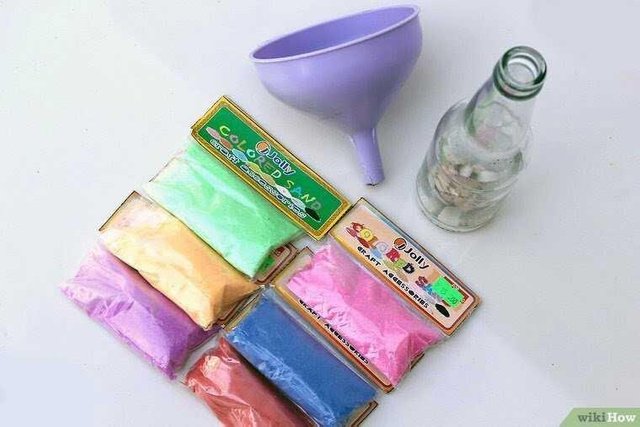
Image Source-Pixabay
1.Plan the materials needed. Do you want to make a vase? Terarium? How much sand do you want to use? In general, some objects look good when there are specific colors that are highlighted. Colored sand can be found in handicraft shops.
Glass bottles
Objects eg plants, if desired
Funnels
Tool to move sand, eg paint brush or spoon
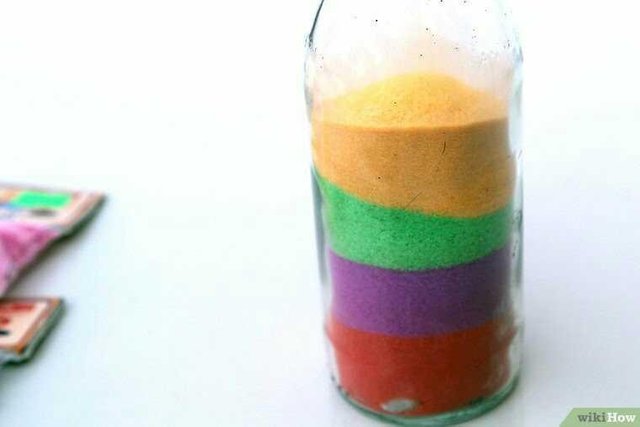
Image Source-Pixabay
2.Start layering sand. This is easiest to do when using a funnel - use a real funnel or use a piece of paper (because you can control the tip size). Move the funnel toward the place where the sand should be - the uneven layers will look good (and most certainly of course).
The funnel is the simplest tool to create layers of interesting colors and to create patterns. And the beauty of the sand work is that when something goes wrong, you can start again from scratch.
If the result is not as you imagine, use a tool such as a paint brush to adjust the sand to the correct positions.
Image Source-Pixabay
Add objects as you wish. If you want to create a terrarium, you can add objects such as rocks, plants, or branches into bottles. Some people love to put a stone at the bottom of the bottle, so that if the bottle is lifted, it will look "roots".
- You can add a smaller vase or bottle to the bottle and put sand around it. Then you can put something into a smaller vase with ease - and it will look like it's buried in the sand.
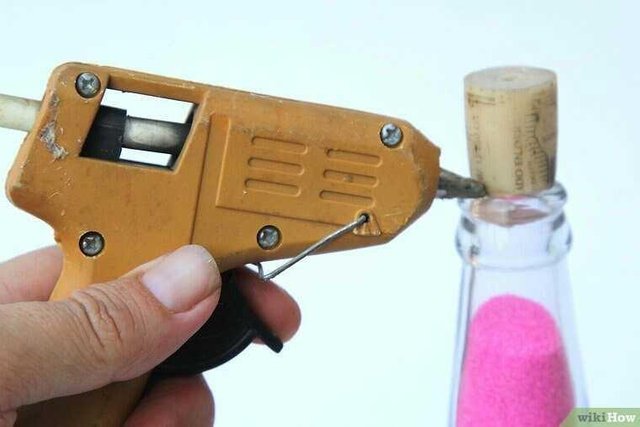
Image Source-Pixabay
If there is a cork bottle cover, cover the bottle with a lid with hot glue. When the bottle is full and you are satisfied with this creation, put a cork cover with a little hot glue (so the glue does not spread anywhere) and gently attach it to the bottom.
- This is not really necessary, but the bottle cap will keep the sand moving everywhere if the vase is knocked or fall off the shelf.
Method 2 of 3:
Using Sugar Sand and Food Coloring
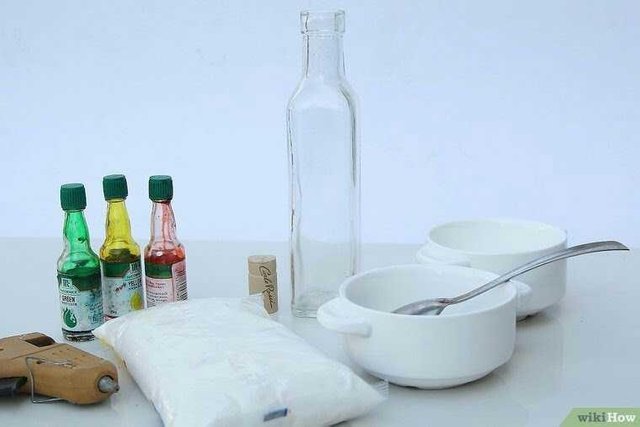
1.Collect the materials. The amount of material required is determined by how many works will be made. Here are the necessary ingredients:
- Sugar
- Food coloring
- Glass bottle with cover
- cork
- Bowl
- Spoon
- Hot glue
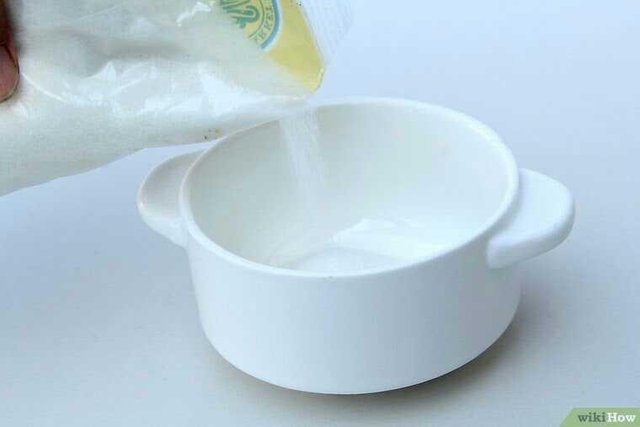
Image Source-Pixabay
2.Put sugar into the bowl. Separate the sugar into a bowl for each color. Make a little more than necessary. You can use colored sugar for pastries or desserts later.
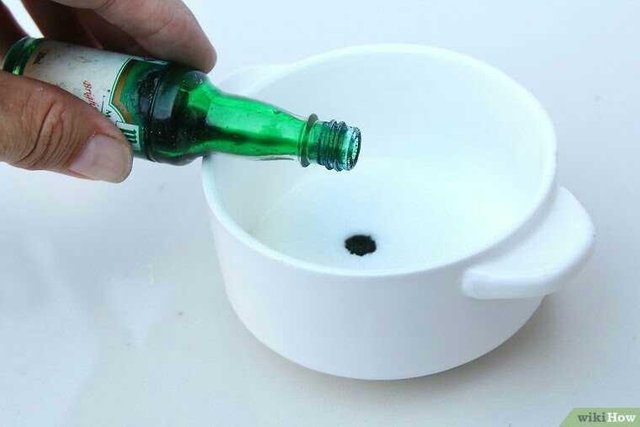
Image Source-Pixabay
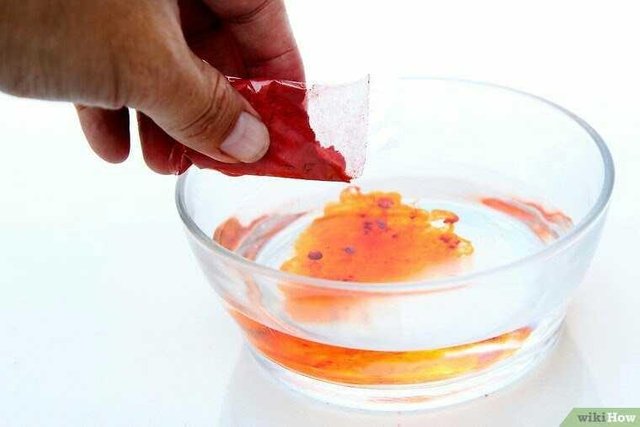
3.Put a few drops of food coloring into the sugar and mix it with a spoon. Start with a few drops to see the appearance of the color; then add a few more drops when needed. One or two drops of dye will make the sugar look darker. Mix well so that the color is evenly distributed.
Do the same steps for all colors. You need separate bowls for each color.
Mix red and yellow color to make orange, blue and yellow to make green, and red and blue to make the color purple.
Try also to combine two different colors to produce a dwiwarna sugar.
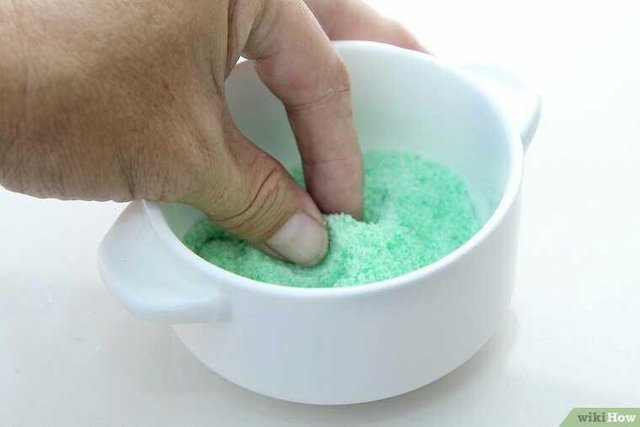
Image Source-Pixabay
4.If all food coloring has been absorbed into sugar, knead by hand. This will make the colors better blended and the texture flat. It's okay to clot, it's normal.
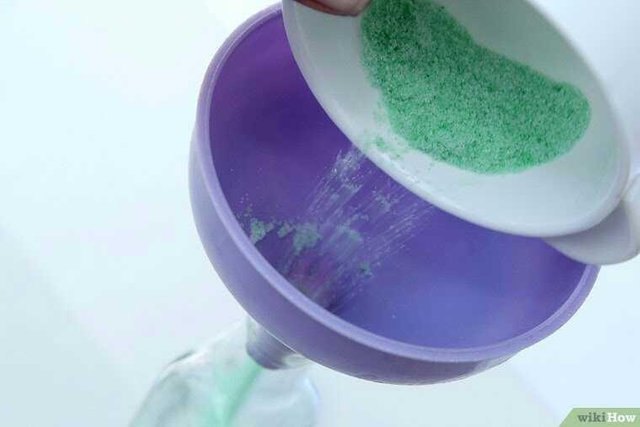
Image Source-Pixabay
5.Start filling glass bottles. You need different materials to make the layers, depending on the size and shape of the bottle. You just need to enter the sand - but to make it more fun you need a funnel.
Wear a piece of paper that is formed into a funnel and use to enter sand. Alternatively, you can use a straw or other similar tool. If the sand is not perfectly arranged, you can flatten it with the tip of a spoon or toothpick.
Try making patterns; using a funnel is the easiest way.
Try tilt the bottle or vase and coat it with sand at the edges.
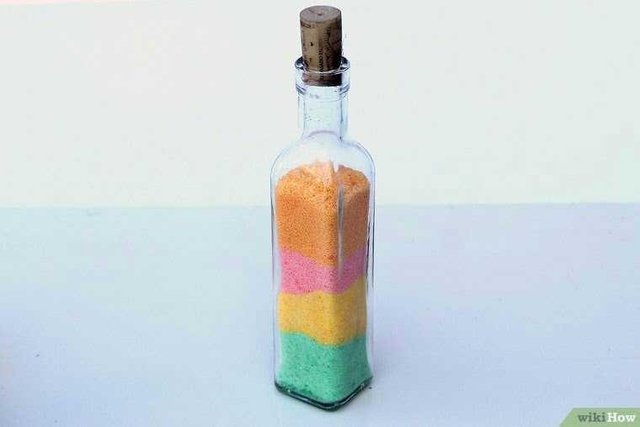
6.Apply hot glue to the bottle with the cork cover. If the bottle is full, apply a hot glue on the bottom of the cover and bottle edge. Put the cork cover to the bottle and let it dry for 5 minutes.
- The glue is really hot! Be careful not to touch it. Once the bottle is closed, the artwork is ready to be exhibited.
Method 3 of 3:
Using Sand and Gel Dyes
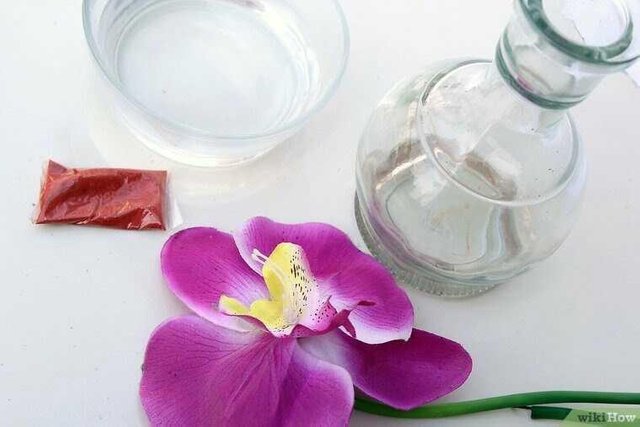
Image Source-Pixabay
1.Collect all the necessary materials. Although using sugar and food coloring is the easiest, you will see if lighter and brighter colors can be obtained from sand and gel dyes. Sand toys (darker-colored sand is better for darker colors) can be found at pet store shops or pet stores at affordable prices. In addition to these two materials, it is also necessary:
Hot water bowl
Glass containers or vases
Interest (optional)
2.Dissolve food coloring with hot water. Each color requires a bowl of its own hot water. Not boiling water, but hot - put a bowl of water into the microwave for 1 minute and that's enough. It takes about 1-3 spoonfuls of gel dye for each bowl (depending on how bright the desired color is).
- Paint. Cat liquid tempera can also be used, you just need to throw away the water and do it slowly when the paint is mixed with sand.
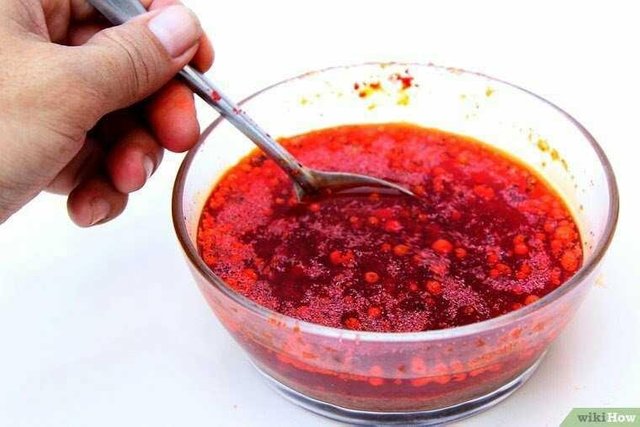
Image Source-Pixabay
3.Put sand into bowls and pour water. It is possible to have 1 part water for 3 parts of sand. If the water is more than that, the sand may not absorb the liquid.
- Stir until the color is completely mixed and flattened with sand - using an egg beatter may be better. Sand texture should be thick and not too fluid.
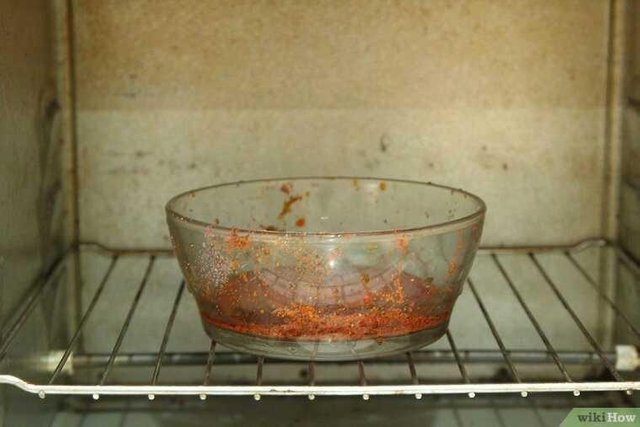
Image Source-Pixabay
4.Dry the sand. This can be done in two ways:
Drain excess fluid. Then the sand over the baking pan to dry overnight.
As an alternative, insert a baking sheet into the oven with a temperature of 200 ° Celsius for 10-15 minutes or until dry.
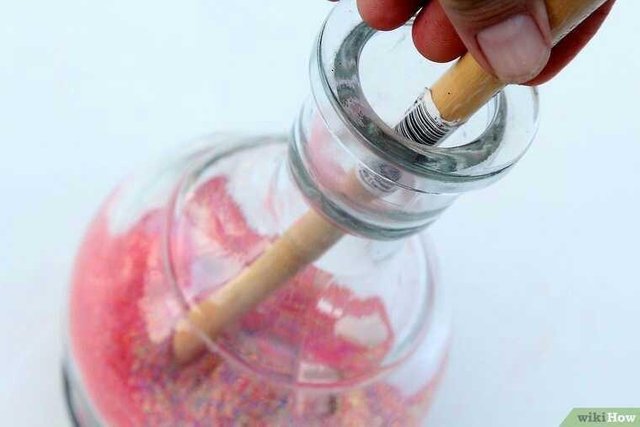
Image Source-Pixabay
5.Design the sand artwork. With dry sand, you can start working immediately. Take out the glass bottle or the flower vase and tap the colored sand inside the bowl. Here are some hints:
Use a piece of paper or a straw that serves as a funnel. This tool will direct the sand to order properly and evenly. Make layers, tilt the vase if necessary to create attractive designs.
Use a spoon handle, paint brush, or other small and thin tools to move sand that does not reach the desired position.
If you like, insert a small vase into a larger vase. Then put the sand around it, and flowers in a smaller vase. This gives the illusion of flowers embedded in the sand, when in fact it is in a vase full of water.
tips
If you want the colors of sugar in the bottle look squiggly, you can use a skewer or something and move slowly gulanya.
If there is a theme for a birthday party or other event, you can buy a sticker and paste it on the glass bottle.
WARNING
- You can get burns by hot glue, so be careful.
Thanks for the information. Good for do it myself...