DRAWING TUTORIAL #1 : Eyes.
Hi everyone !
I'm coming back today with you with a new format : the drawing tutorial. I think about it for a little while and i really wanted to do it, with the intention of really being useful to others, to try to give advice through the articles that can really help to improve.
So this first article is dedicaced to the eyes. It has always been my favorite part in the face drawing, but also in general. I had to draw hundreds of eyes since i draw!! With each time, the will to do more successfully and realistically than the previous one.
Rules and proportions of the eyes
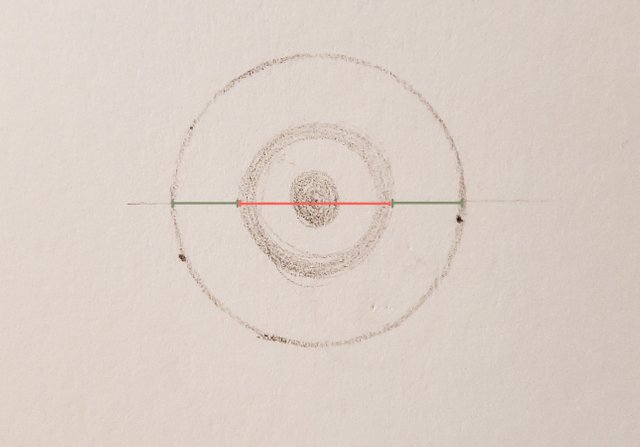
The eyes works like one sphere (delimited by the red line) in an another sphere exactly 2 times larger.
If you want to be sure of having the good proportions, you can use a compat to trace it before of drawing the eyelid and other.
The pupil, as for it, change its size depending on the light received.
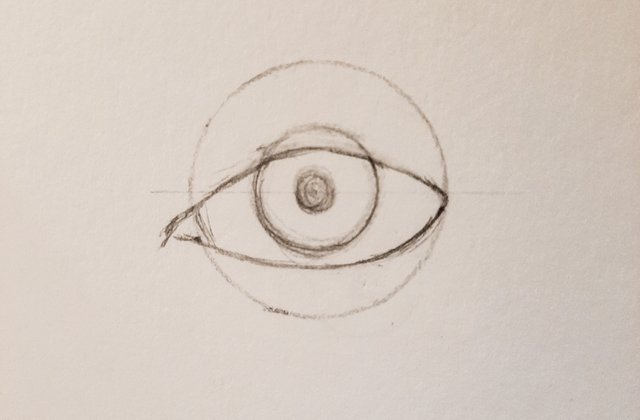
Now, we need to delimit where the eyelids are in relation to this. You must know that it depend of each person.
On average, the lower eyelid is against or close to the iris ring. The must common mistakes of eyes drawing i see is that the white part under the eye is too large.
(Besides, the example I drew is the extreme limit, I think, I've never seen an eye where this was bigger.)
The corners of the eye come to rest at the end of the eyeball. The tear duct is next to that. Pay attention of not drawing it too big.
The upper eyelid is located depending on the person's expression, but at neutral expression it's located on average where I drew it, compared to the sphere.

Pay attention when drawing and eye of not to give your character an unwanted expression, due to a bad eyelid position.
Shading and realistic eye rendering
After placing the eyelids, we can focus on shading and details.
Remember, we have to think eye like a sphere. It is a very important thing.
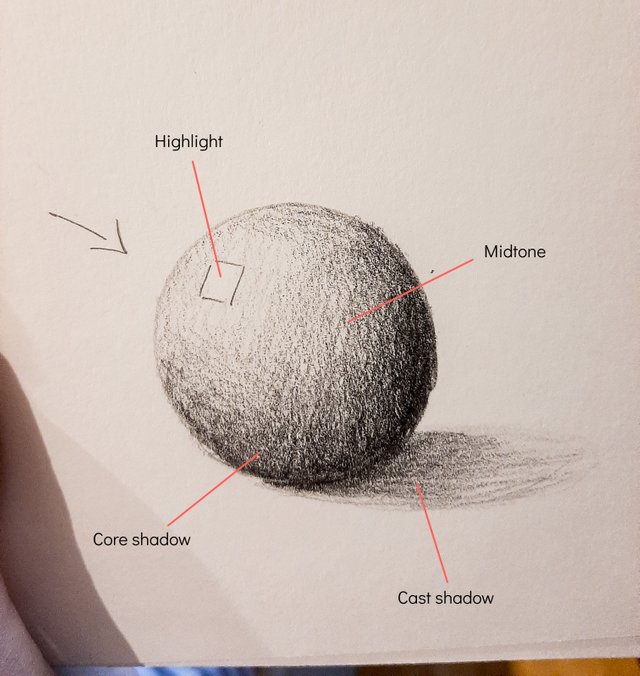
The highlight can be can be more or less marked depending on the material. The more matt the material is, the less visible it is.
In the case of the eye, by its translucent property, brings out this highlight very well and appears in very sharp contours.
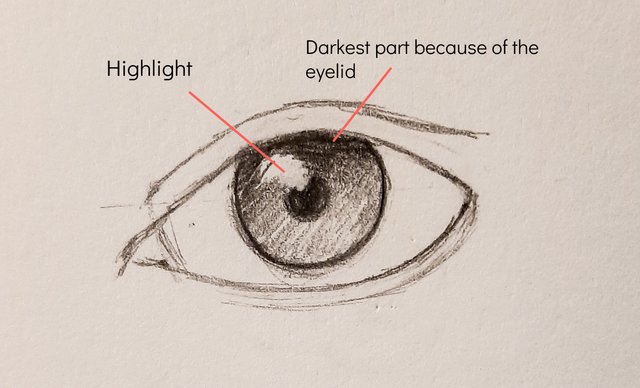
Remember that the shading of the eye only depend of the lighting that the eye have received. It can be very contrasted or very faded. But the pupil should be the darkest as possible. You can use a charcoal pencil for that, because of is very dark rendering.
The extremity of the iris is also darker than the rest.
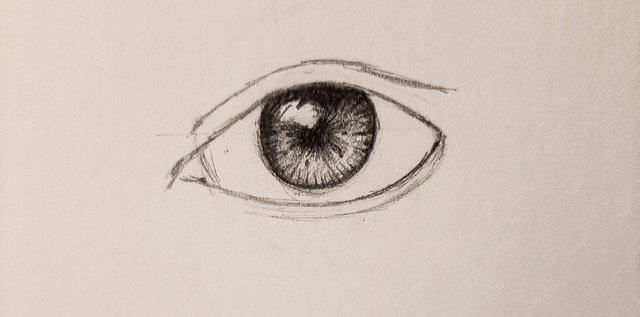
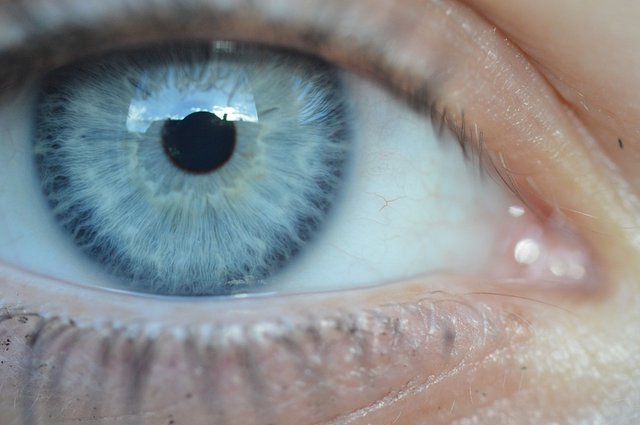
After putting the main shades, you can enter in details. Know that it give a realistic rendering to draw lines from the center and from the outside (not in a too geometric way, take some freedom). But eyes have also spots and wave-like shapes. Take time to observe eye pictures.
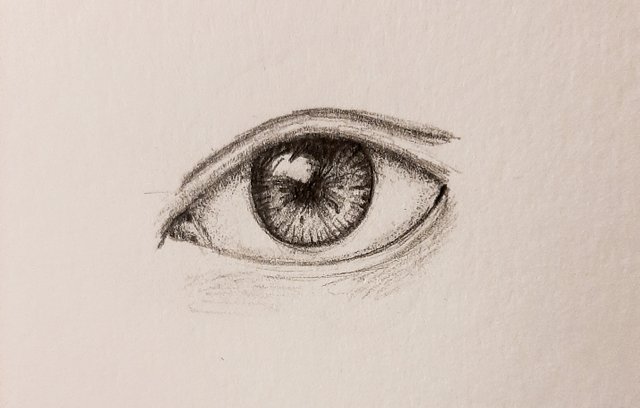
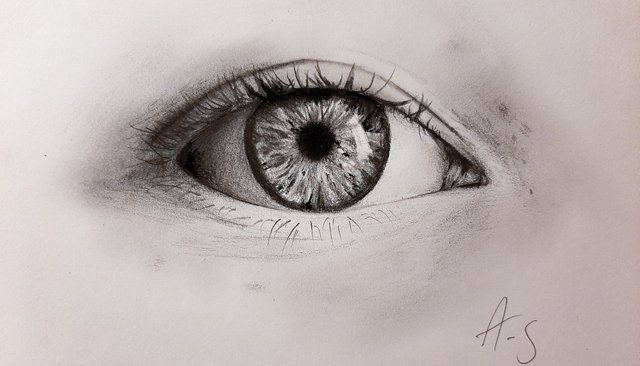
Now, the white part works as the same way. As a sphere, the corners are darker than the center. (It is more marked on my drawing at the top of the article, I confess !) And it is also darkest on the top, because the top eyelid produces a shadow on the eye.
If you succeed theses shadows, you will have a realistic eyes and succeeded this ball rendering effect.
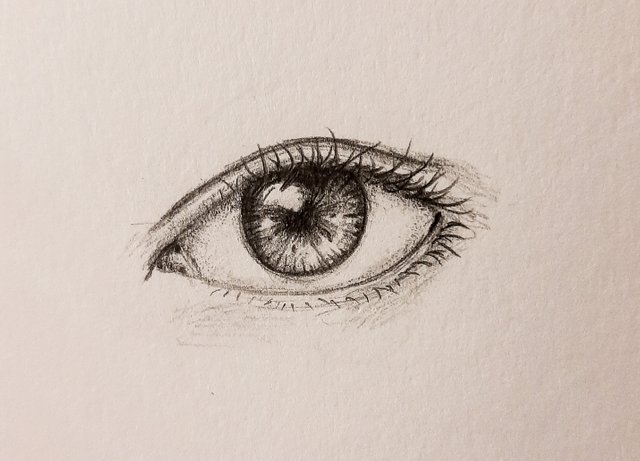
Now, talk about the eyelashes. This an eye part that i found often unrealistic on people's drawings.
- The eyelashes are never perfectly straight. They are curved, starting from the eyelid. Sometimes, they point down.
- The eyelashes never all point at the same direction. Pay attention of not doing a geometric effect. Some eyelashes point on right, others on left,... Eyelashes are wild and unpredictable! ;)
- The eyelashes have not all the same size. Once again, don't have a geometric effect. The average size does not usually exceed the eyelid line, except in the case of mascara. (to draw a realistic mascara effect, draw the eyelashes more thick, maybe with some black particles in places)
- The eyelashes next to the tear duct are smaller, rarer and thinner.
So, to draw realistic eyelashes :
-> Varies the size, the direction, and makes them curved and from the eyelid.
-> Use a mechanical pencils or a very finely crafted pencil to make this thin eyelashes effect.
Eye from others angles
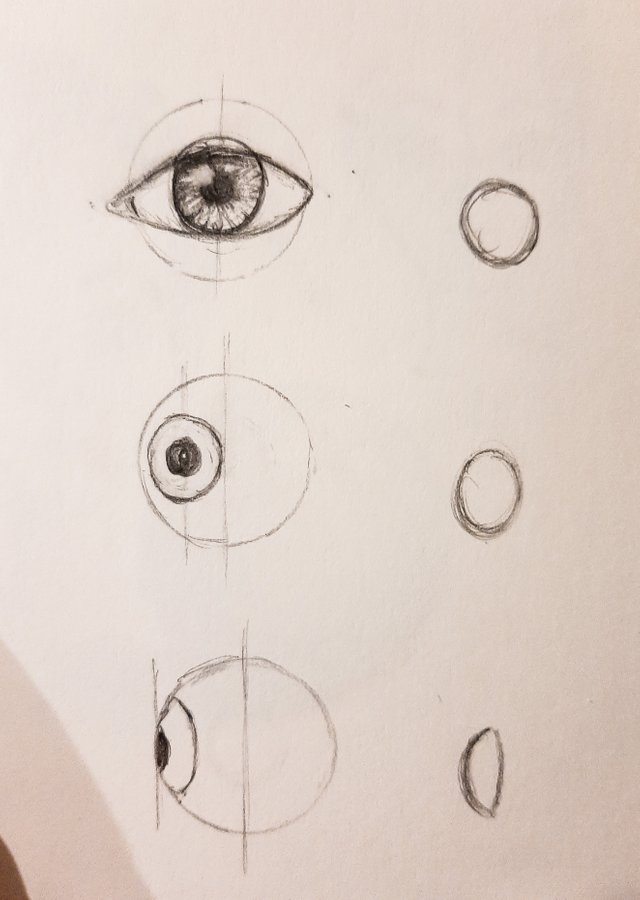
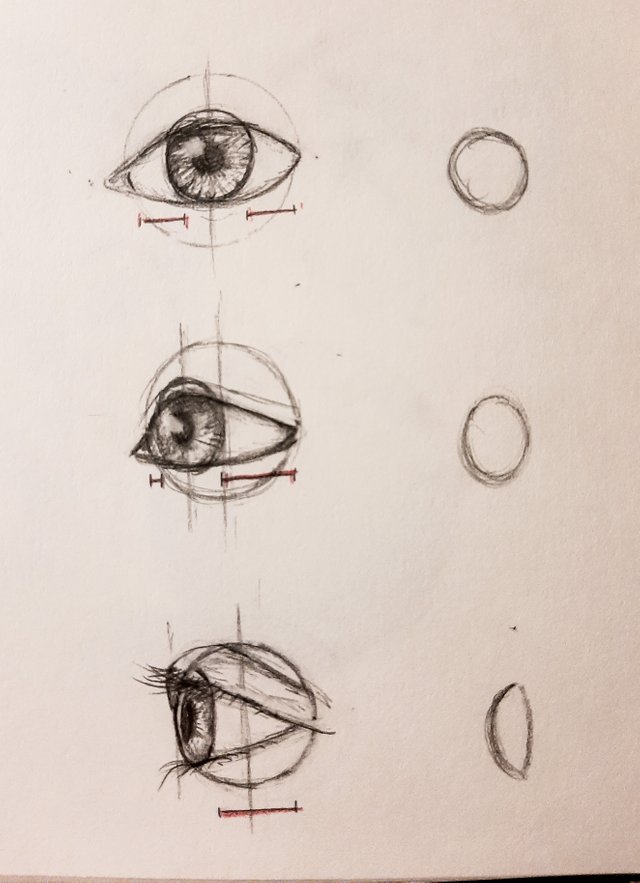
Think about a sphere spinning. The eyeball being perfectly round, it keeps its spherical shape no matter the angle.
The part containing the iris and pupil is shaped like a pastille, so that as we turn, we see it narrower.
Also, it moves away from the centre of rotation of the eyeball, so, like i represented on the right draw, one of the white part expands while the other shrinks.
In conclusion.
What makes an eye drawing realistic?
- The highlight on the iris. It really makes a big difference. It is THE element which gives life to an eye drawing.
- The contrasts and a good mastery of shading.
- The respect of proportions.
- The addition of details, especially in the iris, with all the strokes or waves rendering.
- Good eyelashes, varied, thin, curved and not too long.
I hope i haven't forgotten anything, and that my tutorial is useful and complete.
Don't hesitate to give your opinion, suggestion or anything else.
You can also tell me if it was useful for you, and what do you would like for a future tutorial.
I will come back soon with others tutorials or drawings.
Meanwhile, have a good day or evening !! :)
I am very happy that you decided to go to this direction. Tutorials like this are really valuable and useful for other artists:) Eyes are a very difficult part and you covered every detail with your instructions:)
Thanks for your support! I am happy too to go to this direction. :) It is very pleasant to make.
You are very welcome, i am sure everyone is looking forward for more, i heard a lot of good comments about your tutorial:)
Yes, i'm very happy for having received these positive feedback!! :) I am thinking about the next subject ehe.
Nice tutorial with great step by step guide. Am pretty sure there are those who would need it.
Thanks for Sharing.
Posted using Partiko Android
Congratulations @pipoune! You have completed the following achievement on the Steem blockchain and have been rewarded with new badge(s) :
You can view your badges on your Steem Board and compare to others on the Steem Ranking
If you no longer want to receive notifications, reply to this comment with the word
STOPTo support your work, I also upvoted your post!
Your post has been determined to be Splat-Worthy!! Therefore You’ve been Splatted by the Splatz Curation Trail
source
Rewarding Your Original Work
With an Upvote
And
Resteem
If you find posts worthy of a nasty Splatin’ feel free and mention @splatz in your reply to their post. Call me out!!
This post was shared in the Curation Collective Discord community for curators, and upvoted and resteemed by the @c-squared community account after manual review.
@c-squared runs a community witness. Please consider using one of your witness votes on us here
Very useful! excellent tutorial :), a Venezuelan portrait artist right here... I like very much your drawings, keep up your good work, pipoune! Cheers <3
Thanks for all!!
Very nice tutorial on the human eye, @pipoune ! I really like how you break down the basics and how you showed different variations to generate different emotions of the eye, and I also like how you showed the other angles to represent the eyes :) These kinds of posts are very helpful to beginner artists, I think ! :D
I'm glad you enjoyed it! ;)
Thank you for going to the effort of posting this, it is a very detailed guide, I've been looking at learning to draw properly lately and this will come in handy for me. Posts like this are greatly appreciated. 👍
Happy to know it has been useful for you!! :)
it is such a great and detailed tutorial!
Thanks for your great effort and time into this post!
Thanks to you!! :)
Your post was upvoted by the @art-venture account after manual review and included in Art-Venture magazine. The upvote and support of Art-venture magazine would greatly appreciated!
