How I drew a basket of fruits.
Happy Sunday guys.
In the absence of any sickness, I thank God for life. I am here today again but with a new drawing, just made within few minutes cause I still have a lot to do today but I thank God it was a successful one again, would you like to see? Well I would love to show!
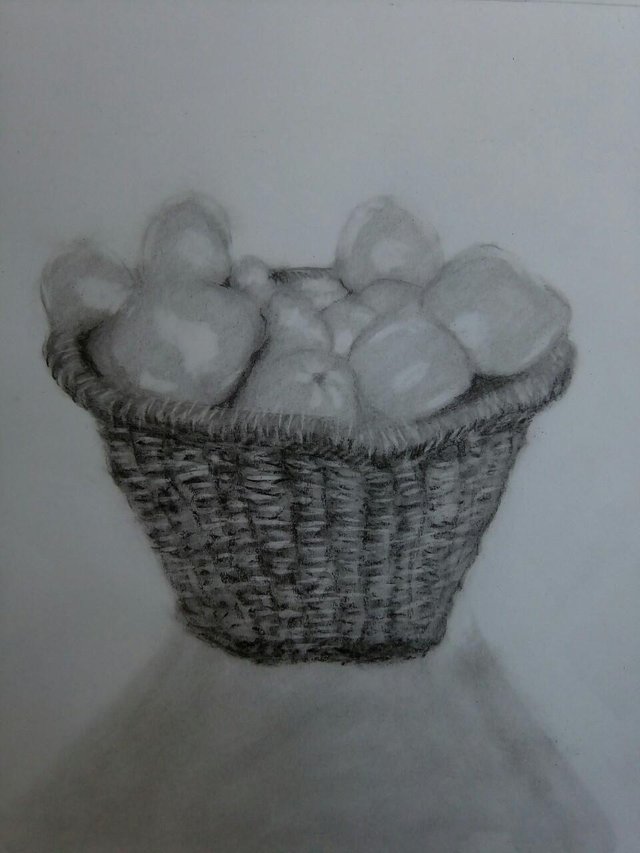
And the above picture is the finished product of my drawing today, a basket of fruits, why basket of fruits? I myself don't even know but I drew it and just to make the post a post to learn from for those who love art and are interested in doing it, below would be my drawing procedures and steps I took with the aid of pictures.
How I got my drawing done. (steps/procedures).
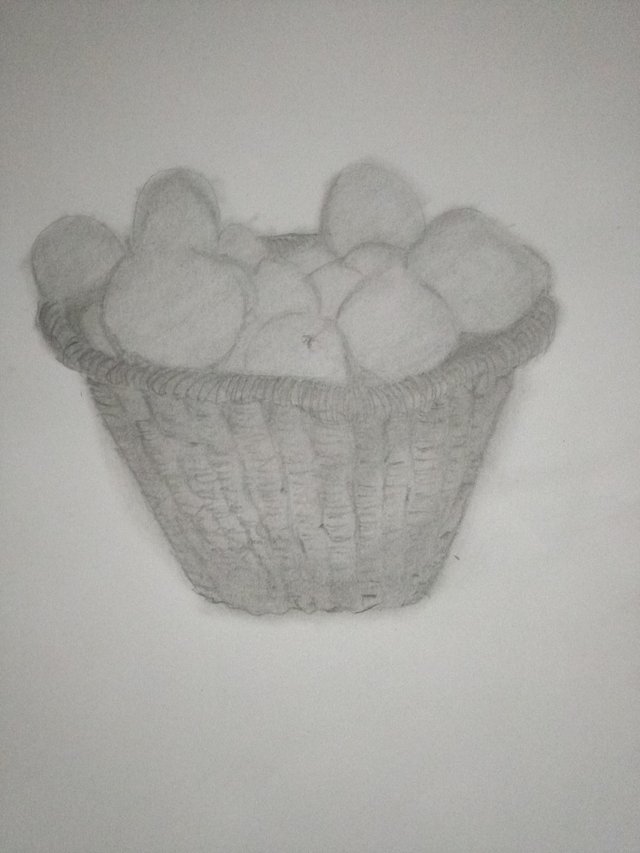
(Step 1).
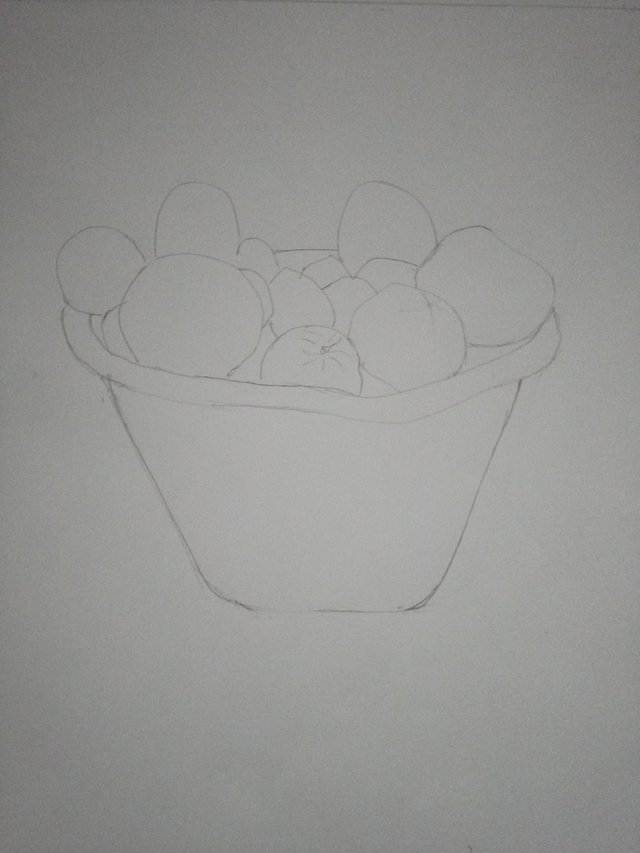
At this point, the first stage of the drawing, I made use of my Mechanical Pencil in making my sketch so as to be able to correct and mistakes easily since the pencil is very tiny and hard, so it would be so easy to make ammends if any mistakes occur.
(Step 2).
Second stage of my drawing where I had so start shading, I shaded the down part of the basket first because it happens to be the sight centered to me and I started shading with my 3B graphite pencil and I then blended my shadings with my blending stump, if you don't know what a blending stump is you can check my previous post you will find it there.
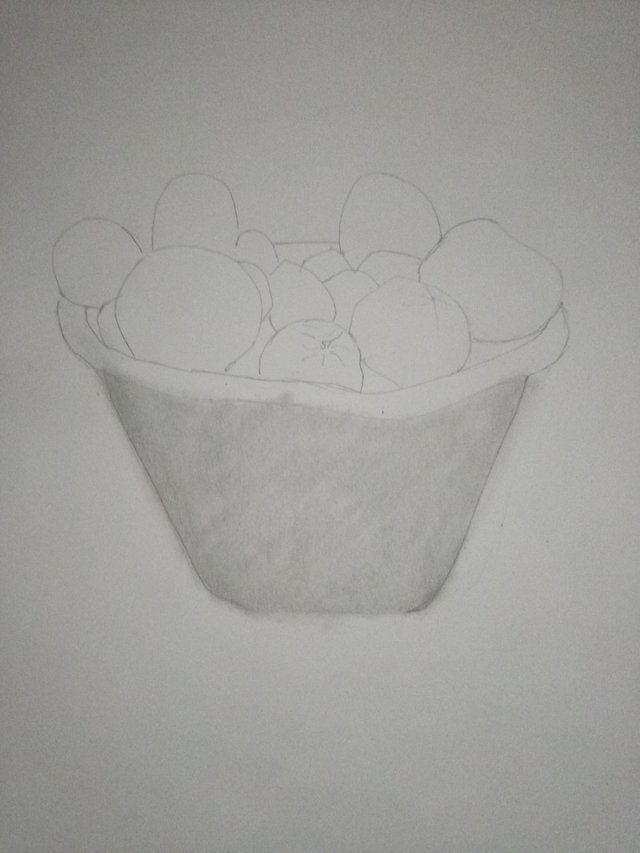
(Step 3).
And the shading techniques kept coming and going, so I decided to give some details on the down part of the basket (like those lines you can see on the basket), I also shaded the top part of the basket with my same 3B graphite pencil while I blend my shadings with my blending stump to make the drawing look as smooth as possible.
(Step 4).
And it seems the drawing is getting interesting when I had to shade the fruits too on a lighter note with my 3B graphite pencil and I also used the same pencil in making some strokes that shows the spaces between each fruits and at the same time I still had to blend my shading even when it's just a little one.
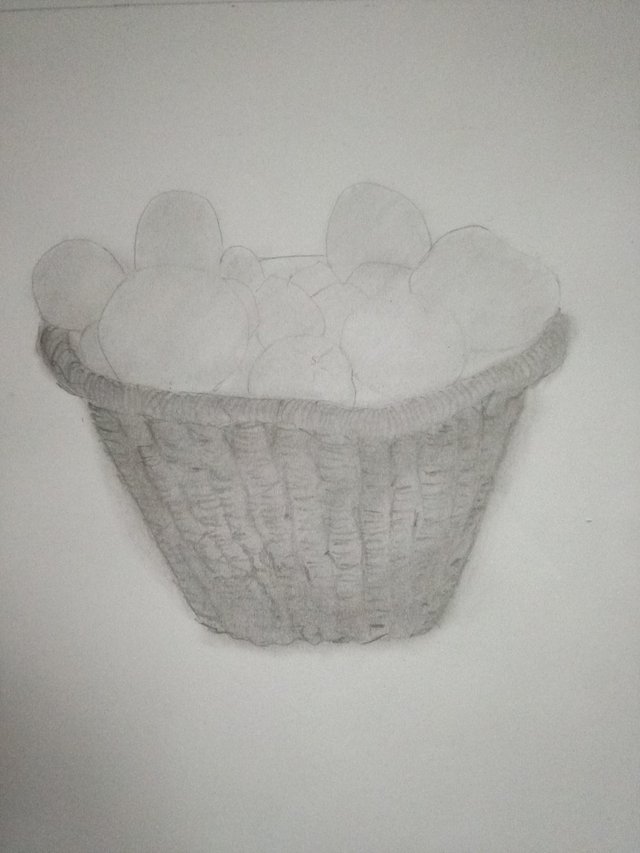
(Step 5).
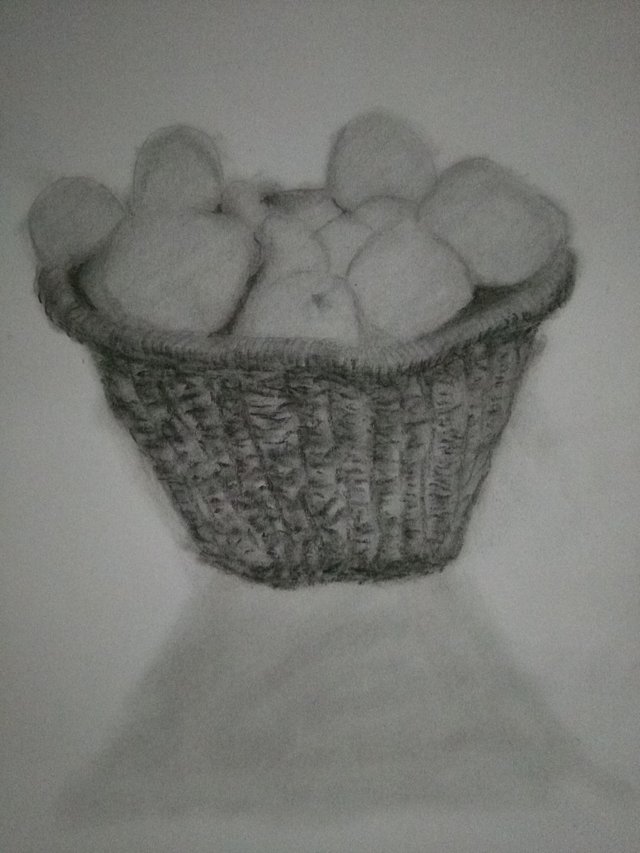
And it's time to give more details and make it more vivid. Now I had to use my 6B charcoal pencil in shading the down part of the basket just to make it darker and to give the initial effects on the basket and all the same, I still had to blend the shades.
(Step 6).
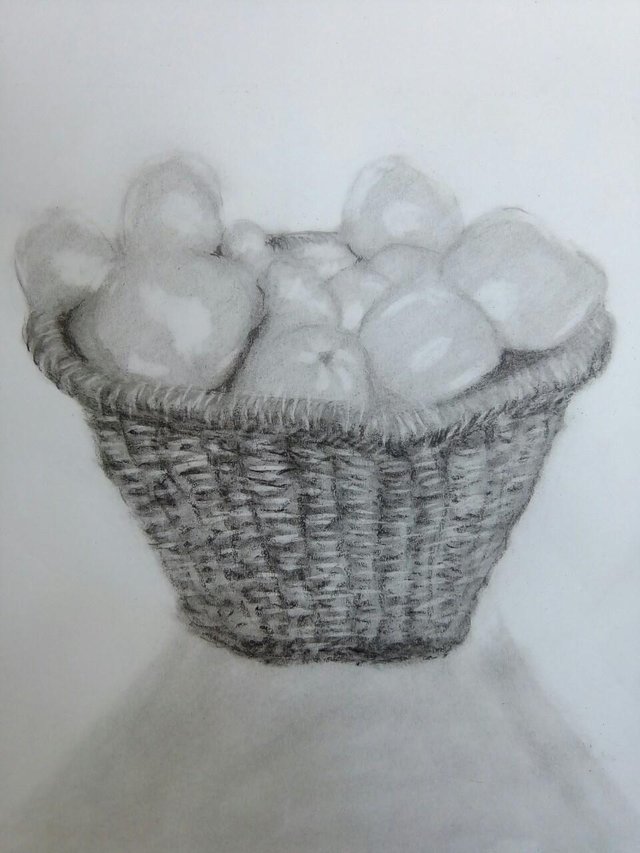
And here comes the final stage where just had to give more details on the drawing. After doing some few shadings with my 3B graphite pencil, the major work left was to give details which I did using my Mechanical Eraser to remove all unwanted shades in order to separate the light from the dark and to make the drawing appear a little bit realistic.
Thanks for stopping by.
Kindly follow our great African community @africaunchained, it's indeed a great place for all Africans to be. Africaunchained community founded by my steemitcrush @destinysaid.

Really well done! Thanks for sharing all the steps in the process... I’ve never gotten into drawing or painting, but this sure makes me want to try.
Keep up the good work.
Thanks fan, you can always learn if you are determined.
Dear Artist ! FineArtNow is a new place for artists on Steemit ! Become our friend ! See you soon !
Thank God for the fruits, so many varieties of fruits, all are nice.
Thanks fan, I guess you really love fruits.
Love when people post step by steps like this. Do you plan on posting a version of it colored in?
I would love to do that but I haven't started work on painting yet.