Learn How To Draw A 3D Character Step By Step - Using Oil pastels And Pencil
Hi, everyone! @trueface here and today I will teach you how to Draw a 3D image step by step.
Today we are going to draw a 3d image of Pikachu which is a character from the Japanese anime Pokemon.
I am not a pro artist and I love to keep things simple so don't worry this tutorial will be an easy one. I will give you every single step to complete the 3D image. You can use the same procedure for most of the 3d drawings.
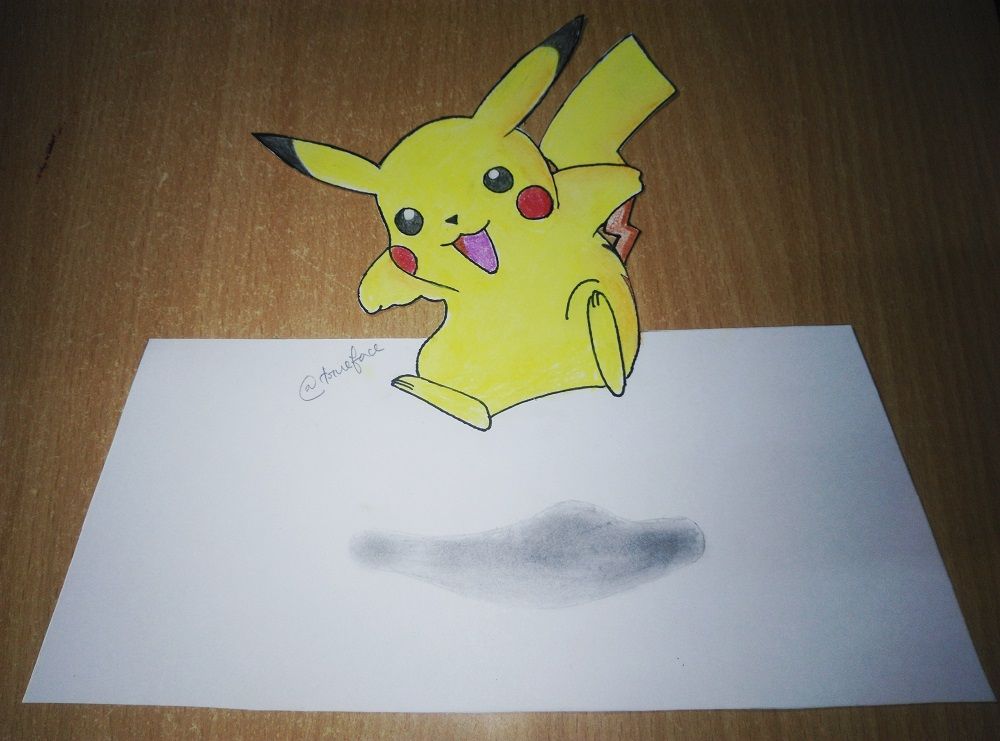
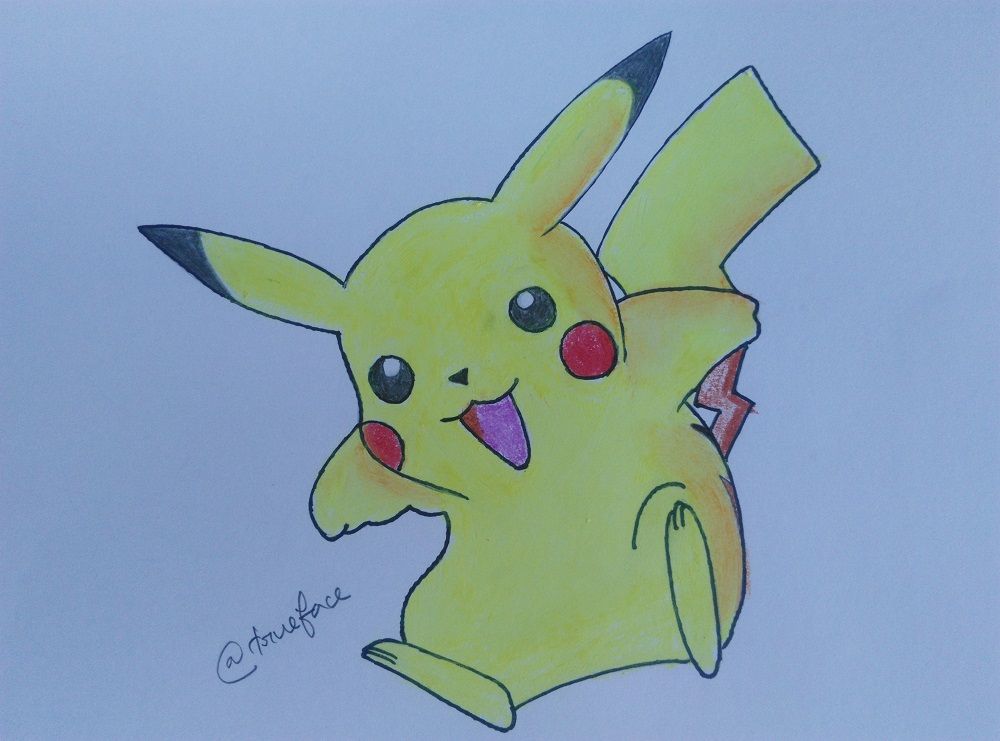
Here is the final 3D image.
So Now let's move on to our tutorial.
Wait...Wait...Before proceeding let me tell you about my tools I used for this drawing.
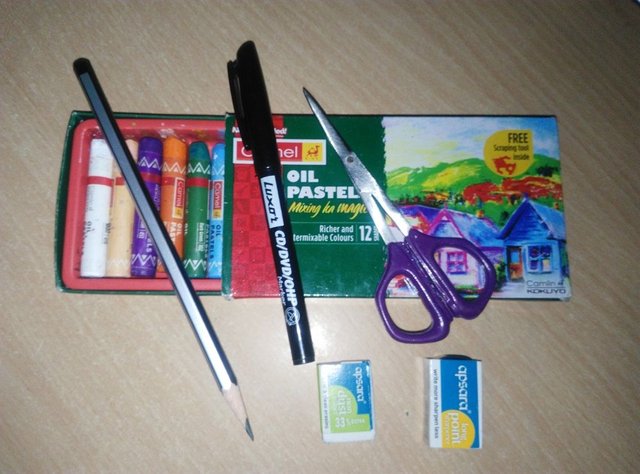
I used Camel Oil Pastels, Apsara Extra Dark Pencil, Eraser, Sharpener, A Luxor Marken Pen (Black color) and obviously a white art paper.
So Now let's jump into the tutorial.
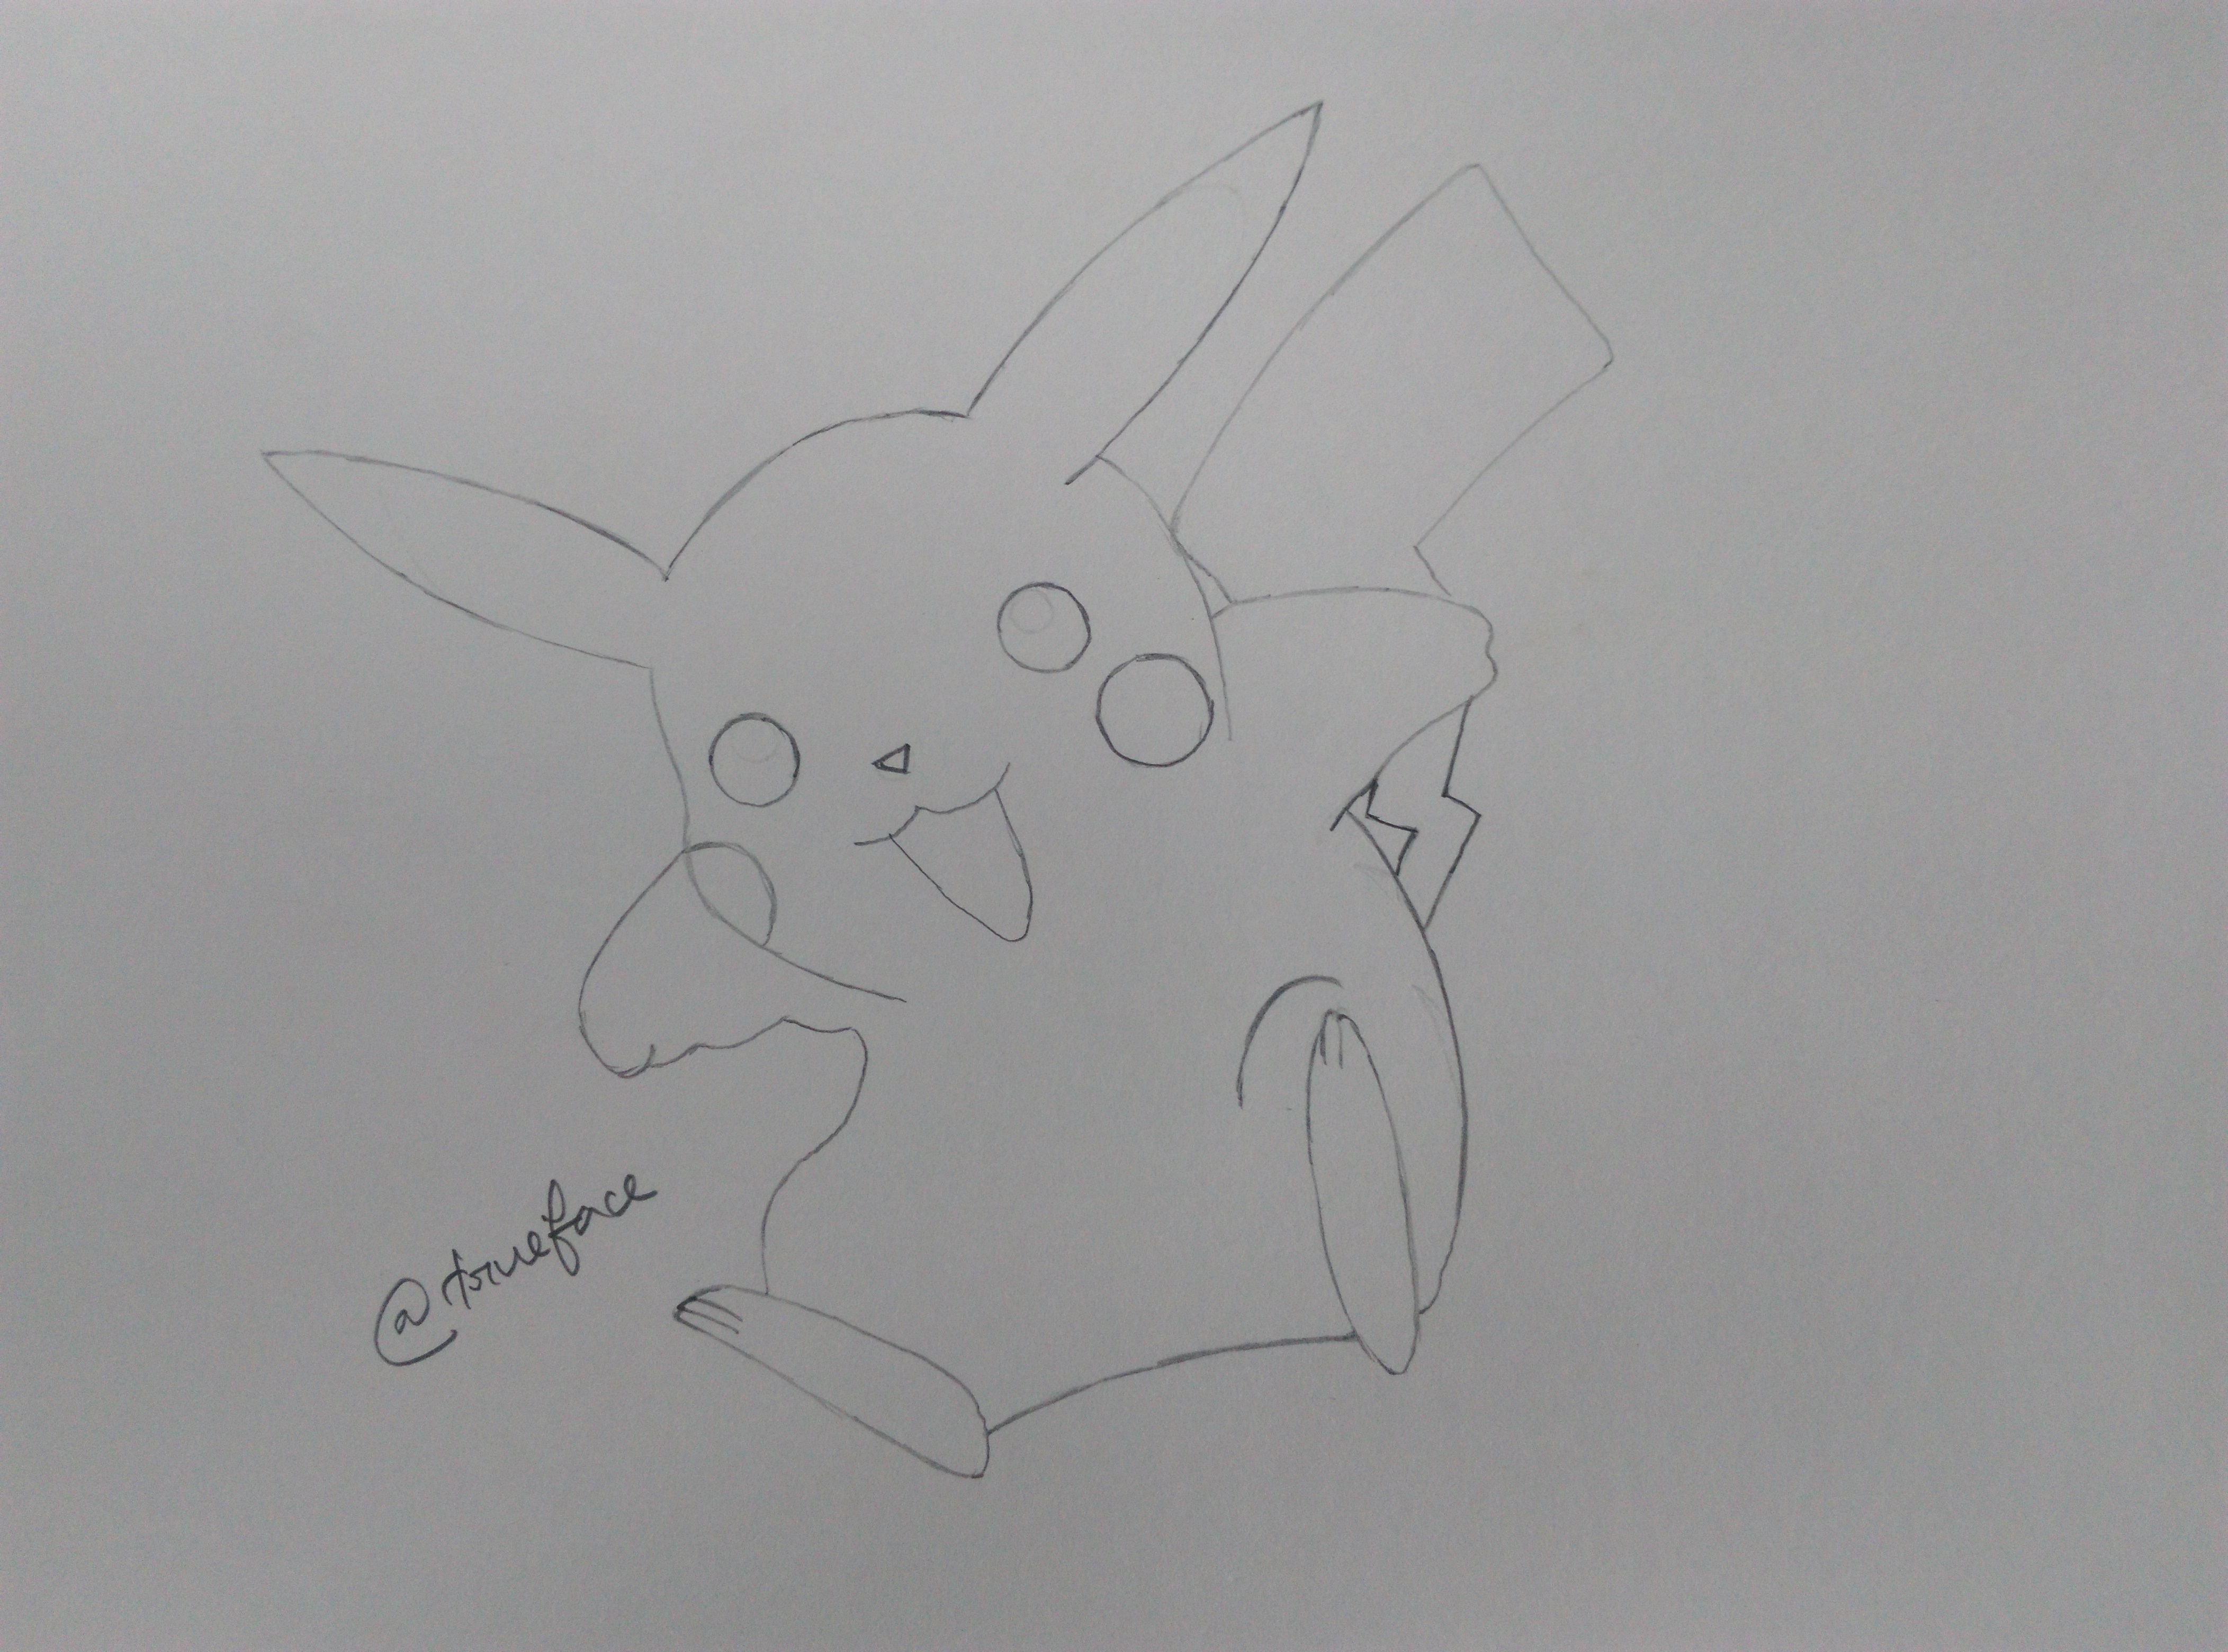
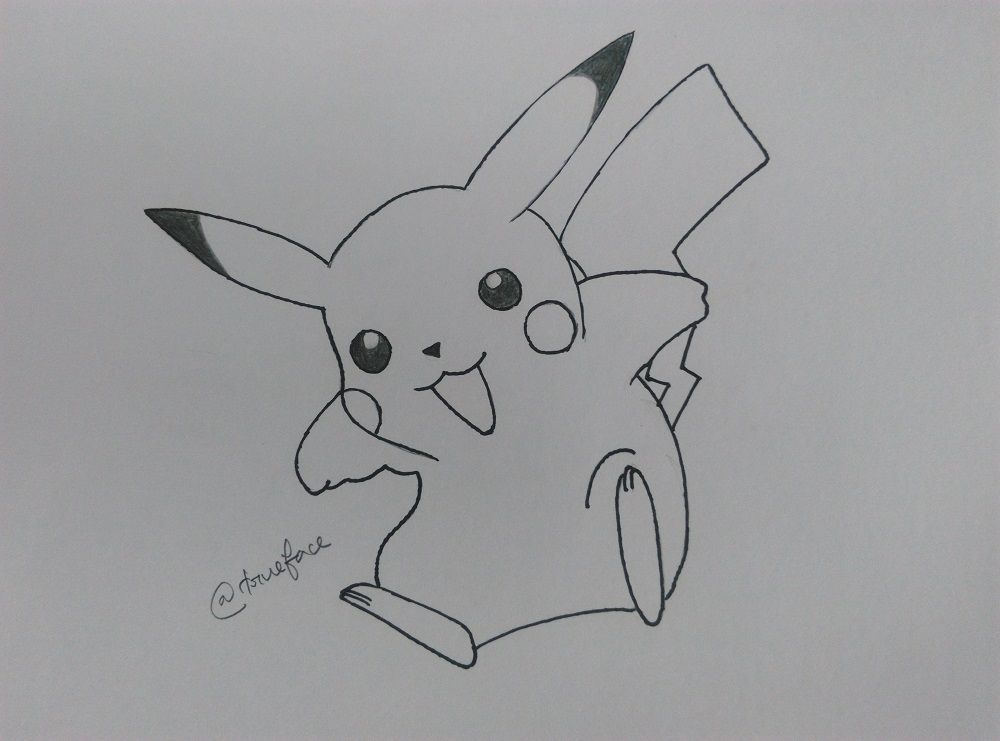
Step 1. As we are drawing a 3D image of Pikachu so draw the outline of Pikachu with a pencil. Try to draw lightly at first so that you can erase it if you do any mistake.
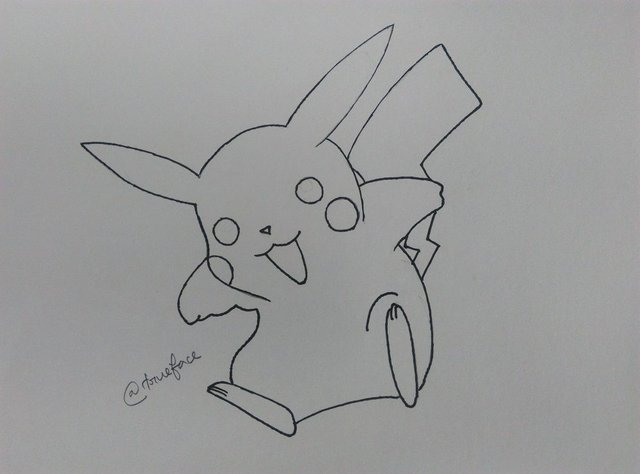
Step 2. In 2nd step, you don't have much to do. Just overlap the outline with a black marker.
Step 3. In the third step give some details in the ear and eyes like I have done in below picture. I used a pencil to color. You can use a black marker or a black oil pastel color.
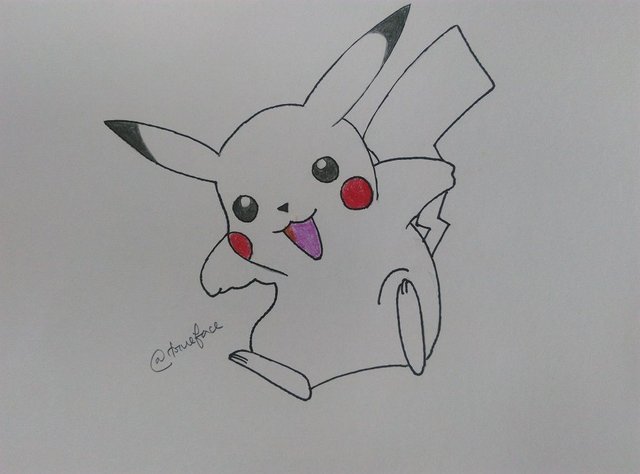
Step 4. Color the balls of the cheek with red color. Now when coloring the tongue use violet color and brown color on the edge to highlight.
Step 5. Color all the body parts and tail with yellow color but leave a small part of tail uncolored like I have done in below Picture.
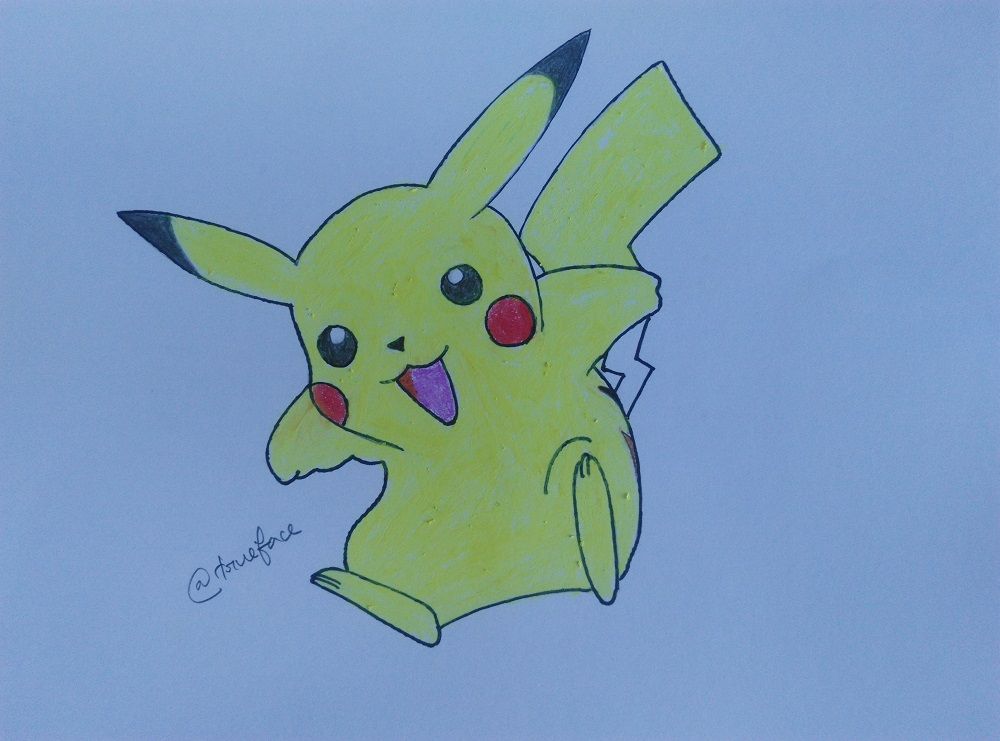
Step 6. Now use orange color in some parts which you want to highlight.

Step 7. This step is important. Take a small piece of cloth or cotton and rub the parts in which you used orange color. It will make the highlighted part smooth.
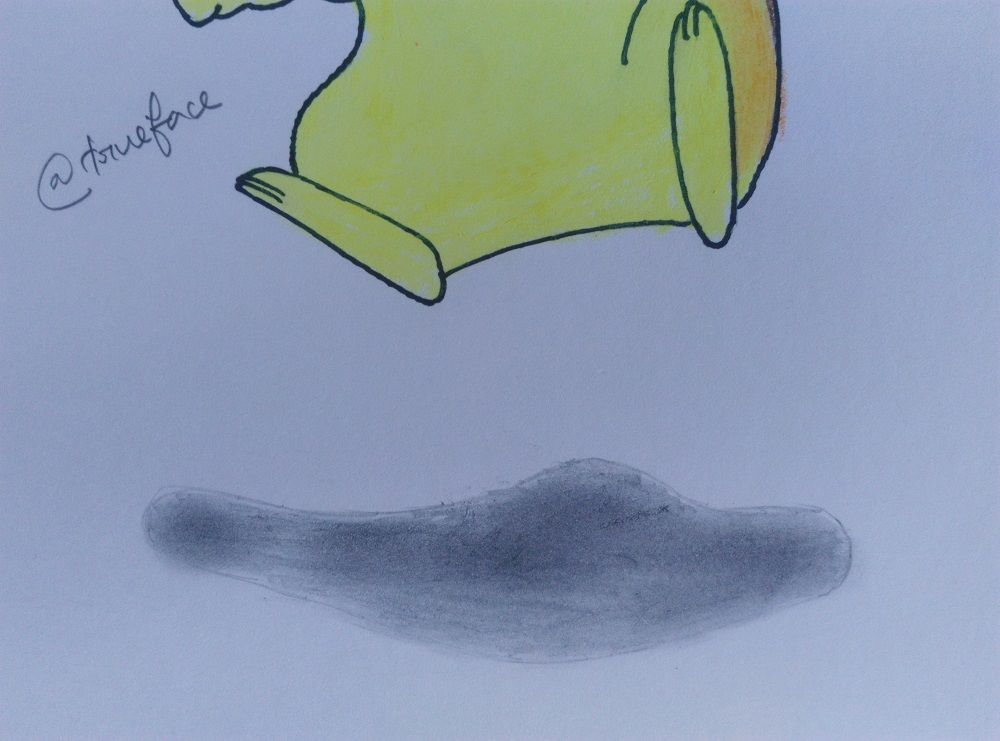
Step 8. Draw the shadow part and do shading. After that put some lead waste of pencil in the shadow part.
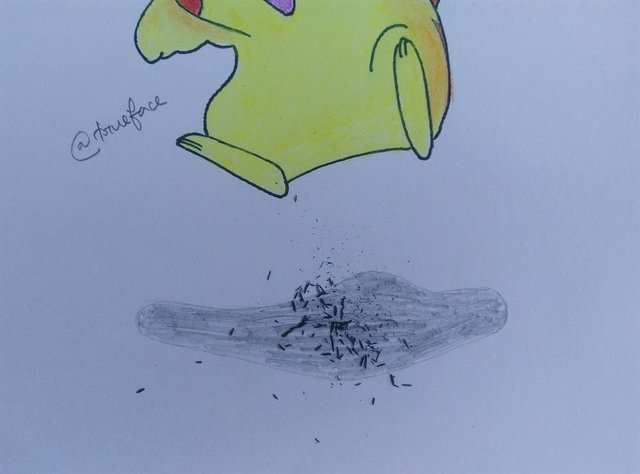
Step 9. Now use a cotton or piece of cloth and rub upon the lead waste. It will make the shadow part look more realistic.
Step 10. This is the final step. Now draw some lines as I have done in below image and cut the outer part.
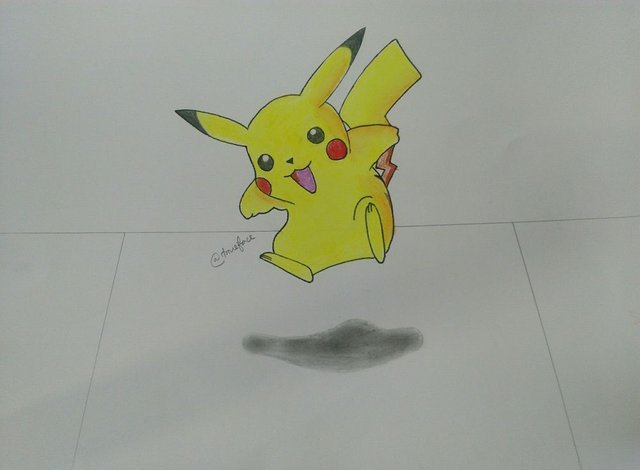
After completion of all the parts, our 3D image will look like this.
Thanks for reading. If you have any query ask me in the comment section.
Follow @trueface for more posts.
Truly amazing! The steps are so clear and easy to follow ^_^ Thank you for sharing :)
Great tutorial. Keep up ;)
It looks incredible, and I think even you can put some clip art drawings like green grass, that would add an extra touch.
Thanks for sharing @trueface
regards
You made it look so easy with your tutorial. Now all this 3d drawings i see on facebook loose their magic :) well done! Thanks