HOW TO CREATE CUSTOMIZED GIF WITH ALL DESIRED FEATURES USING COMBINATION OF CorelDraw and Adobe Photoshop

GIF which is an abbreviation for Graphics Interchange Format are layers of images set into motion.
There are many applications and websites which you can get ready-made GIF or can assist you as robot to create a GIF by just inputting some parameters. The only disadvantage with this application and website for making GIF is that you are limited to the programmed template of the applications and websites. There are some features you would love to see on your GIF but these programmed templates may not offer those features.
The purpose of this post is to guide you on how to create a customized GIF containing feature you will like to see on your GIF without been limited to the programmed template of GIF marker websites and applications.
I was inspired to make this post as a result of excessive work pressure on me. I got a lot of people contacting me to make customized GIF for them with some certain features on it. Sometime I fail to deliver on time because I am human and restricted to 24 hours per day.
NOTE: You don’t have to be a professional with CorelDraw and Photoshop before you can apply this guide to practice.
CASE STUDY:
Since the word “customized GIF” is generalized, I am going to use the case study of the GIF below to guide you on how I made it. You can apply the guidance of this post in making your own customized GIF.
I made the above GIF for @prechi
Materials Used:
- Hp Laptop with 32 bit windows operating system
- CorelDraw X3 Application
- Adobe Photoshop CS6
- Avatar image of @prechi
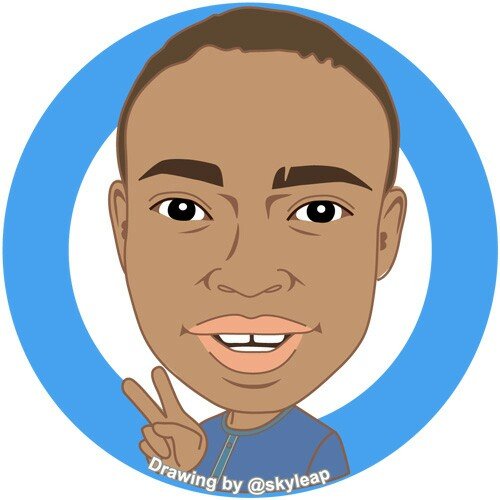
Image Source: @skyleap
Procedure:
Step I:
This step is all about visualization. I first visualized how I want the GIF to look like and the features I want it to contain.
The features include:
“Upvote” which fades and leads to the appearance of “Comment”. The comment fades and leads to the appearance of “Resteem” .
The Username “@prechi” which is set in motion towards the far top left and then to the far top right corner.
Step II:
Here is where I start to put my visualization into action. You note that GIF are layers of images set into motion.
In this step I am going to create different image layers using Corel Draw. I opened the CorelDraw application on my laptop.
I created the first image layer. I did the following to create it;
- I drew a rectangle as the background using the rectangle tool (circled with red on the image below) and I painted it with white on the colour box (circled with black on the image below).
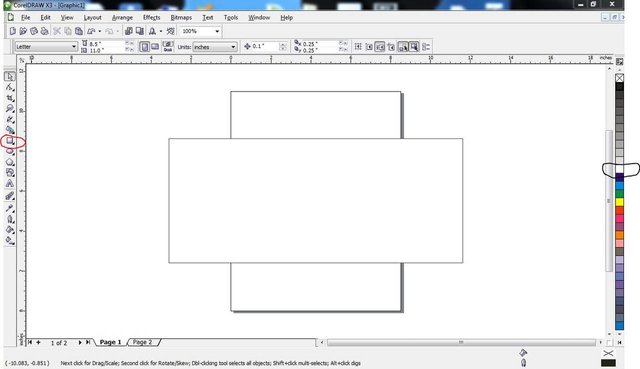
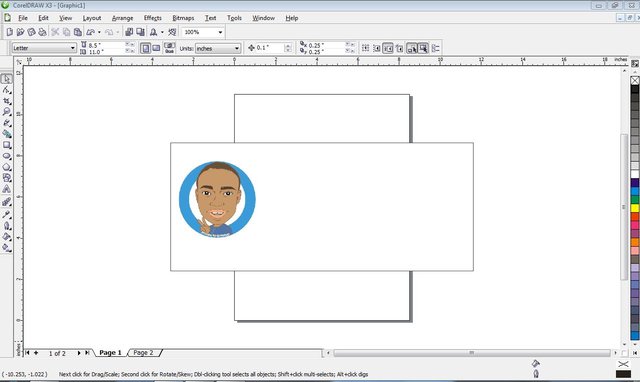
- I copied the photo image from my laptop to the CorelDraw workspace and arranged it on the rectangle background as seen on the image below.
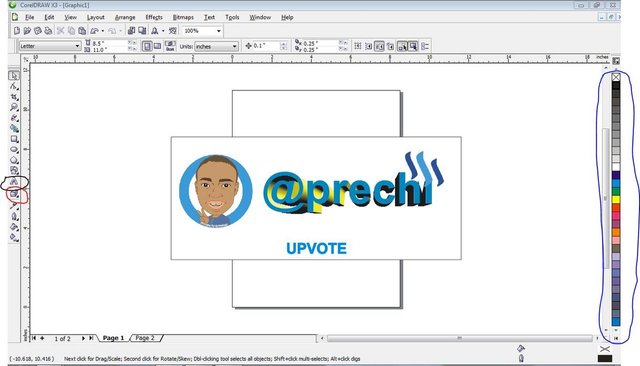
- I designed “@perchi” by first using the text tool (circled black) to type out the word, I used Interactive Extrude Tool (circled red) to give the word a 3 dimensional shape and used the colours palette (circled blue) to give it an face and outline colours of light blue, yellow and black.
- I used text tool (circled black) to type the “Upvote” and coloured it with light blue.
- I copied Steemit logo form my laptop and arranged it on top of letter i of the word “@prechi”.
Step III:
I created the second image layer. I did the following to create it;
I open a new page (circled green) on CorelDraw.
I copied the first image layer created in step II to the new page.
I grouped the “@prechi” and Steemit logo together and rotated it -5 degree.
The “Upvote” I made it look faded using Interactive Transparency Tool (circled red) with a uniform value of 80%.
Step IV:
I created the third image layer. I did the following to create it;
I open a new page (circled green) on CorelDraw.
I copied the first image layer created in step II to the new page.
I grouped the “@prechi” and Steemit logo together and rotated it -10 degree.
The “Upvote” I made it look more faded using Interactive Transparency Tool (circled red) with a uniform value of 99%.
Step V:
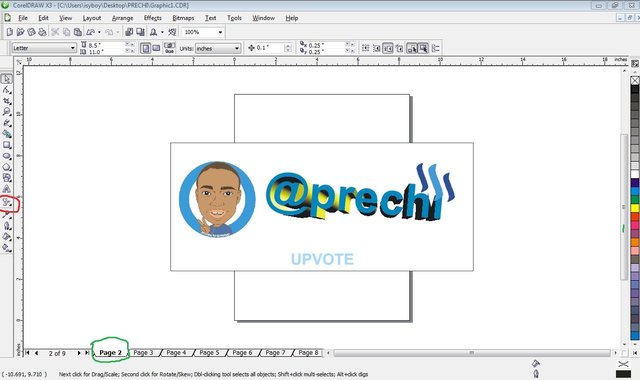
I created the forth image layer. I did the following to create it;
I open a new page (circled green) on CorelDraw.
I copied the first image layer created in step II to the new page.
I grouped the “@prechi” and Steemit logo together and rotated it -5 degree.
I changed the “Upvote” to “Comment”
The “Comment” I made it look faded using Interactive Transparency Tool (circled red) with a uniform value of 80%.
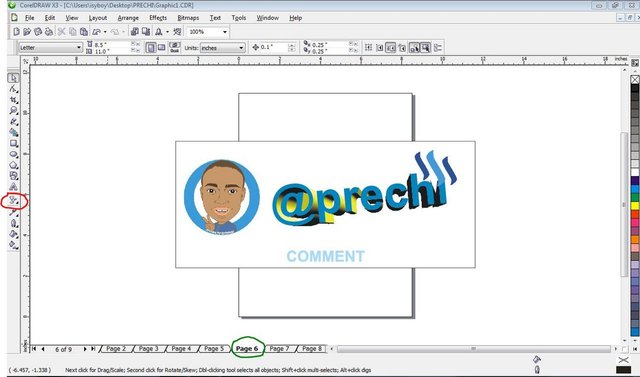
Step VI:
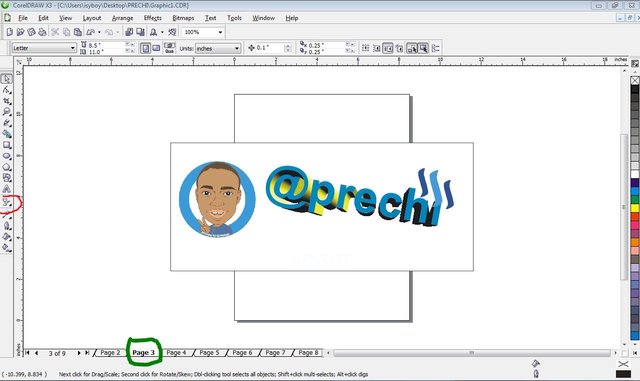
- I created the fifth image layer. I did the following to create it;
I open a new page (circled green) on CorelDraw.
I copied the first image layer created in step II to the new page.
I grouped the “@prechi” and Steemit logo together without any rotation.
The “Comment” I removed faded effect using Interactive Transparency Tool (circled red) with a uniform value of 0%.
Step VII:
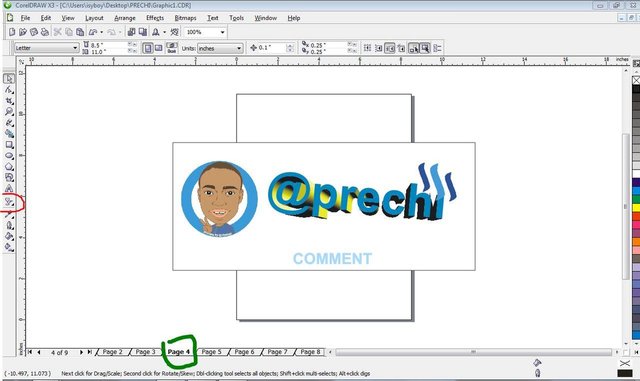
- I created the sixth image layer. I did the following to create it;
I open a new page (circled green) on CorelDraw.
I copied the first image layer created in step II to the new page.
I grouped the “@prechi” and Steemit logo together and rotated it +5 degree.
The “Comment” I made it look faded using Interactive Transparency Tool (circled red) with a uniform value of 80%.
Step VIII:
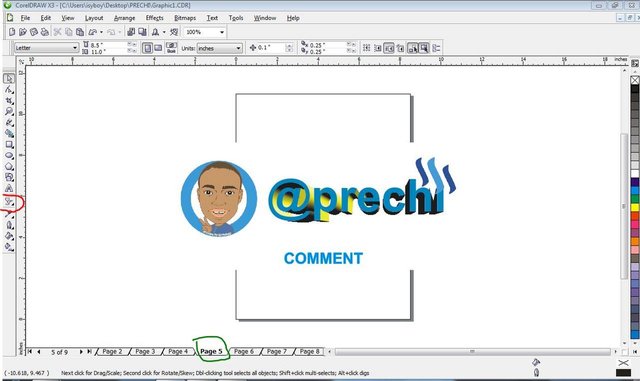
- I created the seventh image layer. I did the following to create it.
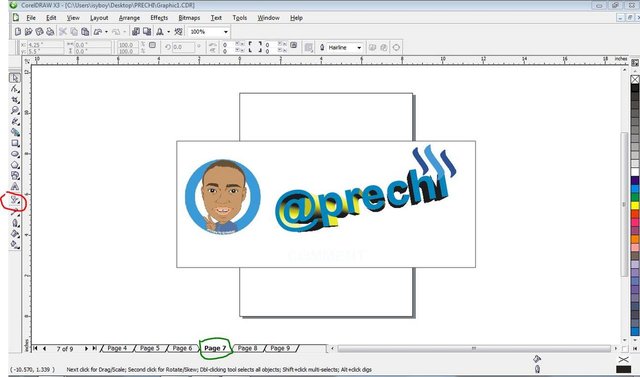
I open a new page (circled green) on CorelDraw.
I copied the first image layer created in step II to the new page.
I grouped the “@prechi” and Steemit logo together and rotated it +10 degree.
The “Comment” I made it look more faded using Interactive Transparency Tool (circled red) with a uniform value of 99%.
Step IX:
- I created the eighth image layer. I did the following to create it;
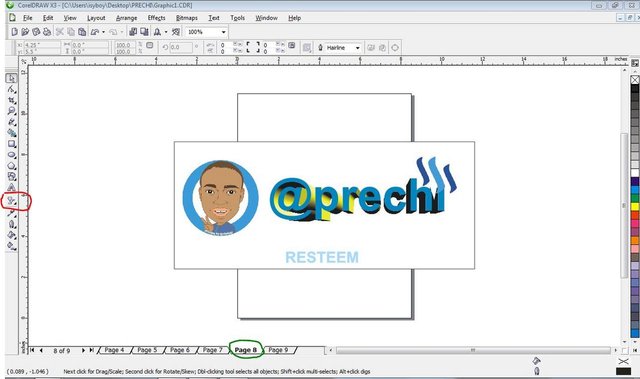
I open a new page (circled green) on CorelDraw.
I copied the first image layer created in step II to the new page.
I grouped the “@prechi” and Steemit logo together without any rotation.
I changed the “Comment” to “Resteem”
The “Resteem” I made it look faded using Interactive Transparency Tool (circled red) with a uniform value of 80%.
Step X:
- I created the ninth image layer. I did the following to create it;
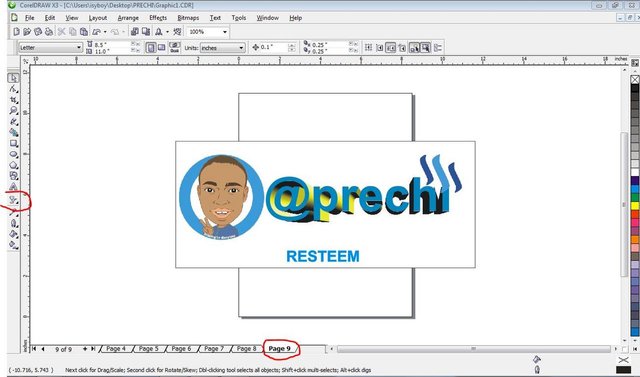
I open a new page (circled green) on CorelDraw.
I copied the first image layer created in step II to the new page.
I enlarged the size of the avatar image a bit.
I grouped the “@prechi” and Steemit logo together without any rotation and increased the size larger a bit.
The “Resteem” I removed the faded using Interactive Transparency Tool (circled red) with a uniform value of 0%.
Pause and Reflect:
So far from step II to X, I created 9 different image layers. If you observe each image layer has different orientation so that when combined together with animation speed range, it’s being set into motion.
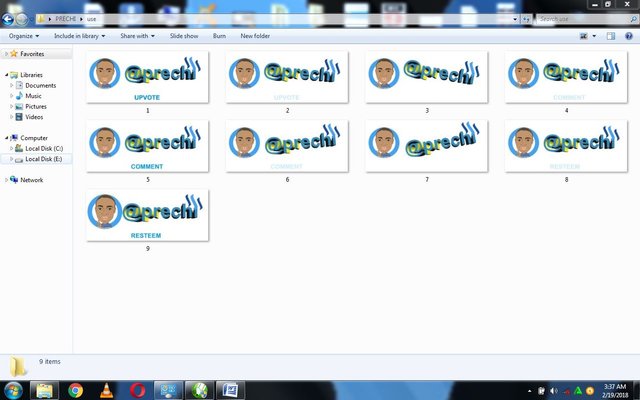
Step XI:
I exported each image layer from CorelDraw into an Independent image file (JEPG format). After exporting, I had 9 independent images in total as shown in the image below.
Step XII:
Now I am going to set the 9 independent image in motion.
- First I open Photoshop Application.
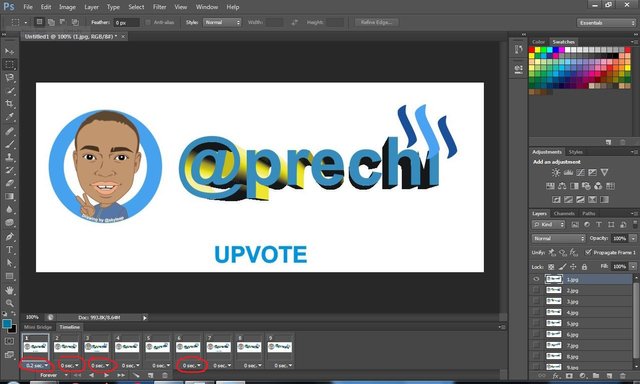
I clicked on File > Scripts > Load files into stack .This enabled me to upload all the 9 independent image file.
I clicked on the down arrow button as indicated in the image below, a window popped open and I selected Make frames from layers.

- I clicked on the icon as indicated in the image below to set the time frame for the motion of each image layer. i set the time frame for each image layer 0.2 seconds.
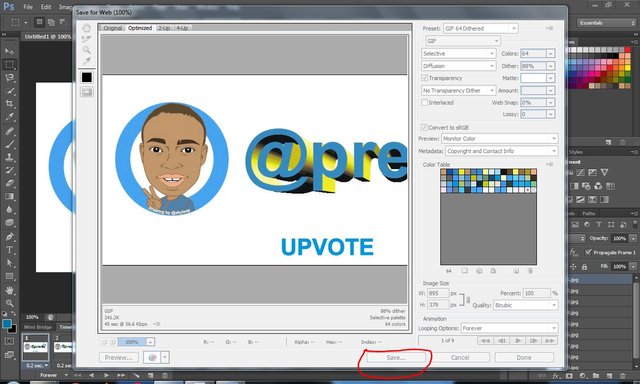
- I clicked the keyboard command key Ctrl+shift+Alt+S , a window popped up as shown in the image below and I clicked save.
You can use this guide to create your customized GIF, use the comment section to upload to show me sample of the GIF you created using the guidance offered by this post.
In my subsequent post, I will make a video tutorial rather than written text to show you how I created the @kingbee GIF.
Till then, stay inspired.
@vic-essien

Very useful, thanks.
I'm glad you found it valuable
Not only @vic-essien a good lecturer, he's also a multi-talented guru with my graphic dexterity. You can hardly measure his creative abilities. Victor. For me you are as good as you. Nicely written
This is a well detailed tutorial. I love this
Thanks for the compliment @ewuoso . This means alot to me
Very details tutorial about creating and customization of GIF.
Thank you for this interesting post.
However, is there other free tools available to make GIF?
Thanks for the compliment @oadissin .
However i know of another tool to make gif. But it isn't free.
The name of the tool is Fimora
You just made my day by posting this lecture. Many many thanks
Thank you for finding it valuable @jglowsinger
Waowww... Thanks for taking out time to tutor us on this, my usual thoughts was #its difficult but I know better now!
I'm glad you do know it better now
Very good tutorial sir, you may wish to offer your expertise also at @steemgigs for those who want to request for a customize GIF in exchange for SBD...Good work sir upvoted and following you...
Thank you @joshvel for the compliment.
Please concerning offering my expertise at @steemgigs , how do i go about it?
Go over his (@steemgigs) contents/blogs for more details sir...
Thanks.. I'm inspired already
I'm glad you are inspired
Wow... Nice one bro... Nice tutorial and thanks for the gif
You are welcome brother
This post has received gratitude of 1.41 % from @appreciator thanks to: @prechi.