The most effective method to Paint a Mountain Valley Landscape – A Step by Step Guide
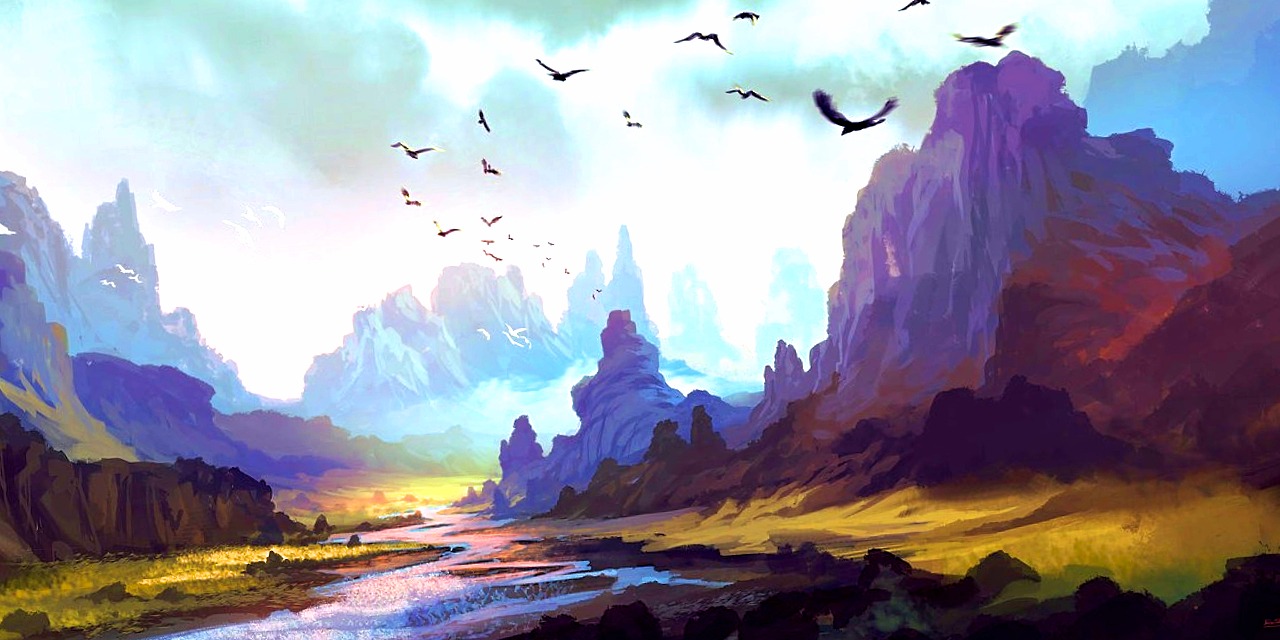
Mountain Valley Landscape
Hello Steemians!
Today I get a kick out of the chance to share my new painting "Mountain Valley" Idea of this artwork come when I visit lovely Mountain Valley yesterday. It was truly dazzling and wonderful. first of all I get a kick out of the chance to educate you that when I like any think so I endeavor to paint, at that point I chose to paint this wonderful Mountain valley. I just landed at home and take my paint brush and straight my leading body of canvas and begin doing this Mountain Valley Painting. What I found in that Mountain Valley its store in my creative ability and mind so it's naturally comes to canvas.
.jpg)
I cherish scene craftsmanship, particularly conventional authenticity painting and I have been painting scenes for a long time. A large number of my persuasions originate from nineteenth Century scene painters, my most loved specialists including Peder Mork Monsted, August Wilhelm Leu, Ivan Shishkin, and Even Ulving to give some examples. From the low chroma profundity of the mountains in August Wilhelm Leu's work to the common natural liveliness of the foliage in progress of Peder Mork Monsted, I adore the way these folks made their depictions and their utilization of shading and tone. I admire these folks for motivation and I look to copy their methods for my own particular scene works of art.
.jpg)
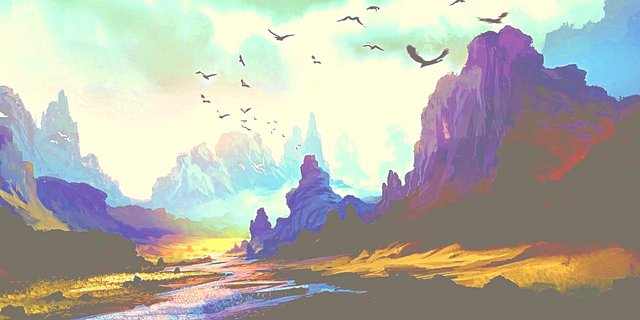
In this well ordered painting exhibition I am will demonstrate to you proper methodologies to paint this mountain scene appeared in the photo underneath. This scene painting depends on Mount Talbot in Fiordland, New Zealand. It is a colossal mountain run which eventually prompts the epic Milford Sound, this is an incredible subject for scene painting.
.jpg)
Arranging the Painting
Keeping in mind the end goal to make a connecting with mountain scene painting most importantly we have to design our photo so we can figure out what the canvas is about. Profundity inside an artwork can be accomplished by having deliberately put central focuses and powerful utilization of shading to make environment and space inside the artistic creation.
.jpg)
With a specific end goal to make the tale of this artistic creation I chose what components I needed in the scene and where I needed my primary point of convergence to be. Before I even started painting this photo I arranged many pencil outlines with a specific end goal to design the sythesis so I could perceive what might work and what wouldn't work in the photo. This is basic so I don't keep running into issues with piece issues later on when I am painting the photo.
.jpg)
When accumulating my representations, I am always contemplating my sythesis agenda to decrease or dispose of components that could destroy the organization. Normal compositional blunders in scene painting can incorporate focus lines or point of convergence set in the focal point of the work of art, distortions and rehashing items, shapes and vectors or potentially a lot of data. Commonly in scene painting toning it down would be best so it's frequently a smart thought to disentangle the canvas particularly regarding arrangement.
Making the Composition
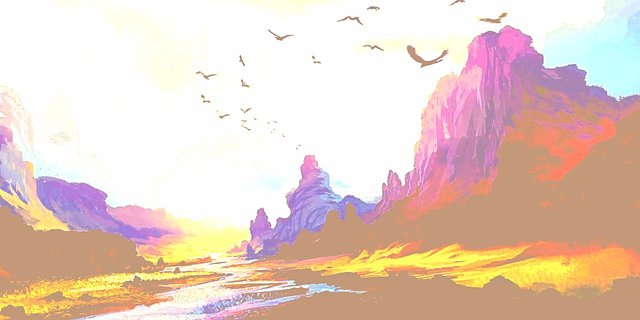
The following is one of the reference photographs I used to paint this scene.
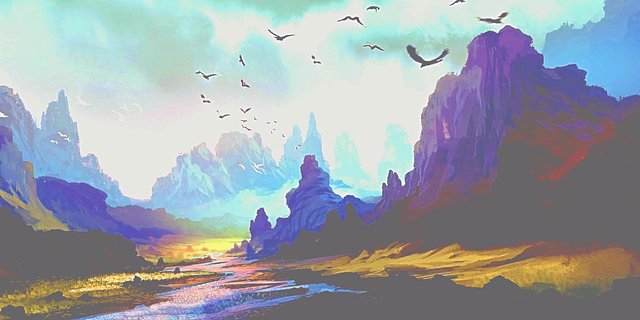
The photograph contains every one of the components required to make an incredible painting however the structure doesn't exactly work in its present shape. Mount Talbot in connection to the waterway is unwieldy and diverting as the stream drives the eye far from the mountain. The skyline is in the focal point of the photograph and there is a diverting vector as the even line of stones over the waterway. This is the place portraying is an essential piece of the work of art process, as it is important to improve the components of this photograph to make a considerably more satisfying organization.

In this work of art I have moved Mount Talbot (the point of convergence) to one side of the composition and I have made it bigger. I have brought down the skyline and reshaped the stream so it leads towards the mountain. I have evacuated the line of stones in the water and made a portion of the shrubberies and plants greater.
My Palette
I painted this scene on canvas, utilizing oils. The work of art measures 400mm x 500mm (16" x 20"). To paint this scene, I have utilized Langridge Handmade Oil Colors:
Titanium white
Cadmium yellow
Cadmium yellow profound
Yellow oxide
Consumed sienna
Consumed umber
Cadmium red light
Quinacridone maroon
Ultramarine blue
Pthalo blue
Cobalt blue
Cobalt greenish blue
Pthalo green
I have additionally utilized the medium Liquin Original which enhances the stream of the paint and accelerates the drying time.
Painting Mount Talbot – Step by Step
Stage 1
Before beginning this composition I arranged the canvas by covering it in a layer of consumed sienna. Including a layer of consumed sienna gives the work of art dynamic quality as it gets through the layers of paint, and warms up the entire painting. You can likewise utilize consumed umber.
To set up the canvas with the consumed sienna layer I blended consumed sienna with liquin and thinners. I at that point connected it to the canvas with a substantial hake brush ensuring that the blend is connected in a thin layer. I for the most part abandon it to dry for no less than a few days before beginning a canvas.
I have portrayed the scene with copied umber blended with liquin.
Stage 2
As I start obstructing in the artistic creation I have begun painting the sky which sets the general scene for the depiction. I will utilize the sky to gage my tonal esteems in whatever is left of the canvas. The blue of the open sky is blended with a mix of cobalt blue, cobalt greenish blue and titanium white. I have obstructed in the fundamental states of the mists utilizing titanium white, once become I will begin constructing scarce the detail.
Stage 3
I begin hindering in the shadow zones of Mt Talbot. As this is the most inaccessible landmass the hues won't be so dynamic and considerably more desaturated. Tonally, there is a littler hole on the scale between the darkest esteems in the shadow regions and the featured territories that are in full sun and this should be reflected in the work of art to make profundity. So I blend ultramarine blue, consumed umber, quinacridone maroon and titanium white.
The consumed umber, of which you'll require a little sum, thumps out the immersion of the blue. Including a little measure of quinacridone red adds another measurement to the shading and will give it a warm violet tint. Be mind not to utilize excessively quinacridone red as it will rapidly overwhelm the blend.
Stage 4
Next I start to include the featured ranges of the mountain shake confront, again I need to keep my shading desaturated so I blend a mix of ultramarine blue, consumed umber and a ton of titanium white.
The snow over the mountain is painted with titanium white blended with somewhat consumed umber. As white is the lightest tone I don't need it to come too far forward in the artwork so including consumed umber tackles this. In the event that required may likewise add somewhat ultramarine blue to the blend too.
The green region of foliage at the base of the mountain was blended utilizing ultramarine blue with a little measure of yellow oxide, quinacridone maroon and a liberal measure of titanium white. The blend will resemble a warm dark on your palette yet will seem green when beside the shadow ranges of the mountains. It's imperative to keep hues including green desaturated else it will come too far forward in the artistic creation and the dream of profundity will be lost.
Stage 5
So now I am making a begin on hindering in the mid-ground. At this stage I am not stressed over detail by any means, I simply need to get in the essential shapes and shades of the sketch before I can start demonstrating the paint.
As landforms in the mid-ground are further forward than the mountain the tonal scale increments, hence darks are getting darker and lights lighter, however I am as yet working in a mid-tone territory. The shadows are darker than the shadow ranges in the mountain. I have utilized my same blend of hues, ultramarine blue, consumed umber and quinacridone red yet I have utilized less titanium white in the blend.
The green is blended by including more yellow oxide with ultramarine blue and a little quinacridone fuchsia and additionally consumed umber to make the green a more natural shading. You can change the tints of the greens by including a little pthalo green and cadmium yellow profound. Utilize these two hues in little amounts generally the blend will rapidly turn out to be excessively immersed and you will lose the profundity in the artistic creation. You truly simply need to present these hues if required.
Stage 6
Next I begin to obstruct in the foliage, grasses and brambles in the frontal area. Here I am utilizing my most immersed green by blending cadmium yellow profound, ultramarine blue, a little pthalo green and quinacridone red. Pthalo green truly kicks up the immersion so be cautious with as it can rapidly overwhelm your blend.
The dim shadows in the closer view give the presence of solid daylight and I have blended this utilizing pthalo green and quinacridone red. At the point when blended on the palette it can make an exceptionally dull tone as the red in the quinacridone fuchsia is the complimentary inverse of green in the shading haggle the two counteract each other. Utilizing these two hues enables them to agreeably blend with the lighter greens as they as of now contain these excessively hues.
Never utilize a pre-blended dark in scene painting, while it is enticing to do this, dark blended with different hues gives it an unnatural look.
Stage 7
Here I begin to hinder in the base shades of the stream, again I would prefer not to get impeded in detail here, I simply need to get the essential hues and shapes.
The dark colored territory of the water mirrors the stones, rocks and scree at the base of the waterway and I blend this with a mix of consumed umber, consumed sienna, yellow oxide and ultramarine blue.
Given the blue in the water if mirroring the sky, I utilize a mix of cobalt blue, somewhat consumed umber and titanium white.
Stage 8
Next I have begun to hinder in the fundamental shades of the huge rock on the privilege and the littler stones and scree at the bank of the stream. I have blended these hues again utilizing ultramarine blue, consumed umber, quinacridone mage
If you like these paintings please "UPVOTE" "Resteem" & support me for upcoming post "COMMENT"
Thank you very much
Follow Me @zk34915
Your painting is so lovely and what a nice, detailed process post.
Thanks for your kinds words really, always follow my post infect i'm sharing work people like you
Woo, this are nice painting of mountain picture you have here...keep it up.
Thank you so much its highly appreciated, always follow, comment & resteem :)
brilliant artwork, thank you so much for all the details including all the exact colours and the process.
Thank you so much for taking a look my post, always try to in touch my post im doing this work people like you