Auxiliary Transmission Cooler Mod - 2011 Ford Flex Ecoboost
I just did a mod to my car that was so successful that I thought it worthy of a write-up. The reason I did the mod is because my transmission failed at 140k miles and I installed a remanufactured unit recently. After the install, I spent a decent amount of time afterward with my laptop installed monitoring transmission temperatures. I noticed that under normal driving the fluid temperature would sit around 205-210 degrees Fahrenheit, with excursions up to 230 degrees with just slightly spirited driving. Even though these modern transmissions take synthetic fluids (Mercon LV in this case) that are more tolerant of high temps, I still find this unacceptable. I think the fluid temps should be sub-200 and should only climb above 200 during spirited driving or towing, and they should never see 230!
In order to protect my investment I decided to add a factory auxiliary transmission cooler off of a 2013+ Interceptor Sedan (cop version of the Ford Taurus, which shares the drivetrain and chassis with the Flex) to fix the problem. The reason I chose a Ford OEM product over a much cheaper aftermarket universal option was because I wanted OEM levels of durability. I've built hot rods in the past with custom transmission cooler setups and they were not what you would call maintenance-free units. That was not a problem since those weren't daily driven commuter vehicles, but this one is. This turned out to be only partially a good decision however because a few modifications to the unit were necessary in order to make it physically fit under the Flex's front fascia. It should have OEM durability on everything except the mounting system, which I had to make myself by modifying the mounting brackets provided. Hopefully it lasts.
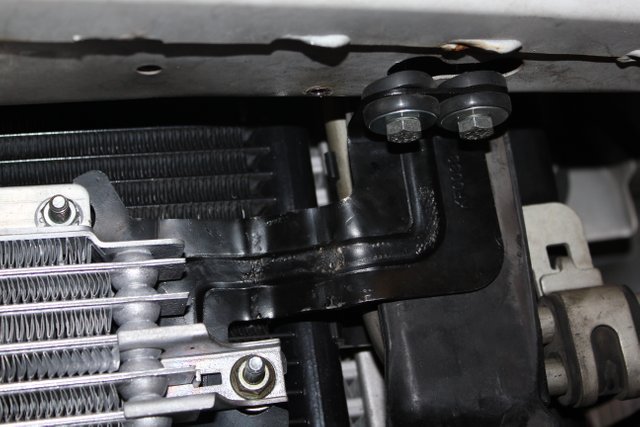
Above is the first bracket (driver side), which I for the most part had to just flatten so that it didn't push the cooler so far towards the front of the car. A little test fitting and tweaking and bending got it just right, although the results are less than pretty. The clearance is so tight that the original location of the rubber isolator mounts had to be moved as well. They're thick enough that they would have rubbed on the front of the stock AC Condenser/Trans Cooler unit. Instead, I hard mounted the bracket to the cooler unit itself with 1/4-20 hardware that I had laying around the shop with a washer on the back side to span the enlarged holes. I moved the isolators to the upper portion of the bracket on the tab where they bolt to the car's bumper. I did this by drilling the holes wider so that the steel spacer from the mounting bushings would pass through. Then I cut the rubber portion in half so that it could be assembled in two pieces and screwed onto the bumper. This is the portion of the mounting system that I'm concerned about for reliability, as the steel bumper uses thick sheet metal, not plate, and so even the fine thread 1/4-28 bolts I used will only engage a thread or two, meaning that they can't be torqued down very hard. I think the fact that these rubber isolator bushings are on here will mitigate any vibration and keep them from rattling loose. I may have to add rivet nuts at some point if these decide to back off but we'll see how they do for now. I'll check them after a couple weeks of driving to make sure they're still tight.
This is a pic of the passenger side mounting bracket. This one was mostly flat to begin with, so I had to bend the upper mounting tab 180 degrees from its original orientation to locate the cooler further aft. This still wasn't quite enough, so I also needed to add a near-45 degree bend at the tab, and then an inch below that to bring the orientation back to perpendicular with the bumper. The isolators were relocated the same way as on the other bracket, except that I had to drill a completely new mounting hole, as only one hole was originally on this side.
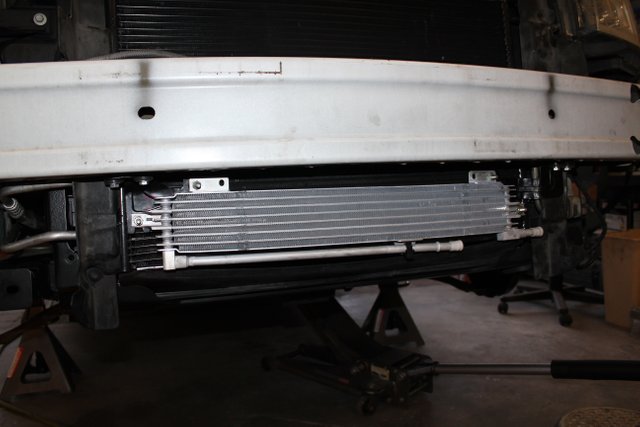
This is what the cooler looks like mocked up. Even after this point, I had to take each bracket on and off several times to get the bends just right so that they would put the cooler as far back as possible, and so clearing the front fascia of the bumper cover.
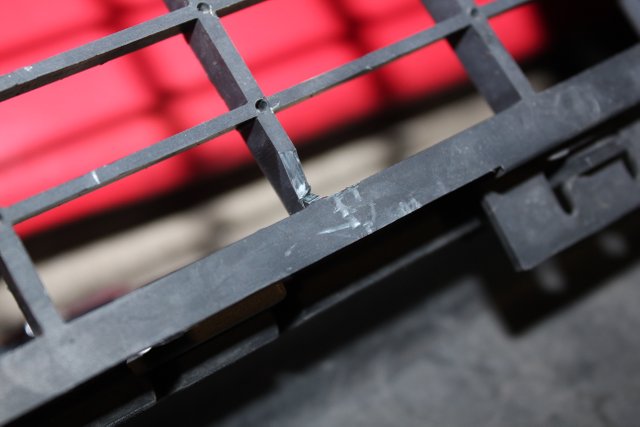
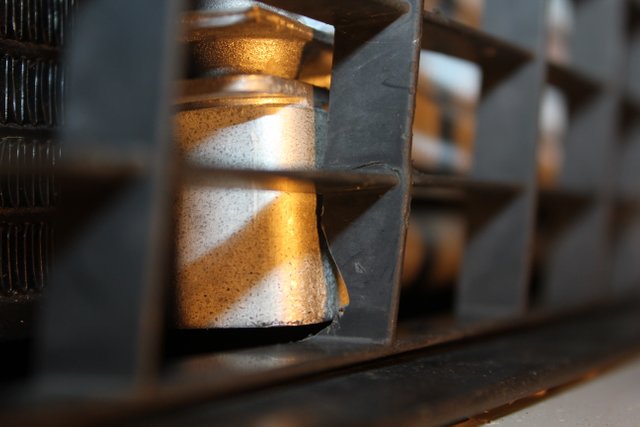
These two pics illustrate just how tight a fit this was. I needed to notch some of the plastic with a utility knife to get it to clear (top pic), and it's still very close (bottom pic).
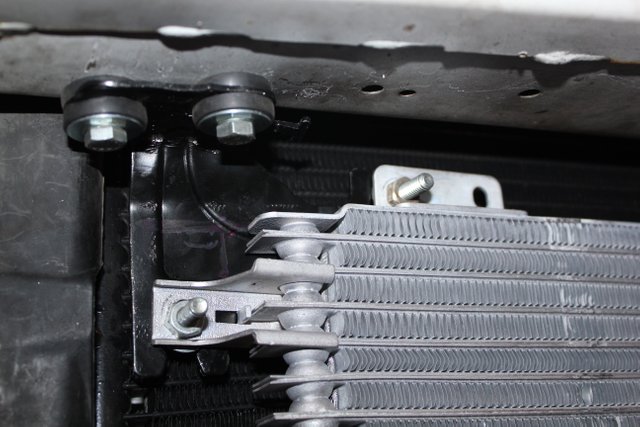
This tab that locates the cooler's output tube had to be bent as well. It used to protrude to the aft of the cooler, and so I bent it 90 degrees down to clear the condenser/cooler. I bent the tube itself forward as well so that it could still be held in place with the included plastic isolator.

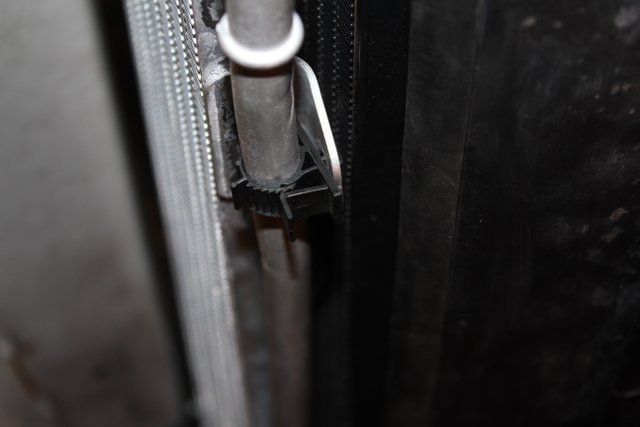
Here's a pic showing the clearance on the back side. This gap actually looks bigger than it is in the photo because it's so zoomed in. It's actually less than a quarter inch in real life.
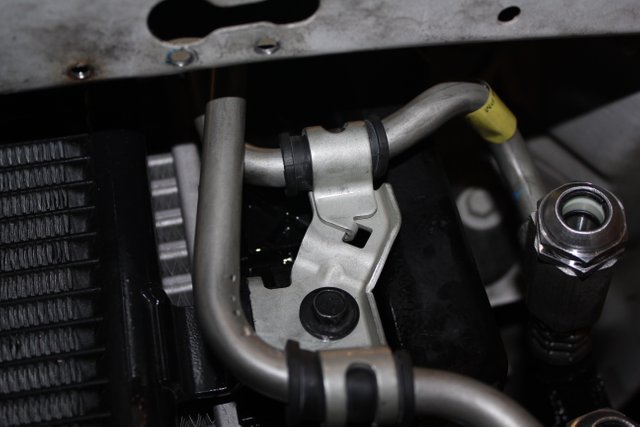
Above is a pic of the new cooler tubes mounted to the factory mounting point. You can contrast this with the original cooler tube on the right side of the first pic. The lower tube on this assembly was originally oriented to run on the left side. I bent up the tubing and bracketry so that the tubes would criss-cross and mate up with my factory condenser/cooler assembly.
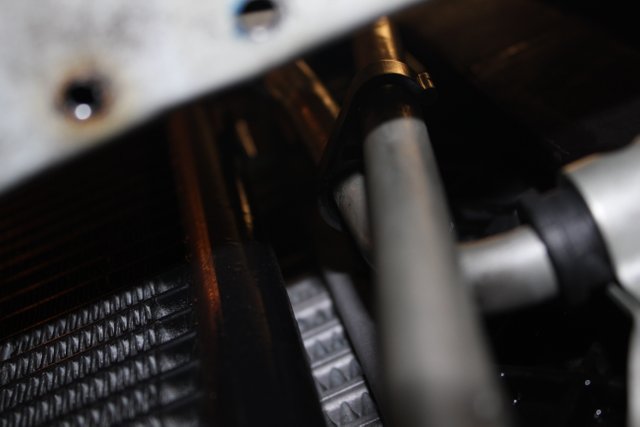
A better pic of the tubes crossing each other on the way up.

This is the upper portion of those tubes in their final installation location. As you can see, the tube on the left is too low to mate up with that upper tube on the condenser/cooler, thus the reason I had to cross them. I used a screw clamp on the right one in place of the factory style spring clamp because one of them broke during disassembly.
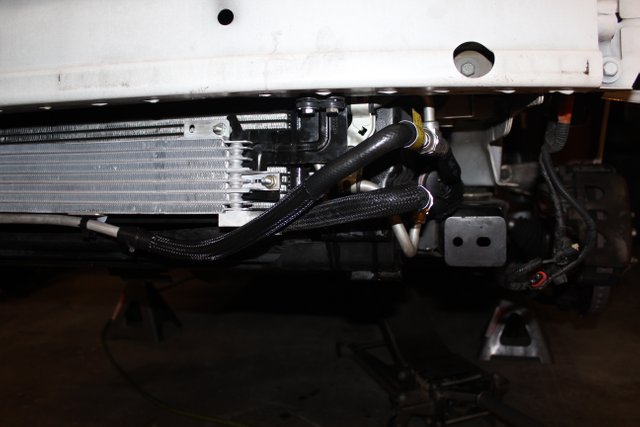
Here it is with the install nearly complete. As you can sort of see in this pic, the two tubes protruding from the front of the assembly extend quite a bit forward of the vehicle, making it difficult to get them to clear the bumper cover. I had the bumper cover on and off about ten times, each time bending the tube assembly a little bit down and back to finally get everything to clear. It was still a pretty tight fit, and the rubber portions of those tubes are pinched in there between the bumper cover and plastic radiator support a little bit. I'm hoping that because they're only touching plastics on both sides, the tendency for them to abrade will be minimal. They're not pinched enough to restrict flow however, because as you'll see below, this setup works beautifully on the road.
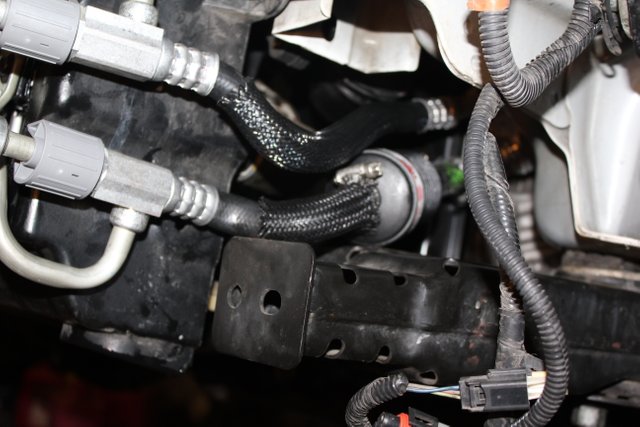
This is a mod that I did when I swapped in the new transmission. It was an external inline transmission filter installed on the return line which I have duplicated on this one with a fresh filter. The 6F55 does not have a removable filter, and the transmission needs to be removed and split in half in order to change the one it does have, so when it fails, the whole transmission goes with it. I installed this removable unit to protect the one inside. It has a pleated paper filter in it similar to the spin on oil filters for your engine, along with a magnetic ring that will collect any iron filings typically found during initial break-in and to a lesser degree during normal wear over the transmission's life. It's a bit of extra insurance, just like the extra cooling, to protect my investment.
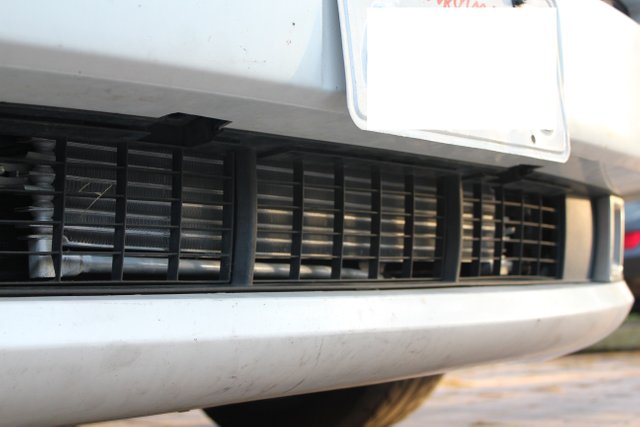
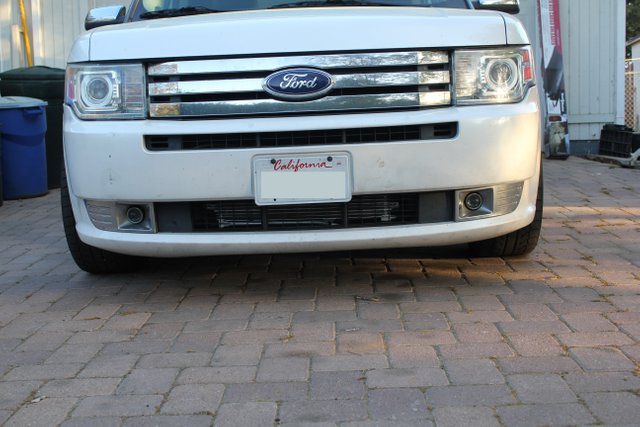
These two are pics of the unit after everything was installed and I test drove it for a day. I'm still debating on whether I should pull the cover back off and spray paint the cooler black. I kind of like the way it looks all silvery like that, except I know it will oxidize and turn into a dull gray at some point. Let me know in the comments what you think. Pardon what looks like dirt on the bumper by the way. Most of that is actually my blood from gouging the back of my middle finger during the install last night. I didn't actually notice I was injured until I saw the blood on the bumper. Next stop, car wash!
As far as functionality goes, I took it out for a test drive last night and it took forever to get the transmission up to temperature. It was only about 60 degrees, and I had to drive around for about 10 minutes to get it to warm up enough to check the final fluid level.
After getting it warmed up and topped off, I took it out for a highway drive, and the temps climbed quickly up into the 185 range and sort of hovered around that during normal driving. After that, I decided to do several hard pulls to get the temps to go up. After five in a row, I couldn't get the temps to rise above 201 degrees no matter what I did, and as soon as I let off the gas and it shifted into high gear, the temps would start to drop again.
I took a bit of a road trip today, about four hours total across various parts of San Diego County. In the low 80s today through mountainous terrain alternating with stop-and-go traffic, I didn't see the temp go above 193 the entire time. It was interesting to see that the slow stop-and-go stuff, even with a light throttle, made the temps climb to the same levels as climbing steep mountain roads at high speeds. The lowest temps I saw were while cruising on relatively flat terrain at about 45-50 mph.
I'd say that's mission thoroughly accomplished. The auxiliary cooler is doing its job, and my transmission should last a lot longer than it would otherwise. That's a good thing because I have a bit of a lead foot. Me and automatic transmissions tend not to get along very well as a result. Of the dozen or so automatics I've owned, only about half of them survived my driving. In my defense, of the dozen or so manuals I've owned, only one of those failed, and it was because I was about to haul my Celica to a junk yard and I wanted to see what would happen if I shifted down into first at 60 mph and let out the clutch. Yes, the diff exploded out the bottom of the transaxle on that one.
But I digress. I'm hoping that with my choice of remanufacturer, who adds shift kits to these to firm up the shifting, along with this cooler and in line filter that will be changed periodically, the transmission should last the rest of the life of the car. Wish me luck!
Great upgrade👍
Thanks!
Here you are talking about some part of the automobile. I'm an automobile student. Thanks so much for a post.
World of Photography
>Visit the website<
You have earned 6.50 XP for sharing your photo!
Daily photos: 1/2
Daily comments: 0/5
Multiplier: 1.30
Block time: 2018-06-06T05:07:12
Total XP: 11.55/100.00
Total Photos: 2
Total comments: 0
Total contest wins: 0
Follow: @photocontests
Join the Discord channel: click!
Play and win SBD: @fairlotto
Daily Steem Statistics: @dailysteemreport
Learn how to program Steem-Python applications: @steempytutorials
Developed and sponsored by: @juliank