TUTORIAL | How to create a safe Bitcoin paper wallet for cold storage
Paper bitcoin wallets are one of the safest ways to store your Bitcoin (cuz you cannot hack the paper, right?). If the wallet is generated offline in the right way. nobody will have access to your wallet except you. If you are storing big amount of bitcoin and you are concerned about the security of third party apps and services that offer you bitcoin wallet on your smartphone/PC or you just getting prepared for the upcoming 1st August's Bitcoin fork - paper wallet might be one of the best (and cheapest) solutions out there for you. In this tutorial I will show you how to create one in the safest way possible (even if your PC is infected with a virus or is monitored by a hacker - nobody will gain access to your paper wallet). So without the further do - let's get started!

First of all - here is the list of things that you might want to prepare before moving to step by step tutorial:
- two USB flash disks
- printer
- piece of paper
- pen
Step #1:
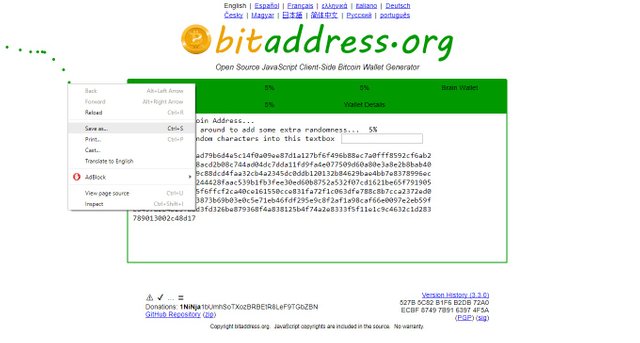
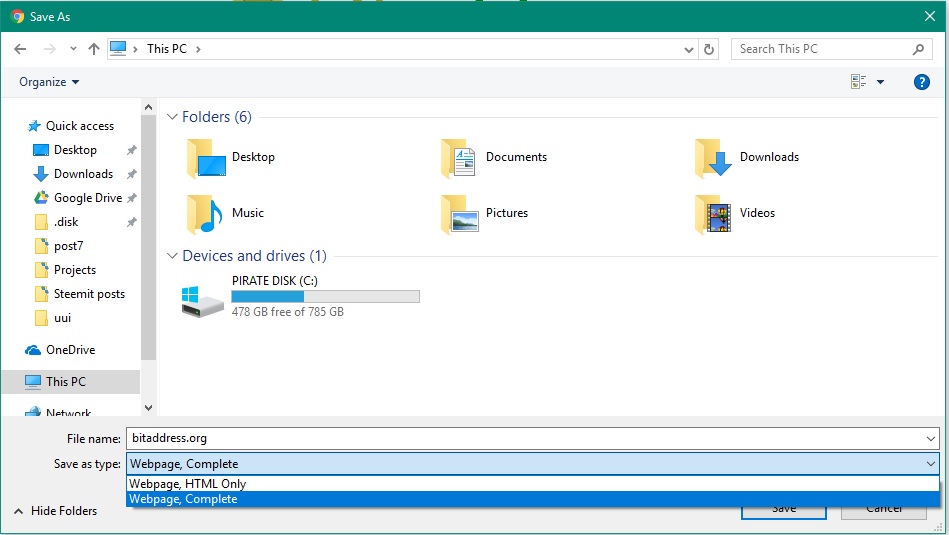
In order to create a paper wallet you need to generate random mnemonic seed via a web page called: https://www.bitaddress.org. But we want to do it as safe as possible remember? So instead of generating the seed in your browser just right-click on the webpage and select: safe as.... A window will pop up - make sure you save the web page as "Webpage, complete". That will make the webpage accessable even wihout the internet connection. Save or move this webpage to your USB stick #1.
Step #2.
Now you have to download:
USB Installer: https://www.pendrivelinux.com/universal-usb-installer-easy-as-1-2-3/
Any Linux OS (I suggest you pick Ubuntu 16.04): https://www.ubuntu.com/download/desktop
After you are done downloading plug in USB stick #2, open the folder where you have previously downloaded USB Installer and double-click on it. Inside the USB Installer:
- select OS: Ubuntu
- choose your 2nd USB stick as a medium
- find a path to your Ubuntu ISO file
- format the USB drive to make sure that the flash disk is clean and ready for OS installation
The final picture before installation execution should look like this:
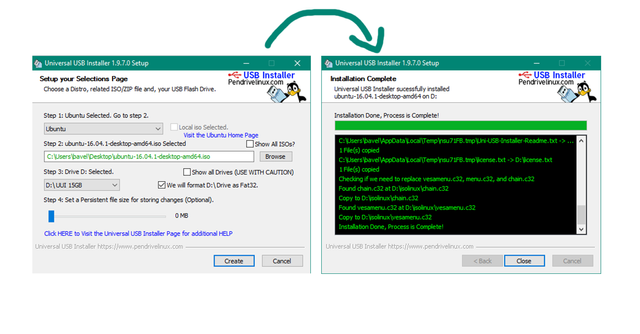
After you hit "create"Ubuntu will be installed on your flash drive. When it's done - unplug both USB sticks, also unplug ehternet cabel if you are using one and boot your pc into BIOS.
Step: 3
Disclaimer - if you do not know how to enter BIOS on you PC: The way to enter BIOS varies from PC to PC and because I do not know what kind of PC you possess - you will have to find the way yourself. Google is your friend on this one :)
We will use Ubuntu Live boot from USB in order to manage 100% secure offline mnemonic seed generation. In your BIOS select boot options and make sure that USB drive boot is #1 (or if there are no such options - "enable USB boot"). Also make sure that Boot Mode is switched to "Legacy Suppport" and Boot Priority is set to "Legacy First". Safe the changes and reboot.
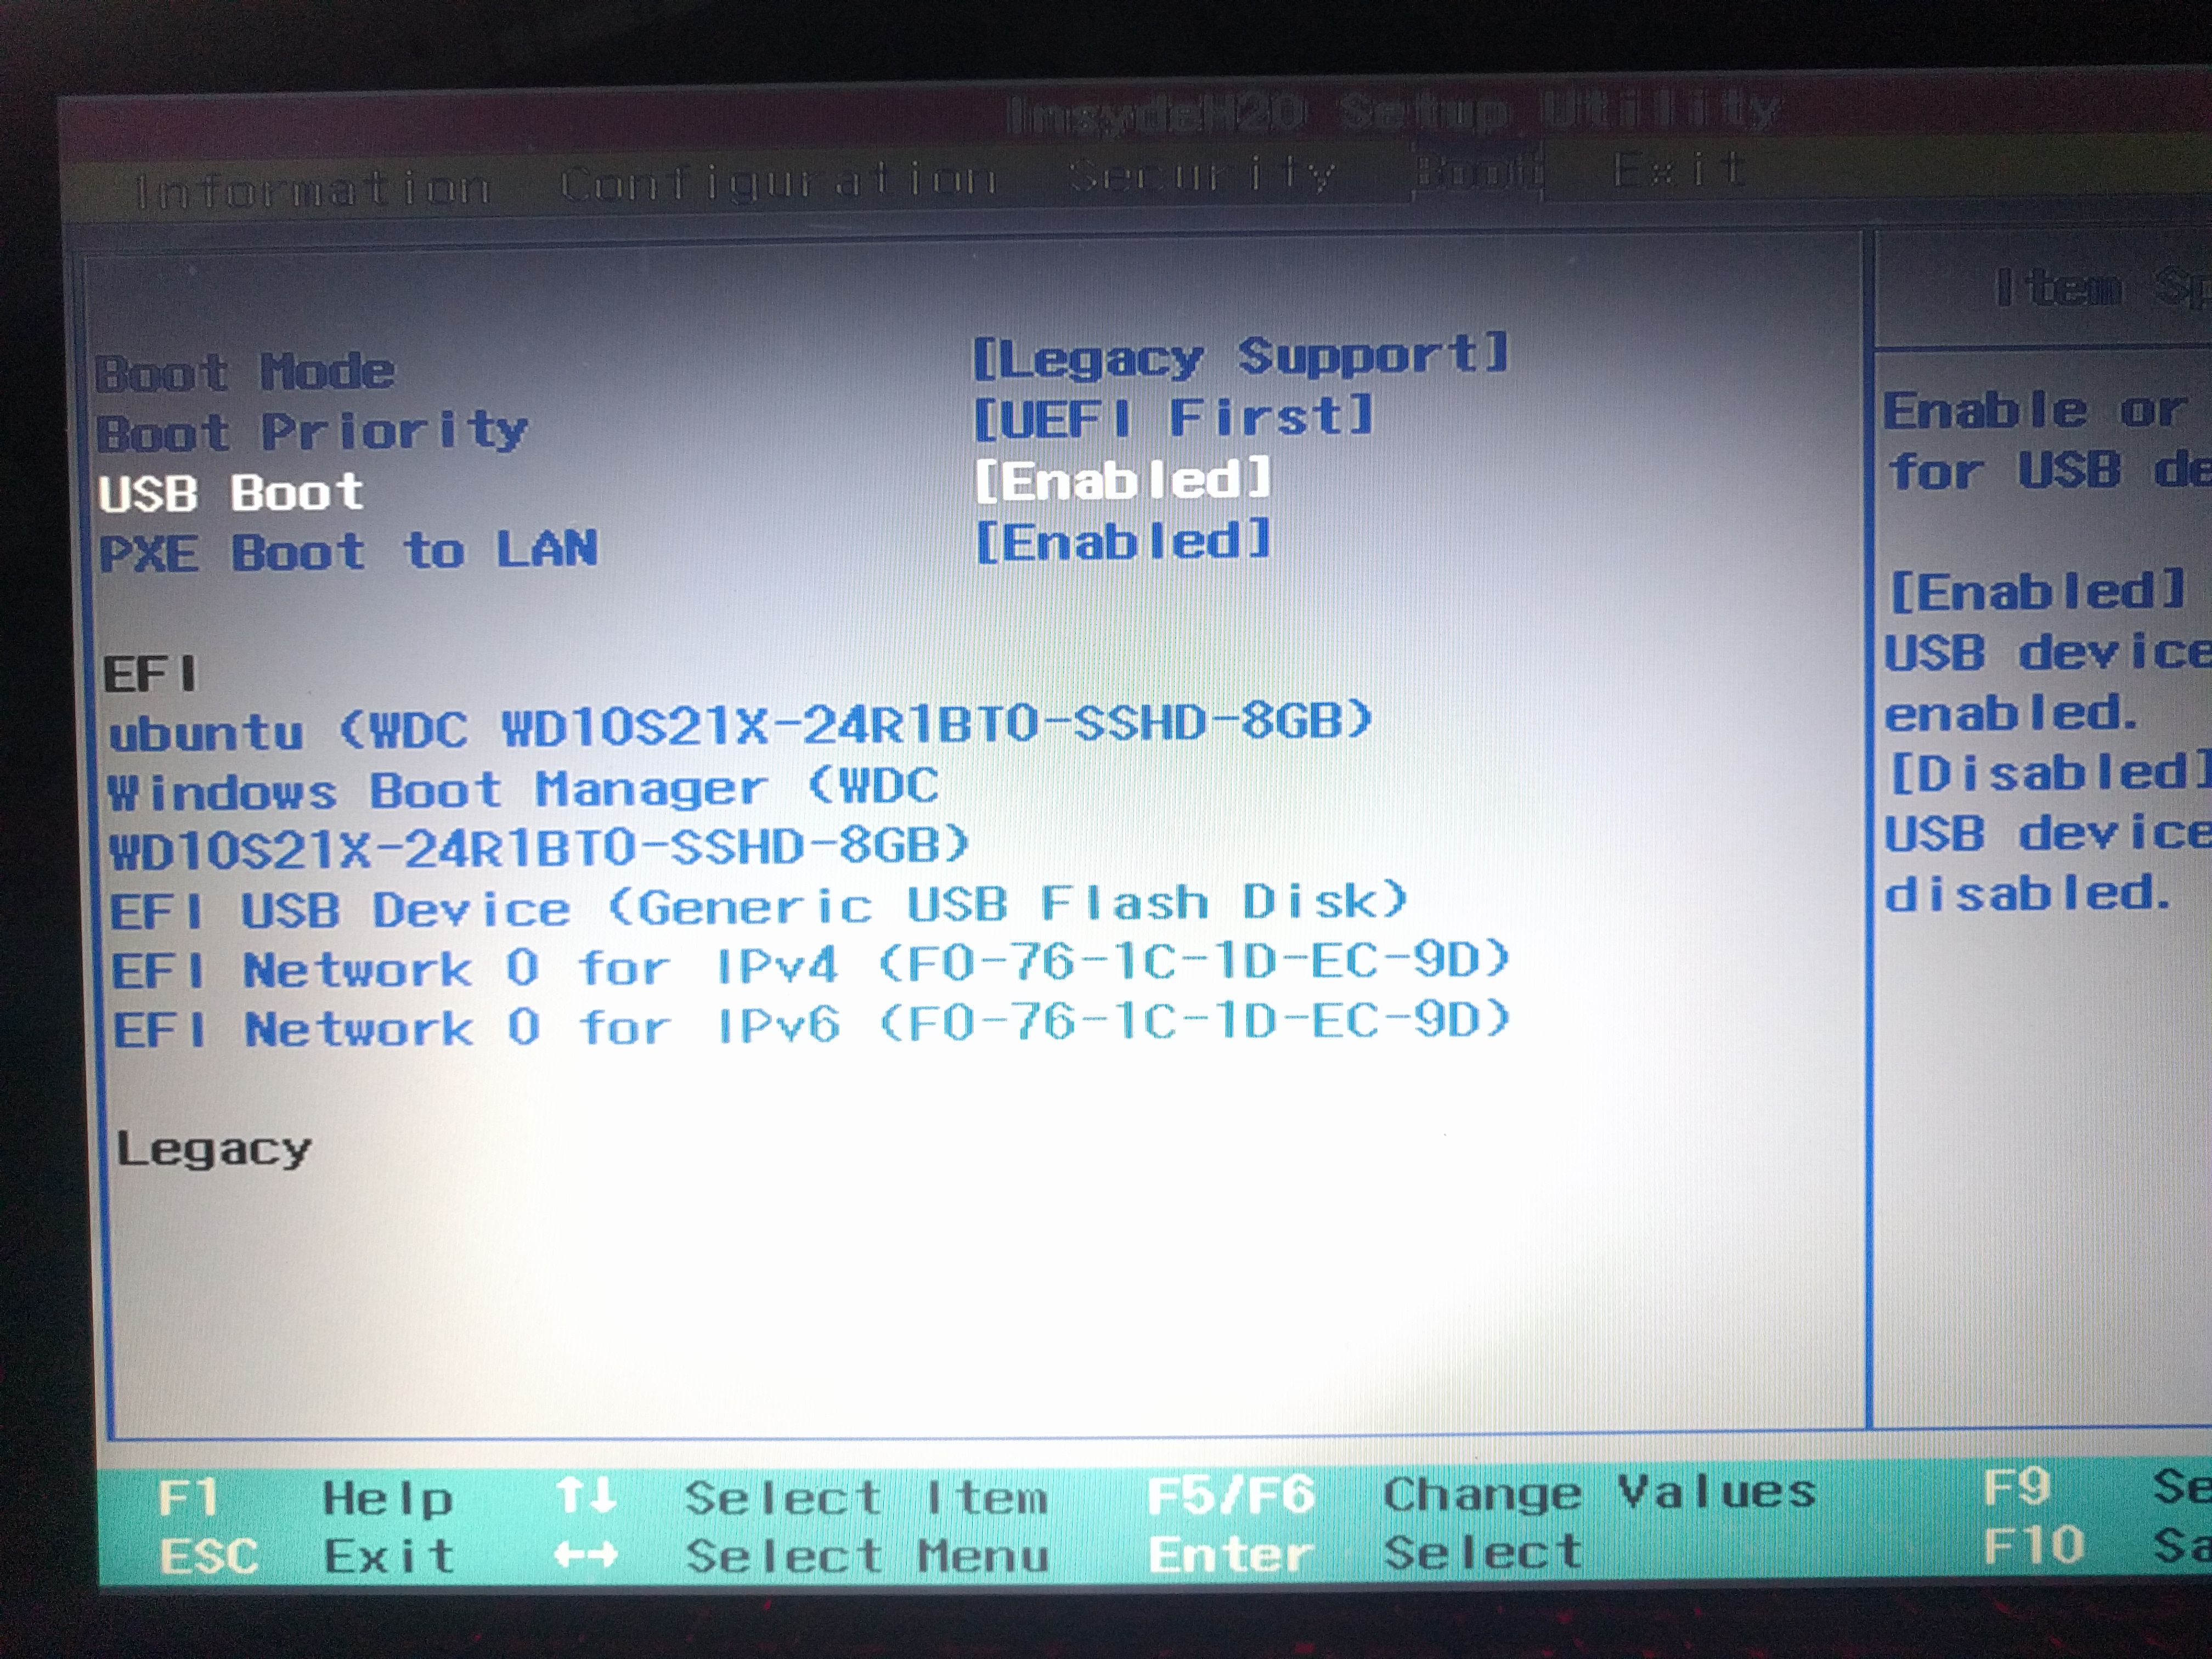
That's how it looks like on my PC
Step #4:
Now you should enter the USB boot and the Ubuntu boot options should be displayed:
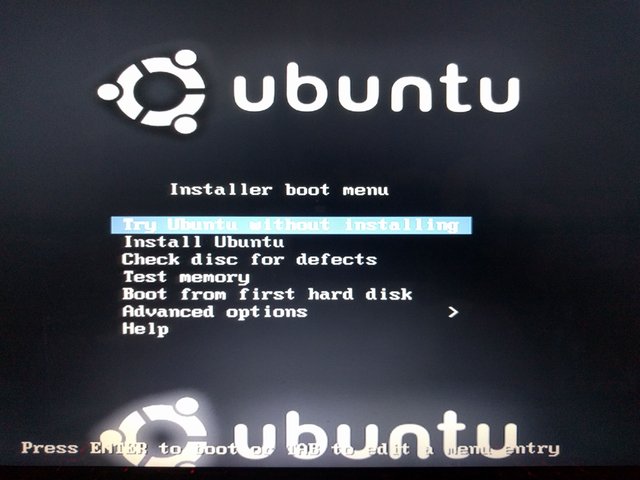
Select "Try Ubuntu without installing" and wait until the OS finishes the booting sequence. Now you are in the Ubuntu desktop and after making sure that you are not connected to internet (top right corner - there is WiFi indicator) you can start to generate the seed.
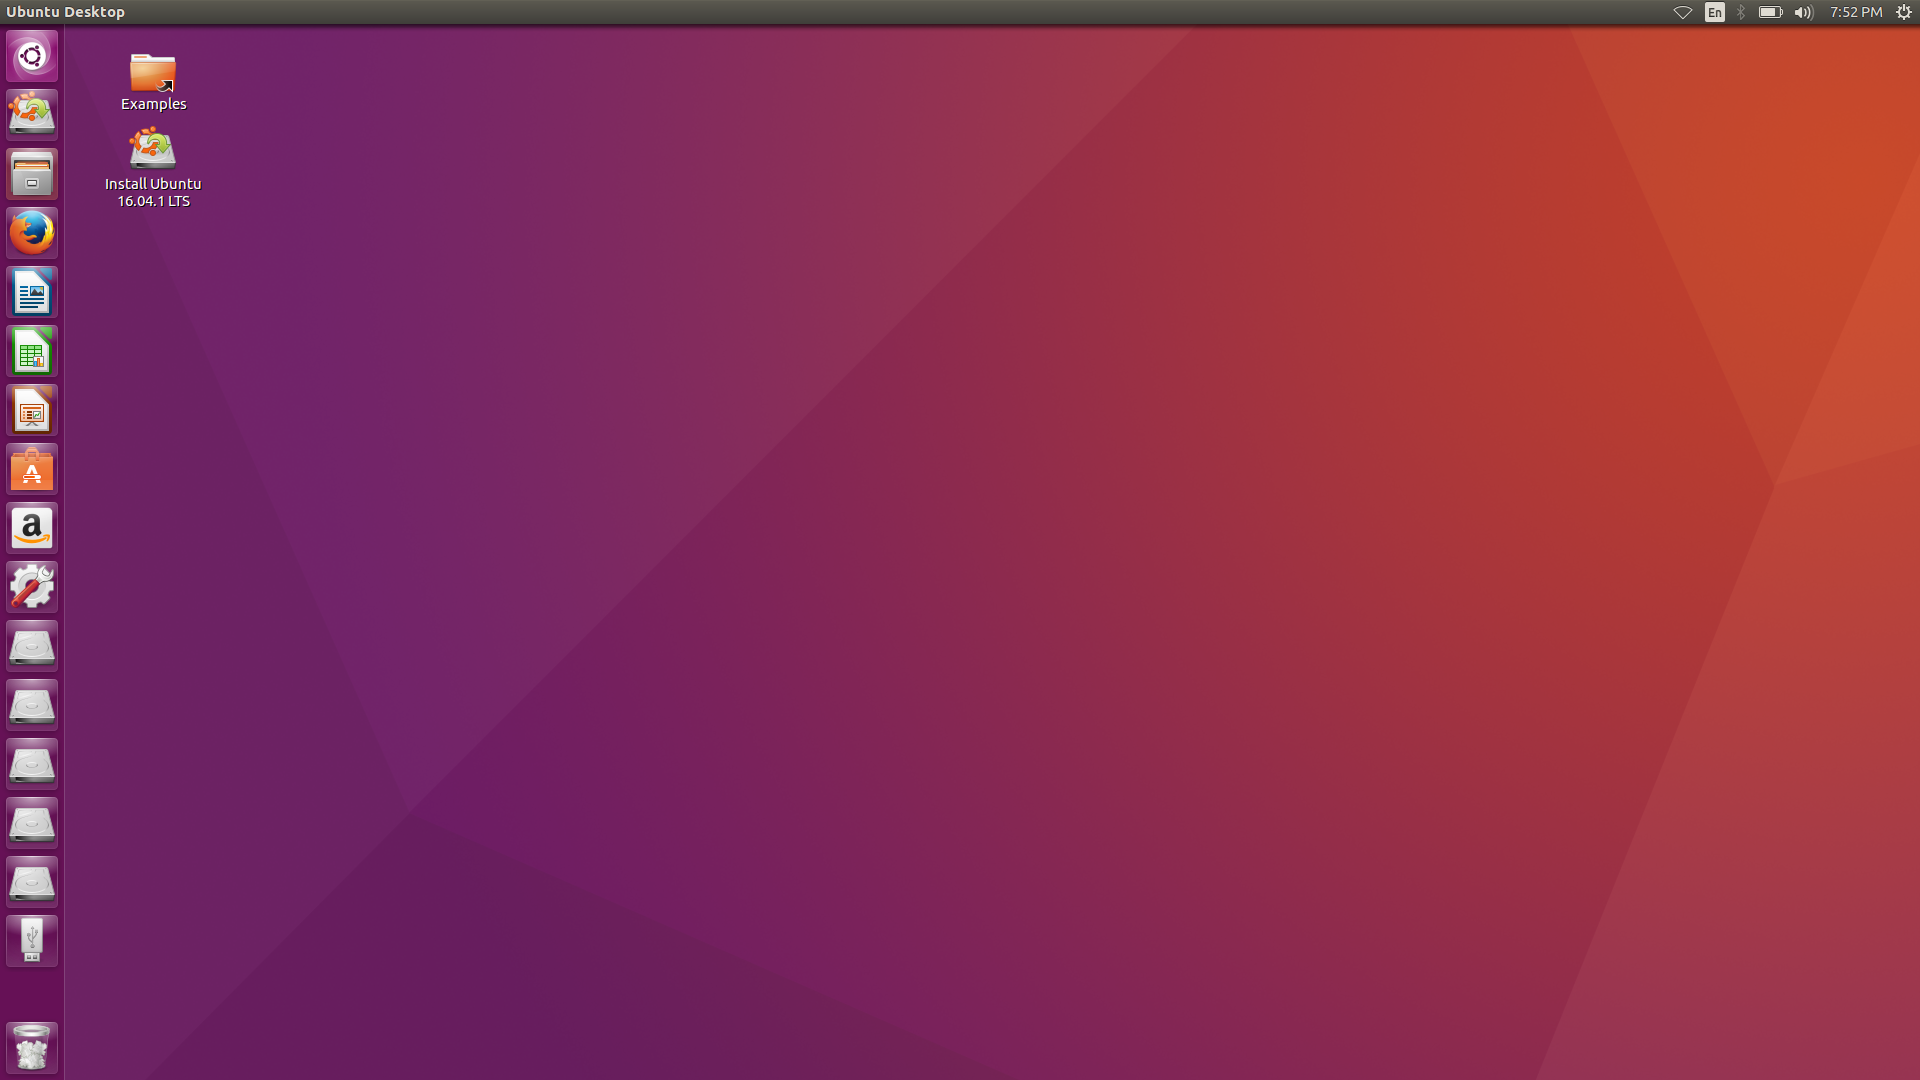
Plug in your USB stick #1 with the webpage copy on it - a window should autmatically pop up. If that is not the case - click on the third icon "Files on the Dock on the left side. There select your USB Stick and open the Webpage.
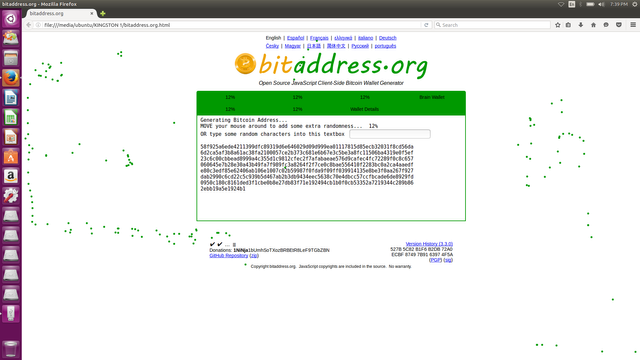
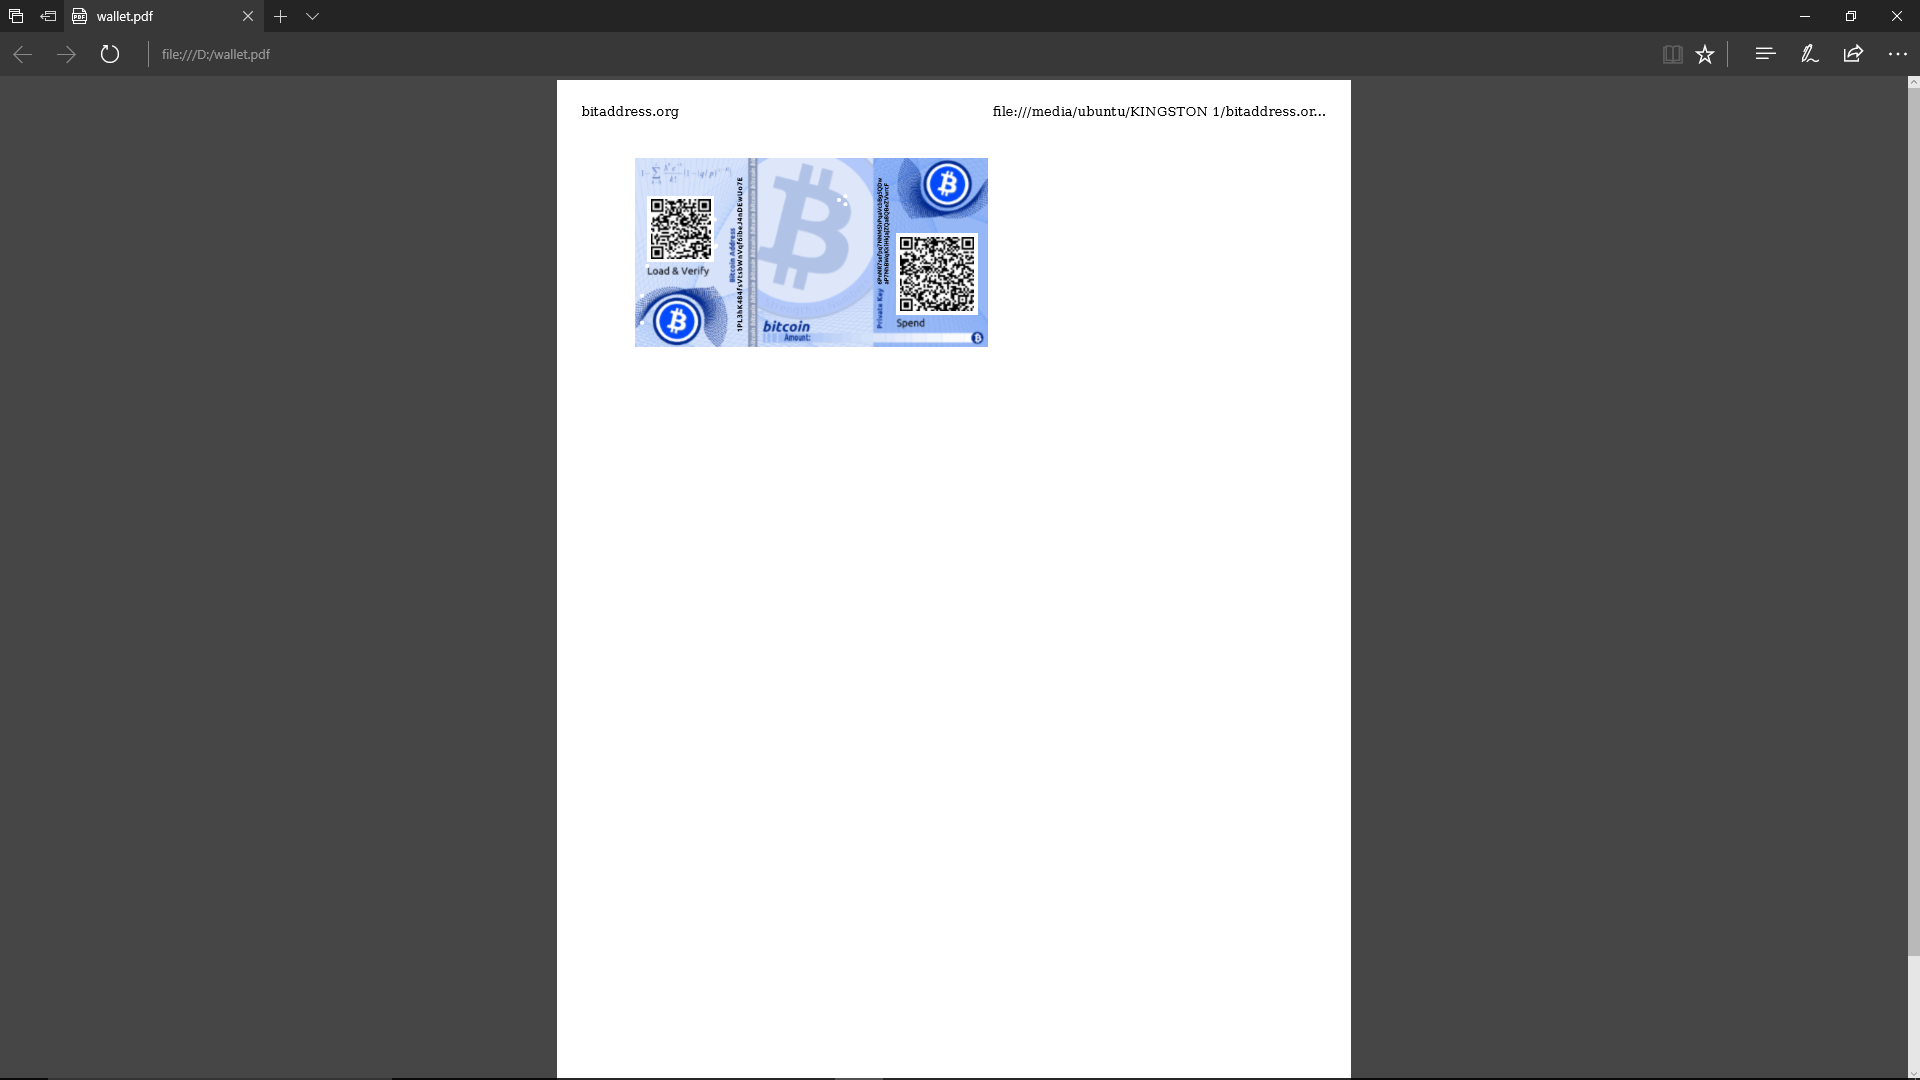
As you can see - the whole thing works even without the internet connection. So now move the cursor around the page to randomly generate your seed. When you are done a page with two QR codes and some options should appear. Choose "Paper Wallet" and select the amount of copies you want to make. You can also secure your wallet with "BIP38 encryption" by entering a unique passphrase for your wallet (this step is not mandatory). After that click on "Print" (which in our case is more like "Save") button.
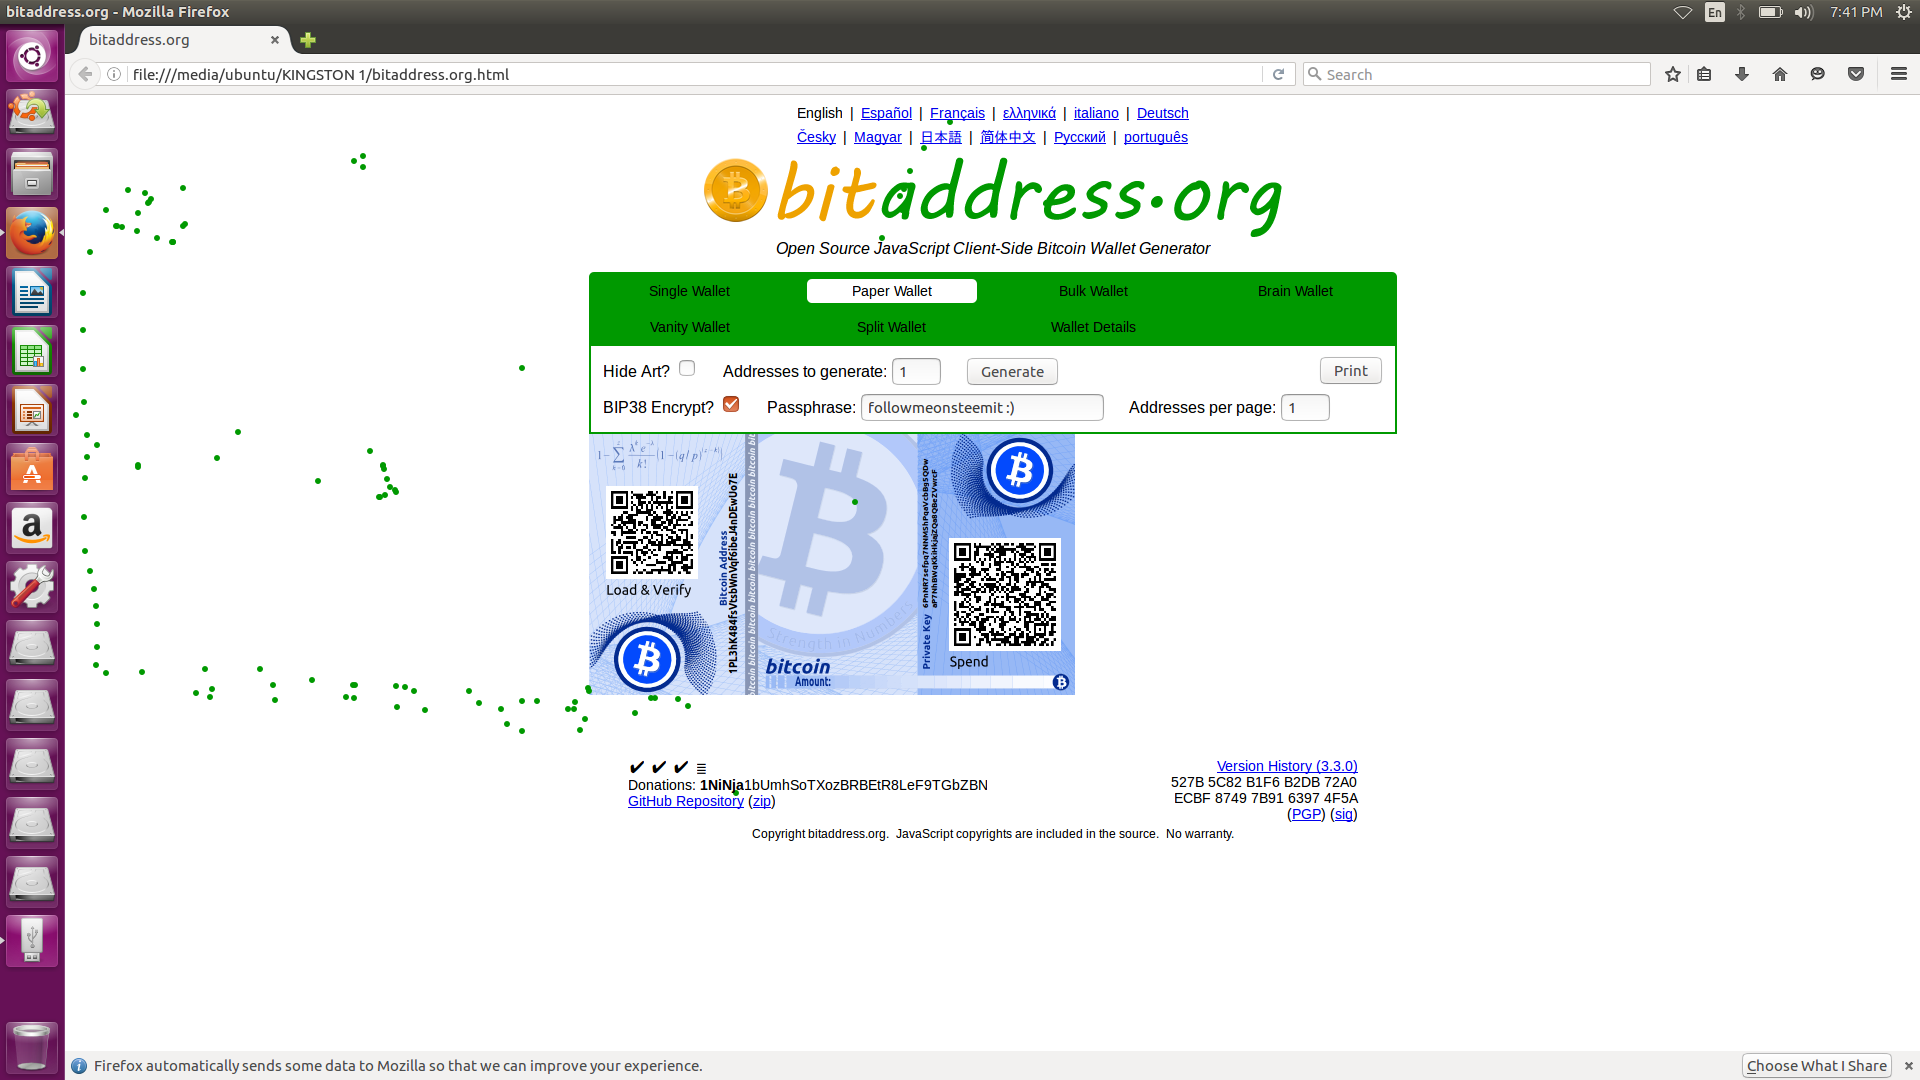
In Print window make sure you have "Print to File" option and below "PDF Format" selected. After that choose to safe your file onto your USB stick under the name: "paperwallet.pdf" (do not forget to put .pdf at the end!) and save it. Then right-click on each of the QR codes and save them as pictures (remember - Load & Verify = public key, Spend = private key!) to your USB stick. After that you can turn off your PC, unplug all USB sticks and boot into BIOS to change all the boot options to default.

Step #5:
After you boot back to your Desktop environment make sure that all the internet connection is closed. Then you can safely plug in your printer, open the PDF file from your USB stick and print your bitcoin paper wallet.
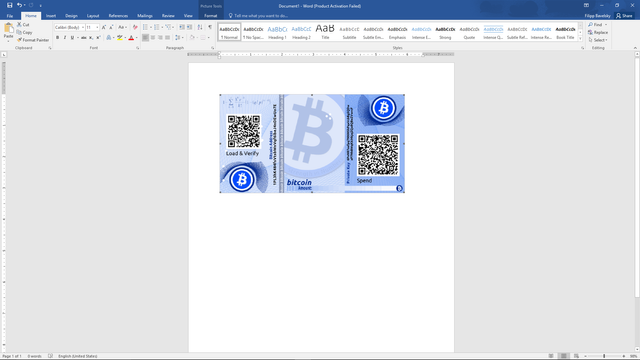
One issue that I've encountered is that the default size of the wallet in that PDF file is pretty small and thus for some devices it might be problematic to scan the codes on it. So what I prefer to do is to press PrtSc (Print Screen) button on my keyboard to make a screenshot of the file, then paste it into Paint program, crop it and save it as a picture (again on USB stick - no files shall ever touch the hard drive of your computer!). After that just drag and drop the new created picture into your favorite text editor (Word/Pages) resize it and print it.
Fin. That's how it's done :) now you have your own secure Bitcoin paper wallet that has 0% traces online - that means that you and only you have the access to it. Remember if you want to send you bitcoins to this wallet scan the public key - "Load & Verify" and if you want to withdraw your Bitcoins from this wallet use the private key - "Spend" (in this case you will be asked for your passphrase so write it down on a piece of paper that you have prepared and put it somewhere safe)
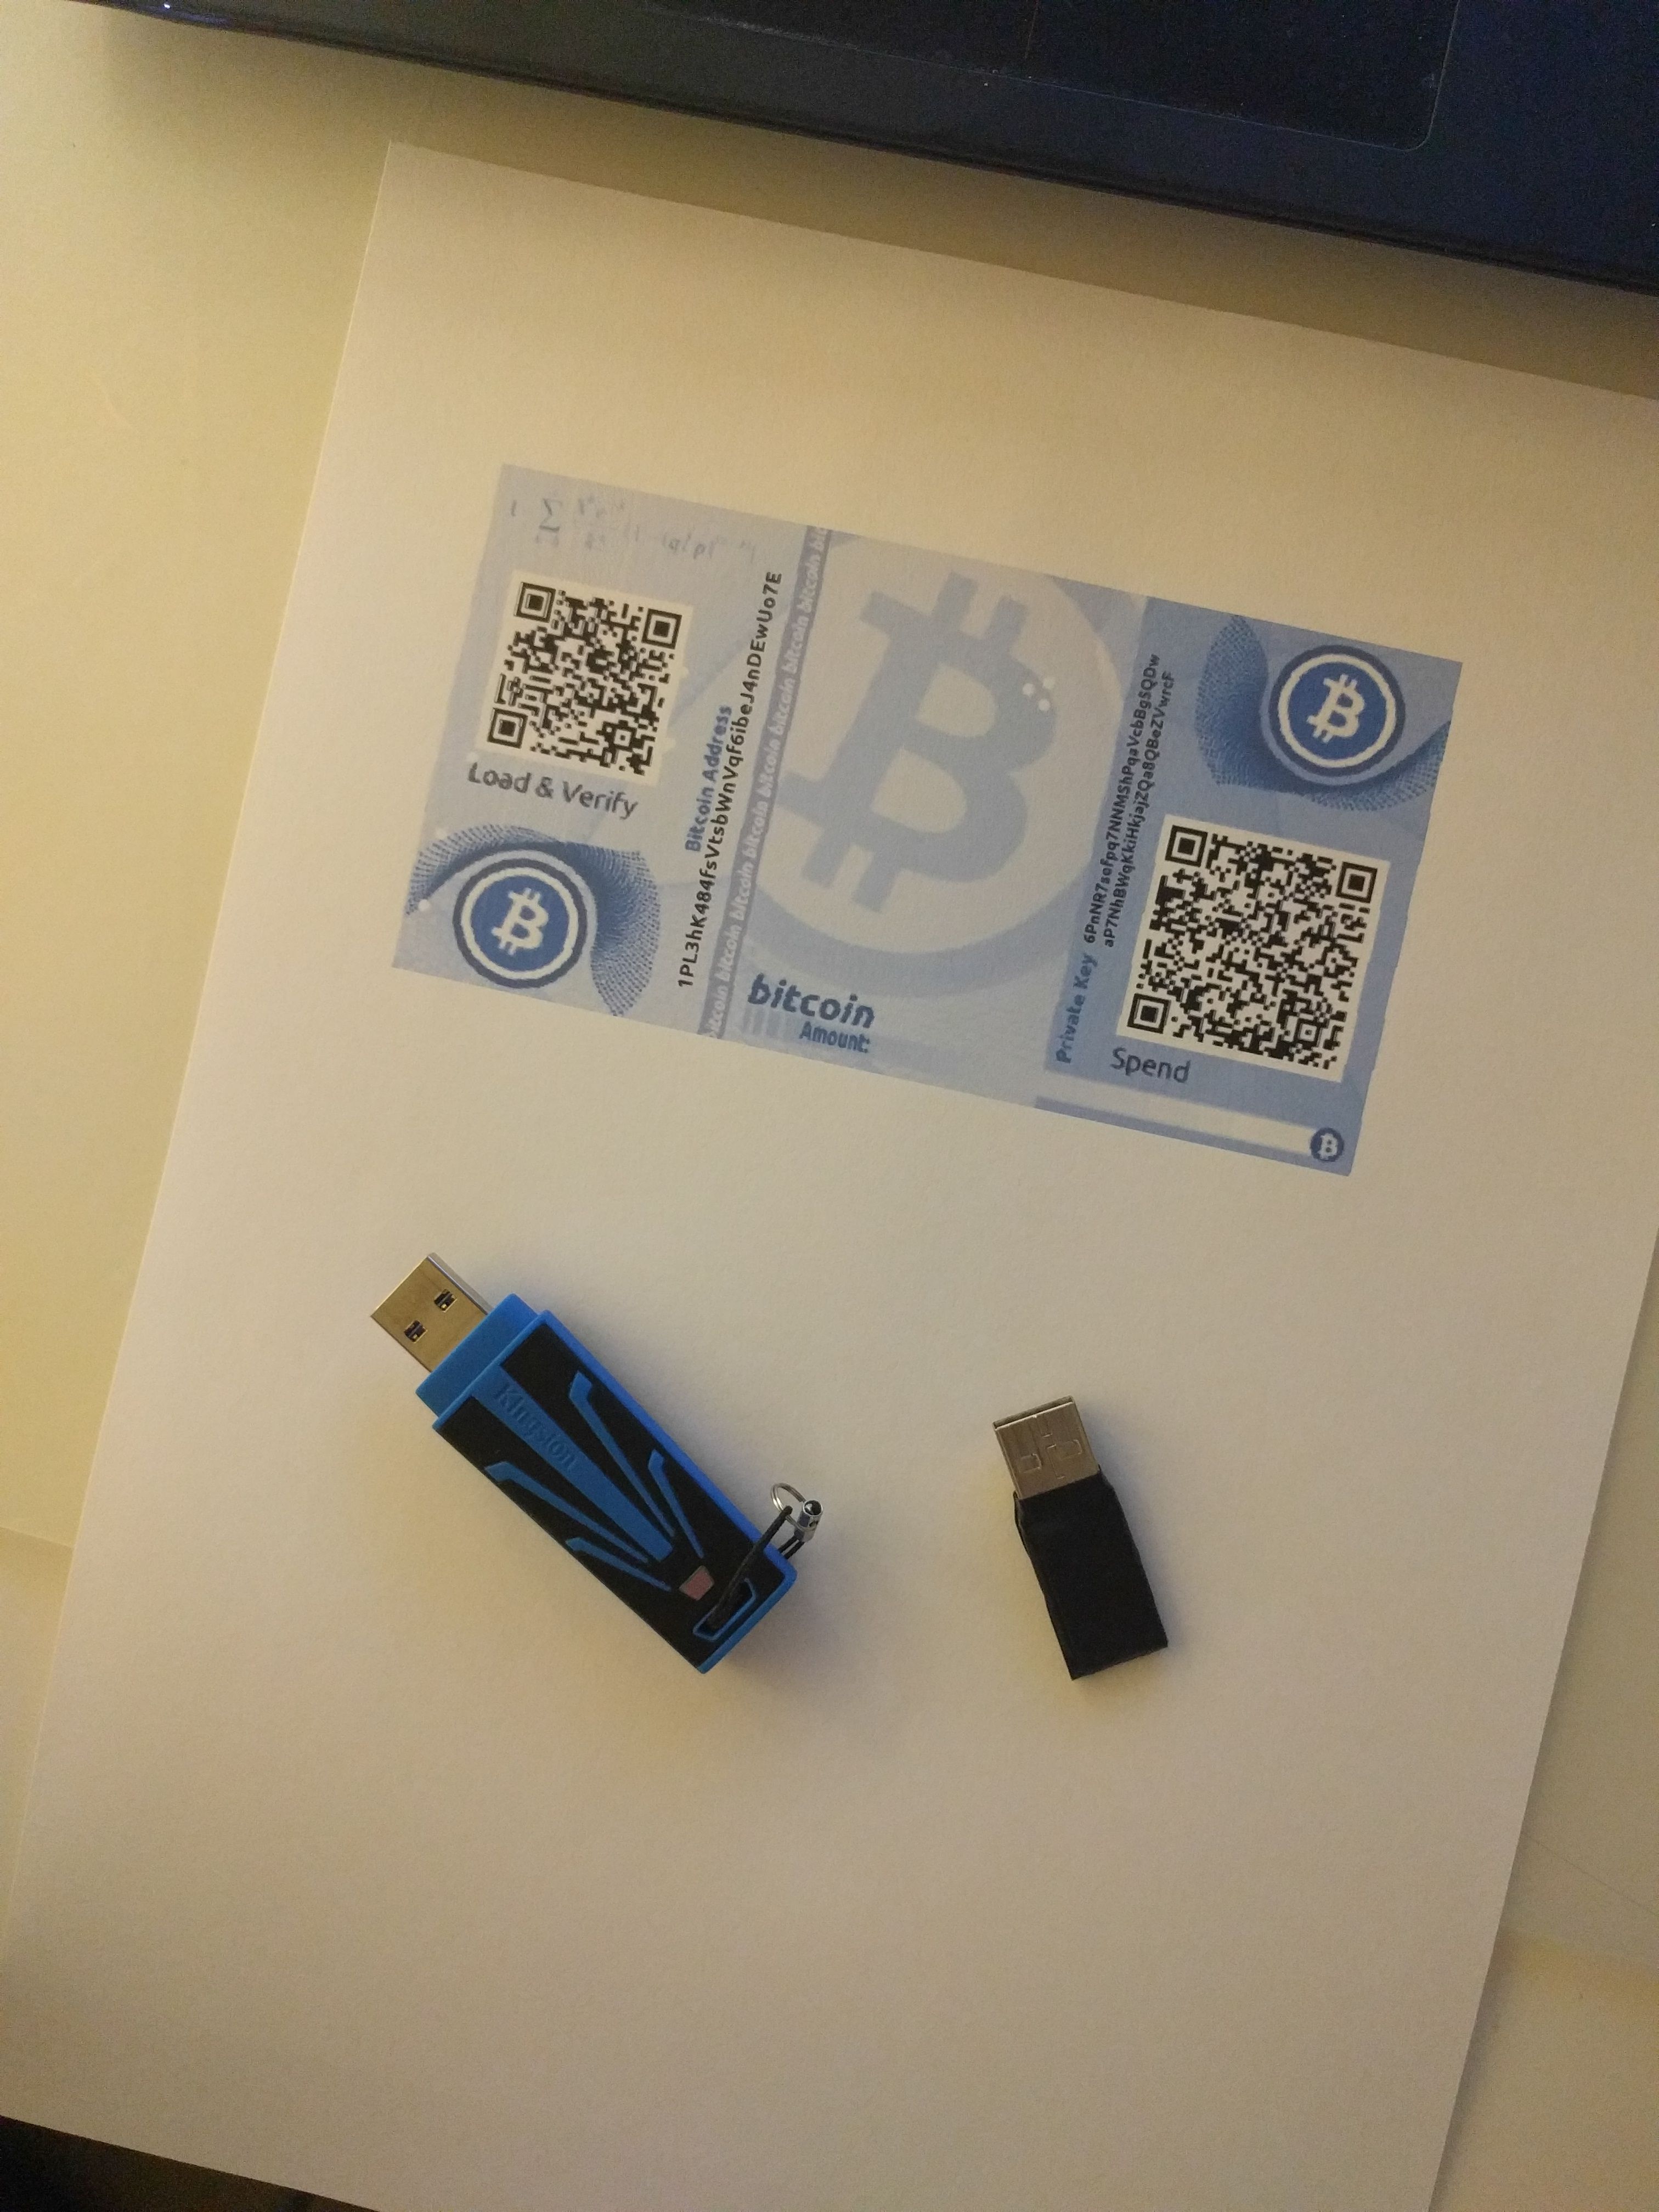
I do not recommend to use this wallet for payments, daily usage, etc. - Just use it to store your Bitcoins in safe offline place. Also make sure that you have more of these copies as a back up! if you loose your only copy with bitcoins on it - you will loose your money forever. You can also have a digital copy on your USB stick (remember those two QR codes you saved?). If you have more paper copies and a digital copy - your founds are safe and secure!
I hope you enjoyed this step-by-step tutorial - if you liked it do not forget to upvote, resteem and follow me for more cool tutorials! Give me some feedback in the comment section and tell me - what do you do to store your Bitcoins safely?
thanks for share. upvotes your post & you upvotes my post.
Well @hrhabibur , if I find something forth upvoting on your blog page - I will upvote :)
Great info dude! Please take a look at my BTC forecast for today https://steemit.com/bitcoin/@hotsauceislethal/bitcoin-price-forecast-7-30-2017