Tutorial: How to use the Asset API in Bitshares
If you're reading this, I assume you already have some knowledge of how graphene works and are looking to enable the Asset API for use within your programs. This API is primarily used to make calls on asset holders, such as get_asset_holders, which returns a list of accounts that hold a particular asset that you pass into the call as an argument. Note that the Asset API is not enabled by default in Bitshares nodes, so we will have to create our own node and configure it correctly so that it supports this functionality.
Preparation
The hardware requirements are a bit rough in the setup I used. We'll need an Ubuntu 16.04 server with at least 25GB RAM and 100GB disk space. It may be possible to get this to work with lower specs, but I have not tested any other specs so I will only be referencing the aforementioned specs in this guide. Note that if you don't have that much RAM, you might be able to get away with an SSD which has high IOPS (input/output operations per second), by using your SSD space as swap space to substitute for the lack of RAM.
Full Node Installation
We will be following the standard Bitshares guide on setting up a full node outlined in the core repository. In case you don't want to read through that, I've also added the proper commands to run in your terminal within this guide.
Log into the root account of your server (we could make a new user, but user management is beyond the scope of this guide).
Update the package repository and install the build dependencies:
sudo apt-get update
sudo apt-get install autoconf cmake git libboost-all-dev libssl-dev g++ libcurl4-openssl-dev
Build the witness node program:
git clone https://github.com/bitshares/bitshares-core.git
cd bitshares-core
git checkout master
git submodule update --init --recursive
cmake -DCMAKE_BUILD_TYPE=RelWithDebInfo .
make
Wait until the build completes. Do not run any other commands while waiting. Note that this may take a while depending on your hardware, so be patient.
Once the build completes, we need to generate the necessary configuration files and sync the blockchain before we can progress further. Since the syncing is going to take around a day or two, we want to be able to leave witness node program running and come back to it later. To do this we need to use GNU screen:
apt-get -y install screen
Then, start up a screen session to run the witness program in:
screen -S witness
Start up the full node:
cd ~/bitshares-core
./programs/witness_node/witness_node
Awesome, you now have a full node running. It will start to download blocks from peers until it is fully synced. You can now exit the screen session by holding down the key CTRL, then tapping the A key, and finally tapping the D key. Exit your server but come back periodically to see if the syncing is complete. If it is, you can proceed onto the next section.
Asset API Configuration
In order for the Asset API to be enabled within your node, you need to provide the node with a JSON configuration file that outlines the access restrictions that users have when accessing your node. The default configuration does not include the Asset API within the access restrictions, so we need to create a custom one which does include it:
touch ~/bitshares-core/witness_node_data_dir/api-access.json
Open up the created file for editing:
nano ~/bitshares-core/witness_node_data_dir/api-access.json
Paste the following contents into the file (note that asset_api is appended to the end of allowed_apis):
{
   "permission_map" :
   [
      [
         "*",
         {
            "password_hash_b64" : "*",
            "password_salt_b64" : "*",
            "allowed_apis" : ["database_api", "network_broadcast_api", "history_api", "asset_api"]
         }
      ]
   ]
}
You can now save and exit from the file by pressing CTRL+X and then pressing enter to accept the save prompt.
We have the access restriction file, but the node does not know where it is located yet. We have to modify the global configuration file for our node and specify the location of our access restriction file:
nano ~/bitshares-core/witness_node_data_dir/config.ini
You will see something like this:
...

# JSON array of P2P nodes to connect to on startup
# seed-nodes =

# Pairs of [BLOCK_NUM,BLOCK_ID] that should be enforced as checkpoints.
# checkpoint =

# Endpoint for websocket RPC to listen on
# rpc-endpoint =

# Endpoint for TLS websocket RPC to listen on
# rpc-tls-endpoint =

# The TLS certificate file for this server
# server-pem =

# Password for this certificate
# server-pem-password =

# File to read Genesis State from
# genesis-json =

# Block signing key to use for init witnesses, overrides genesis file
# dbg-init-key =

# JSON file specifying API permissions
# api-access =

...
You now need to modify the part listed as # api-access = to api-access = /root/bitshares-core/witness_node_data_dir/api-access.json
Also make sure you modify # rpc-endpoint = to rpc-endpoint = 0.0.0.0:8090 so that the node is accessible through websockets for use in testing commands later.
You can now save and exit from the file.
The last thing we need to do is to actually apply the configuration. The witness program only reads configuration files when it is started up, so we need to restart the witness_node process in our existing screen session since it is already running and has a stale configuration loaded. First, resume back into the witness screen session:
screen -r witness
Now we need to signal a SIGINT (signal interrupt) to the witness_node process. Press CTRL+C. You should get an output that looks something like this:
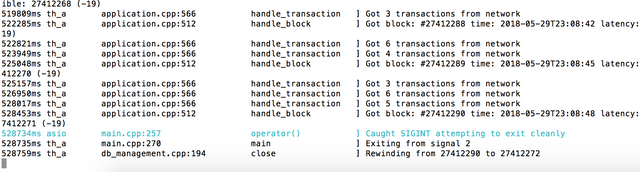
Give it a few moments to exit cleanly. Once you see your prompt appearing again, it means that it has finished exiting. Start the program up again:
./programs/witness_node/witness_node
It will take a while to start up, but if it starts to list transactions without any errors being displayed in between, it means you did everything right!
Using the API
This step is optional, but recommended as it shows you how to use some of the Asset API commands and also allows you to make sure that your node is working properly. In order to issue commands to your node, you will need to connect to it through a websocket client. We will be using wscat in this tutorial. You should be installing it on your local computer using the Node Package Manager:
npm install -g wscat
Then, connect to your node by substituting ${NODE_ADDRESS} with the IP address (or DNS address, if you have one) of your server:
wscat -c ws://${NODE_ADDRESS}:8090
Your prompt should have changed to the > symbol. Start off by enabling the Asset API for your current websocket session (copy paste the following call into the prompt):
{"id":2,"method":"call","params":[1,"asset",[]]}
Once it is enabled, you can make queries on asset holders. Try searching for the top 100 holders of the BEYONDBIT asset:
{"id":1, "method":"call", "params":["asset","get_asset_holders",["1.3.1454", 0, 100]]}
If you get a bunch of JSON output, it means that the Asset API is working properly. If not, it means that you have misconfigured something along the way. Step back and try each step one more time.
Wrapping Up
If you've made it to this point, congratulations! In this guide we covered the basics of how to set up a Bitshares full node and synced its database with the blockchain data provided by peers. We then modified the node's configuration to support the Asset API, and finally made sure that the API was working properly by making some test calls using a websocket connection.
I hope this guide helped you, and good luck in developing your graphene-based applications.
If you find any errors in this guide, please point them out in the comments below.
Congratulations @cyberdust! You received a personal award!
Click here to view your Board of Honor