Second Blade - Suleiman the curvy
It's been a while since I last posted about bladesmithing, but I've still been at it. My first writeup got fairly good reception so for posterity I figured I'd finally get around to blogging my second blade.
A few notes: I finished this blade several months ago; I'm only just getting around to writing it up. (I'm finishing up my 5th blade right now as I write this.) I've since learned various things I've been doing wrong but I'll largely be covering how this blade was built at the time. Second, I've decided that I should start giving my knives names to help distinguish them rather than just "first", "second", etc. My forge instructor said my first blade looked vaguely Civil War-ish, so I have retroactively dubbed it "Ulysses", as in General Ulysses S. Grant. This blade is curved, so I hereby dub it Suleiman The Curvy!
Steel yourself
Suleiman is another railroad spike knife. Railroad spikes make for fairly easy work but poor knife-usage, as they're generally very low carbon, maybe 0.3%. (Whether that makes them good to practice on or bad to practice on seems to depend on who I ask.) Here's where it all started:
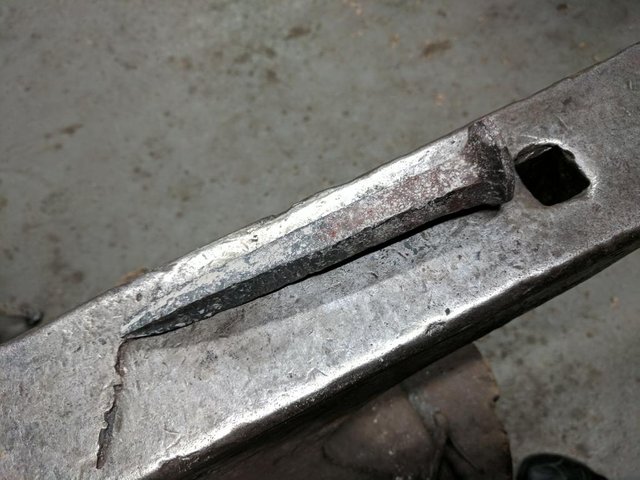
Once again I started by cutting off the head, which I attempted to do something with but this time gave up. It's just too odd-ball a shape to make working with it not stupidly annoying.
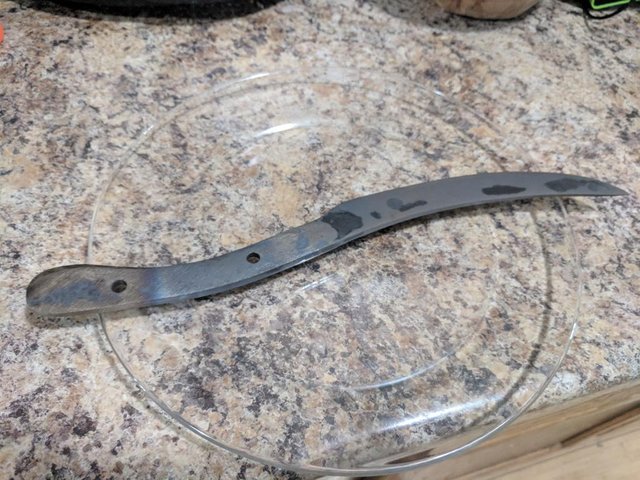
My goal this time was to do something different from Ulysses; that meant a curved rather than straight blade, no guard, and an exposed tang (which is more traditionally "knife style"). I stupidly didn't get any pictures of it post-forging and pre-grinding. It took a few days' work (3 hours each time) for me to hammer it into the desired shape, although I was working faster than the first time out. After I had it mostly the shape I wanted I bent it over the horn of the anvil to give it a nice sloping S-curve. I wanted something that would "flick" nicely in the hand, and an S-curve does that well. Here it is after grinding and some filing:
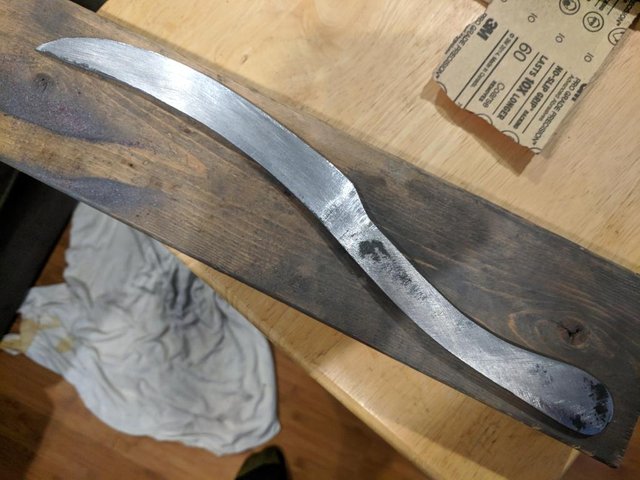
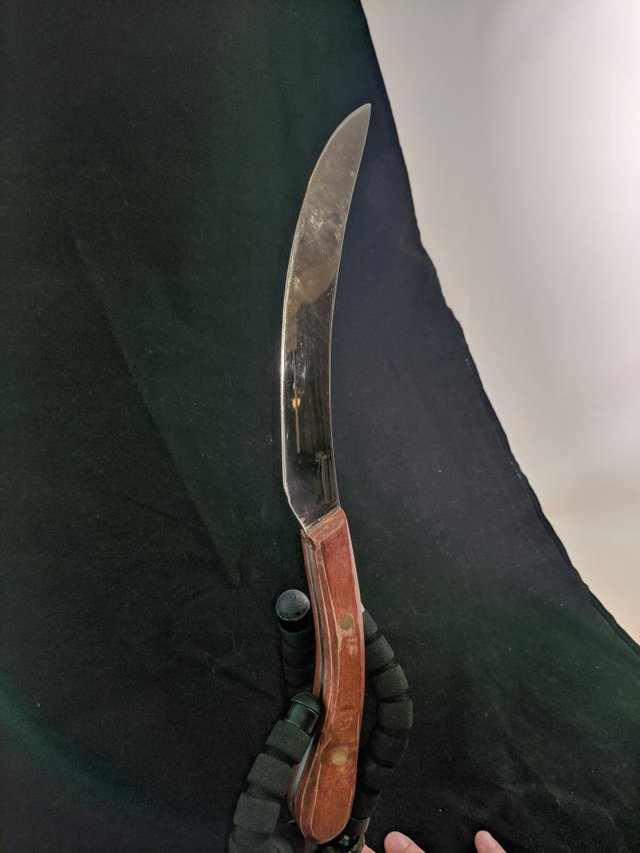
It's not a fixed, specified curve, just something free-handed. There's also a slight recurve at the tip so that the point is approximately in line with the hand. That gives it at least some stabbing ability despite being mostly a cutter. The shoulder where the blade meets the tang is a smooth curve rather than a hard corner, mainly because that was easier for me to get while forging.
Here it is fully sanded, and ready for heat treatment:
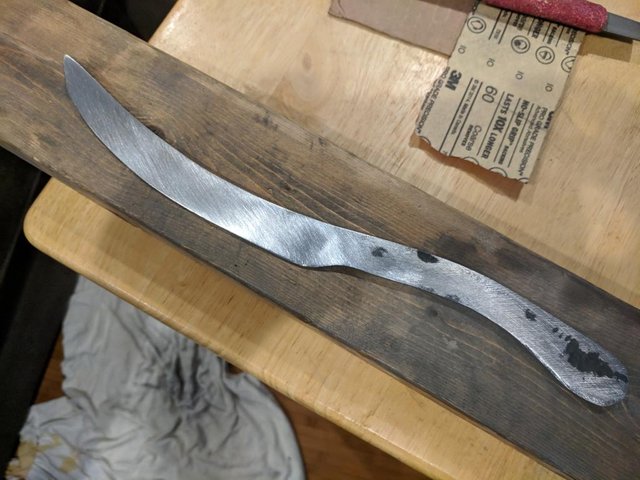
The final step before heat treatment was to take it to the drill press and drive through two 1/4 inch holes for the handle to attach with.
I personally find a polished-and-heated blade to be surprisingly attractive so here it is still cooling:
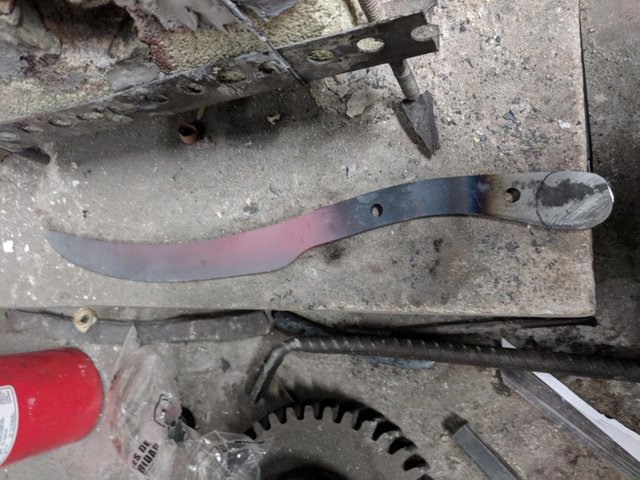
Finally I quenched it in oil:

And then tempered it in my oven at home. Note the straw-ish color on the back end of the tang. One of these days I want to make a blade where I temper it last, after it's fully polished, so I can keep that color.
After that it was more sanding, all the way up to 1500 grit. I hate sanding. It takes way too long. (More on that later...)
Let's see how well you handle it
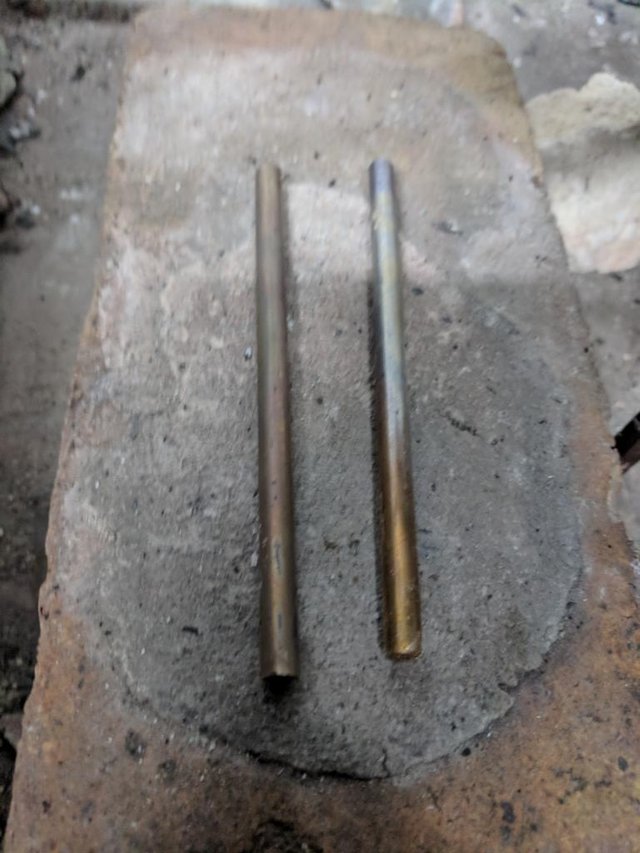
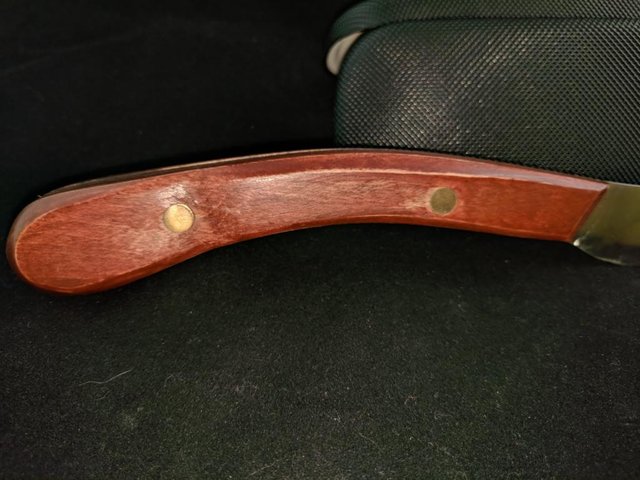
The handle was the most novel part for me. An exposed tang generally involves sandwiching the tang between two scales of wood, plastic, bone, or whatever material and usually affixing it with pins. (Glue also works, but pins are more historical.) I went with maple for the handle scales because it's a relatively inexpensive but fairly hard wood. It's also light in color which makes it easier to stain. For the pins I picked up a 1/4th inch brass rod, which is frankly the most expensive piece of material in any of my bladesmithing endeavors to date. (Brass is expensive, yo.) I sawed off 2 short lengths, then traced out the wood. I was far more precise than I needed to be given that I was going to be grinding the whole thing down anyway:
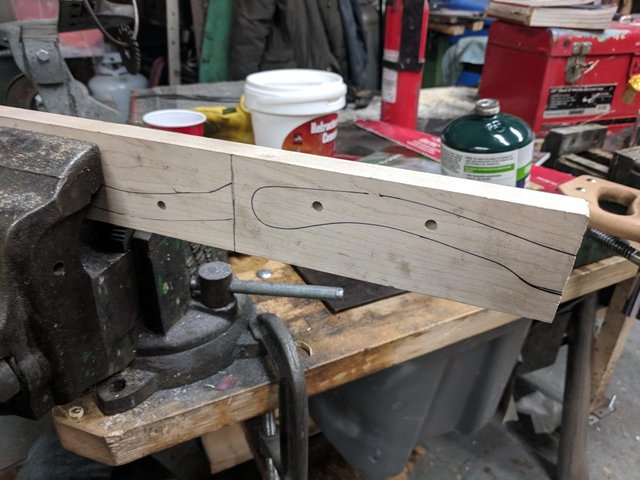
The holes were drilled by marking the wood from the holes in in the tang and then taking it back over to the drill press. Which was, when you think about it, a rather stupid way of doing it since it would have made way more sense to just sandwich the tang first and drill holes all the way through all three pieces so they'd match up perfectly. The holes... almost matched. They were off by less than 1/32nd of an inch, I think; not enough to see but enough that getting the pins through proved to be stupidly hard.
The brass pins also needed to be annealed. Brass is much softer than steel and so work hardens as you bang on it. Unlike steel, however, it anneals through rapid cooling rather than slow cooling. (Steel is the odd-metal-out in this regard, as I understand it.) That meant sticking the pins in the forge for a few seconds and then pulling them out to cool quickly.
Cutting the wood closer to shape by hand and jamming the pins through got me to here. Because the holes were not absolutely perfectly aligned, yet were the same size as the pins, it was such a tight fit that I figured I wouldn't need any glue to hold it together at all.
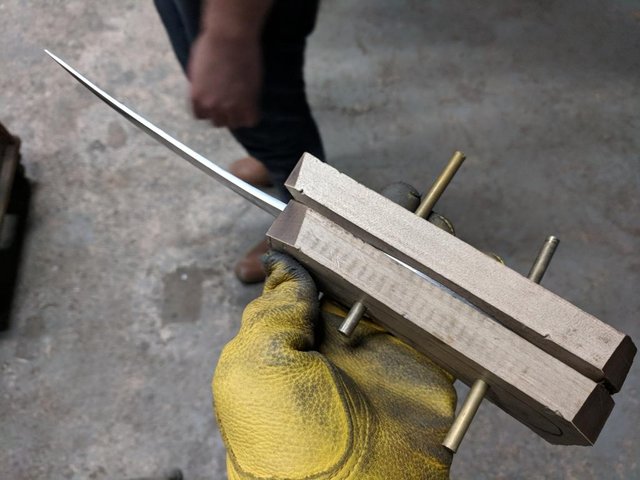
I then cut the pins so they were only slightly longer than the width of the scales, and hammered them the rest of the way. With the brass annealed to be soft it's easier to hammer them. That starts with tapping around the edges to give them a slight mushroom shape, top and bottom, so they stay put, then harder pounding from both sides. That causes the softened brass to expand internally, creating even more pressure and locking everything in place. (You put a 5/32 inch piece of brass into a 4/32 inch hole and tell it to come out. It will laugh at you.)
Then it was back to the belt grinder to bring the handle, pins and all, down to the desired shape. This took a while and included my first major screw up. I managed to nick the bottom chin of the blade itself on the edge of the belt sander. Bugger.
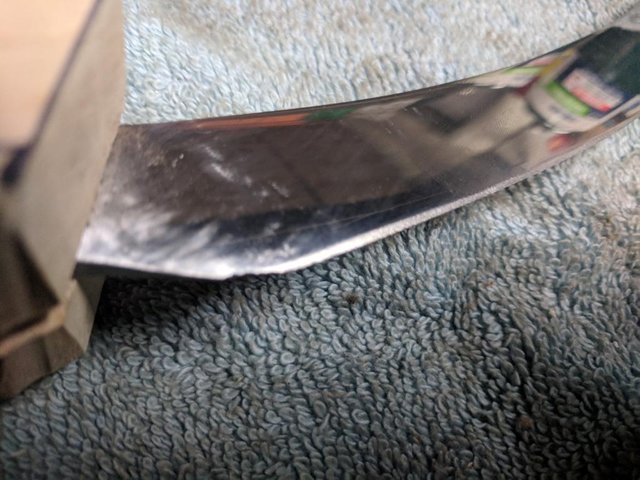
I was able to mostly repair that later by filing it to a less-pronounced curve, but it's still annoying as it had a nearly perfect belly before. :-(
After quite a bit of work I ended up here:
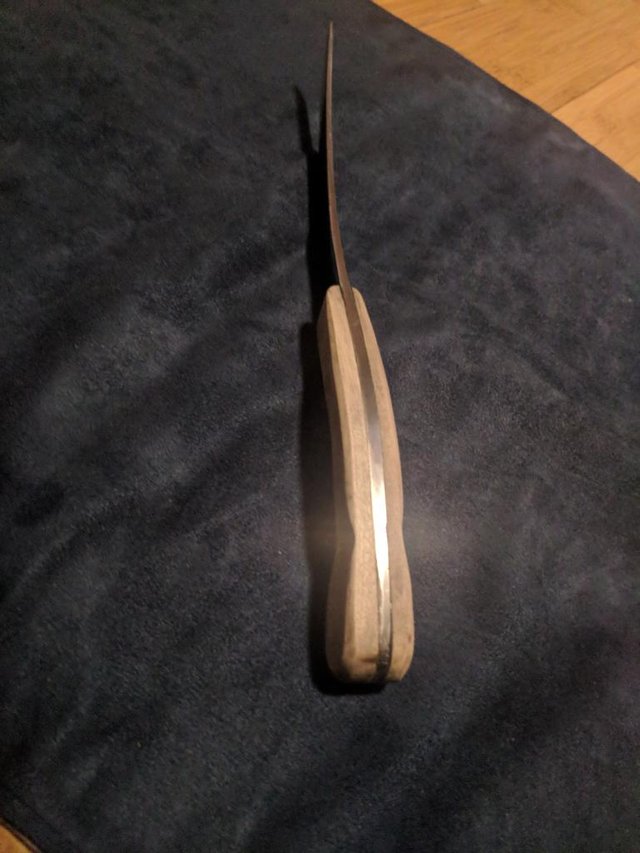
The dark areas are where the wood burned while sanding. Maple, I have learned, burns stupidly easily when using a power sander of any sort. The handle is beveled all around (although not quite evenly), and I also put a dip into both sides near the back to allow my pinky finger to fit into it. Jake at the forge thinks the handle is too chunky, and while he may be objectively right I find it easy to hold in a position that gives a good "flick", and the balance point is almost exactly where my index finger lands. (How I got the balance that perfect for a second time I don't know. I don't expect it to continue.)
I mentioned before that maple stains well, which is exactly what I did. I found a nice red stain at the hardware store for it. (Why I wanted the handle red I don't know, but I'd been aiming for that since I started.) However, stain on steel and brass is not what I was going for. How to keep it off?
Painters tape plus a 3 hole punch equals a piece of tape exactly the same size as the pins!

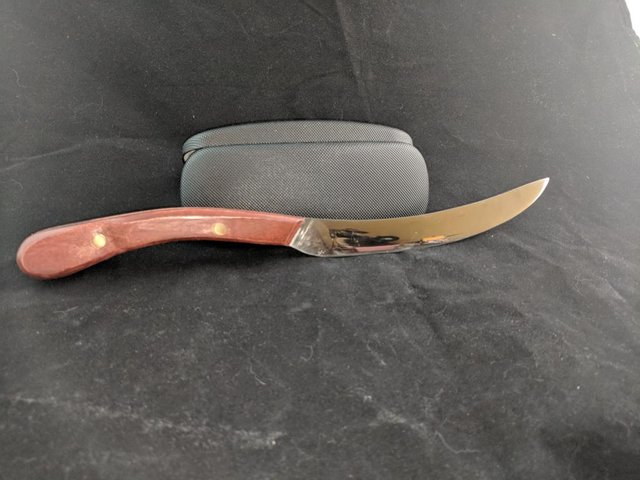
2 layers of stain, 2 layers of sealant, and a quick wipe with steel wool to smooth it off and give it a slightly worn look in a few places (which was not deliberate but I'll go with it) and the handle was complete. The final step was taking it to my housemate's buffing wheel to get the blade itself nice and shiny.
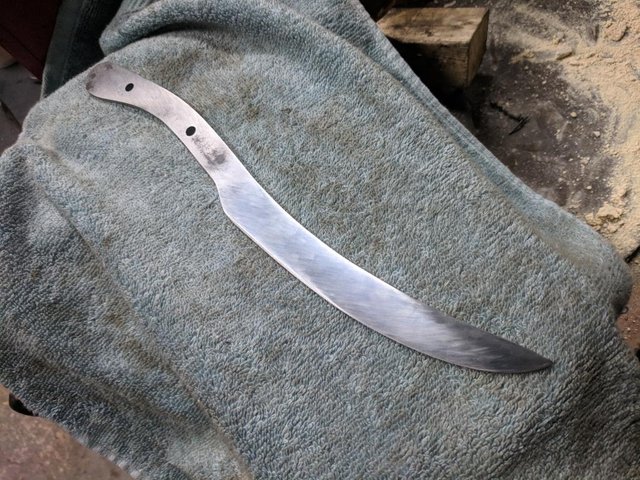
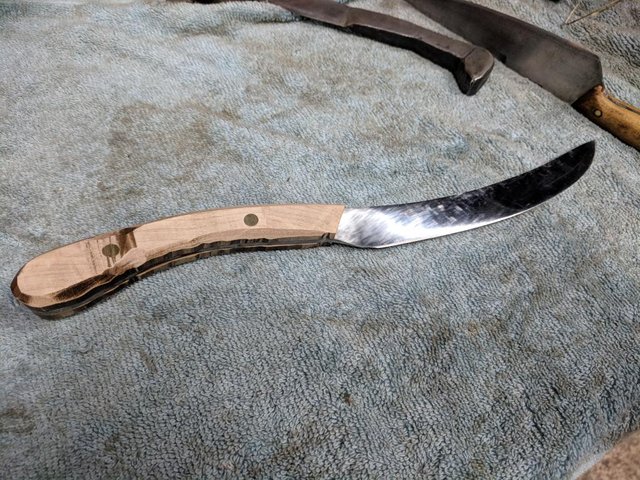
Presenting Suleiman the Curvy
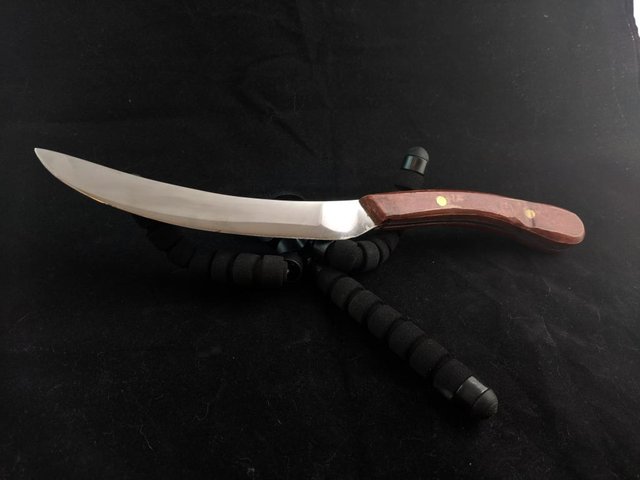
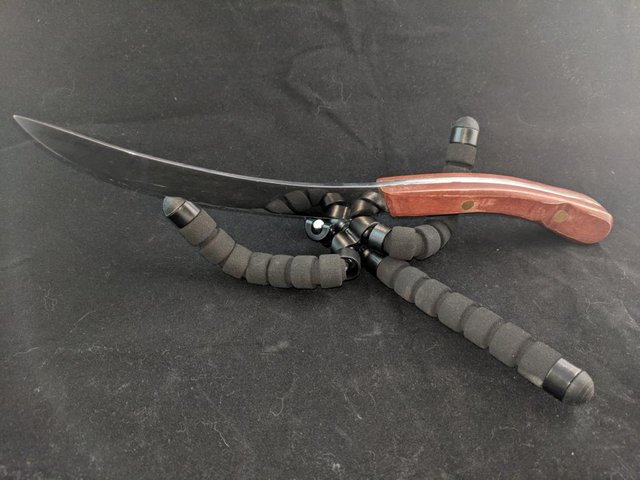
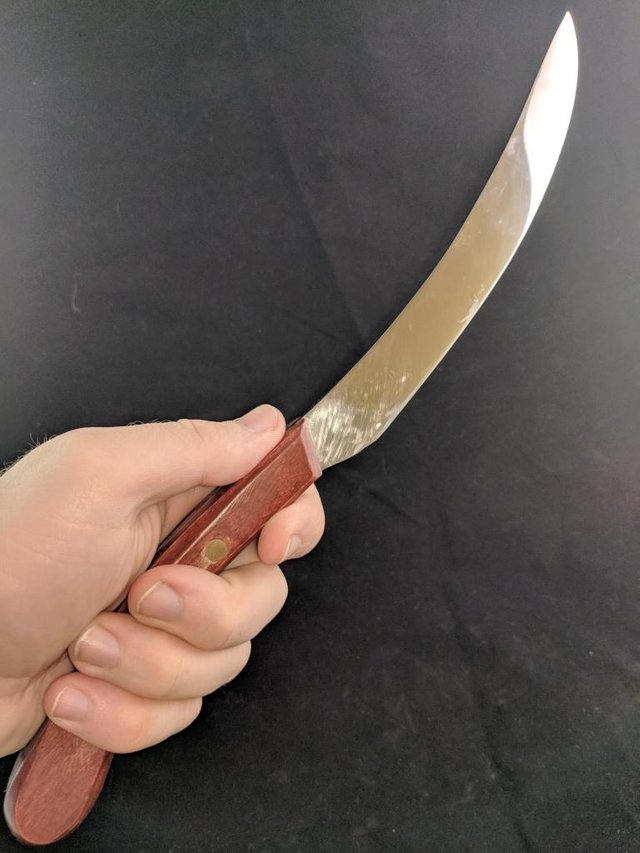
Overall length: 12.6" (straight), 13" (following the curve)
Blade length: 6.6" (straight), 7.5" (following curve)
Steel: Railroad spike, ~0.3% carbon
Handle: Maple
There are some scratches on the blade itself, which are due to my still mediocre sharpening skills. I'm going to have to get some junk blades to practice on before I trust a nice blade to my sharpening hands. :-)
Still, it's a pretty good chopper despite the distal taper. Just flicking it into a block of wood with my fingers leaves a nice big cut. Putting actual effort into it should give it even more cutting power. also, shiny! It feels nice in the hand, too.
I haven't made a scabbard for this yet, although I have wood to try at some point. I don't even know if the curve will fit in a scabbard. We'll see eventually, perhaps.
Oh, a fellow knifemaker - glad to have found you.
Your second blade looks really nice. Looking forward to seeing more of them.
Maybe use real steel for the next one ;)
Hey now, it is steel! Just low-end steel. :-P
I have a couple more blades I've made since then. One's a leaf spring (so probably 5160), then two costume pieces that are also railroad spikes, and I just started on a Dirk in 1075. More on them when I have time to write them up and collect pictures.
Also, hi! Is there some tag other than bladesmithing I should be using for these posts?
;)
Looking forward to seeing them.
As for tags, nah not really that many of us here. At least I don't know many. I simply use knife tag.
Congratulations @crell! You have completed the following achievement on Steemit and have been rewarded with new badge(s) :
Click on the badge to view your Board of Honor.
If you no longer want to receive notifications, reply to this comment with the word
STOPTo support your work, I also upvoted your post!
Do not miss the last post from @steemitboard:
SteemitBoard World Cup Contest - Quarter Finals - Day 1
Participate in the SteemitBoard World Cup Contest!
Collect World Cup badges and win free SBD
Support the Gold Sponsors of the contest: @good-karma and @lukestokes