Making a Kitchen in Bulgaria
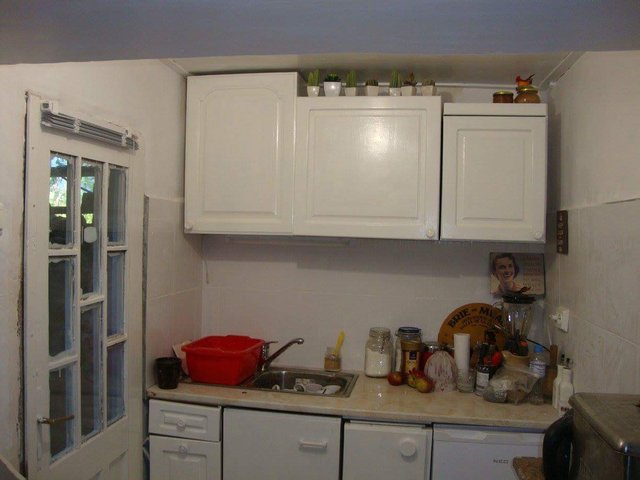
When we moved into our new home, we didn’t really have a kitchen, all that was in the property was what can only be described as, a very small kitchenette, the kind you might find in a bedsit, so not something that you could really call a kitchen.
 et that I would build them a kitchen before Christmas, well with less than a week to go, I have achieved that goal, along with the help of the girls and from what has now become a good friend and our local builder.
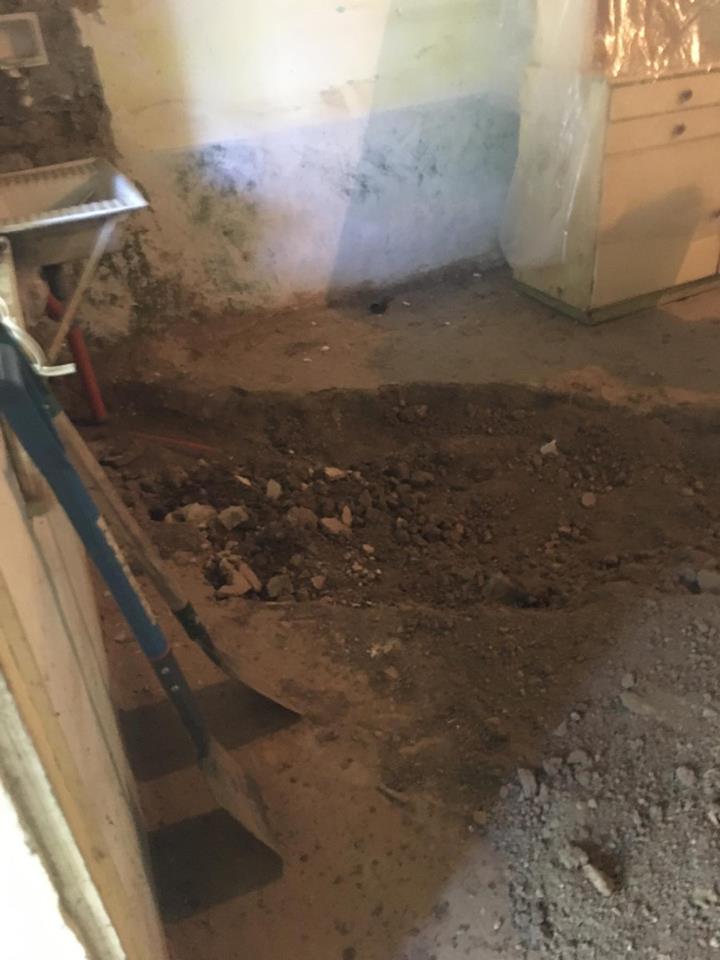
First things first we needed to install a new water main into the house. The girls started digging the trench to locate this new pipe, and when they decided to go back to the UK for a 10 days for a family visit, I continued their hard work and finished the trench off. We ended up digging between 3.5 feet to 4 feet down, mainly through soil, but I had some concrete to dig through in the summer kitchen ready to bring the water into the new kitchen. All this hard work turned out to be a really good idea, as the old metal pipe that had been in the ground for numerous years, had started to corrode and was pitted. We replaced this knackered old pipe with some new plastic pipe and covered it in insulation before putting it back in the ground. We are hoping that by insulating the pipe and burying it so deep, that we won’t have any problems with freezing in the harsh winters that we can get here. As an additional safety measure, we have installed extra stop cocks, so that we can segment off certain areas of the house, without having to shut down the entire system.
Next stop was a new roof, yeah I know, we don’t do things by halves do we !!
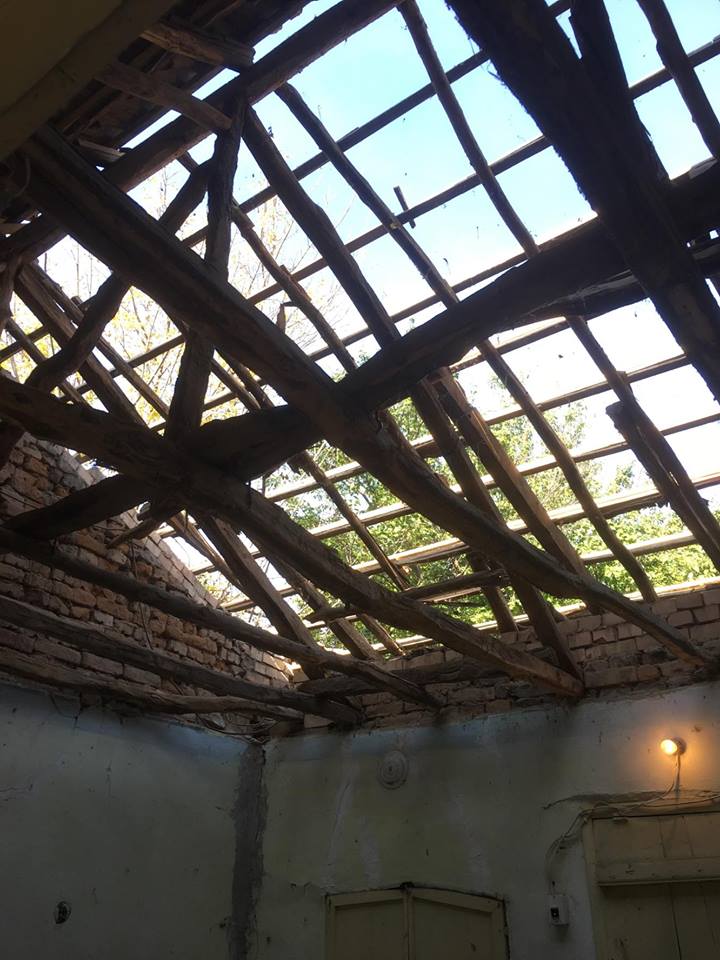
The old roof had a few leaks, wasn’t sealed properly and also looked horrible in certain parts, so we figured as we were essentially turning a derelict part of the house into something liveable, we might as well do it properly.
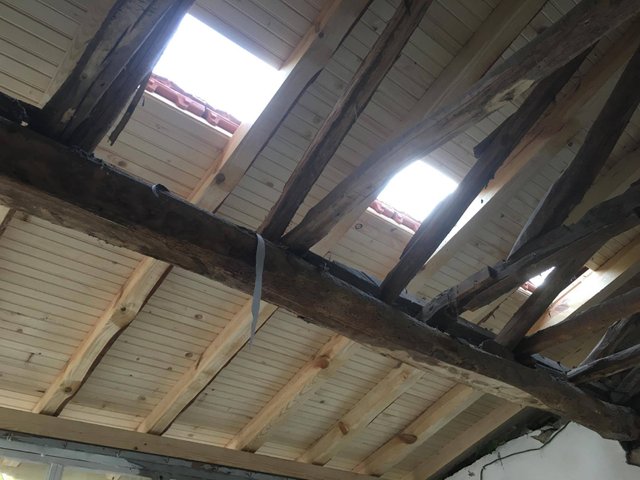
Our builder friend and his workers removed all the tiles, replaced the latts, installed new beams, installed a water proof membrane, re-installed the tiles and installed some new tiles and ridge tiles. We also decided to become creative with the roof, we used the skills of our builder to make us some skylights, now anyone can go out and buy a Velux window and install it, that’s the easy and expensive way of doing things. With us being us, we decided to use an old glass shelving unit, yes you did read that right! The glass from the shelving unit is tempered and hardened, even more so than that of a roof skylight, and with the possibility of the large hail that we can get here, we wanted something to let more light in and be safe at the same time. So we have 3 excellent sky lights without paying through the nose for the luxury.
Once the roof was done and sealed we started work on the floor. The original floor was a lovely blend of mud and dust, all being uneven and basically completely useless, as you can imagine, this is not exactly ideal for what you want in the kitchen. So we set about digging down between 1 to 2 feet and manually wheelbarrowing all of that soil out into the garden, to be honest the girls weren’t exactly impressed, as our once semi tidy garden was now turning into a scene reminiscent of a war movie. Once the digging was completed I quickly installed the drainage for the kitchen sink and washing machine, then carefully buried the pipes with hardcore and put down a hardcore base ready for the concrete. Whilst all this was going on we arranged for some ballast to be delivered.
( )![24282418_1172497712853330_2026155093_n.jpg]
Now this could be a short story in itself, we basically ended up with 24 tons of ballast, as you know this is not a small amount of aggregate. The date for delivery was arranged and all I had to do was wait for a phone call. I received the phone call and was directed to wait at the bottom of our track for a big lorry. I did this and when I saw a 40 ton lorry arrive, I must admit that I was a bit shocked, as we hadn’t actually ordered 24 tons, we just asked for whatever the lorry could carry, assuming that it would be a normal amount. With my very broken Bulgarian and hand signals, and the drivers yes or no smiles he managed to understand where I wanted the ballast dropping. With some guidance from me and with what appeared to be half the village watching, I helped the driver pull a 3 point turn and reverse up my track, and then was shocked to see just how much I was getting when he handed me a weigh station piece of paper. Needless to say we are still working our way through all this ballast.
Right on cue a few days later, our builder friend and his colleagues arrived to begin the concreting of the new floor. Not only were they concreting our kitchen floor, but also concreting the trench through the summer kitchen and a big deep trench that I and the girls had dug for underpinning the outside summer kitchen wall. I had already put the rebar through the wall and along the trench. So with one guy on mixer duty, another with the barrow, our builder doing the levelling, and his female assistant ensuring everything was running smoothly and passing tools to people, the whole amount of works, was completed in a little over 4 hours, not bad going for what was probably around 6 – 8 tons of concrete barrowed by hand 30 – 40 metres. I can definitely not complain about the work ethic of these guys and the way that they get the job done, and to a high standard as well.
After around 10 days the concrete was dry enough so that we could walk on it. So I started making a step for one of the doors and also a hearth for our woodburner, I used some reclaimed bricks that we have had sat around for a while in the garden, as we didn’t want anything to fresh and new, we prefer the used and rustic look.
Once that was all done and set, we finished off the electrics that I had installed previously and tested them. Once all tested and we were happy the girls set about plastering the walls and filling in the channels I had dug out to run the electrics into. Next step was the ceiling, originally we wanted to keep the exposed beams, but after a chat with our builder and some realisation, we decided to put a false ceiling in, as this way we could insulate the ceiling which will help to keep the room warm in winter, and cooler in the summer. We didn’t want just a traditional plasterboard ceiling though, we wanted something with a bit of character. After a bit of looking around we chose to use tongue and groove boarding for the ceiling, to give the room a bit of warmth but also as it would tie in with the rest of the look, we were going for.
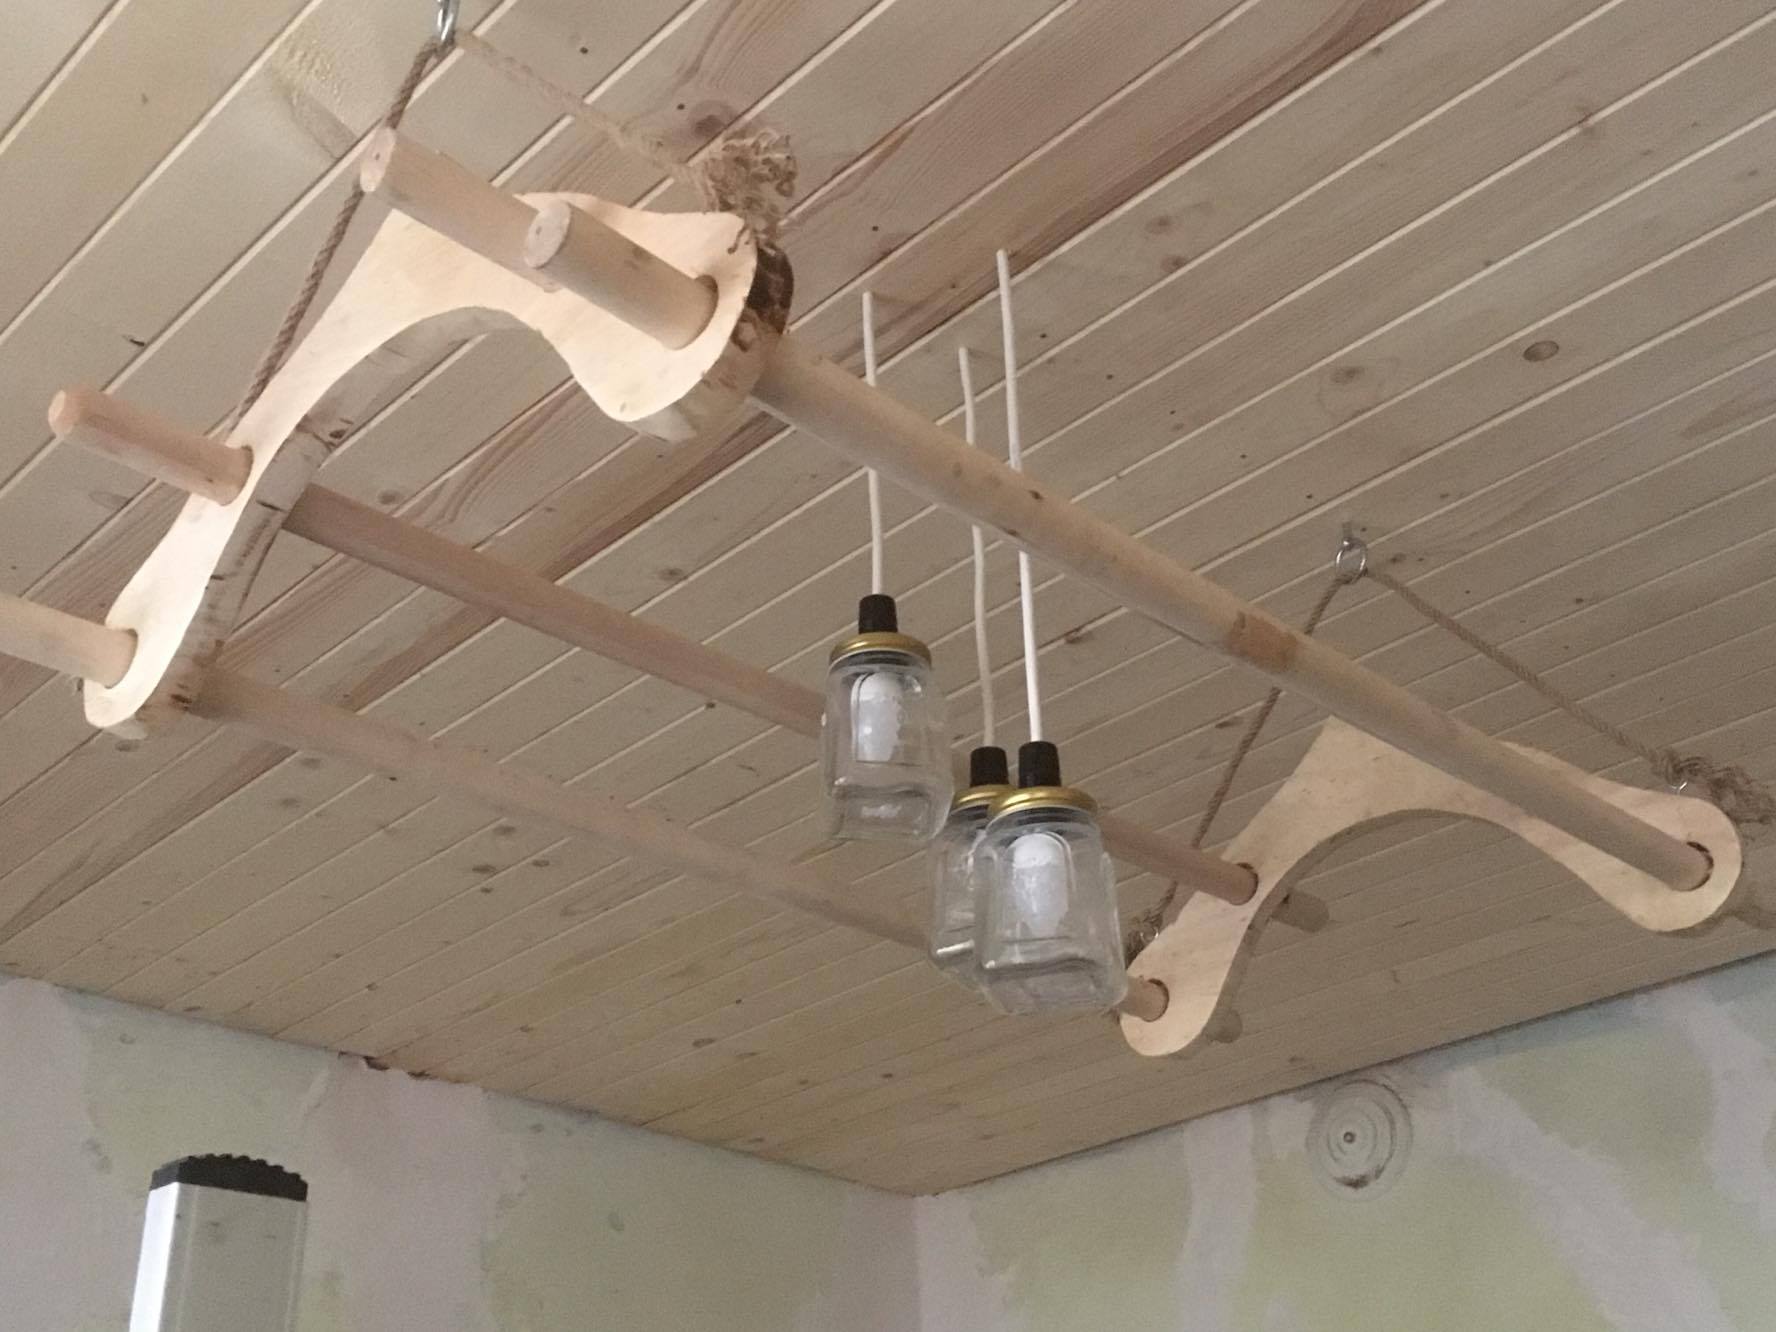
So after a day and a half, me and the girls had managed to put the framework up and then the tongue and groove ceiling. We also made our own light fitting, using some mason jars, which I wired up and put together, and then surrounded them with a pot rack suspended from the ceiling, which I conjured up from a really old piece of shelf from out of the barn that was initially covered in a shed load of dust and muck, and 4 broom sticks. See it really is amazing what you can make from pretty much next to nothing, some of those guys on pinterest and the ones that go to stores like Ikea and spend a fortune on stuff like this, should hang their heads in shame, you guys have more money than sense. All in for this light fitting was less than £ 10, not the hundred’s of pounds you see them advertised for.
We started this journey in mid September, by this point we are near the end of October which for the work we had done, and had had done, I didn’t think was really to bad going. Next stage on this transformation was some flooring. We inherited some laminate flooring when bought the house, so decided as it was a wood effect that we would utilise it in the kitchen, we wanted to try to keep it all along a similar look. I’ll be honest the quality of the laminate is not what I would call top quality, but for what we wanted to use it for, it was ideal for out needs, plus we had a cunning plan to utilise it elsewhere as well.
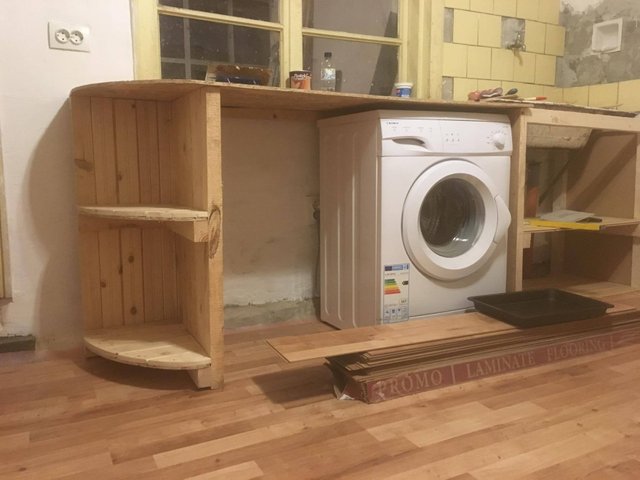
My next step was to build the kitchen cabinets from scratch. I had already purchased some 4 metre lengths of 8×6 so using my table saw and radial arm saw, I was able to begin making the carcasses to fit the girls requirements. All of the wood that I was using was a mixture of oak and pine. Finally having a level floor to work off was an absolute god send, this is something that is normally quite rare in Bulgaria unless the room has been renovated. But as with most old Bulgarian houses, the walls are definitely not straight. Now we could have plasterboarded and made them straight, but as we wanted the rustic and original look, we opted to keep them the way they were. This was something that then became a bit more fun when I made the work tops. I constructed simple carcasses and using a different style of tongue and groove, made the sides, shelving inside and the doors. I also knocked up a small curved shelving unit to go at the end by the washing machine and fridge. I had to work around the original cast iron sink and the new drainage pipework that I had put in previously.
One of the cabinets I made included a pull out pantry drawer to house the pan lids and some small jars, utensils, etc, which considering that this was my first time trying to make something like this, I must admit that I was quite pleased with myself. Also the girls loved it, and if the girls are happy then my life is a lot easier :).
Next stage was to make the work surfaces. Now as you’ve probably guessed, I don’t like to go to big DIY stores and just buy something off of the shelf. This part of the project was no exception. We wanted a wooden effect top but without the hefty price tag that goes with it, between the 3 of us, we came up with the idea of using chipboard ( one of the few times that I would use it ) and cover it in laminate flooring. The chipboard was used to give strength to the worktop and the laminate was chosen, as we liked the design, but also it is hard wearing, think about it, you walk on laminate and it doesn’t damage, so why not use it for a work surface, plus it is easy to clean, total bonus in my book. By combining these two materials I was able to cut them both so that I could get a close fit to the uneven walls.
As you can see from the video I think that this DIY kitchen from bare and salvaged materials has turned out really well, please feel free to leave your comments below.
So now we were on the home straight so to speak. We had an old bread oven in the kitchen, that couldn’t be used as a bread oven again, so rather than just keeping it as a cupboard, we decided to put some shelves in to and turn it into a display area for the girls antique and shabby chic bits and pieces, again using left over stuff from the barn so cost us next to nothing.
During all of this, the girls had worked long and hard to get the tiling, plastering and painting done throughout the whole kitchen, which was no mean feat, but they have done a cracking job, of turning something derelict into something that is nice warm and cosy.
There will be more posts that I will be adding for the other bits that we have done to the kitchen, but I will save them for another day.
So thanks for reading this extremely long post, and I look forward to reading your comments.
Congratulations @andysmancave! You have completed some achievement on Steemit and have been rewarded with new badge(s) :
Click on any badge to view your own Board of Honor on SteemitBoard.
For more information about SteemitBoard, click here
If you no longer want to receive notifications, reply to this comment with the word
STOPCongratulations! This post has been upvoted from the communal account, @minnowsupport, by andysmancave from the Minnow Support Project. It's a witness project run by aggroed, ausbitbank, teamsteem, theprophet0, someguy123, neoxian, followbtcnews/crimsonclad, and netuoso. The goal is to help Steemit grow by supporting Minnows and creating a social network. Please find us in the Peace, Abundance, and Liberty Network (PALnet) Discord Channel. It's a completely public and open space to all members of the Steemit community who voluntarily choose to be there.
If you would like to delegate to the Minnow Support Project you can do so by clicking on the following links: 50SP, 100SP, 250SP, 500SP, 1000SP, 5000SP. Be sure to leave at least 50SP undelegated on your account.
Este Post ha recibido un Upvote desde la cuenta del King: @dineroconopcion, El cual es un Grupo de Soporte mantenido por 5 personas mas que quieren ayudarte a llegar hacer un Top Autor En Steemit sin tener que invertir en Steem Power. Te Gustaria Ser Parte De Este Projecto?
This Post has been Upvote from the King's Account: @dineroconopcion, It's a Support Group by 5 other people that want to help you be a Top Steemit Author without having to invest into Steem Power. Would You Like To Be Part of this Project?
I really enjoyed reading your whole process. It looks like a lot of hard work. I particularly liked the skylights and how you reused old material to make all these changes. The craftsmanship is beautiful and I'm looking forward to seeing the rest of your new kitchen!
thank you @soulturtle we have a huge amount of work ahead of us, but I intend on using the same ethos on as many projects as I can. I truly enjoy repurposing as many items as I can and aim to construct and undertake as much of the work on my own without tradesmen. I am an avid believer that you should reuse and make as many items as possible, rather than just going out and buying off of a shelf. I hope you enjoy my future posts, as there will be a lot more to come.