DIY Speaker repair, My old speakers were damaged in shipping and a DIY fix was in order.
It seems I always have some projects around that are best served by my willing DIY hands.
I love repairing and fixing things, I find it very satisfying to give life to materials that may otherwise be discarded. I also love making and assembling my own version of something, rather than buying it finished. When I make something myself, each project really becomes a unique piece of home brewed art.
There is simply something about handling a project myself that I truly enjoy. In a nutshell, I feel that is really the basis for a DIY project. The joy. Applying my creative skill and imagination to make something happen is a joyful experience for me. While my absolute skill level is very novice, I am learning and I am putting the tools that I have into practice.
When I moved from Albuquerque to Minneapolis I had to ship several items. While I was keeping very few things and moving with a light load my largish Morel Renaissance, speakers would not fit in my car with everything else.
I shipped them via FEDEX ground. The speakers were well packed yet somehow they arrived damaged. When I unloaded them something was rattling around inside the speaker enclosures. I opened them up and discovered that the magnets on the back of each speaker driver had broken right off in transit. A bizarre thing. My guess is they were dropped from a large height. Whatever the case they were shot.
Originally these were $1500 for a pair speakers. However mine were about 10 years old and I did not anticipate a problem so I did not add extra insurance for them with FEDEX. This is a bummer because I could only get $100 per speaker from FEDEX for the damages. That is the amount they provide as a baseline, any more and I needed to declare the value beforehand and pay an appropriate fee.
This is where my DIY soul kicked in.
I was about to take the speakers out to street and let them go to the trash. These speakers had a nice cabinet and as I carried them out, I changed my mind. I decided to try to transform them in a set of DIY home made speakers using the cabinets as the base.
I had $200 to work with and that was not enough to just buy the original drivers. The originals were made by Morel Acoustics and out of my current price range. Instead I went to partsexpress.com and chose a DIY speaker design. I picked the "Hitmaker", a design by Paul Carmody. It fit my budget and was well reviewed. I did not need cabinets since I would be working with the ones I already had. I just went ahead and ordered the correct speaker drivers and crossover parts for the kit minus the cabinets. I also purchased binding posts, speaker wires and a few other odds and ends.
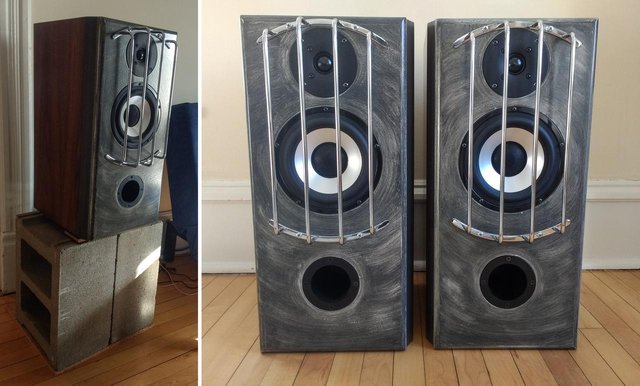
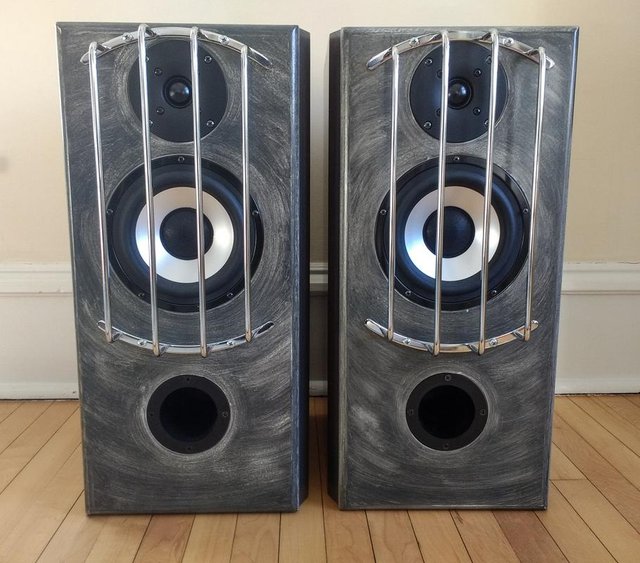
Here is an image of the Original pared with what I made.
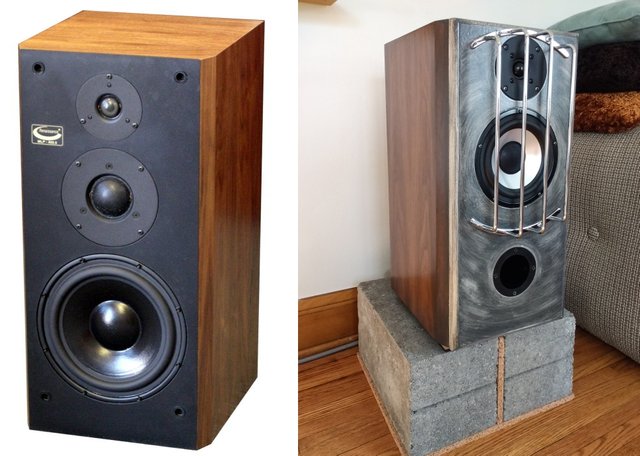
As you can see they are quite different. The original has three drivers and the speakers I made have two.
There was some work required here to make this all happen.
First I removed the old broken drivers from the cabinets, and removed the wiring and crossovers from the enclosures. I also sanded down the speaker faces to remove any old glue that had been used to adhere the black vinyl.
That left them looking like this.
The cabinets are nice looking, with African walnut veneer. They are however very live or resonant. If they were given a knuckle wrap they made a fairly loud sound with a hollow quality. I wanted them to be made less resonate and more solid or "dead" sounding. This is personal preference. When music is playing a live/resonant sounding cabinet has a certain type of sound characteristic and a dead/solid cabinet has another type. I prefer the solid cabinet.
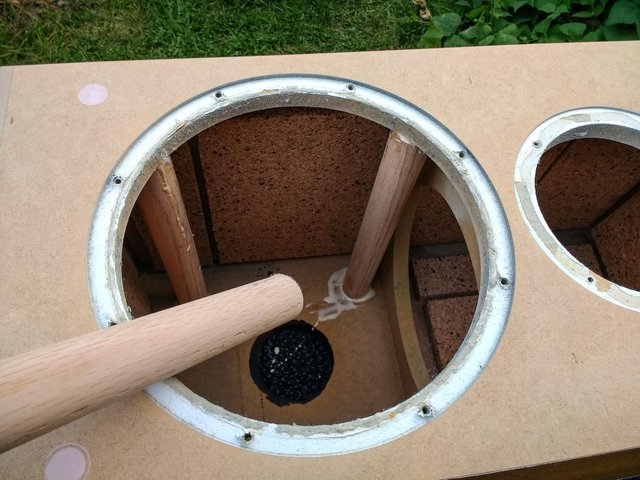
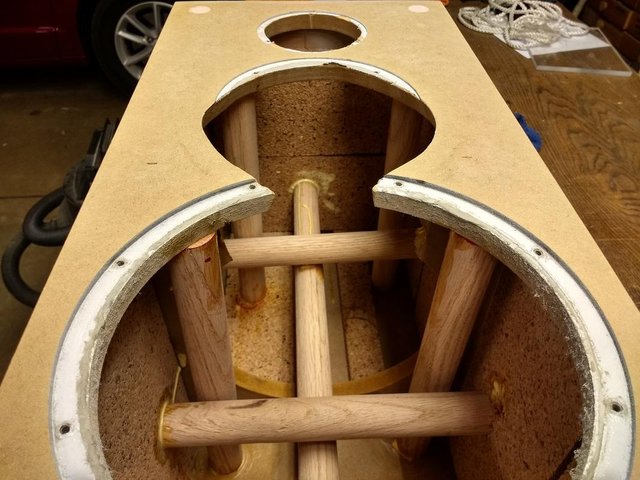
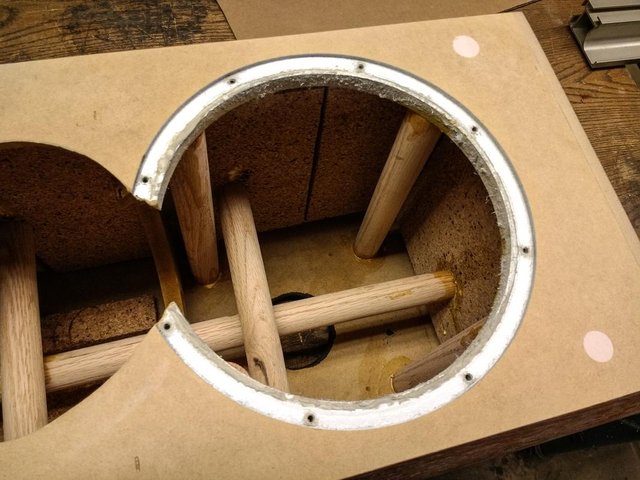
I lined the inside with 3/4 natural cork pieces and inserted several oak dowels. The cork dampens the cabinets vibration and the dowels make the cabinet more solid so it vibrates less.
The Cork was added to all interior panels, it was hard to fit it in. It was glued with a very strong adhesive that does not allow the cork to peel up.
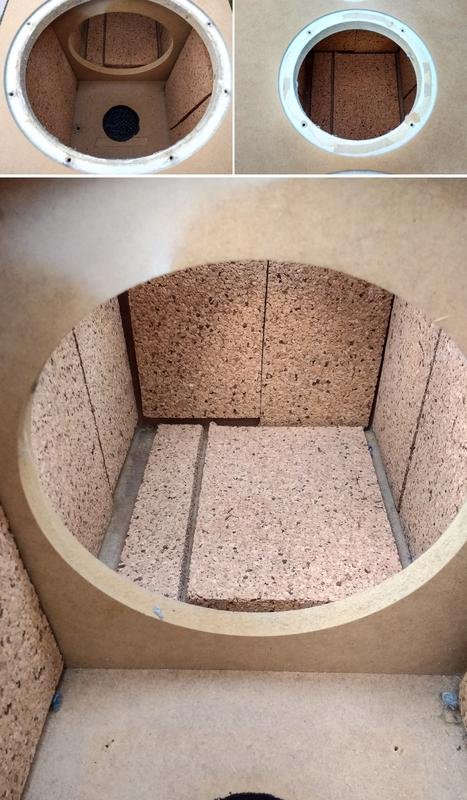
I put dowels everywhere inside across the various panels. They were cut to just fit and glued with a liberal amount of wood glue. In all I added 12 dowels to each cabinet. The cabinets are now very, very solid.
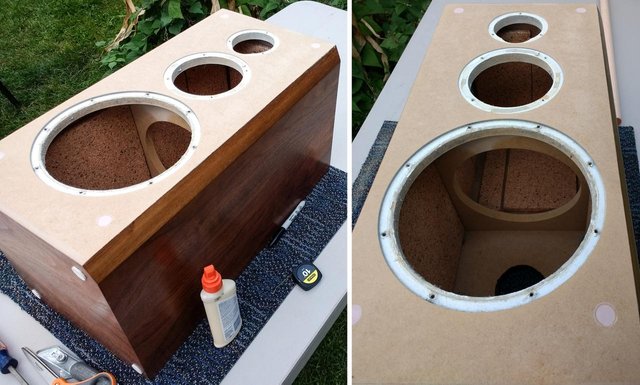
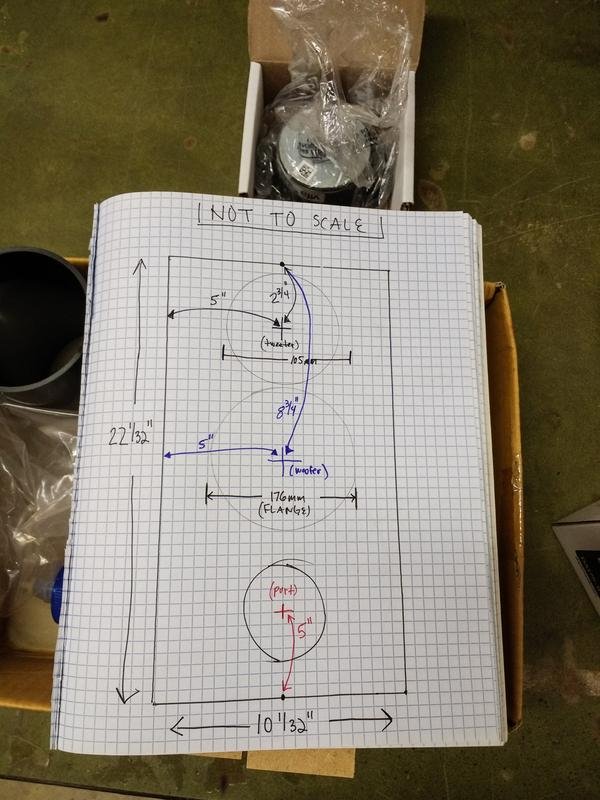
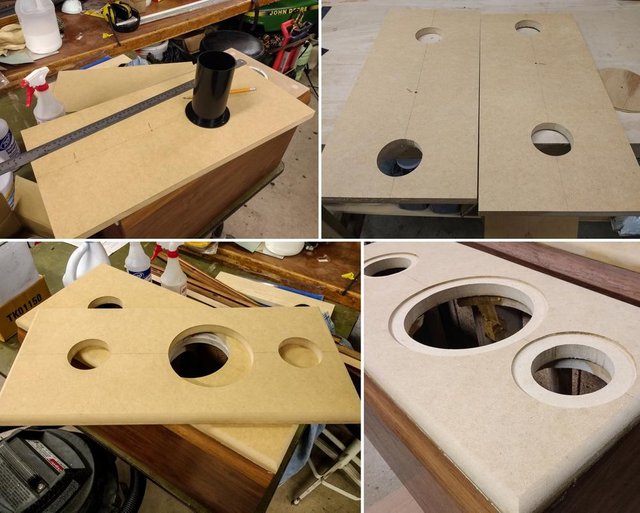
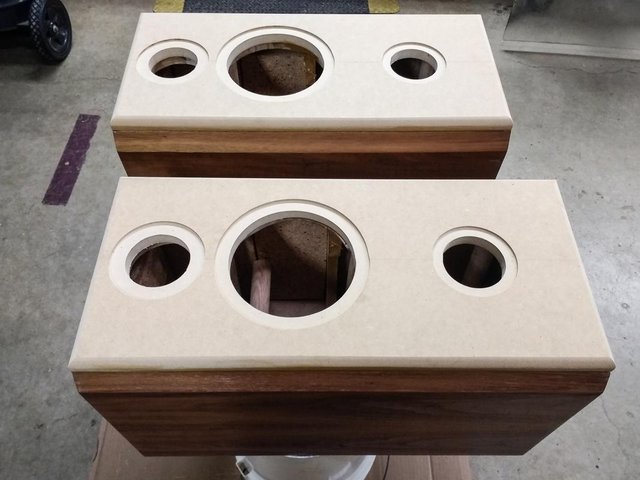
Next I used MDF 3/4 sheets to make a new face to glue onto the old face. These would fit the new speaker drivers and port - An added bonus is the face is now 1.5 inches thick and well braced.
Here is the layout for the Tweeter, Woofer and port.
I cut each hole using a router and then used a router to cut a slot to flush mount the
driver in the face. The edges were also rounded over.
thank you to @lovejoy 's dad. I couldn't have done this very well without his router and table saw.
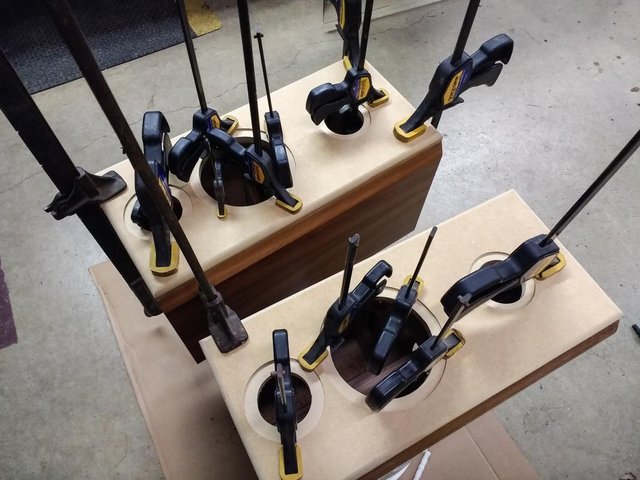
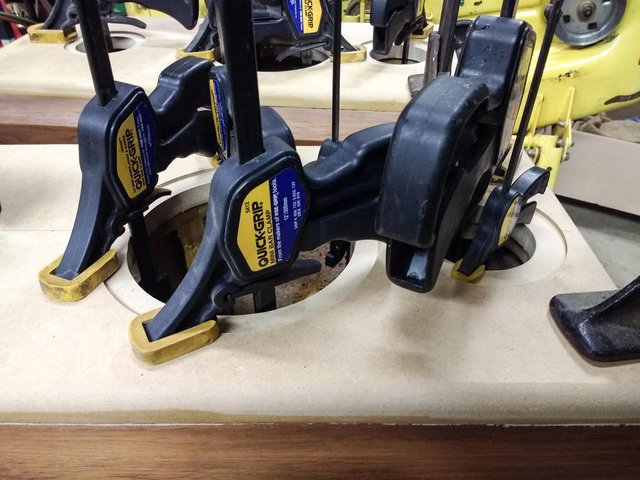
I wanted these to be glued solid to face. Many clamps helped and liberal amount of wood glue.
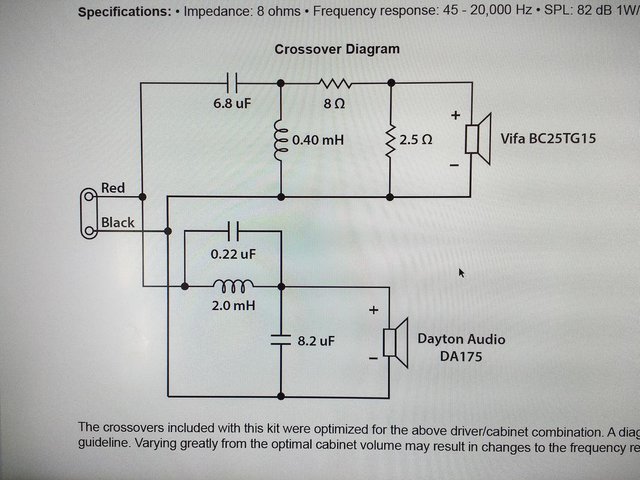
Here is the crossover schematic. The crossover is a passive electrical circuit that goes inside the speaker. When you connect your amplifier to the speaker each crossover circuit divides the frequency spectrum between the woofer and tweeter. I well designed crossover is generally the key to what makes a speaker sound excellent. I am following a design created by an expert for the exact speaker drivers I am using. Crossover design is a very complex and time consuming task when done well. Hats off to the designer. The speakers sound superb.
schematic
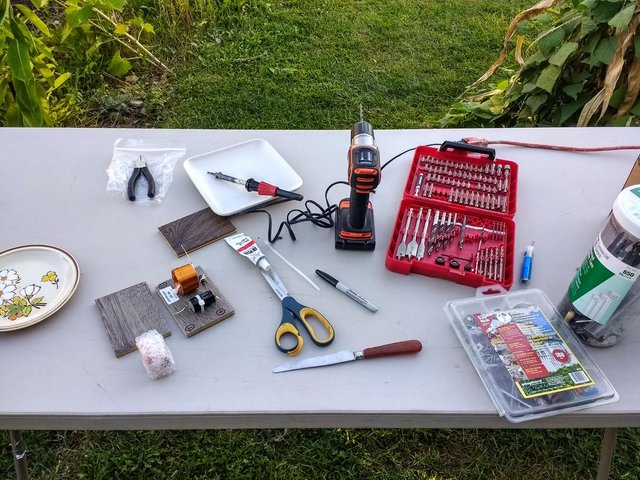
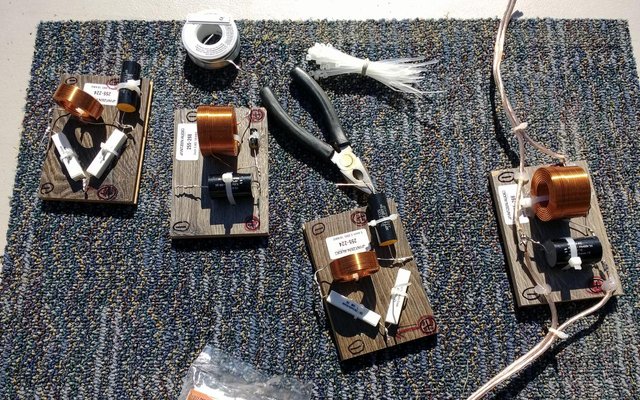
My soldering and assembly work table. Twas a beautiful evening in the yard.
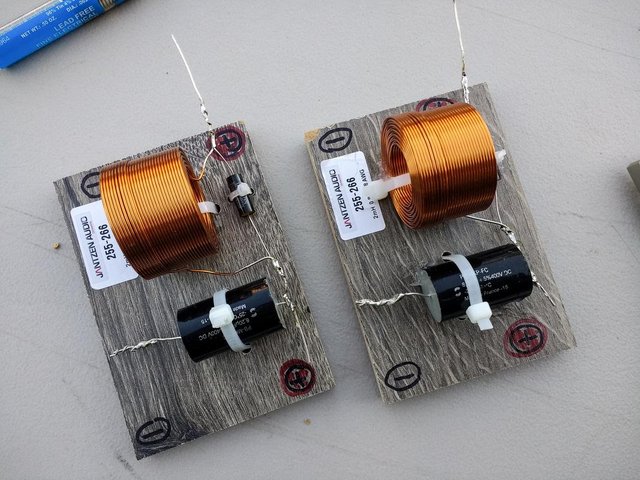
A nearly finished pair for the woofers.
working on the tweeter circuit
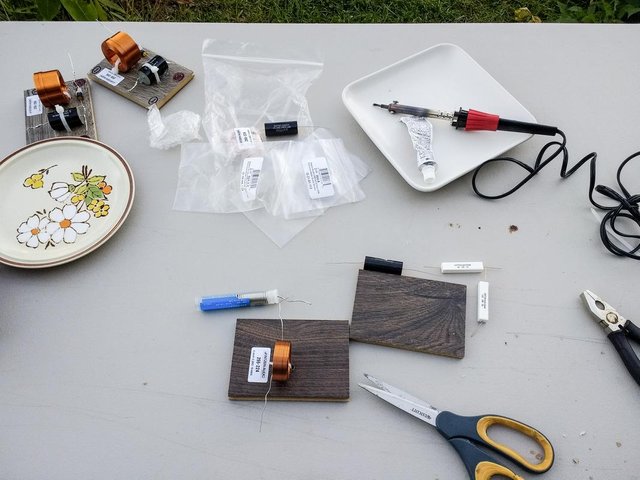
Attaching the wires.
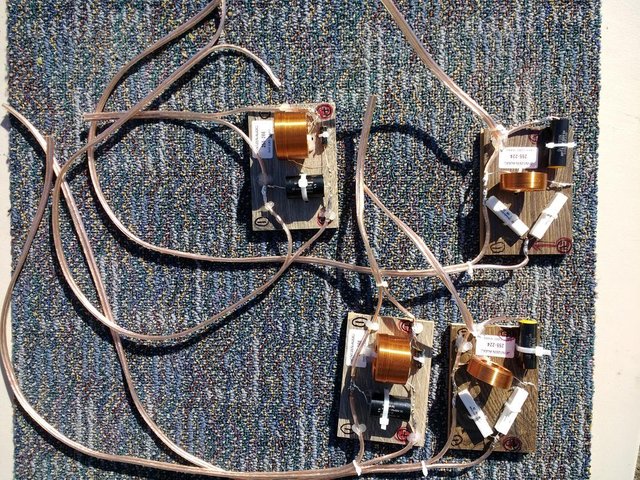
The crossovers and speaker driver were installed.
Here are the drivers I used.
Peerless by Tymphany BC25TG15-04 1" Silk Dome Tweeter & Dayton Audio DA175-8 7" Aluminum Cone Woofer

I lightly sanded the the cabinets and re-coated the walnut veneer in a sightly darker color with a light grey over cast. I simply wanted them to look different.

The faces were painted white and then brushed with grey to give them sort of unique concrete look. I added the silver grills to give some protection and I like the odd yet sturdy look they have.
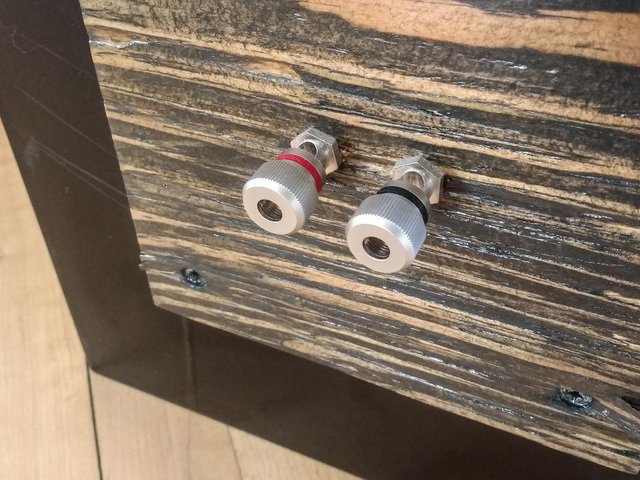
Binding posts were added to the back and connected to the crossovers installed inside the cabinets.
The speakers sound excellent. In many ways better than the original Morel speakers. For $200ish US dollars these are easy to recommend! Check them out at PartsExpress in the speaker kit section.
Thank so much friends. Please enjoy the week.
Live.
Badass.
Beastie
Damn dude I didn't realize you put all this love into the speakers, including those crossovers. Well done.
Thanks! It was a bit of work man. I want to make another pair - twas fun.
Dude! Fantastic work, that was an awesome post, I might try it out! I liked how you showed us what you did step by step! I enjoyed it very much!
Hey thanks alot. Give it try if you are in the USA partsexpress is great place to start. So is Madisound.
Great work and nice post..
All of people like me dont have much idea about how and what are the tools needed for making a good speaker..
Thanks for the post...
I got to resteem this and follow you up for more update
Thank you, yes it was a substantial amount of work. I really want to thank the man who designed the crossover modules. They sound excellent as planned.
The legendary DIY refab'd Fremont dance-party speakerboxx's! Great to see this. :) What a well-constructed post man, great work.
Dude!