Complete Beehive Made From Scrap Pallet Wood | Full Picture Tutorial
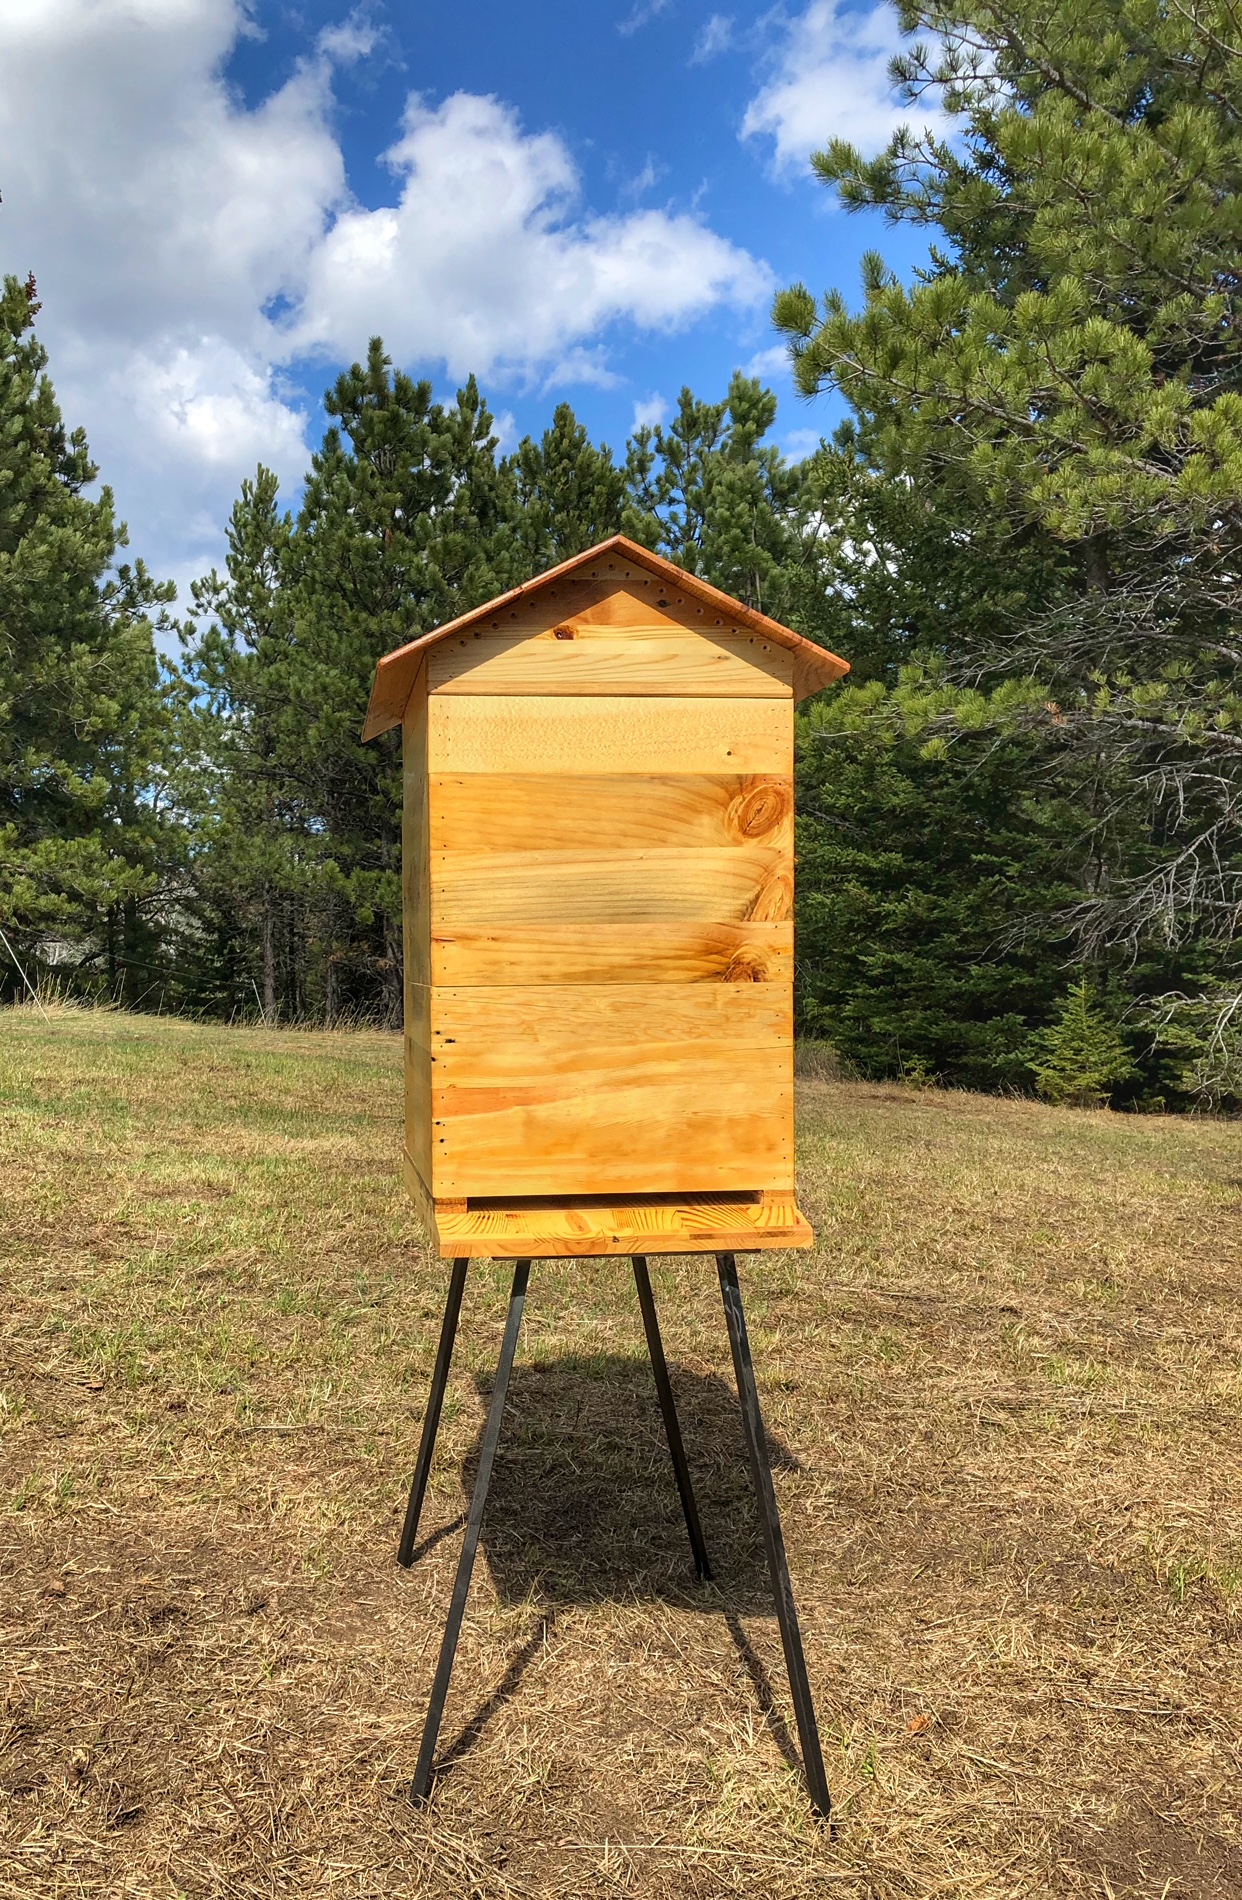
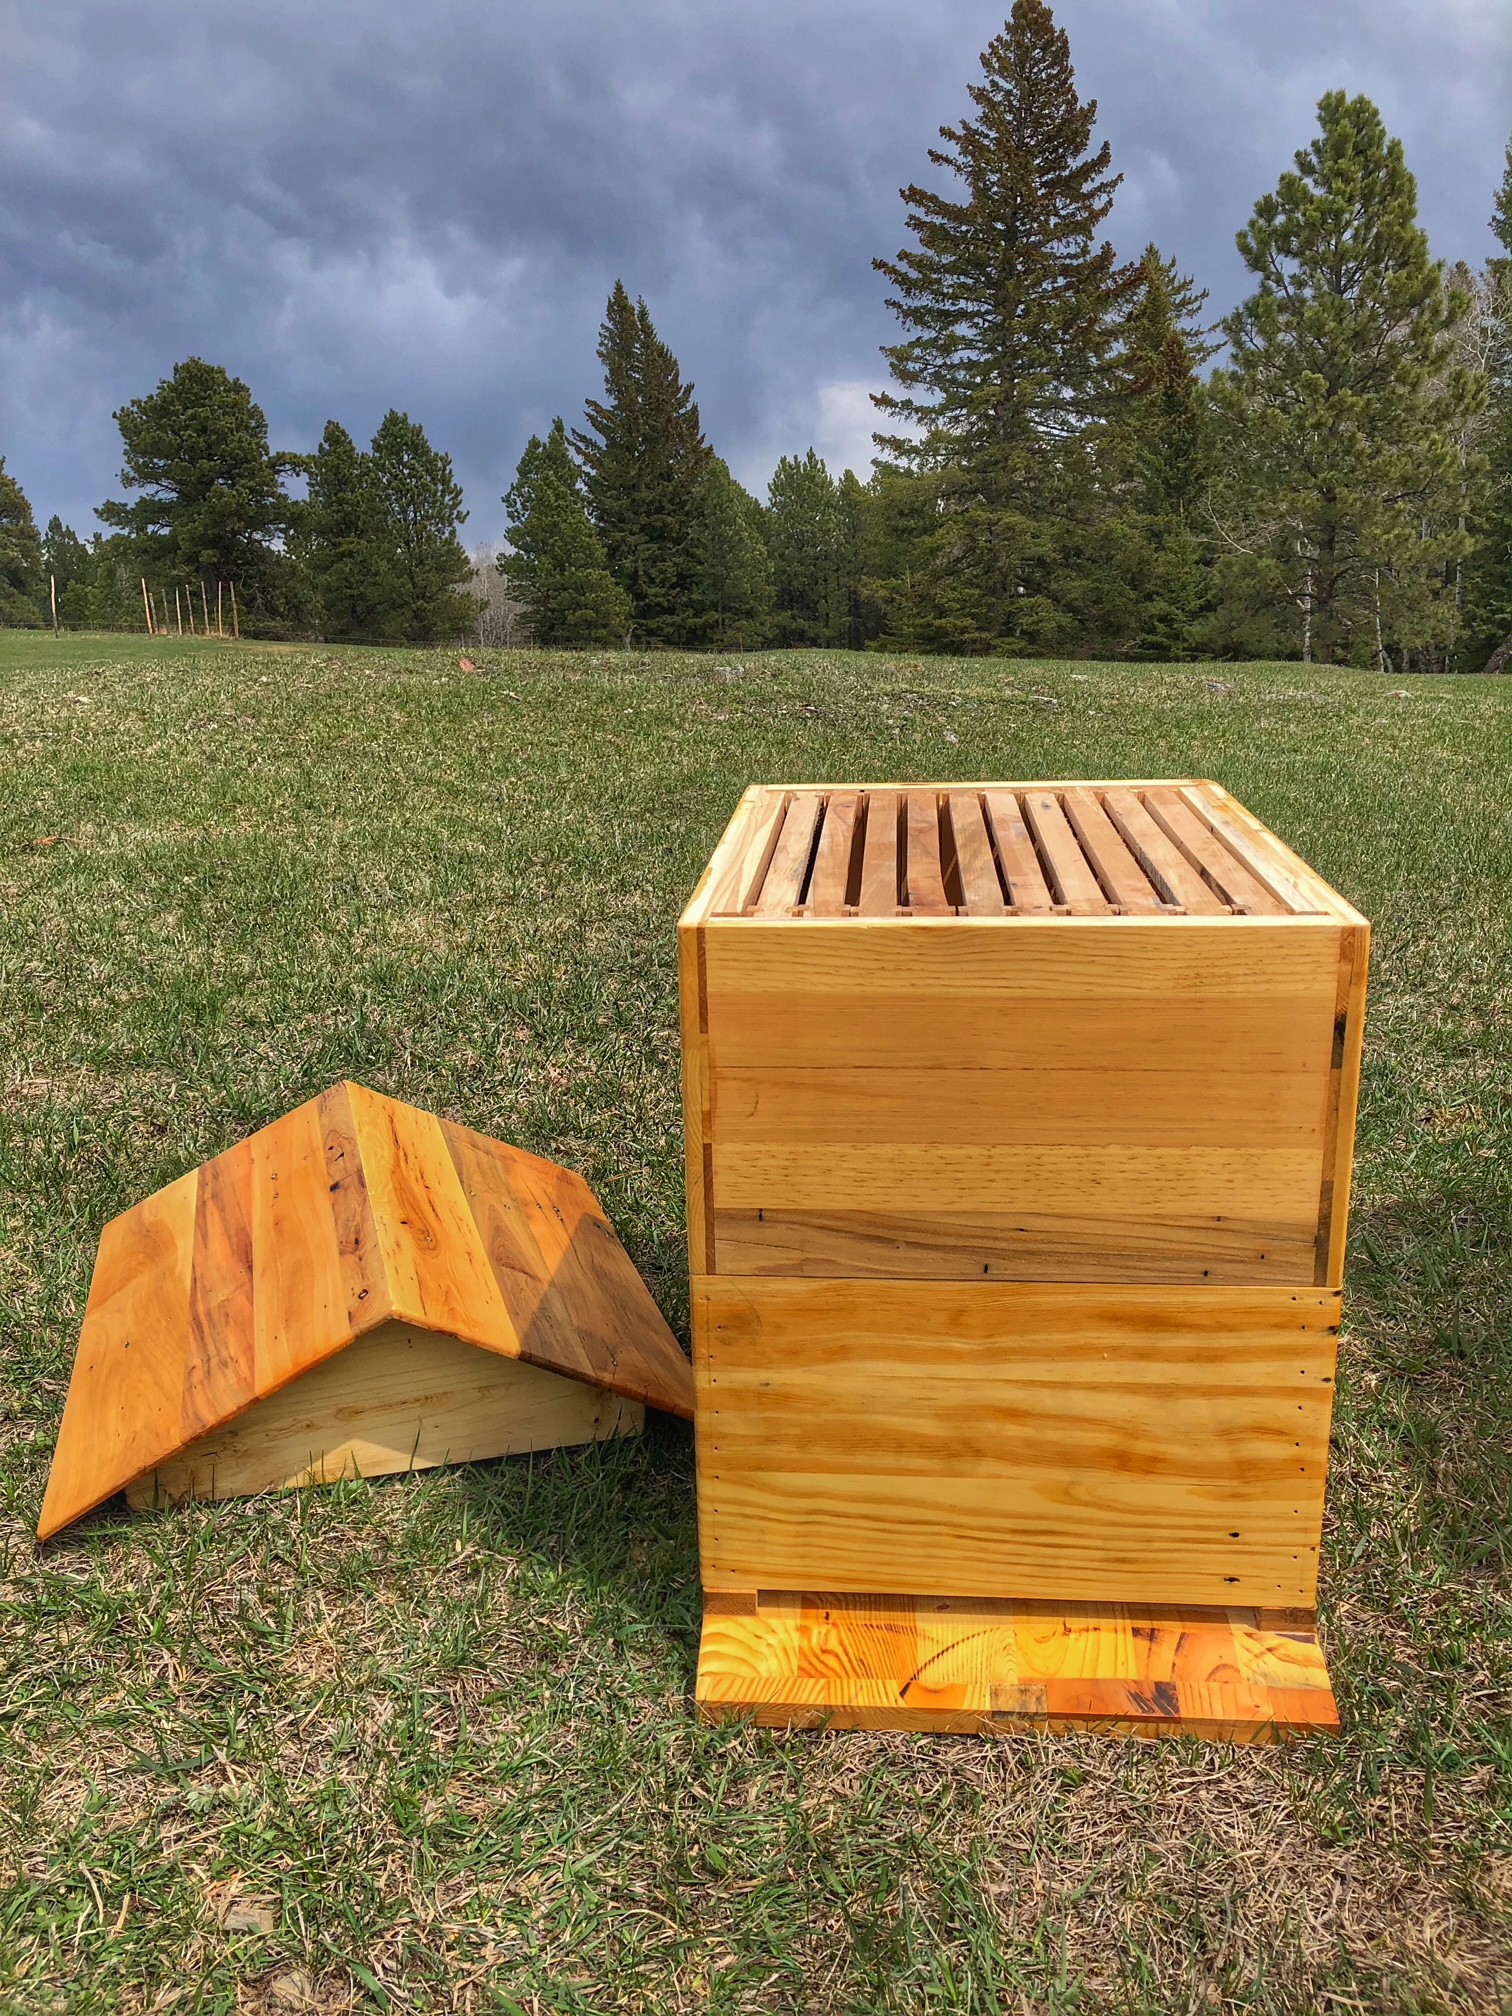
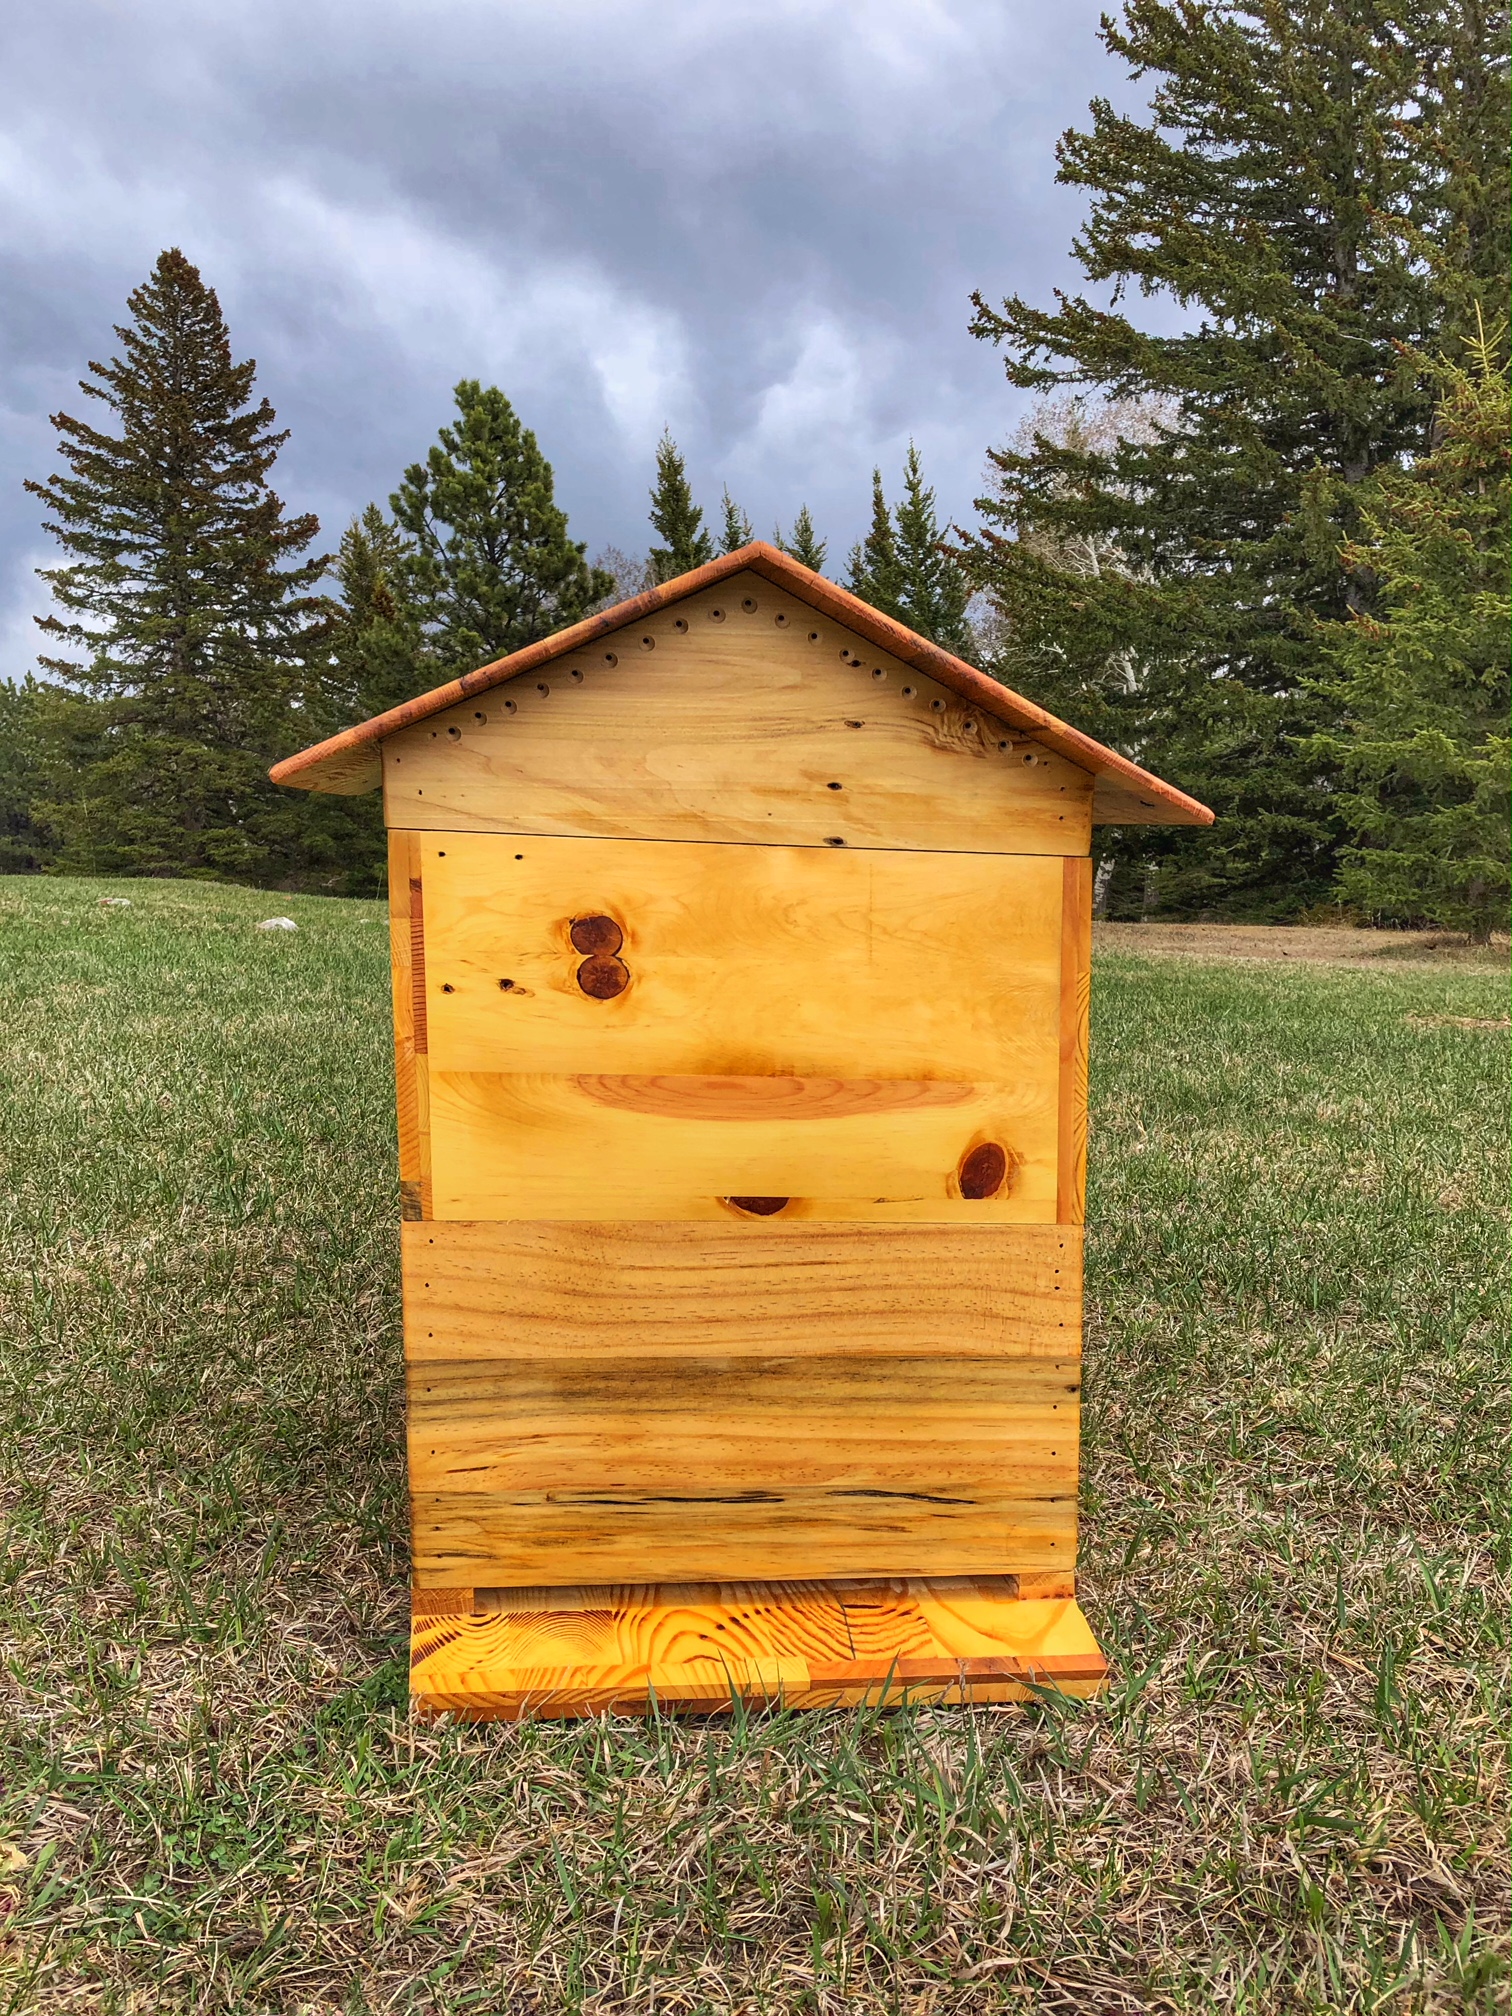
Higher R- Value than your typical hive - Keeping the bees warm in the winter and cool in the summer.
Insulated Warre Top - Helping with insulation and removing any moisture from the hive.
Sturdy Construction - This hive will last for years to come.
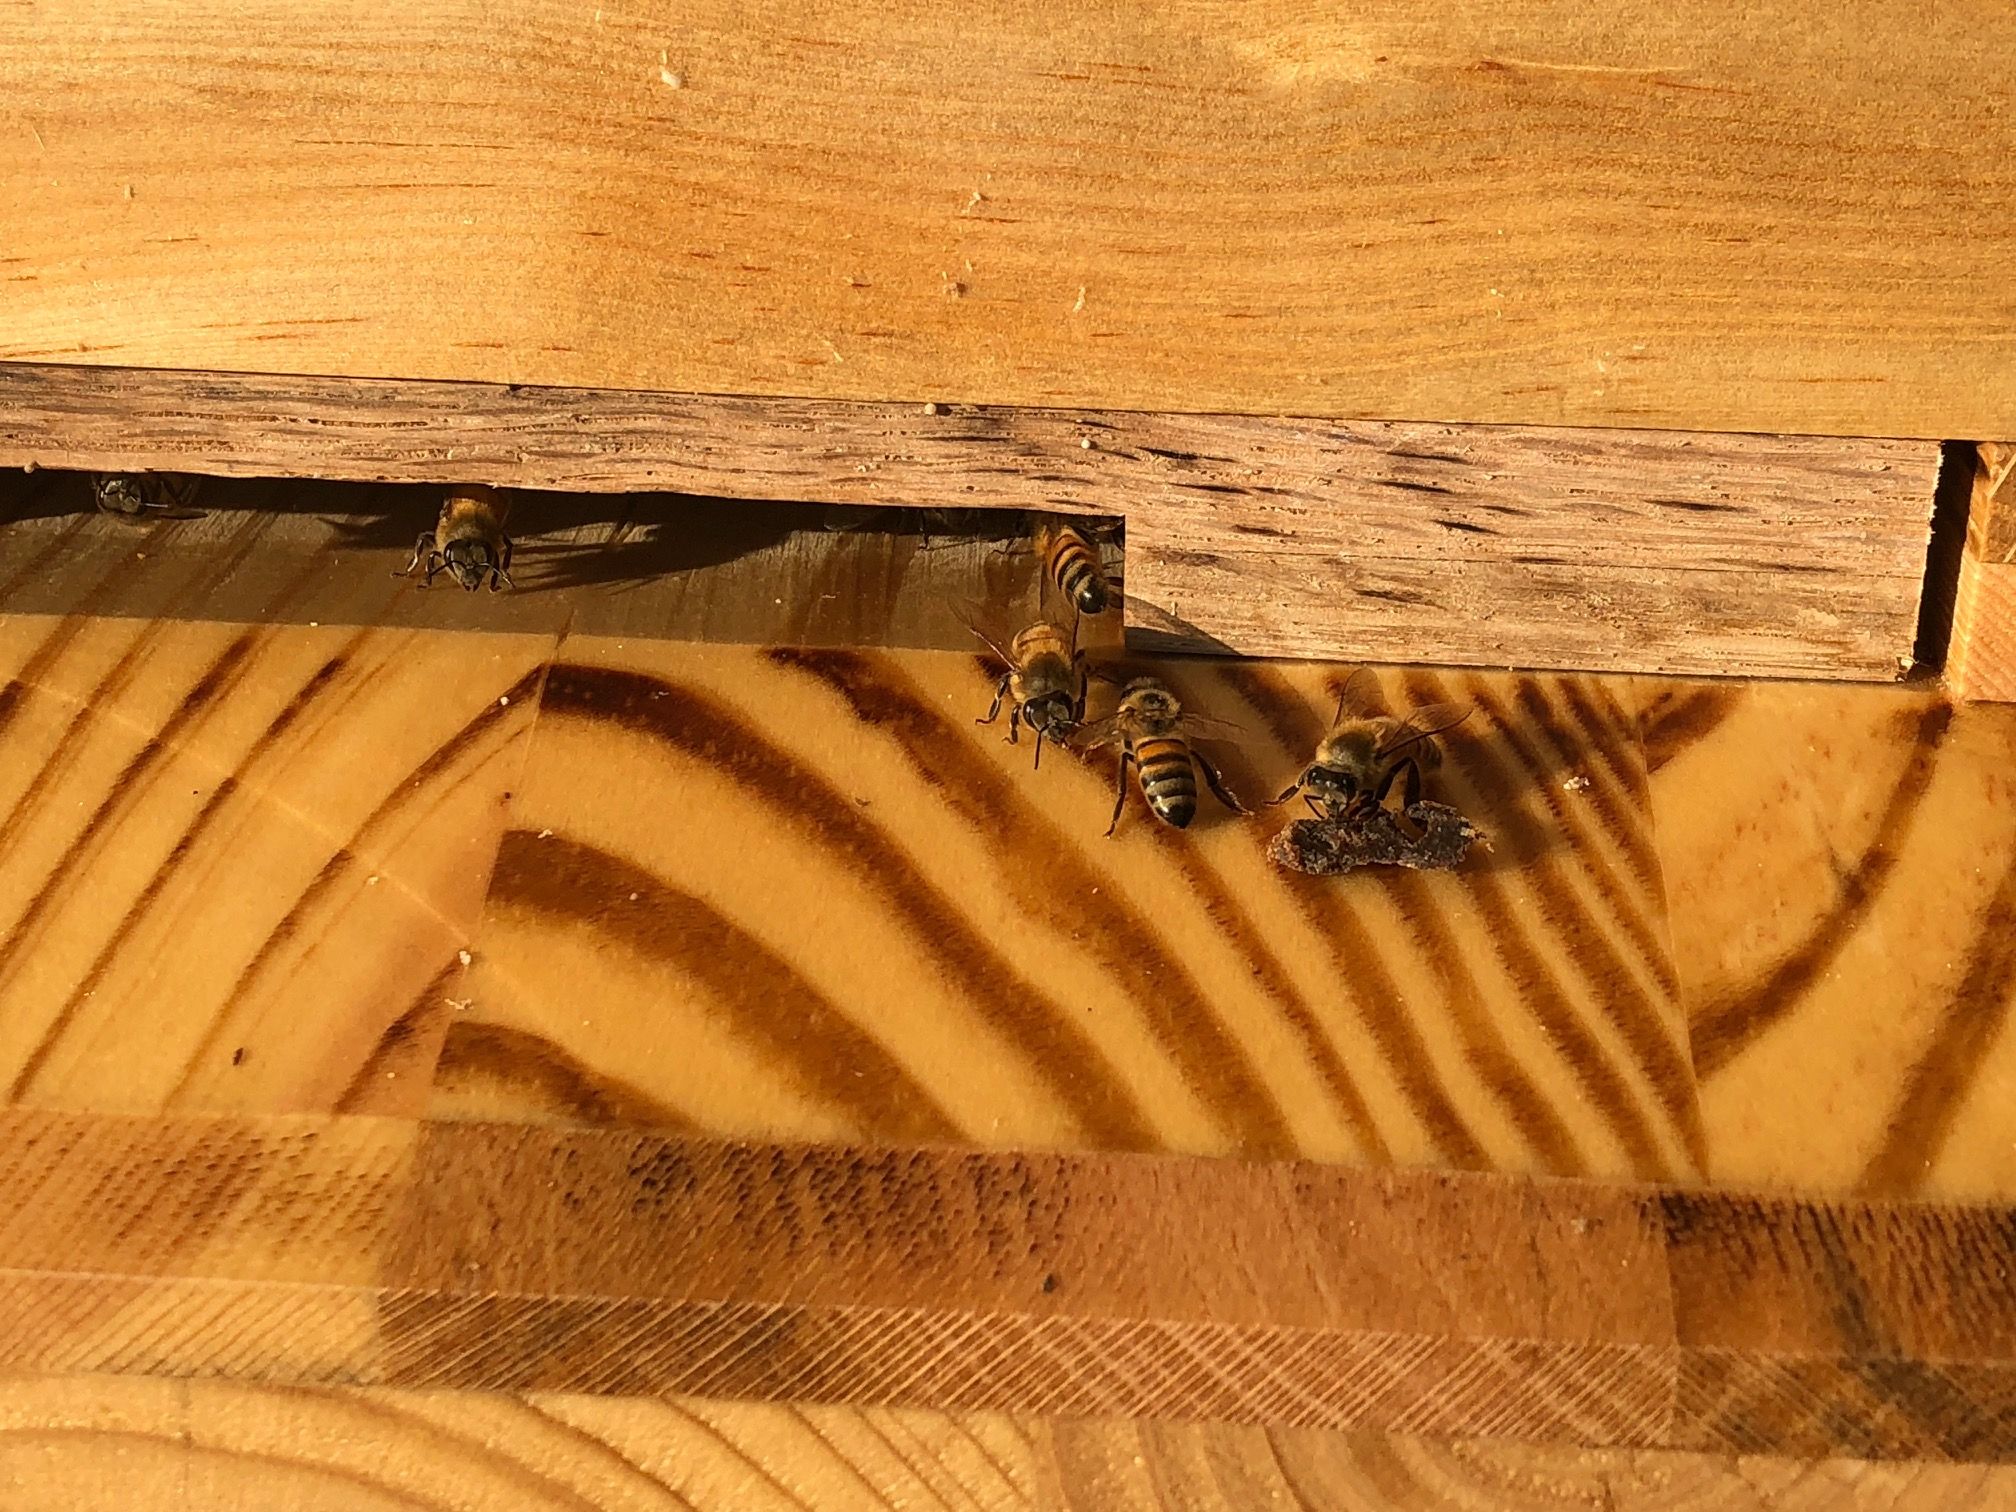
Custom entrance reducer - To allow us to better control the ventilation depending on weather.
as well as a list of other things you will see as we go along
Curious if building with pallets is safe? Check out this article for more information.
Price Comparison
- Warre Hive Body w/8 frames x 2 - $178.00
- Hivetop Feeder - $69.00
- Warre Bottom Board - $54.00
- Warre Hive Top - $109.00
Total = $410.00
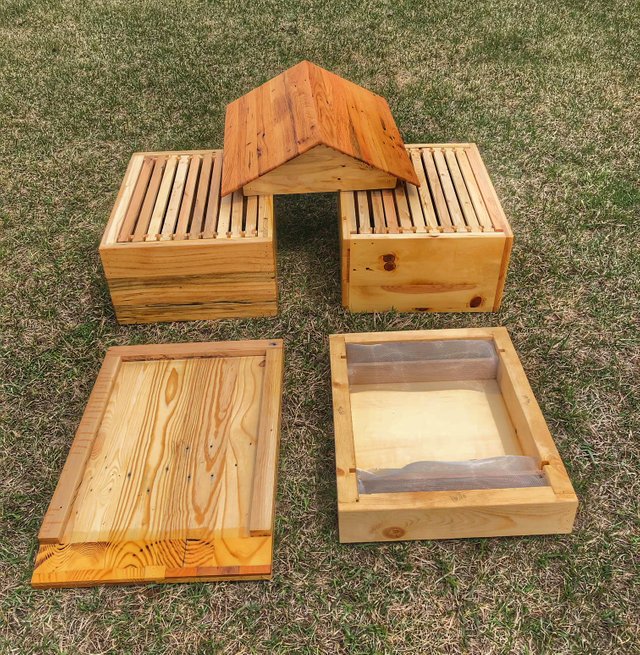
Includes the following pieces;
- Warre Style Hive Top
- Hive Box Body w/10 frames
- Hivetop Feeder
- Warre Style Bottom Board
- Set of 20 Frames
Total = $15.00 per hive
The goal was not only to save money, but to produce a higher quality product than what is available on the market...and I think we did just that. Let us show you how!
The Process
When making your own beehive out of pallet wood here are a few things to consider:
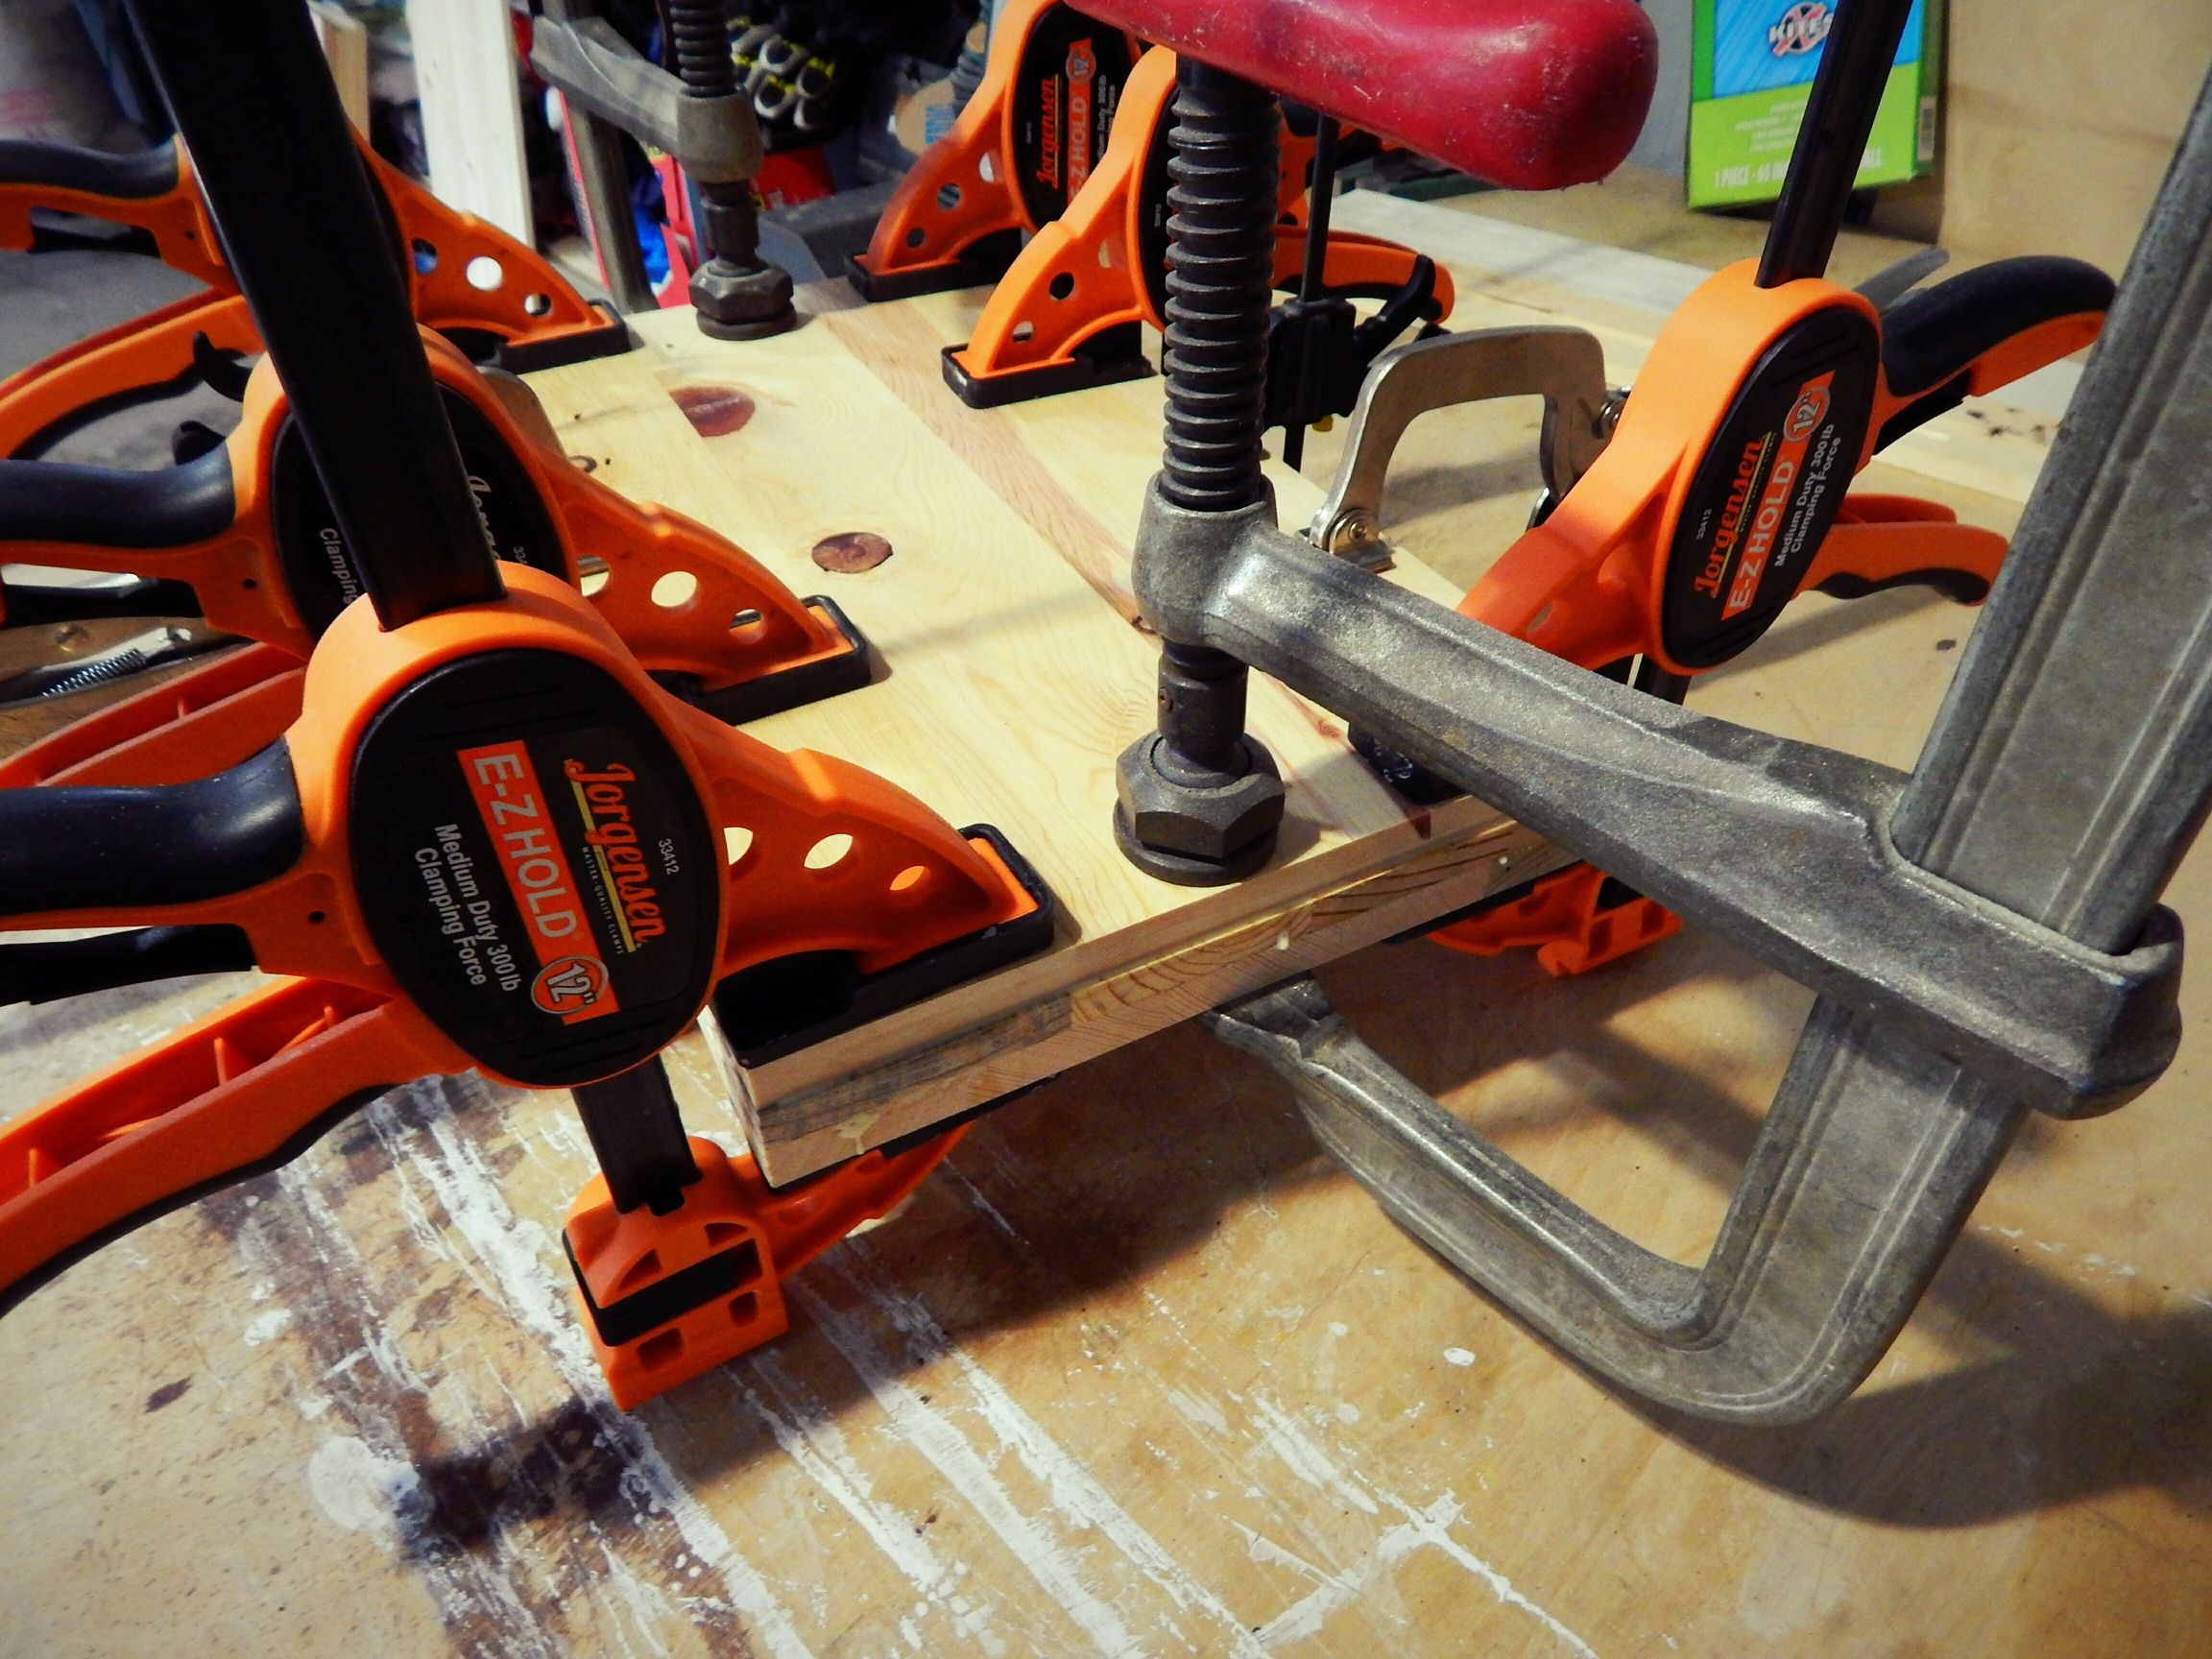
- You will need access to a table saw, 12" jointer or planer and several clamps to complete this project.
- Avoid hardwood for this project due to its low R value and for the additional weight that it adds.
- This hive will fit standard langstroth frames, but the exterior dimensions will be larger due to increased wall thickness for insulation purposes.
- Langstroth hives are typically made with finger joints but because of the added thickness rabbet joints work perfectly for this project and make it a bit easier.
- We are choosing to make our hives out of pallets for many reasons. If you don't want to use pallets, you can simply skip to Step Four and use 2"x 12" material instead to build this hive.
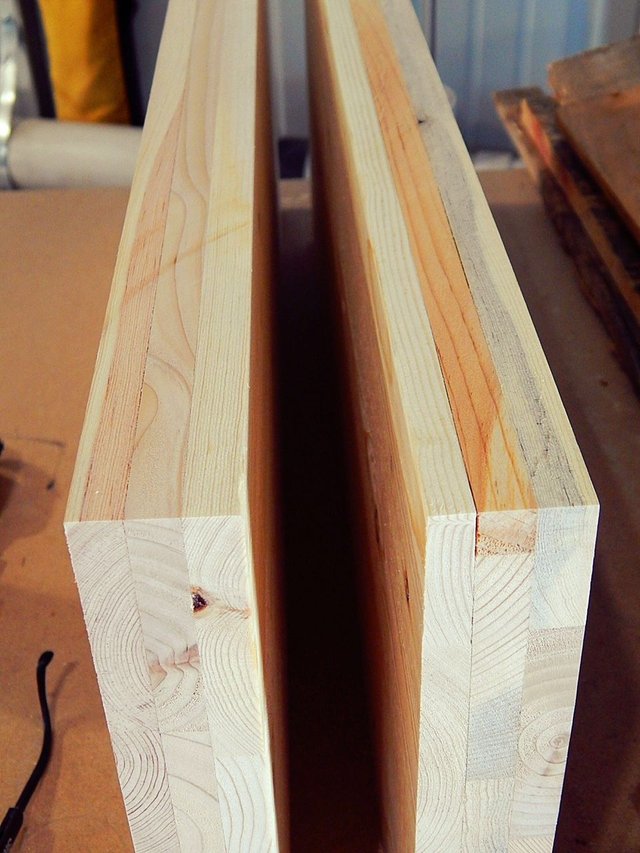
- Typical beehives are made of 3/4" softwood which has an R value of roughly 1 (1.4 R value per inch), this hive measures out to be 1 1/2" thick giving you an R value of 2.1
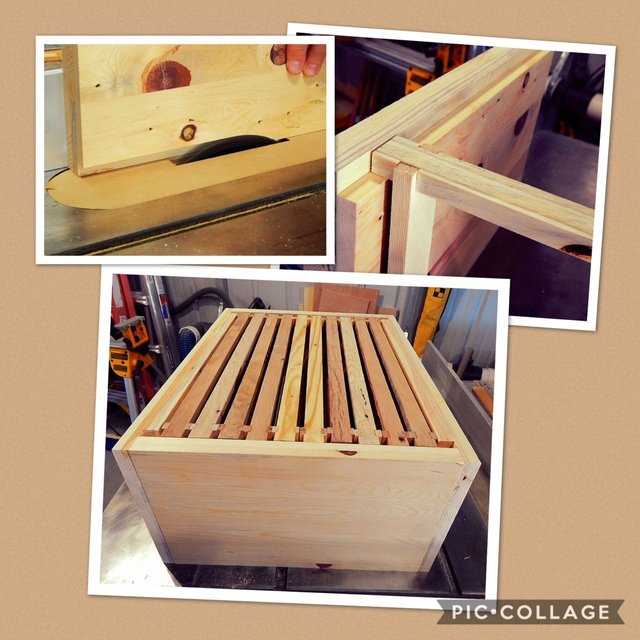
First Things First | Processing The Pallet Wood
- The first thing we need to do is remove the long boards from the pallet itself. We did so my using a reciprocating saw and cutting through the nails, allowing each board to be removed with out breaking.
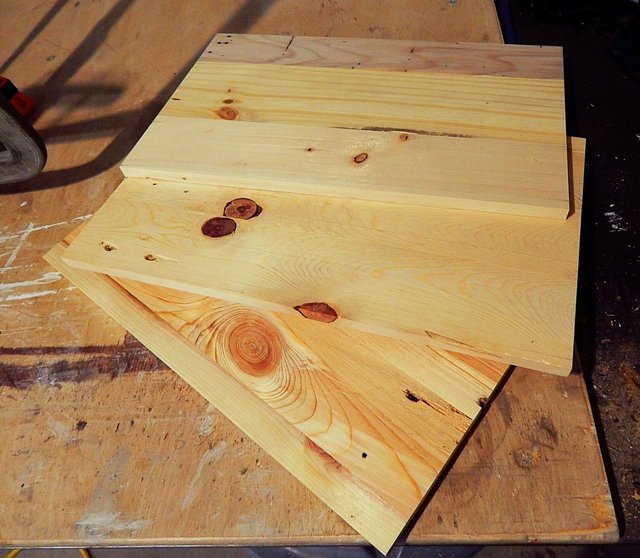
- Once we have our boards removed, we run those through the planer and table saw until we have smooth surfaces.
- Then we take our now smooth boards and glue and clamp them together.
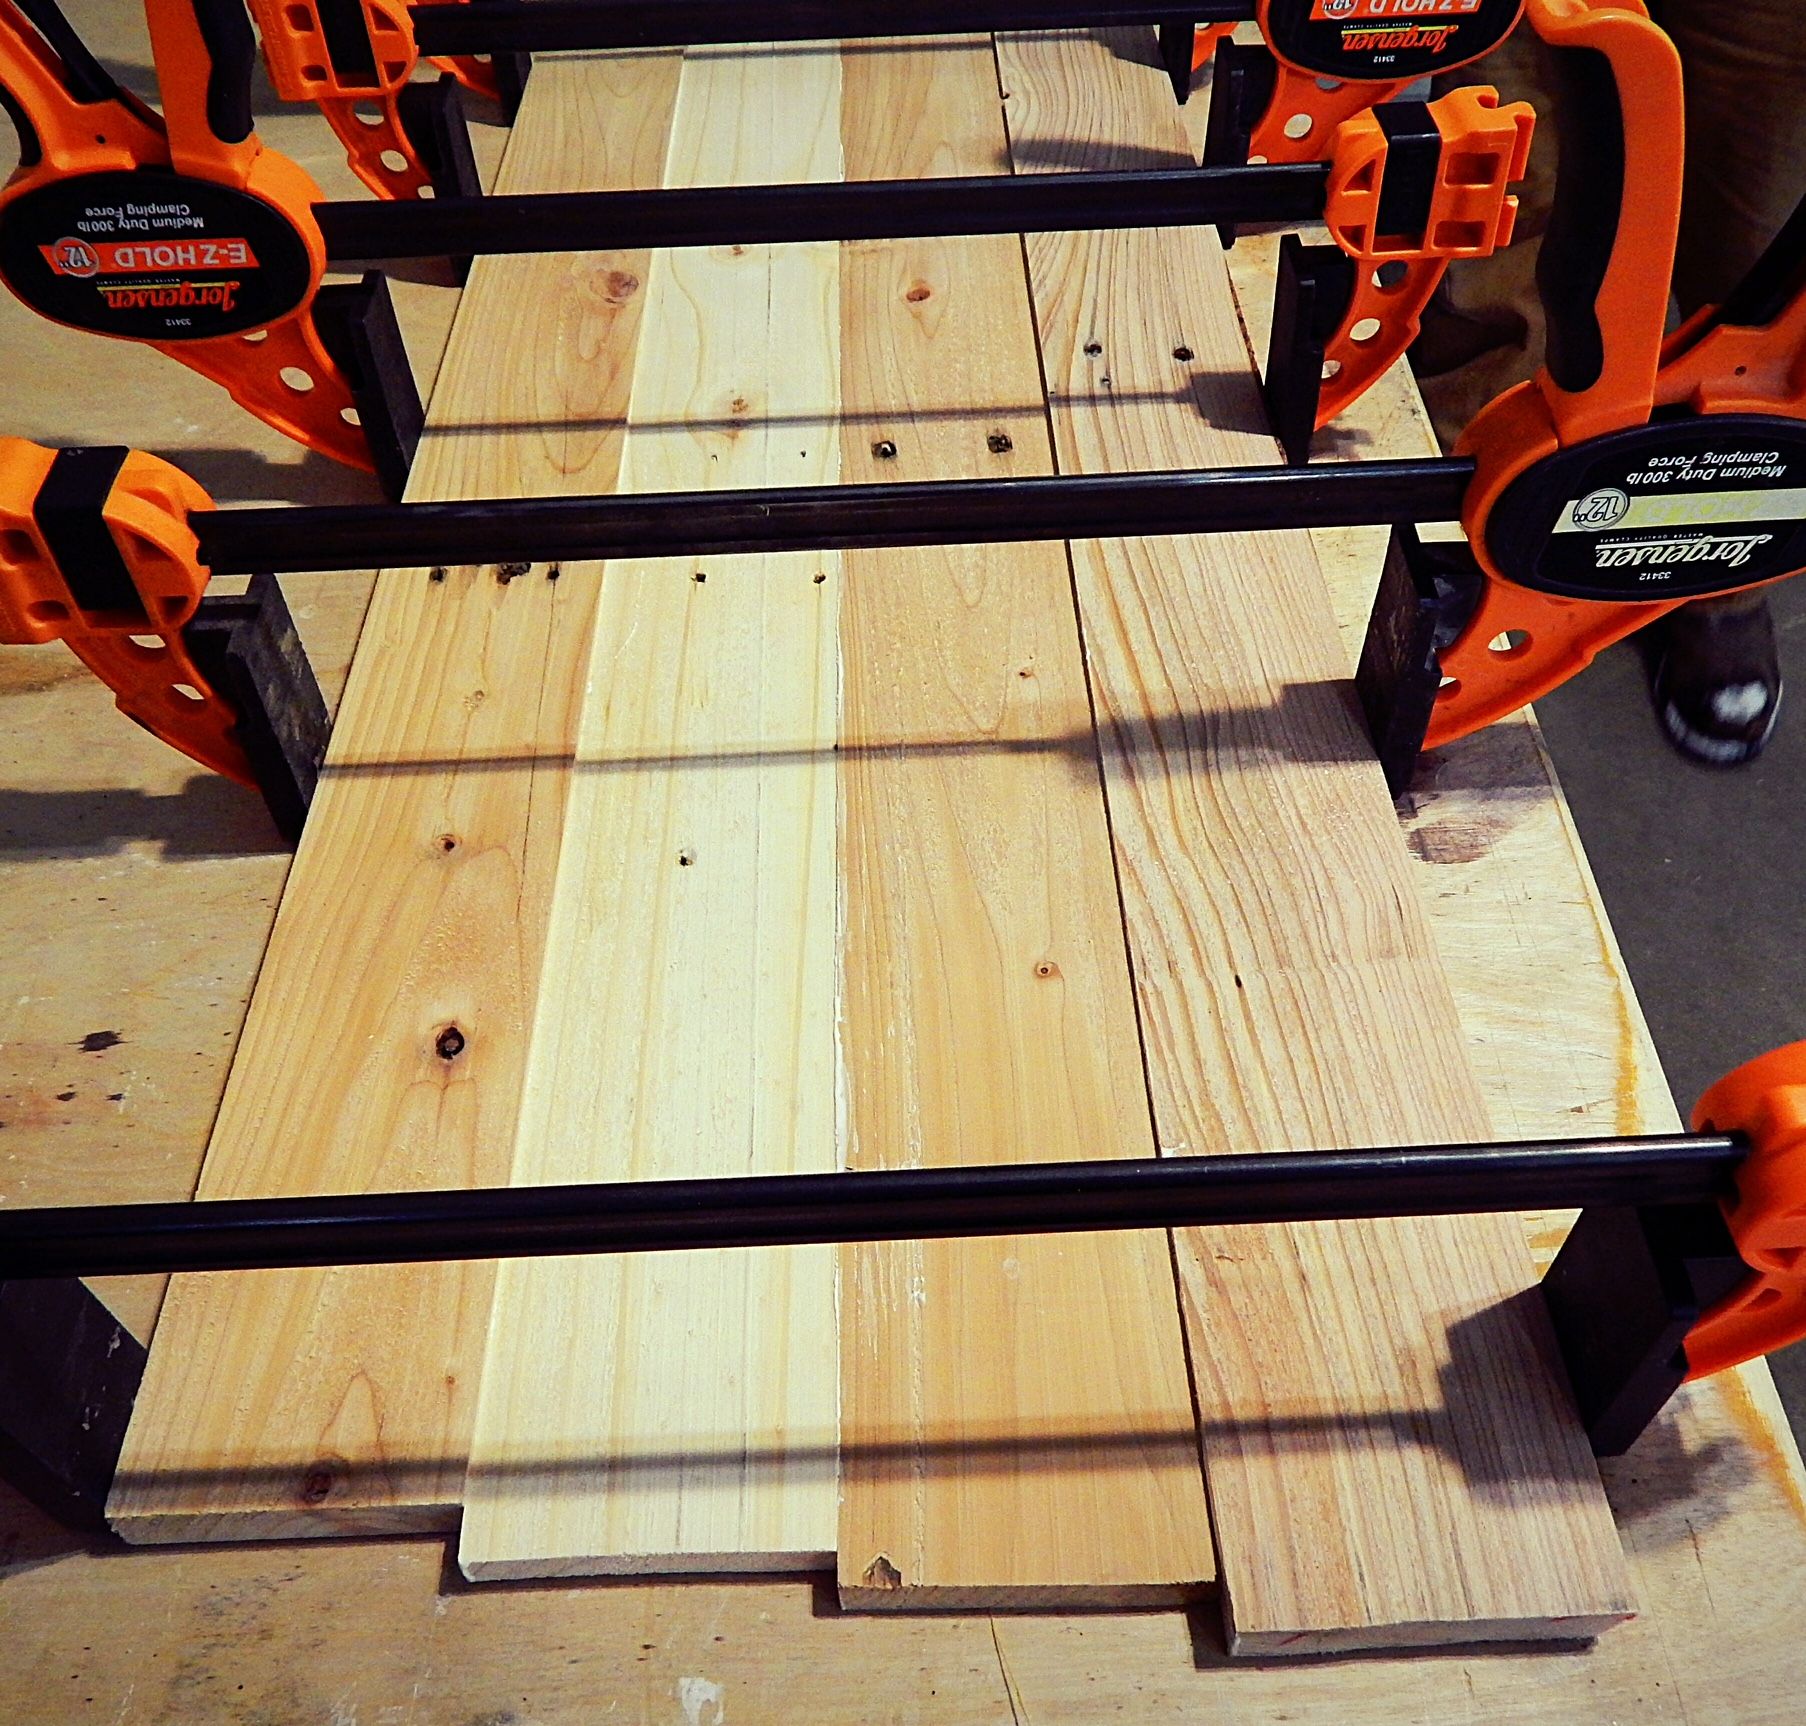
After a few hours we can remove clamps, but make sure to let them dry overnight before working with them.
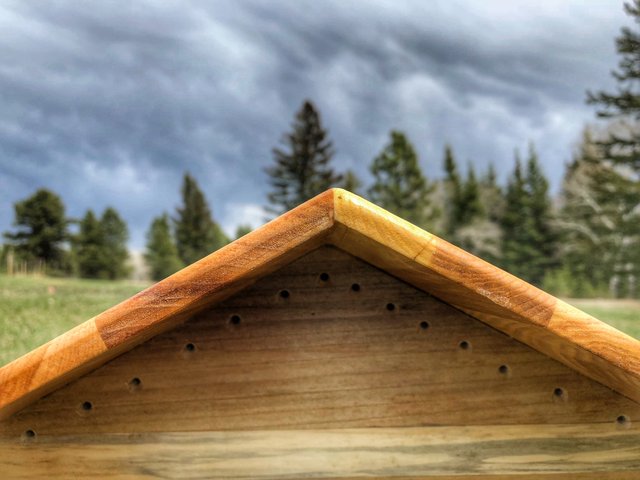
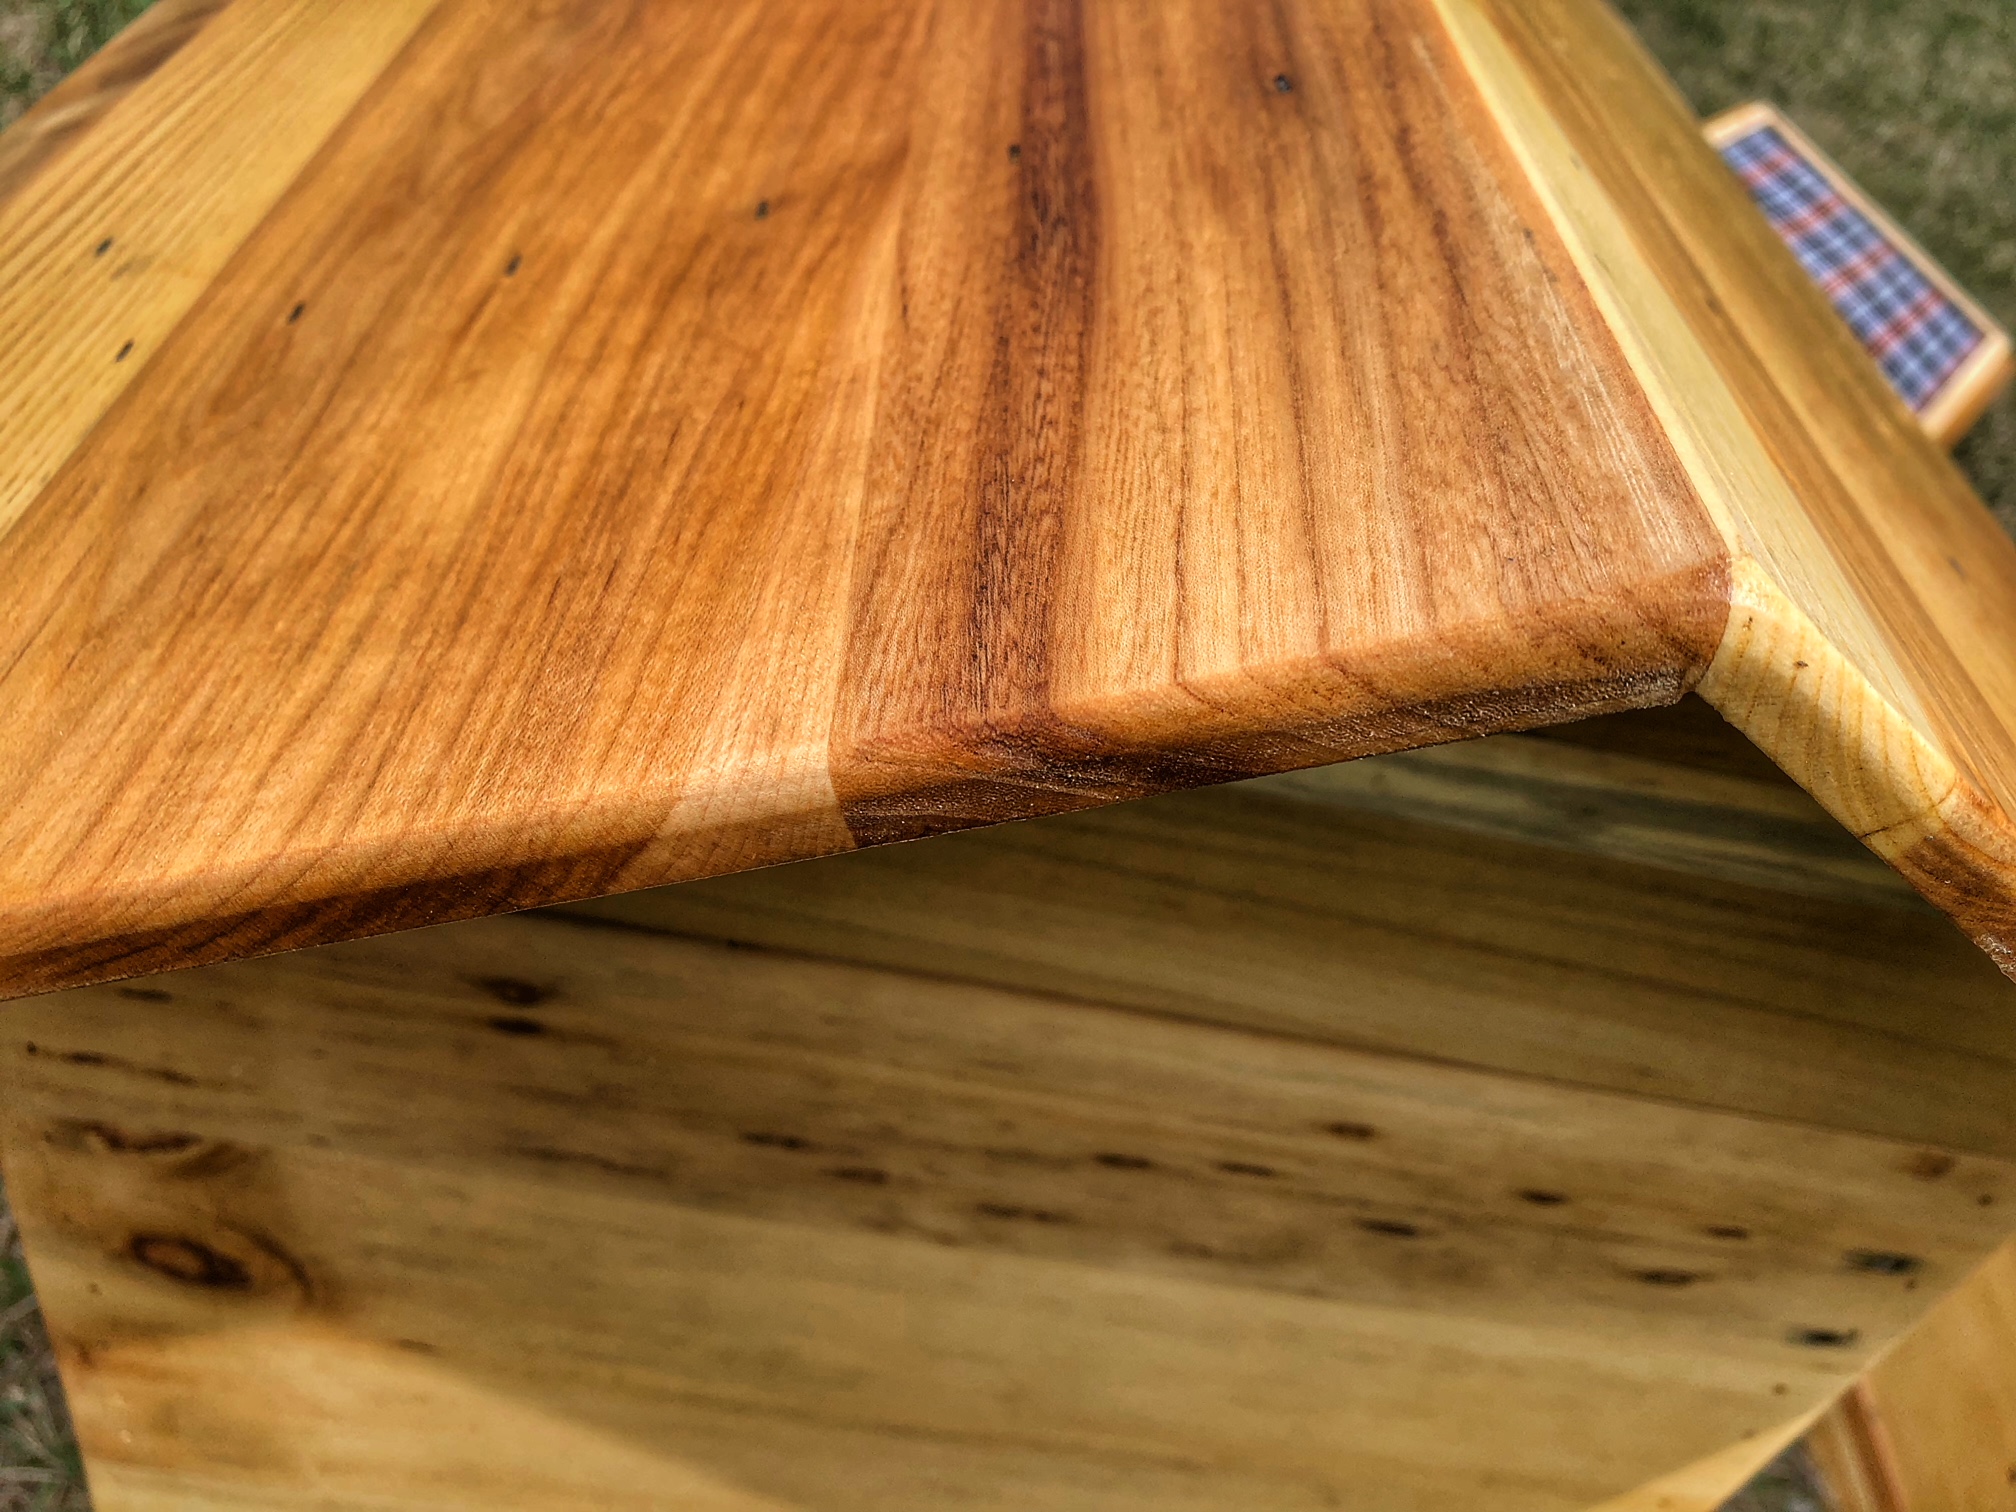
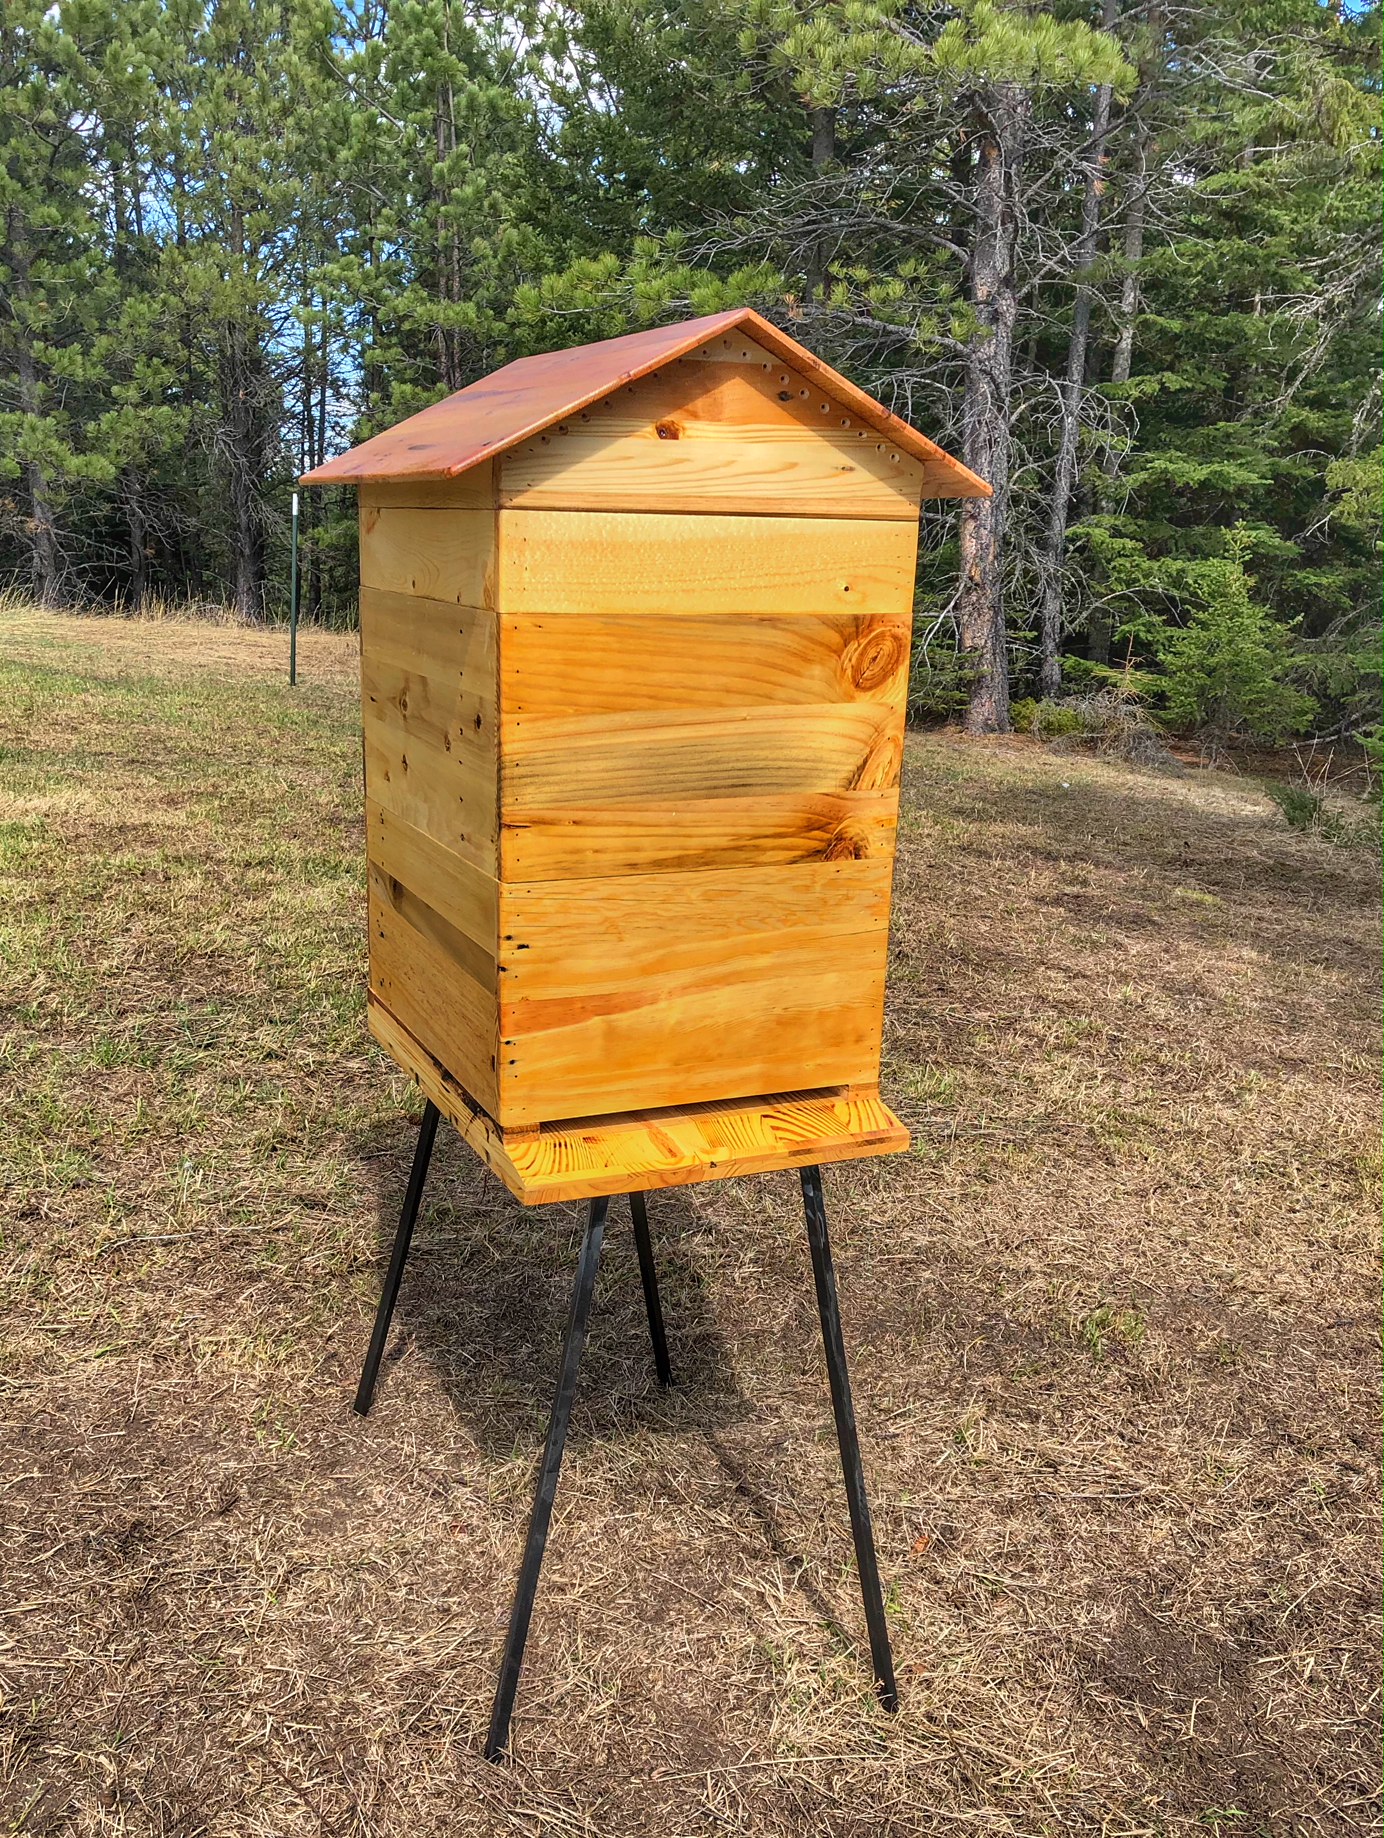
The Beehive Top
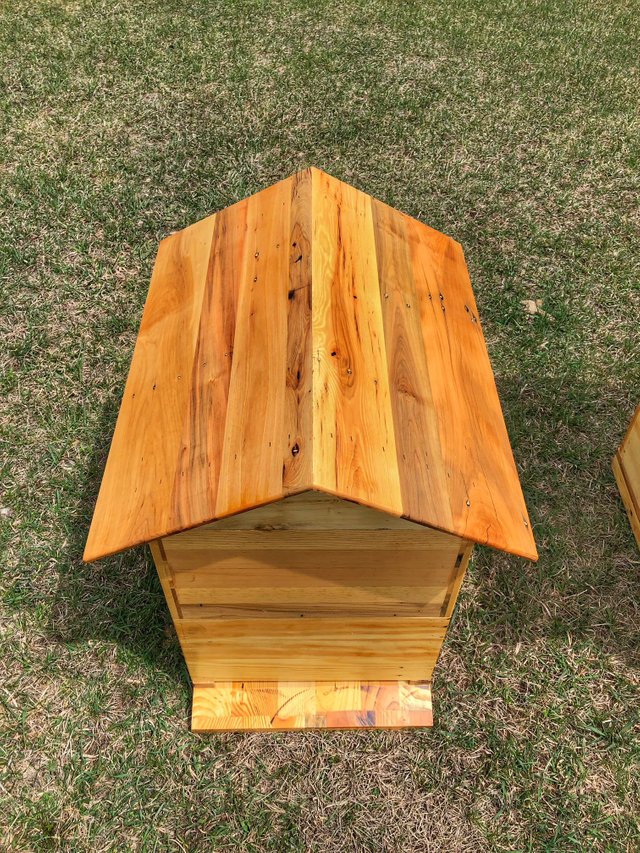
This is a custom design (with free plans included) pulling ideas from different styles of tops we have seen in other hives, which we combined to make something unique. This top is insulated with pine shaving to wick out moisture as well as helping to keep the bees warm in our harsh winters, as well as cool in the summer months.
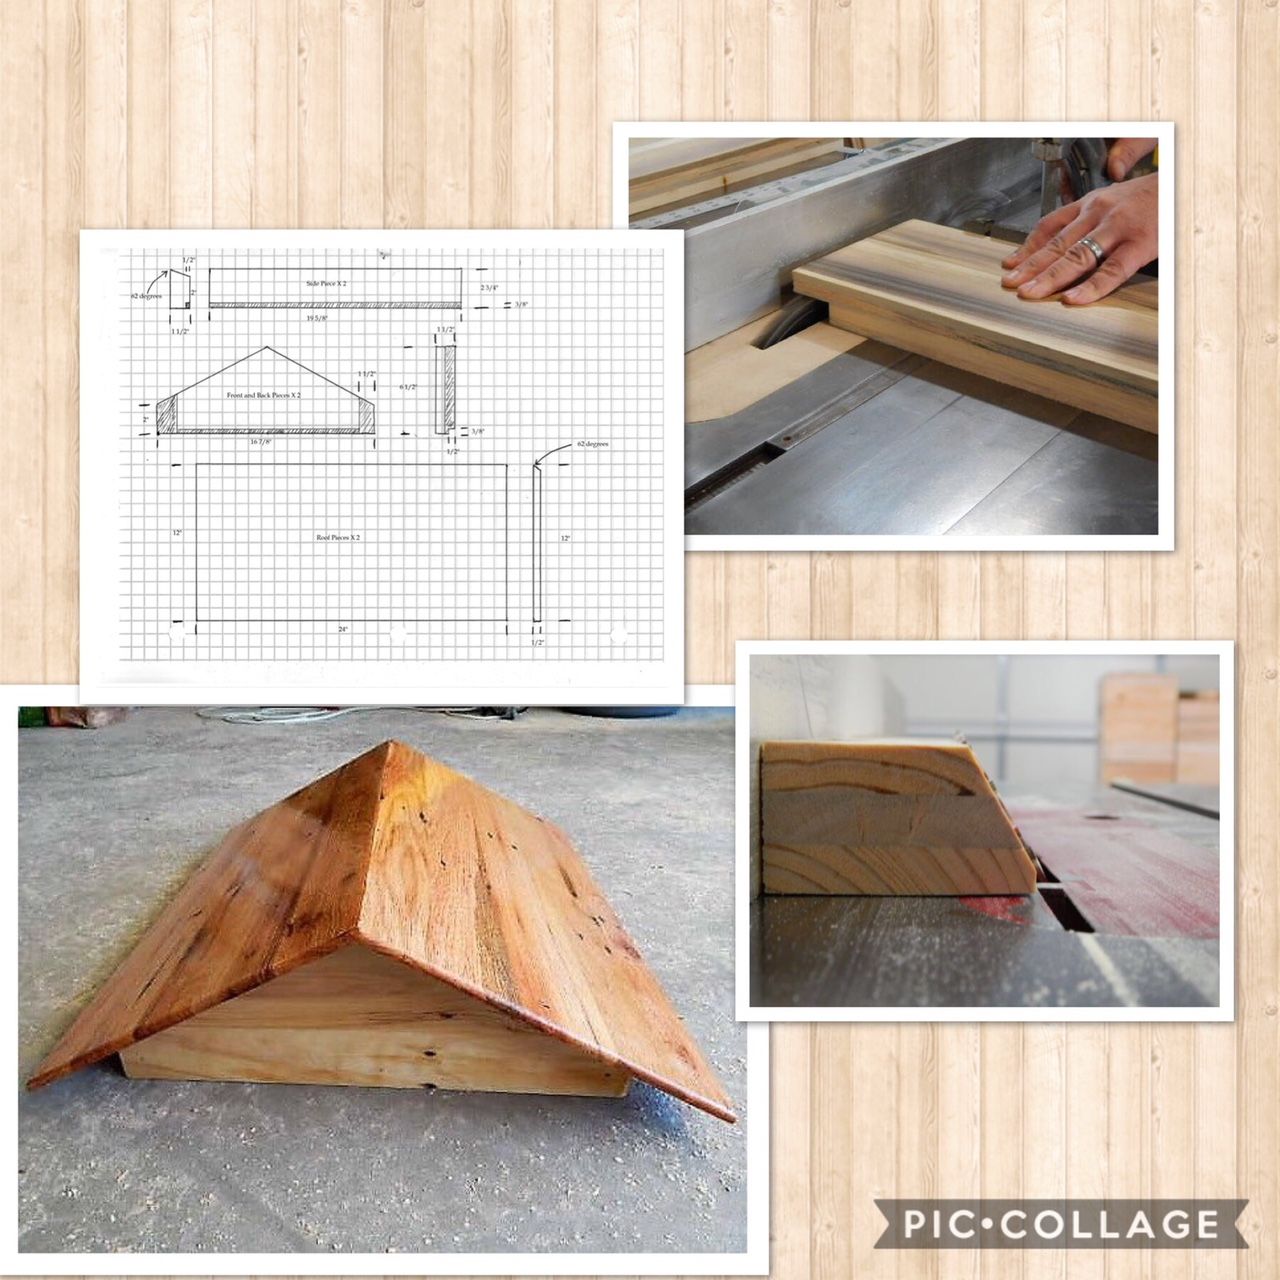
We first cut down on one layered lumber from above to the following dimensions.
(2) - 19 5/8” x 2 ¾” x 1 ½”
(2) - 24” x 12” x ½”
(2) - 16 7/8” x 6 ½” x 1 ½”
Then we make a few simple cuts (found in the full tutorial) and glue the pieces together.

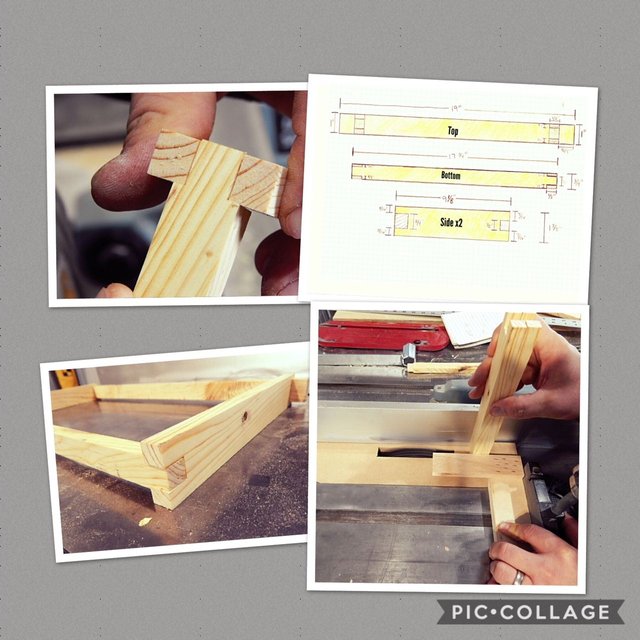
The Hive Box
For the hive boxes we used the 3 layer lumber we made and cut it to the following dimensions;
(2) - 9 9/16" x 1 1/2" x 15 3/8"
(2) - 9 9/16" x 1 1/2" x 21 1/8
Then we use a dado blade to make our joints and glue/clamp the pieces together to make our hive box. We then finish off using a brad gun along the joints to help strengthen it overall. We made two of these for each hive, adding the second to the hive later in the season.
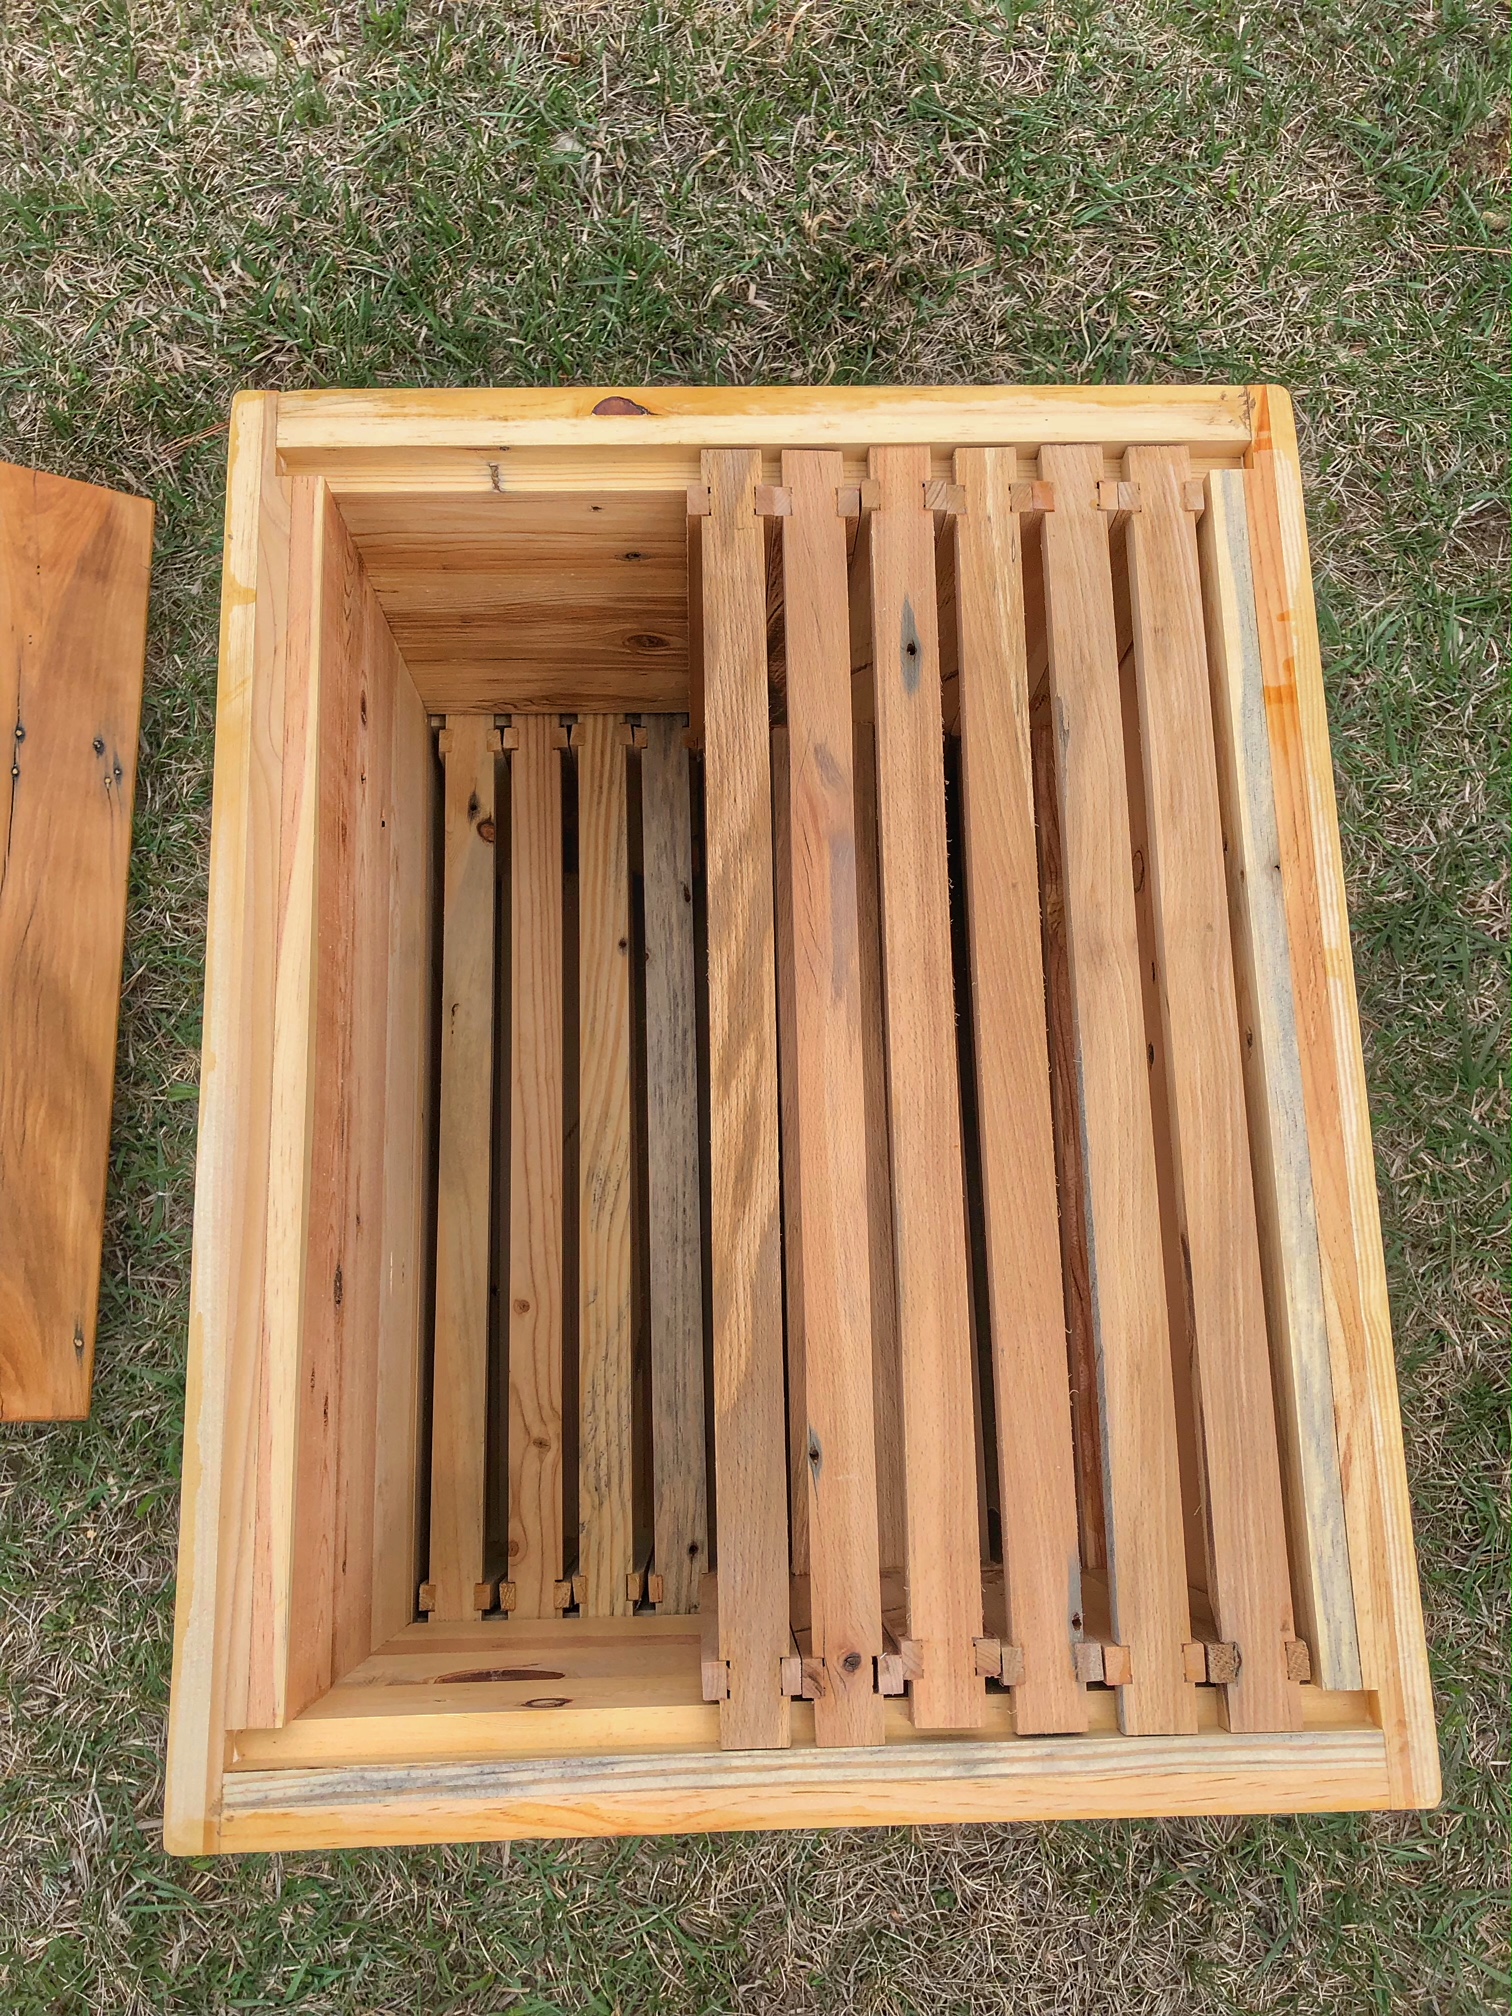
The Frames
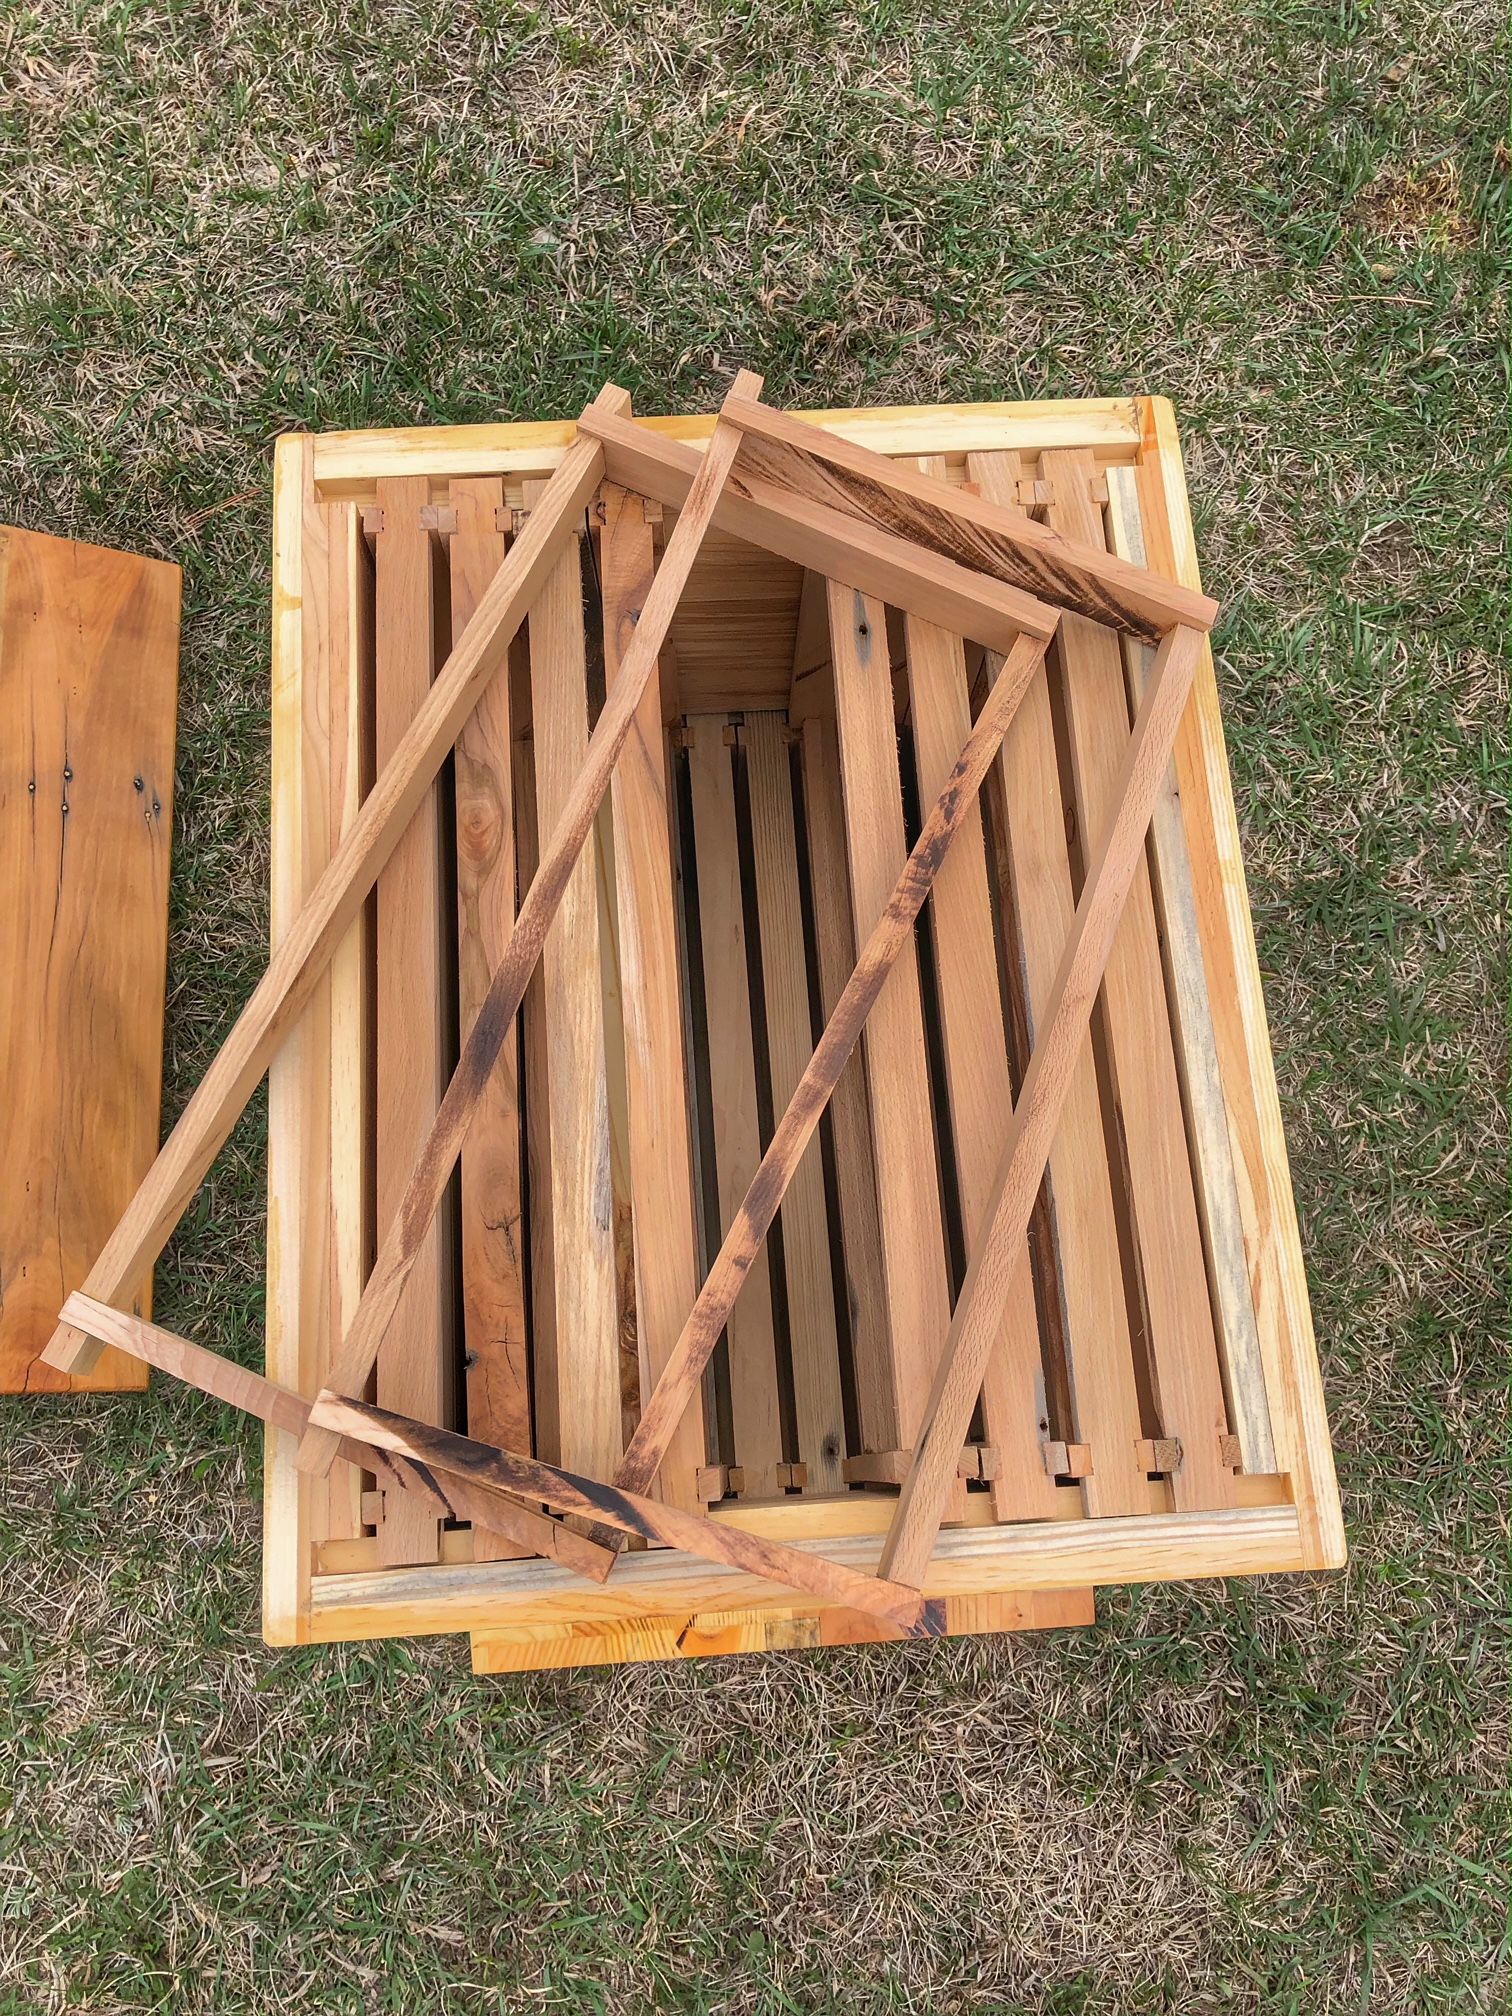
These are the standard frame (brood frame) size of the Langstroth Hive. So if you order a Bee Nuc the frames will be identical to what we are creating here, therefore fitting perfectly. In reality, when making the frames you will want to do an assembly line style, doing all of one size before moving on to another...making your work quick and easy.
We will start by cutting our single layer lumber that we made into the following dimensions;
(1) 19" x 1" x 1/2"
(1) 17 3/4" x 3/4" x 1/2"
(2) 9 1/8" x 1 3/8" x 1/2"
We then simply join the pieces together using glue and clamps to secure until dry.
The Bottom Board

This is the base of your hive or the hive bottom board. It might seem like a pretty easy concept, but there are some important details to consider; stability of the hive, ventilation, easy accessibility for bees etc. This is a design that my husband came up with is for a 10 frame style hive.
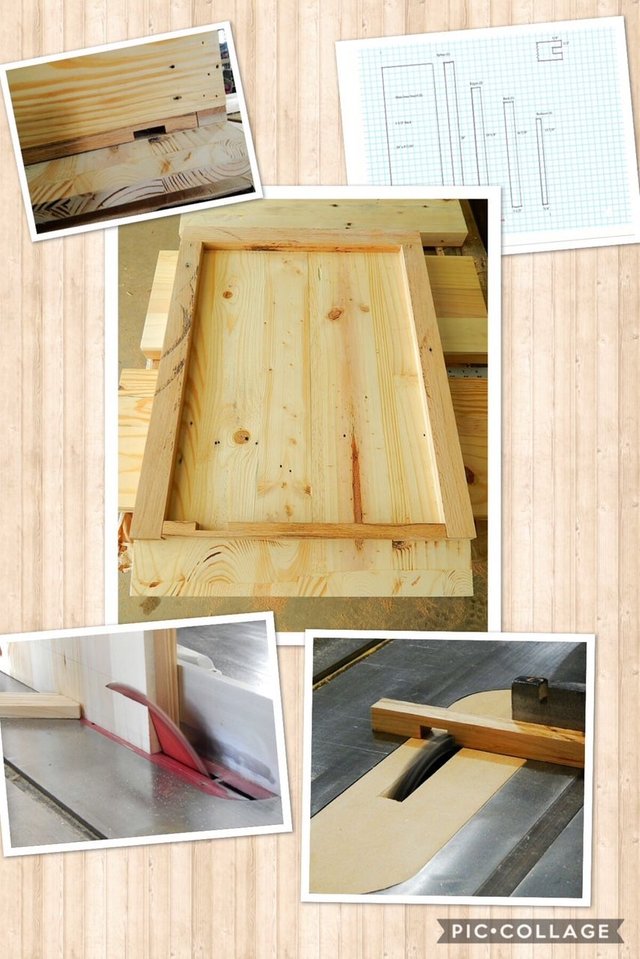
We start with the 3 layer lumber we made for the base and and cut the lumber to the following dimensions;
Base x 2 (24” x 8 7/16” x 1 ½”)
Spline x 1 (24” x 1 ½” x 1/2”)
Perimeter Side x 2 (19 ¾” x 1 ½” x ¾”)
Perimeter Back x 1 (16 7/8” x 1 ½” x ¾”)
Entrance Reducer x 1 (13 7/8” X ¾” x ¾”)
Then we simply glue and clamp the perimeter pieces to the base and its ready for the hive box.
The Hivetop Feeder
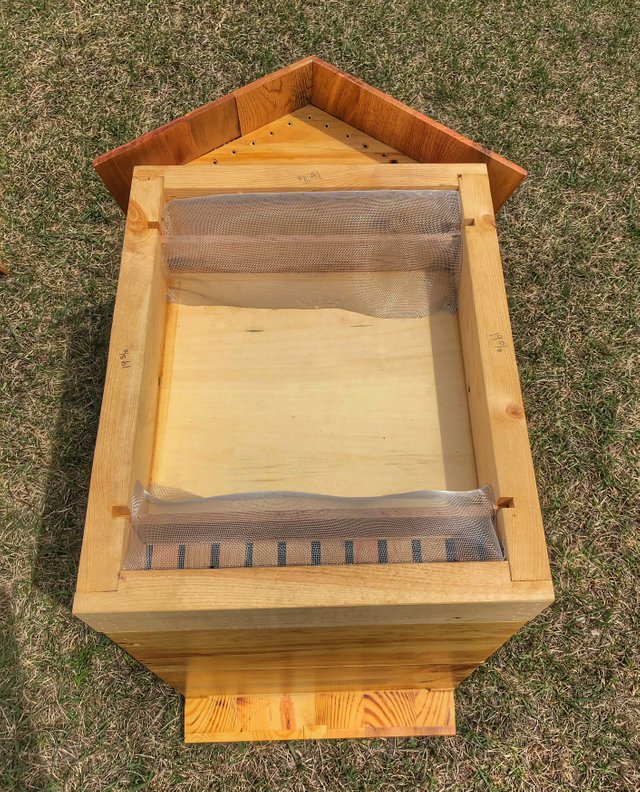
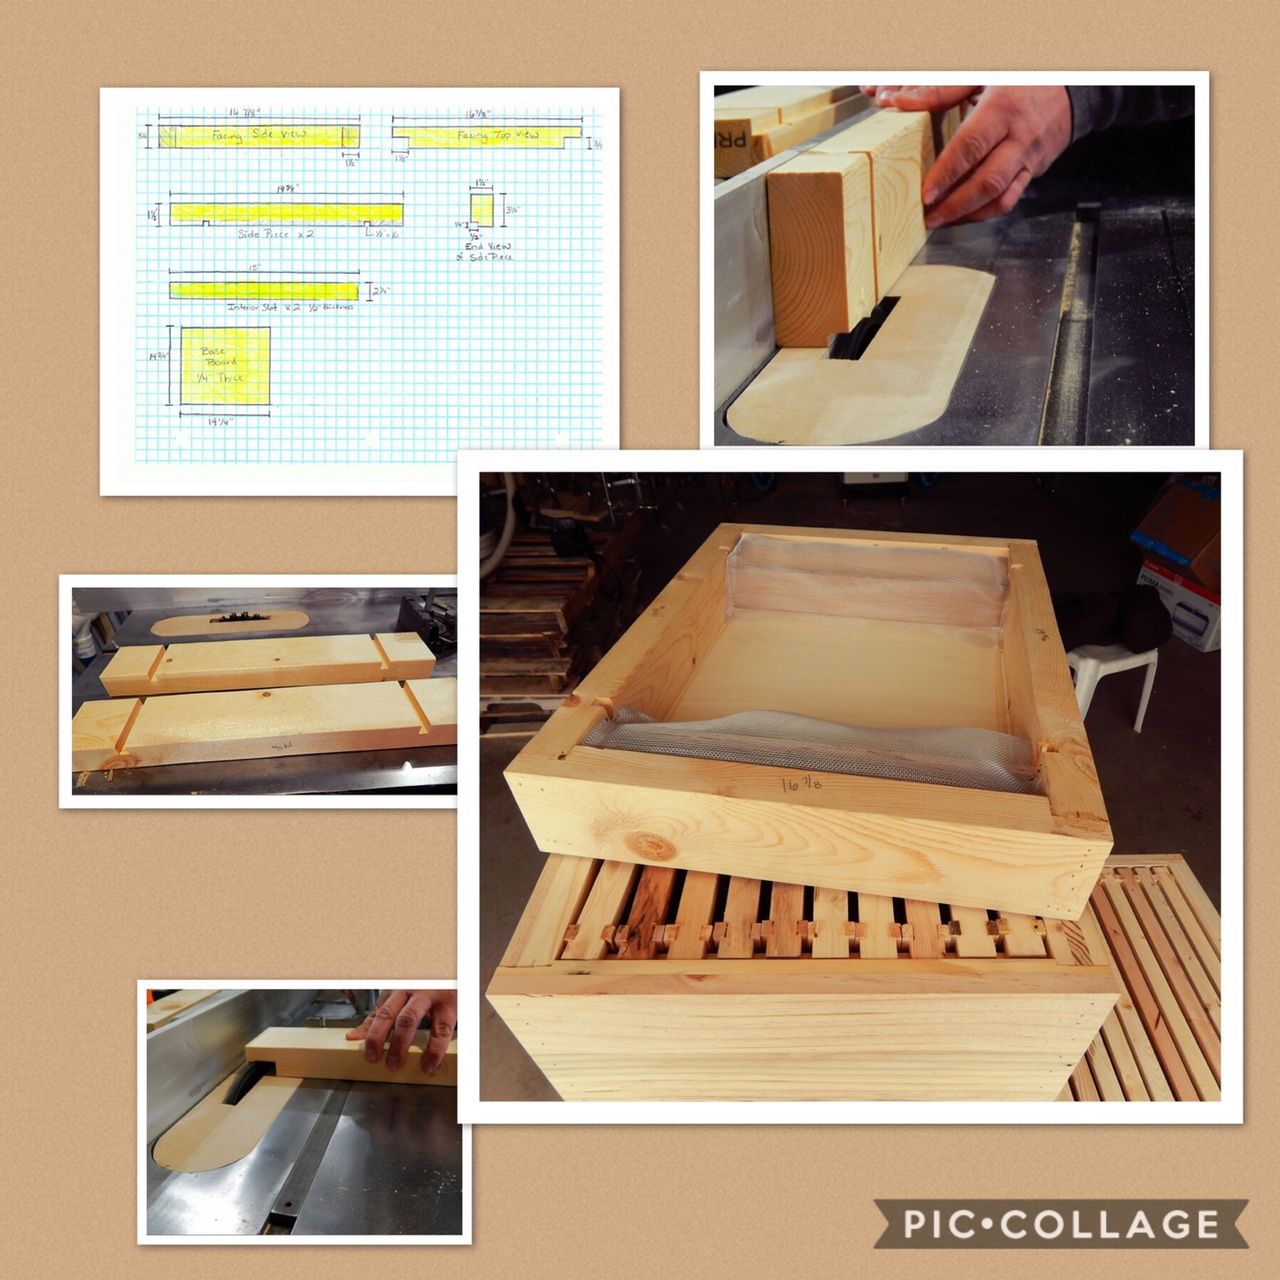
We start with single layer lumber cut into the following dimensions;
19 5/8" x 2
16 7/8" x 2
15" x 2 1/4" x 1/2" x 2
We then secure the pieces using wood glue and a brad nailer, then add in some recycled screen material to allow the bees to access the food without getting trapped in the liquid. Allowing you to give your bees access to the necessary food and water without them having to leave the hive.
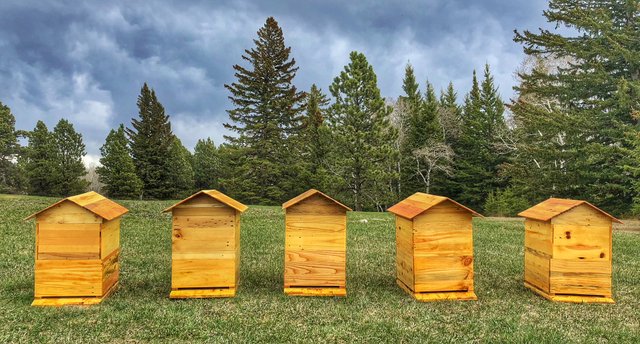
The Complete Hive
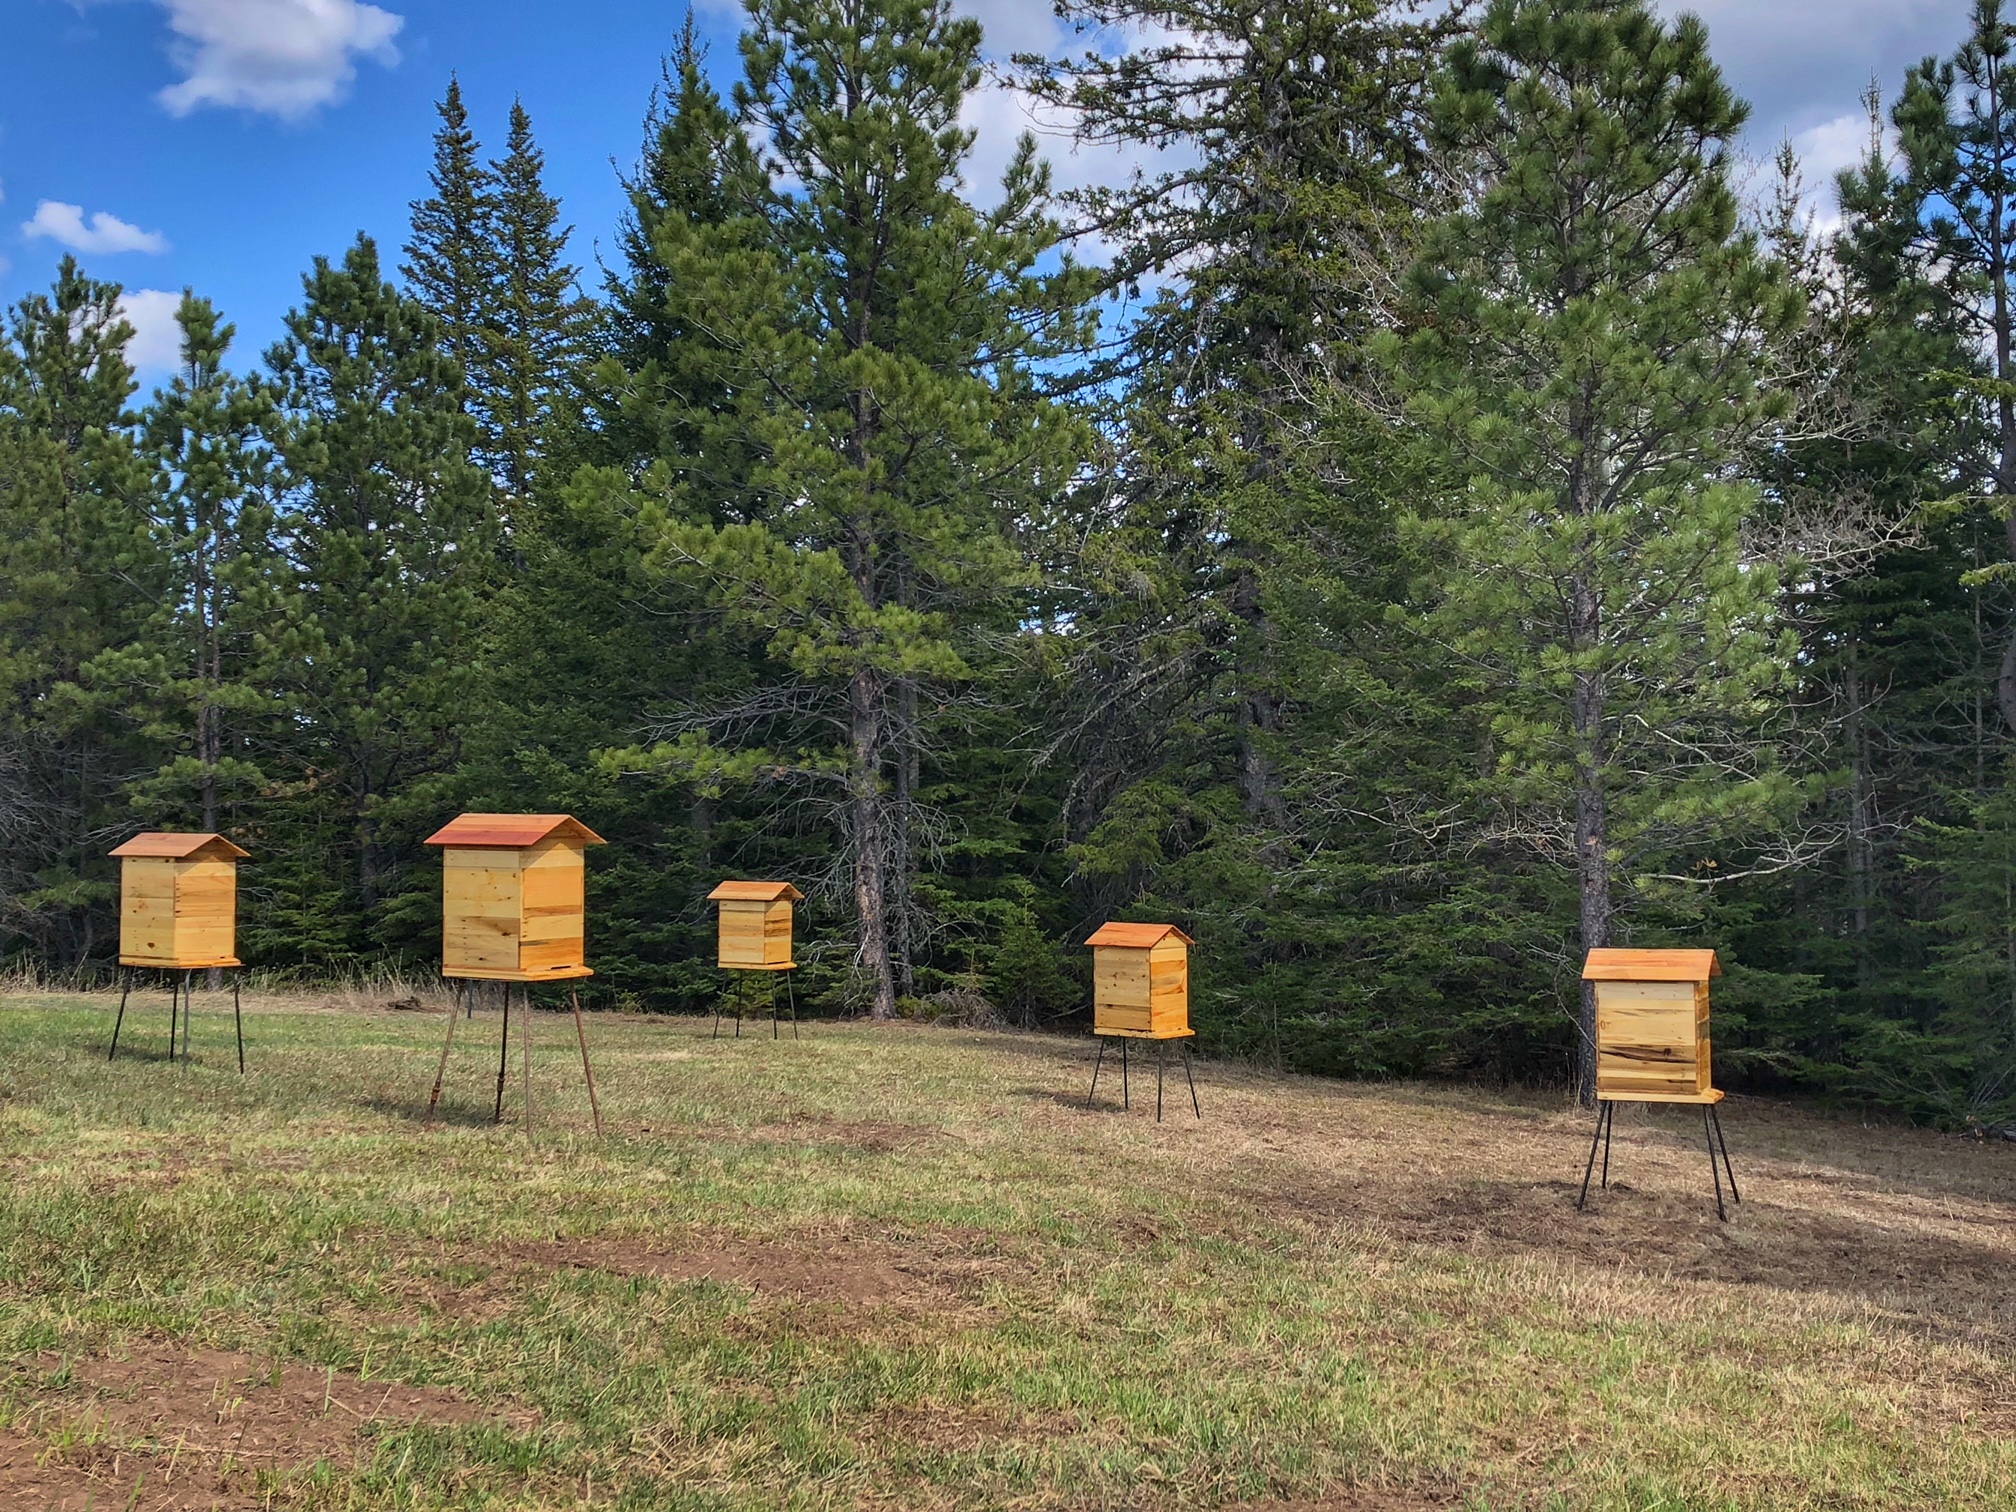
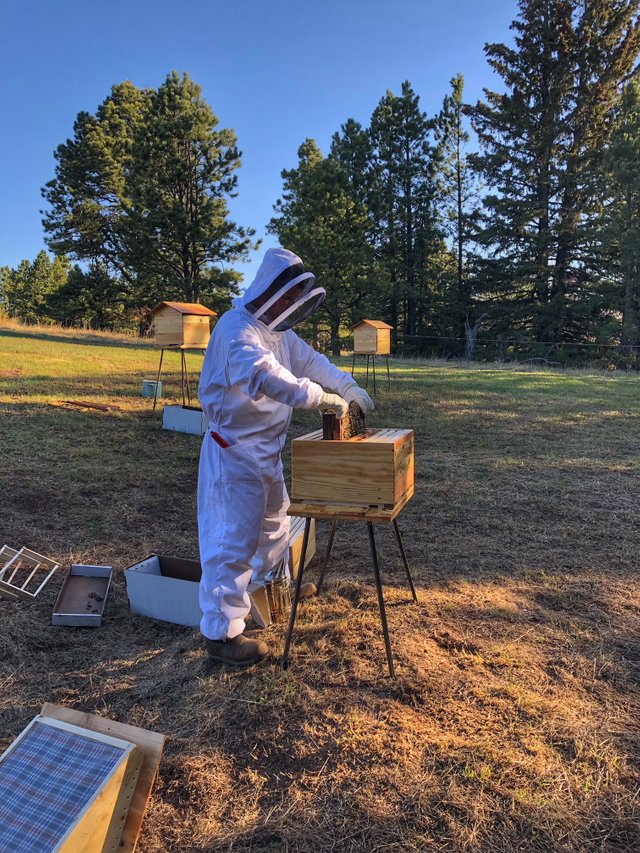
Happy Homesteading!
Loved the post LL. It was nice to learn something new about the R factor and how boxes are designed keeping the bees alive and safe during harsh weather. I need to say that @normok is a rockstar when it comes to woodwork, clean and good looking boxes for bees.
P.S-I loved the astronaut dress you are wearing there :P
Im still sort of rookie when handling the bees. It doesnt take too many mistakes before they let you know theyre not happy. But there are pros out there who handle them like they are ladybugs.
Isn't astronaut suit protective enough? I mean I don't think it could let the sting pass through its layer :D .
Are these your photos too? You did very well on them. I love your bee hives - and I've seen a lot of bee hives - these are very neat and tidy and functional and FREE (except for the building part of the job).
Have you ever visited Funky Junk Interiors on the web? You might like her projects. Most is building from old things and pallets.
Thank you! Yes they are my photos too ❤️.
I haven’t heard of her but will have to check her out thank you! Pallets are such a great free resource
@llfarms Wow!!! this is amazing work from start to finish the principal, the design, the execution the photos and the write-up. this is really inspiring and great content i truly wish my 0.01c upvote was worth more as you deserve it way more than that! upvoted, resteemed and followed so glad i found you
Thank you so much!! This is a project we have been working on for awhile and are so glad to be sharing it here. Thank you so much for your kind words and the resteem, very much appreciated!
Beautiful work! This is so inspiring. They really do look like they are built to stand the test of time!
I have been following your posts. Very nice work!
Thank you so much, we really appreciate your constant support... it really means a lot!
What a fabulous post! So informative and thorough. Craftsmanship is beautiful, you should be proud. @llfarms Nothing is better than recycle, reuse. I am a firm believer in this. The hive are so beautiful. I can't amazing the honey you will have. Love, Love, Love it!
Oh man, I’m dreaming of all the honey we are gonna have this year, So exciting! Thank you!! Yeah we really try to focus on not only making things ourselves but using scrap or free material that would normally be thrown away and transforming it into something new.
Damn! Now I see why your standards for those homesteading posts are so high. Promise I'll think twice before asking your opinion of any of them in the future; though I'm sure if we held all of them to this standard we won't find any quite worthy. This is too dope! Way too dope. You make me want to have myself some bees.
Cheers,
Ras.
Much respect and admiration here... The love and care you take with building all this, and making this detailed post complete with beautiful pictures... I'm impressed and love what you do! Thanks, @llfarms, for sharing the wisdom and love :-) <3
P.s.
I remember from a couple years ago this worldwide panick in the news about bees dying or disappearing everywhere... Did you notice any of that? Just curious...
Thank you so much!!! Yes, there is definitely a decline and with that comes concern of what happens if bees are no longer able to pollinate and therefore how that would effect the food supply. They help our personal crops as well as the surrounding forest areas, so they will always have a home on our homestead... plus I have an unhealthy obsession with honey 🙊
Hi @llfarms ,
The new Curie Author Showcase which features this post is now posted and ready for viewing.
Thanks for being a part of it.
Gene (@curie Curator)
What an incredible post! So detailed and specific. Not to mention the great photos! I am resteeming!