Byteball Bot Wars progress report - Github Attestation Bot
Repository
https://github.com/git-ball/github-attestation
Introduction
Well, I hope it's not too late to submit my first and last report (better late rather than not 😭). This is just a simple attestation bot that attests your Github profile. I participate Byteball Use-a-Thon before with this idea and this bot is a small step to realize that idea. I try to write it as simple as possible which resulting that it only has ~100 lines of code 😆 (it probably will be reduced more once I refactor the library that I create).
What takes it so long?
If you read the code, you will notice that I don't use the headless-wallet as the dependency. That's because I wrap and shim it on a library that I create called botbyte (I will give more details later in utopian post after cleaning it up). It took a while to understand byteballcore and headless-byteball and I often bump into a problem like can't run the example bot, IP banned from the Testnet hub (thanks to @papabyte for creating a relay for me that I can avoid IP ban 🤗), and many more. Most of the time I ask those problems in slack on the #tech channel at weekend and salute to all core developer for trying to answer my problem 🥺. I hope for a technical discussion and Q&A, I can ask it on discord or other chat that not limit the chat history because I sometimes search chat history for previous answer/quote.

How it works (technical)
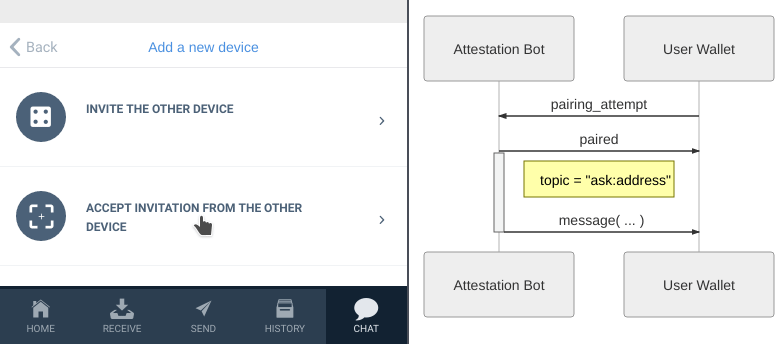
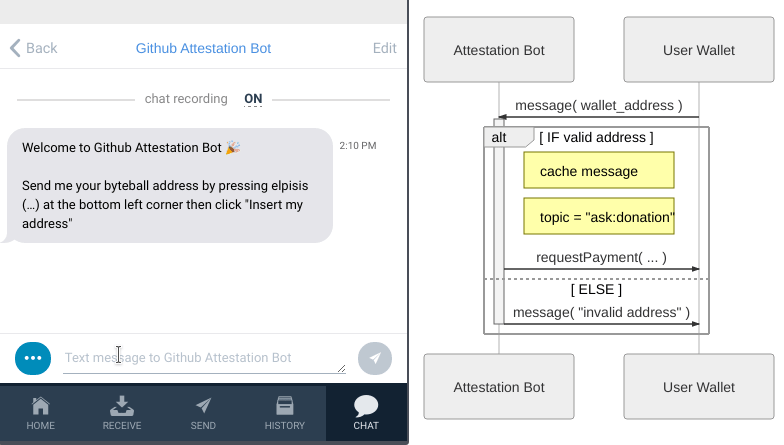
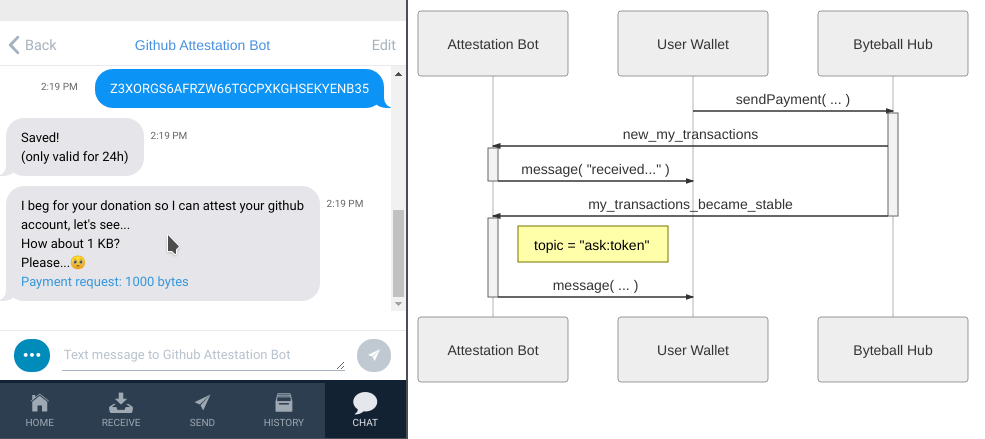
First, I split it into 3 topics: ask:address, ask:donation, and ask:gh_token. Each topic will move to another topic when a specific event happens. For example, when someone pair into this bot, it will enter to topic ask:address.[ref] The conversation will move from topic ask:address to ask:donation when the bot receive a text message of a valid wallet address.[ref]. The benefit from using this concept is to ensure the flow of the program, especially if it listen to many events. On the higher level, this is the flow conversation of this bot:

Each conversation is unique which is stored on the cache storage with device_address as the key to access it. The cache will persist only for 24 hours. This makes the bot can only remember the conversation that happened 24 hours before. After 24 hours, the bot can't continue the conversation. In other words, the attestation must be done within 24 hours 😆
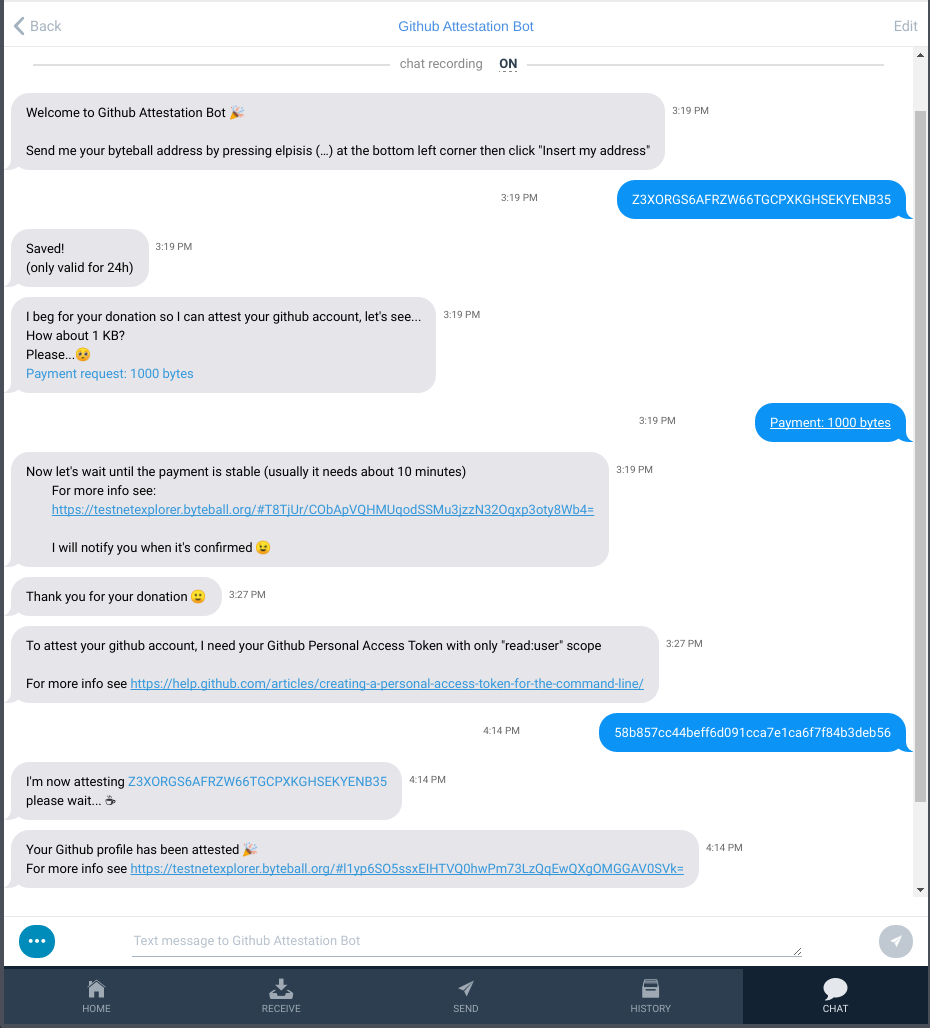
From the user perspective, the attestation consists of 4 steps:
for the full diagram, see here
1. Pairing [code]
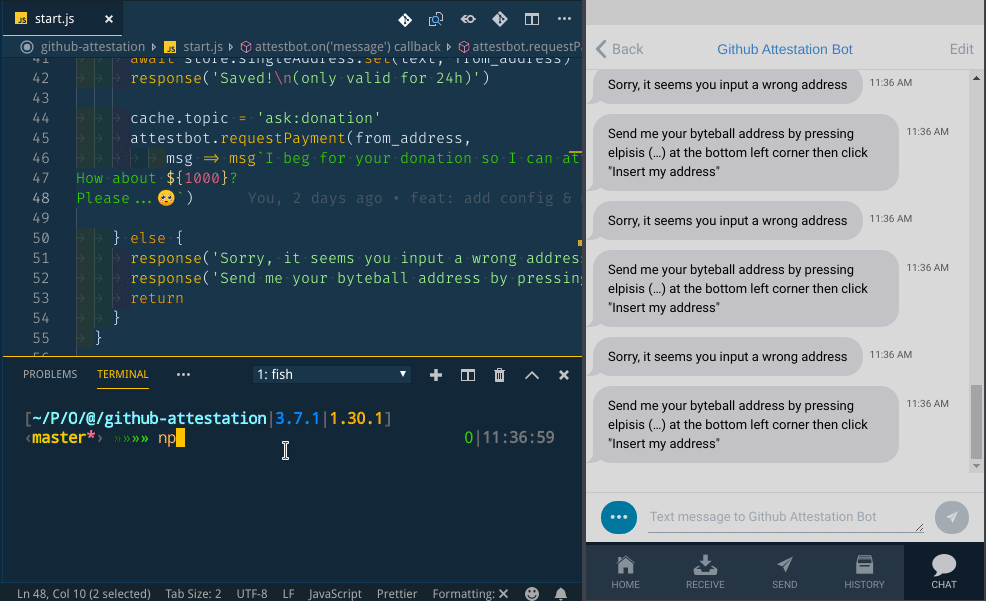
This is the first step when the bot gets into the topic. When the pairing successful, it will enter the topic ask:address which the bot will send a message asking them to send their wallet address. This is also the first time the cache storage get populated.
2. Send wallet address [code]
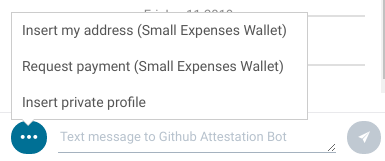
In this event, when the user sends a valid wallet address, it will move the topic conversation from ask:address into ask:donation which the bot will send a payment request to the user. In this case, the bot will ask for donation about 1000 bytes. Also, since the incoming payment/transaction event (my_transactions_became_stable and new_my_transactions) doesn't expose the device address like in pairing or incoming message (probably security reason), I need to cache the device address based on the wallet address that the user sends. (see start.js#L40-L41)
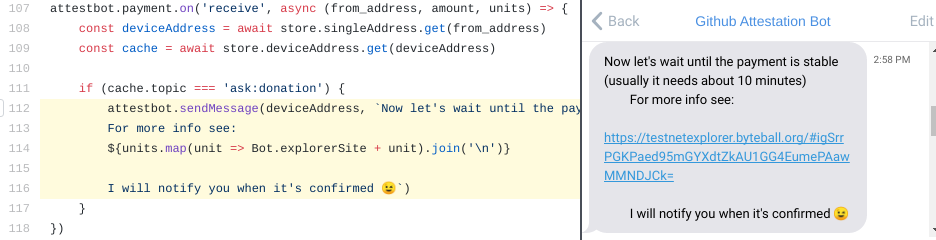
3. Send payment [code]
[8 minutes later]
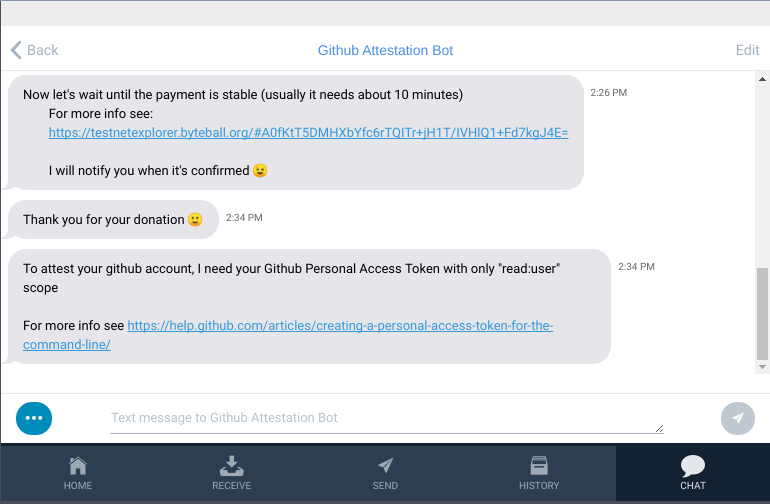
When user send any amount of payment and the transaction was stable/confirmed, the bot will move the topic conversation from
ask:donation to ask:gh_token then message the user asking for their Github personal access token.
For me, this is the trickiest part. When I look at the bot-example code, I notice there are parameter device_address_determined_by_analyzing_the_payment. I try to dig it more what it's mean and found out that in any event related to the payment transaction, I can only get the wallet address and not the device address. I guess it's because the user wallet sends the payment unit to the hub then the hub will notify the bot when there is a transaction addressed to the bot. I guess this is the reason why this button exists 🤔
4. Send Github Personal Access Token [code]
To create your own Github Personal Access Token, open https://github.com/settings/tokens/new

This is the last step of this attestation bot. Ideally, when we are talking about a service that connects/integrate with Github, it's better to register it as Github Apps or OAuth Apps. However, this attestation bot will only interact with the Github API once (for each user) so there is no need to register it as Github/OAuth Apps, it just needs the personal access token. After it's attested, the user can remove their Github token.
Other stuff + Lesson learned (tips & trick)
When fiddling around with this bot, there is some tricks that I use to make the development enjoyable.
1. Use live-reload
For people who have tasted the front-end development in this century wouldn't want to kill and start an application manually because less time to do something manually means less stress. Since I'm using bundler, I run the bundler in watch mode then run the bundle result when the compiling process is finished. For people who don't want to use a bundler just for a simple application, you can still use nodemon or pm2.
2. Beware of template literals
Becarefull of using template literals when developing a chatbot. Not many chat application trim the trailing whitespace or indentation. To much indentation in the template literals can make your chat message unreadable 😂
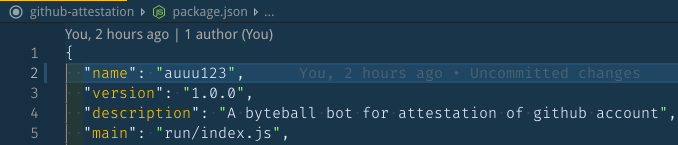
3. Change package.name when you want to start a fresh new bot
If you look at this line, you might notice that it will respect the field name in your package.json file. The name will respect on the folder name that the bot will save the data. So changing the field name in your package.json file will start a new fresh bot.
Parting words
There is a lot of things that I want to try like deploy it in SBC like Raspberry Pi then connect it with ESP8266, communicate with a microcontroller using Byteduino, try to fiddle around with the smart contracts, and many more. I guess I'm out of time for that 😅. I'm aware that the Byteball developer ecosystem is still in growth but overall it quite interesting how the byteballcore was built (I guess it's written before es6 appear). Their approach (in term of software development) is quite simple and yet it solves the fundamental problem (as a result the byteball have many features built-in). I'm looking forward to the growth of the Byteball developer ecosystem.
Check the README on how to run it. There is also a Heroku button if you want to deploy it 😉
If anyone wants to improve it and host it on a better server, feel free to DM me. I will transfer the ownership of the repo to your github organization.
I love it! Good start.
Thanks 😊
Posted using Partiko Android
Congratulations @drsensor! You received a personal award!
You can view your badges on your Steem Board and compare to others on the Steem Ranking
Vote for @Steemitboard as a witness to get one more award and increased upvotes!