Do It Yourself - Save $$$ by replacing your BMW's Brakediscs and Pads in OEM style yourself (E46, E39, E38, etc.) - 2020 Part 3
Welcome back fellow Steemians to Part 3 of my 2020 'reverse shop diary' on my 1999 BMW 320i which is nearing completion and is about to go to the German biannual technical check > TUV!

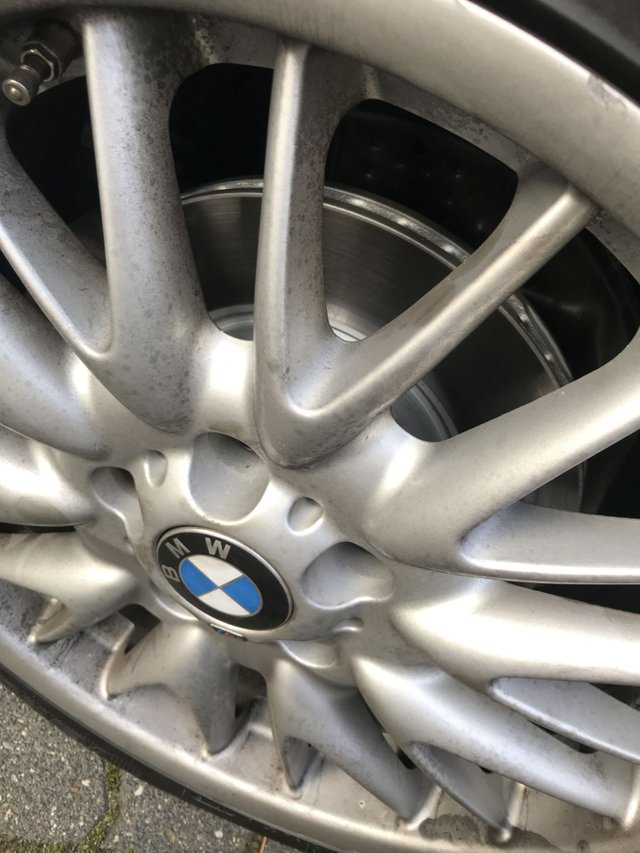
Before going there I needed to take care of my brakes though, specifically the front ones as the discs and pads were unchanged since I bought the car 6 years and 60.000mls/100.000km ago - needless to say they were completely shot.
Ironically they still performed well and without any noise or error code which speaks volumes to the quality of the parts - whose origin I don't know as I bought the car with these brakes.
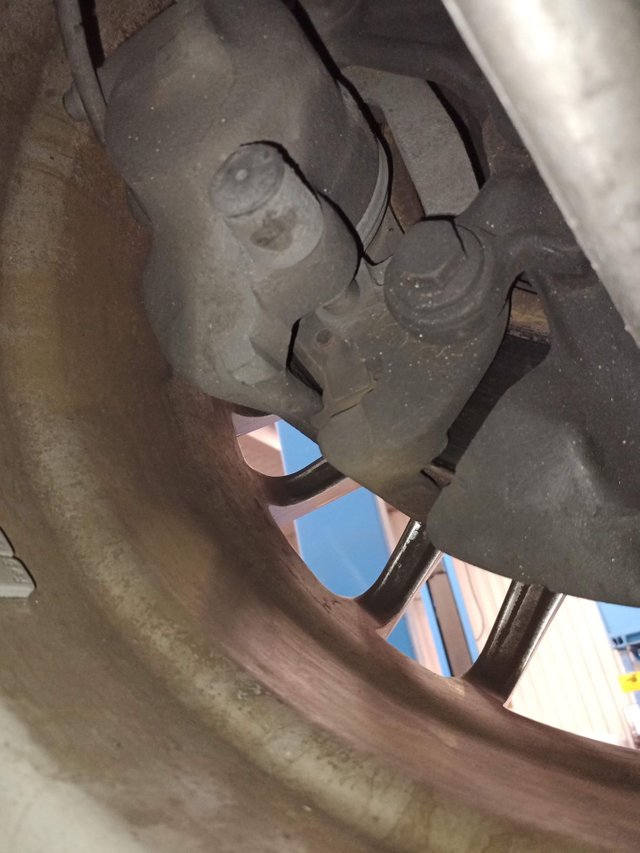
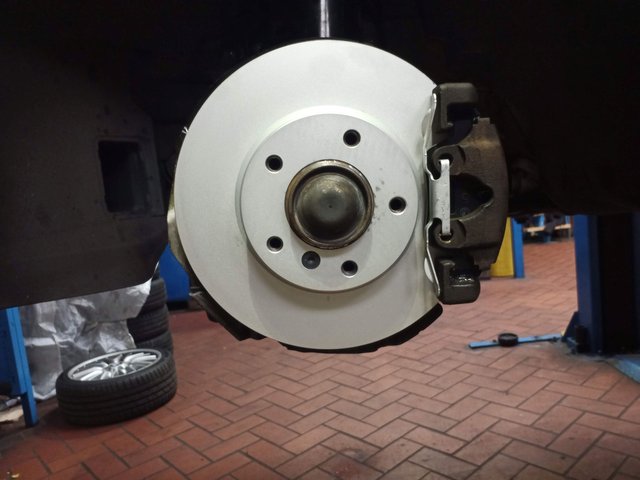
Here you can see 'somewhat' of a lip on the rotors:
Still I believe that these were genuine BMW rotors as they didn't show any sign of vibration, fatigue or loss of performance to the very end which usually only genuine rotors do.
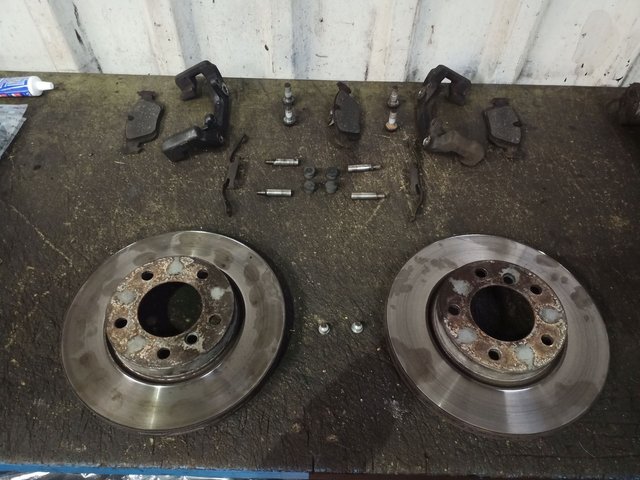
Required Parts
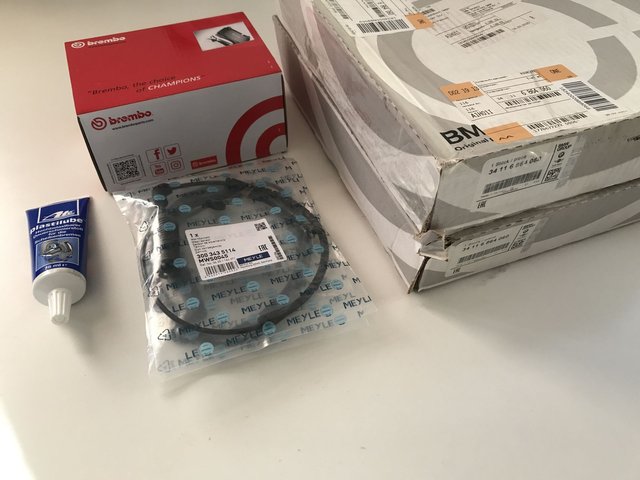
Before going in I bought the following:
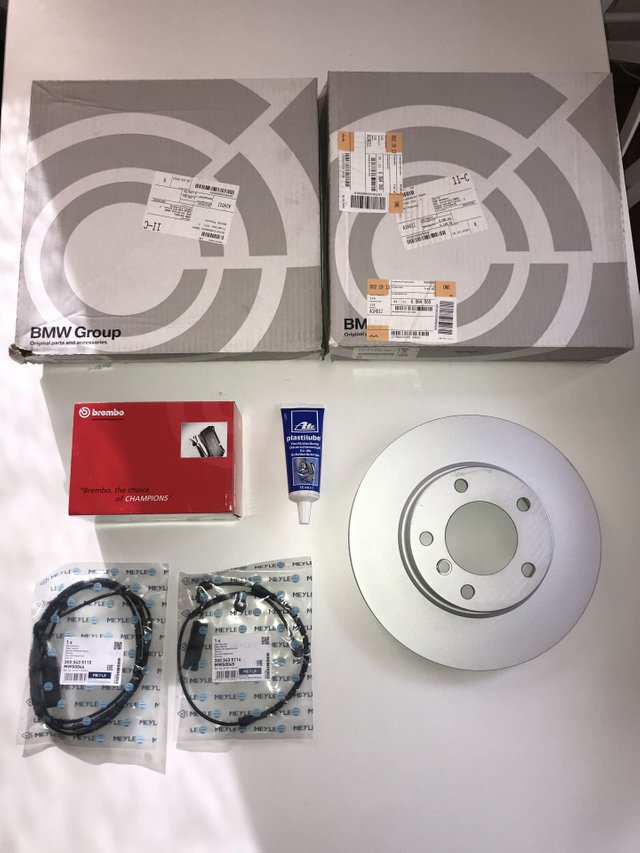
2 genuine BMW ventilated front rotors (286x22mm)
BREMBO brake pads front and rear
Meyle wear sensors front and rear
ATE Plastilube lubricant for disc brakes
We'll be only using one of the wear sensors as there's only one per axle.
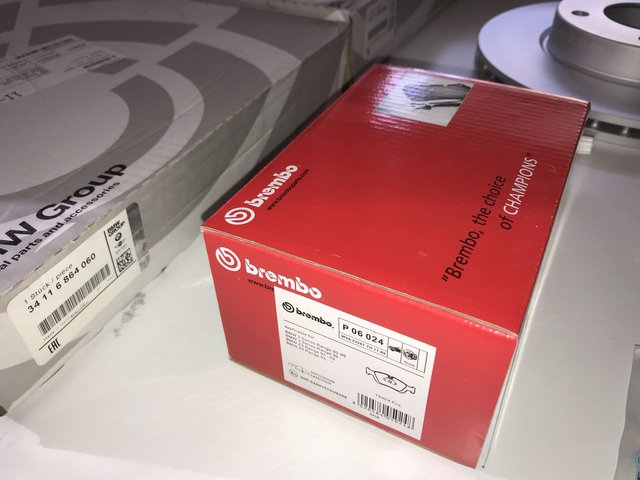
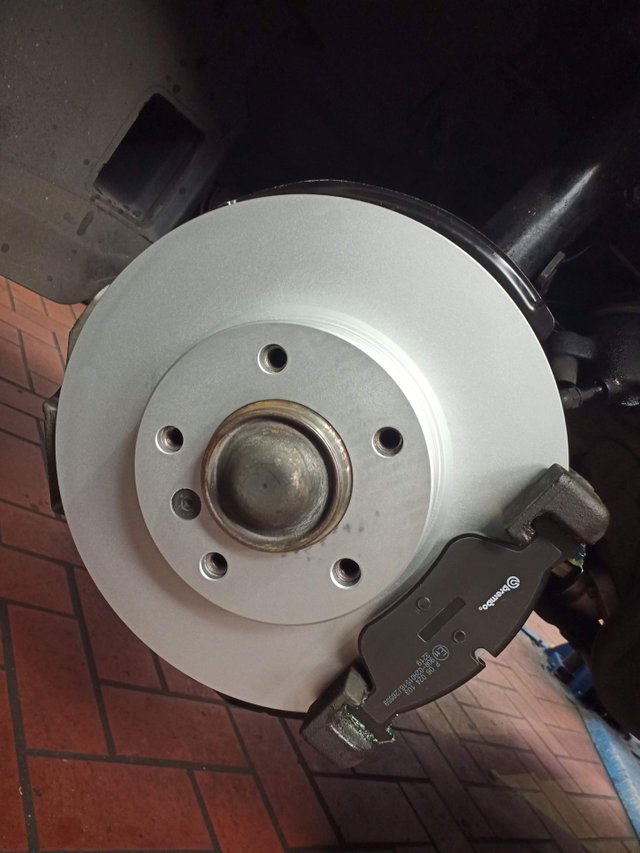
I did not have any prior experience with Brembo brake pads but so far I must say they seem to be of the highest quality:
As for the discs, there are cheaper ones out there but at a unit cost of EUR 68.89 for a total of EUR 137.78 I went for original as brakes are quite important and the vibration and fading on non-OEM parts has a long history.
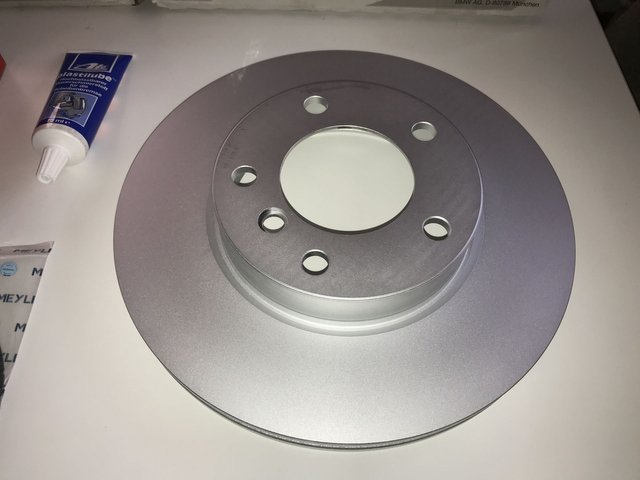
As you'll see later these discs are also BMW stamped and come directly from the manufacturer.
There are a few other parts you don't have to replace but I went for it as it was my first brake job on this car and I probably won't have to do it again anytime soon.
The caliper bracket is fixed with two 16mm bolts to the front wheel carrier. This being a floating caliper disc brake design the caliper which houses the piston is fixed with two guide pins (also bolts) to the caliper bracket. You can see a dust cap which should be black but is now almost indistinguishably grey which cover the guide pins next to the bolts.
I bought 4 new bolts and 4 new dust caps, guide pins were fine on my car so I didn't buy them. Also one guide bolt costs EUR 22+ so only replace them if necessary.
The only other part I bought was 2 new arresting springs that keep the outside brake pad in the right position in the caliper.
Here are most of the tools you'll need plus a 16mm socket with a long extension!
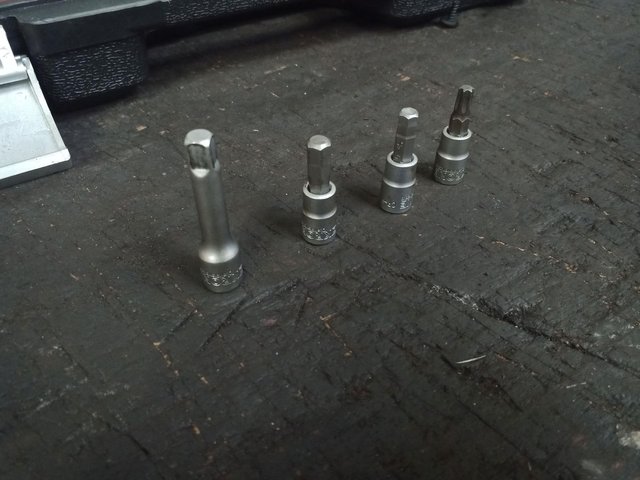
On to the job then...
Replacing Front Brakes on an E46 BMW
This operation is equivalent on E36, E38, E39 and countless other BMWs and cars in general if they have a floating caliper design with wear sensors and ABS.
Removing the brake system
After removing the wheel we're greeted by this, I've removed the arresting spring already:
First of all remove the wear sensor from the pad:

Start opening the sensor housing in the wheel well and free the entire cable from the connector to the brake but don't remove it yet.
NOTE: Before doing anything around the caliper, open the brake fluid reservoir and put a rag around the opening to prevent overflow when you push the piston back later on!
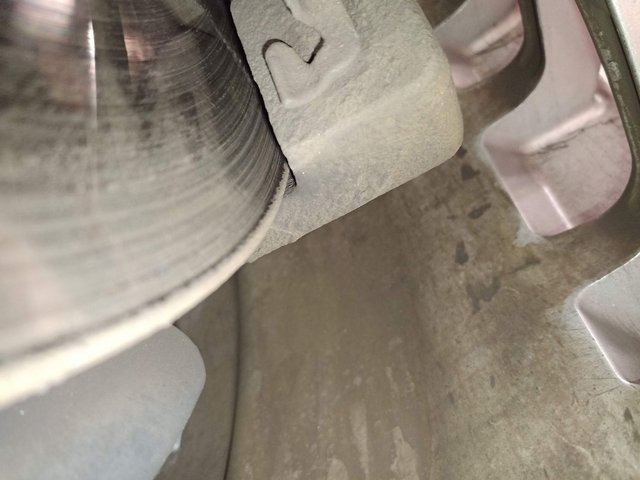
Lubricate and remove the two guidance bolt dust caps and remove them, here you can see the thread coming out of the brake pad, you'll have to do quite some wrenching to get these out all the way:
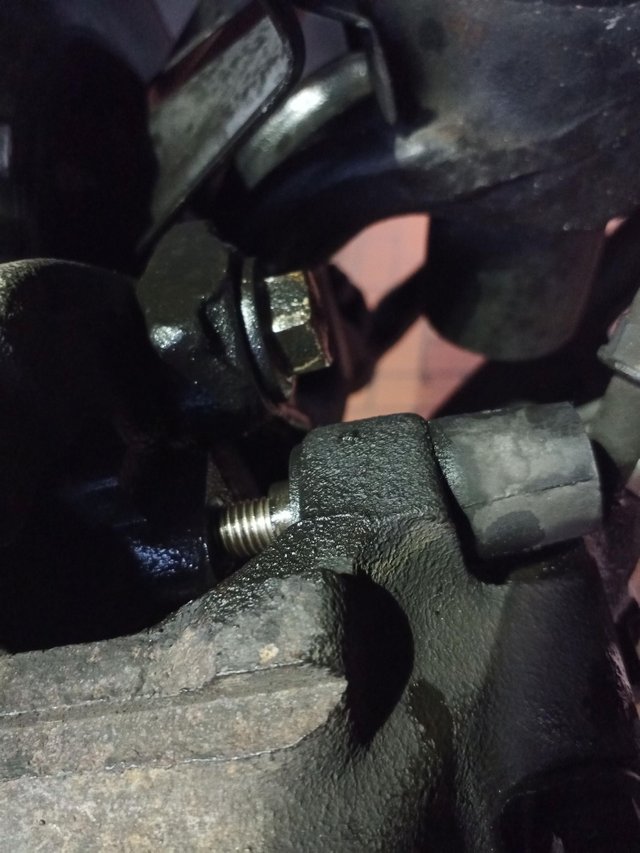
As you can see I've lubricated the two 16mm bolts that hold the bracket already - these will be hard to loosen!
After having removed the guide bolts and wear sensor you can slide the caliper with the pads off of the brake disc.
Use some cable clamps to tie the caliper to the front strut so as to not stretch the brake line unnecessarily.
Now all you have to do is get these two 16mm bolts loose and off of the car and you can remove the bracket as well.
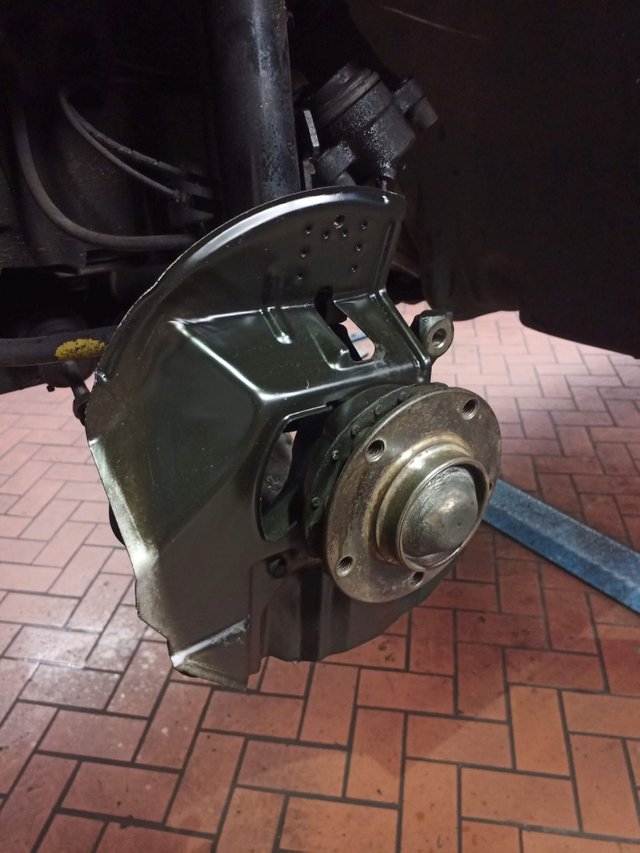
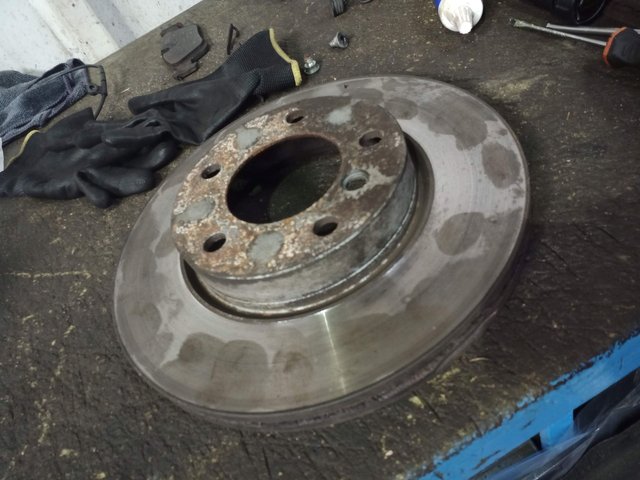
You can now loosen the brake disc arresting bolt and hammer the old disc off of the wheel hub et voila:
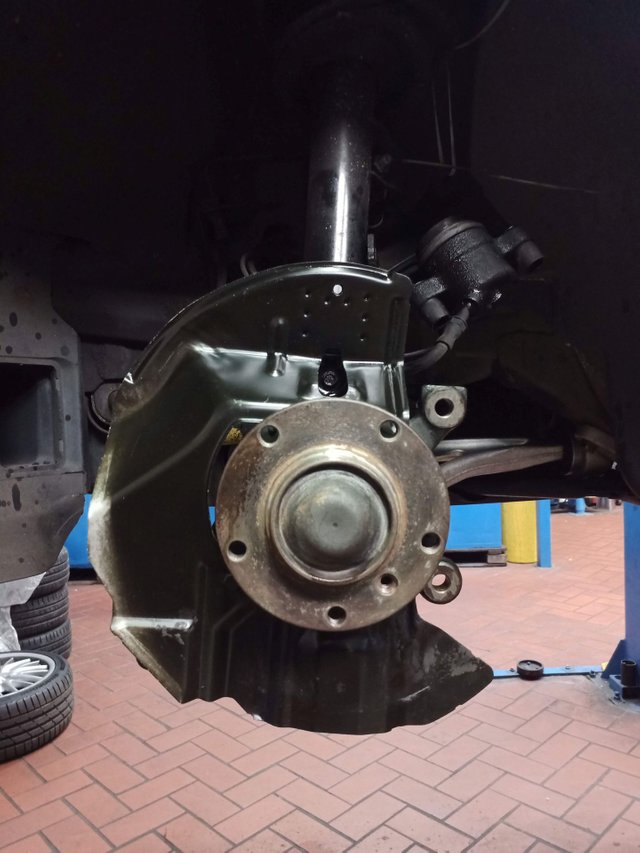
You can see my caliper 'hanging' in the background. Now use some brake cleaner and a metal brush to thoroughly clean the wheel hub and ideally also the anchor plate:
I was quite amazed how well these parts looked after the cleaning given the likely age of 20+ years and mileage of over 405.000km!
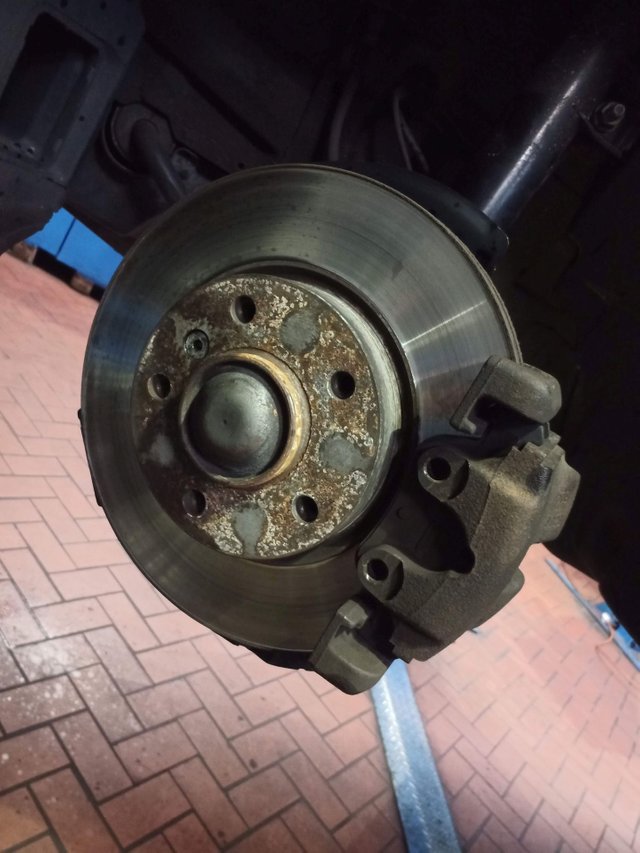
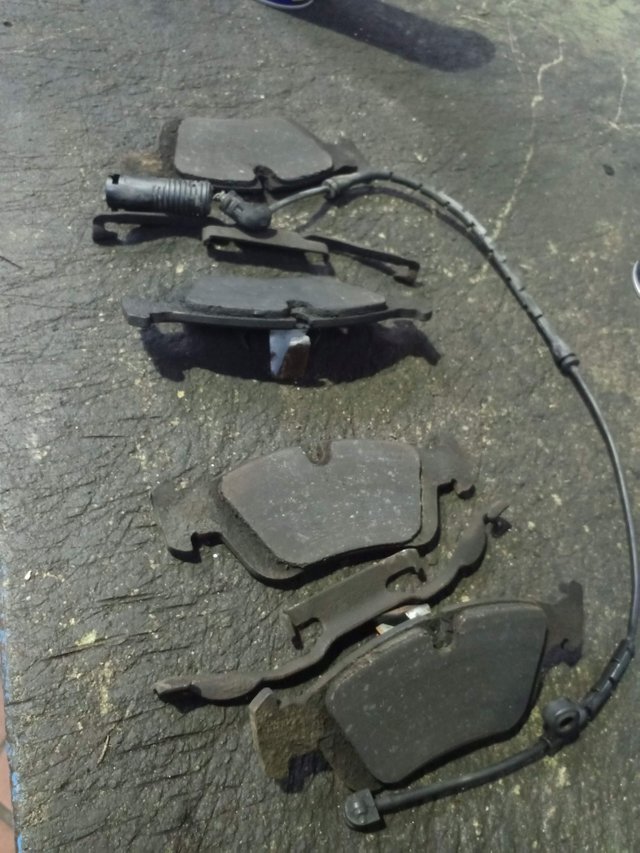
Examining the old parts
Well there we are. I must say these are some of the most worn brakes, discs and pads, I've ever seen. The wear sensor must have broken down as it is beyond me how it could not have thrown an error code with the pad level down this much.
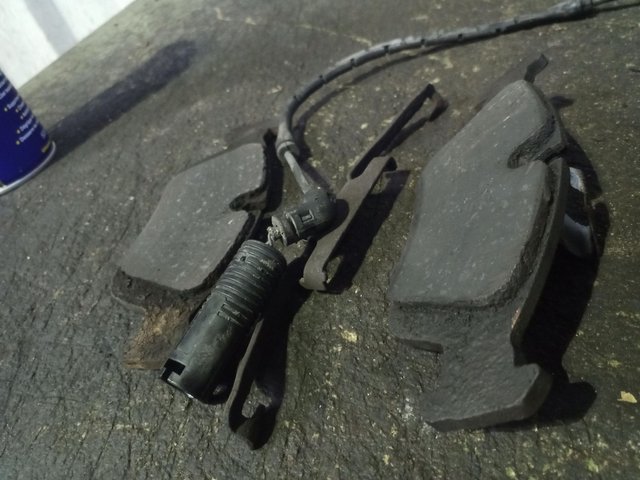
These are done!
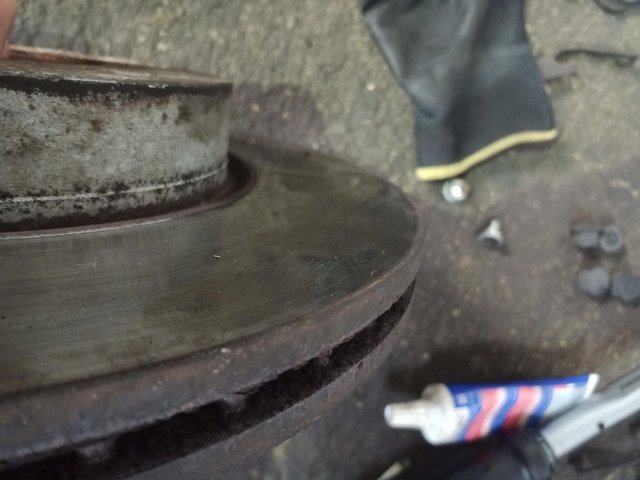
That is done!. Note the lip around the inside of the disc - totally shot.
There's still some material on there but overall it wouldn't have been long until the caliper goes into the disc so good to have done this now!
Installing the new brake
Before installation make sure to clean the old parts you'll be reusing in my case:
- calipers
- caliper brackets
- caliper guide bolts (make sure these are like new!)
NOTE: Contrary to some online tutorials you should not treat or cover the wheel hub with any lubricant whatsoever. According to BMW shop manuals and common experience any excess material will lead to a misalignment of the new brake disc and wheel hub and lead to vibration, shaking, lack of performance, premature tear and wear and follow on damage. So give it a good clean until the surface is silky smooth and then put the new brake disc on the hub.
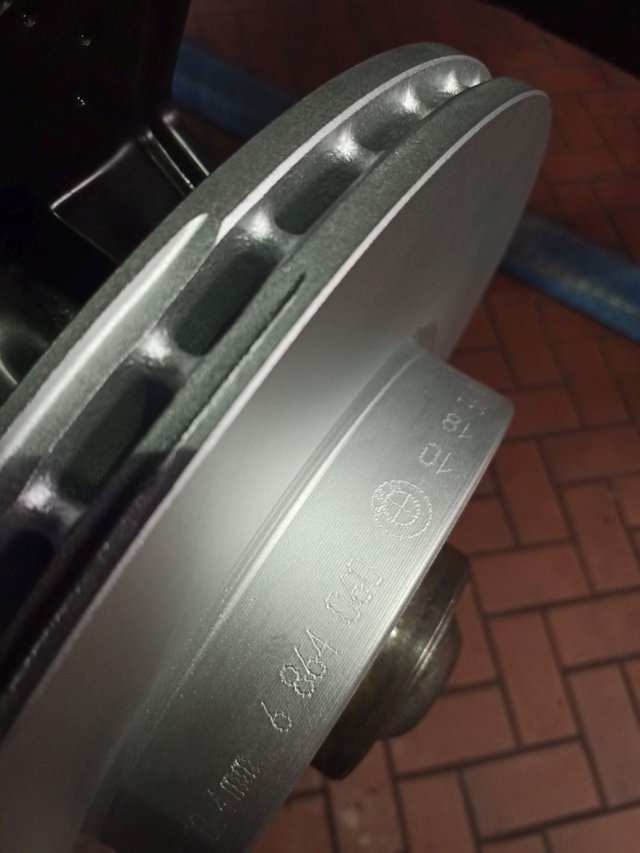
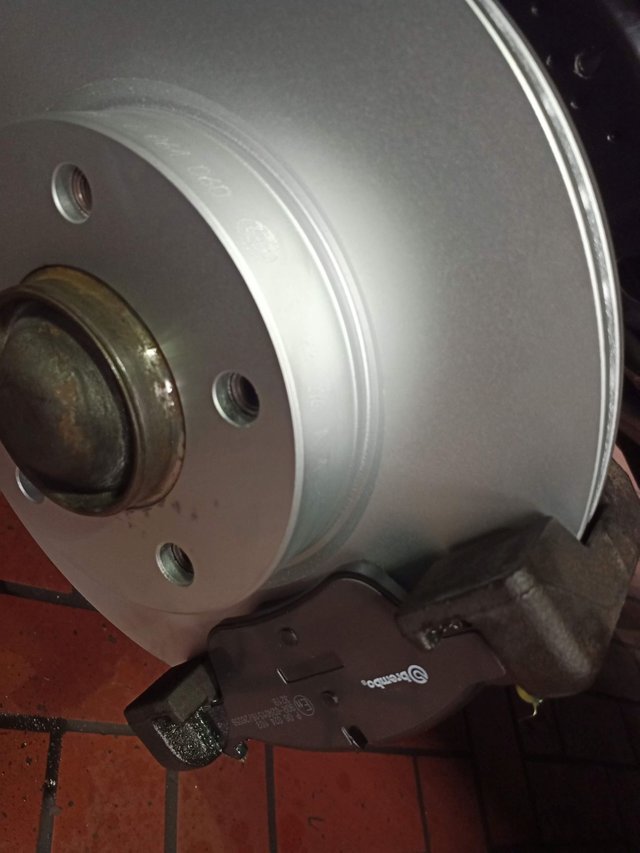
You can see the etched BMW logo and part number - definitely a nice piece of machinery!
Next you'll have to thoroughly clean your caliper bracket - your new brake pads will travel in it so any area around the edges needs to be cleaned with a metal and or wire brush (I actually used a big and a small one) and subsequently lubricated with the ATE Plastilube disc brake lubricant or equivalent.
Brake Disc to Wheel Hub > Torque to 16NM.
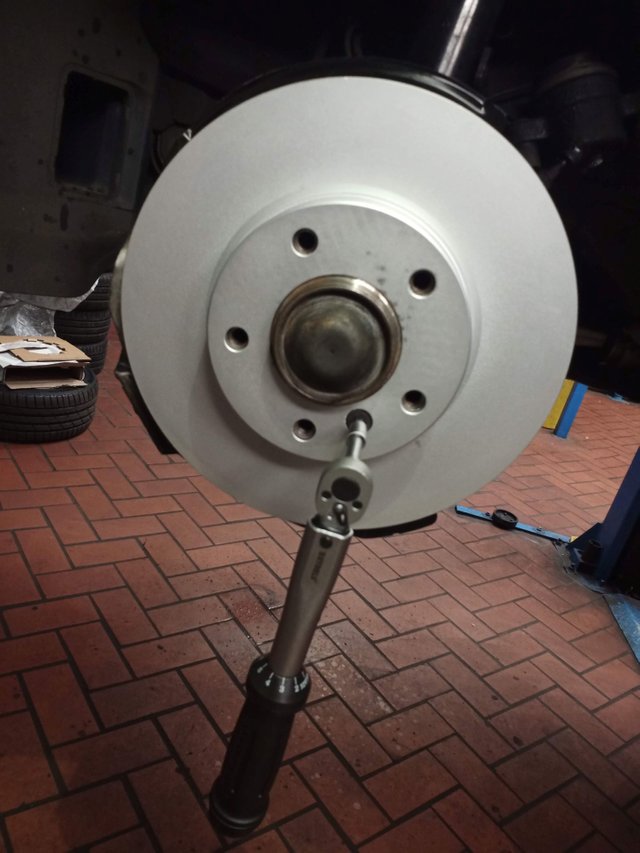
For this I used my 'small' torque wrench.
Reattach the brake caliper bracket to the wheel hub carrier and tighten the 16mm bolts:
You can now slide in the outside brake pad into the bracket.
Caliper Bracket to Wheel Carrier > Torque to 110NM.
Here the other side:

I actually did this job sort of synchronized for both sides just because I was tired to always do one side first and then the other :).
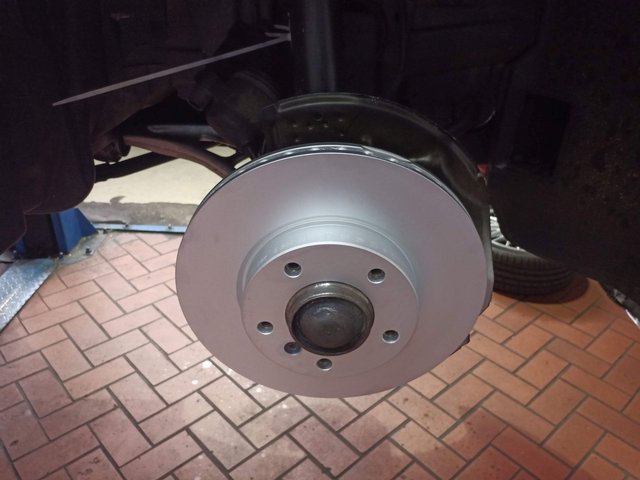
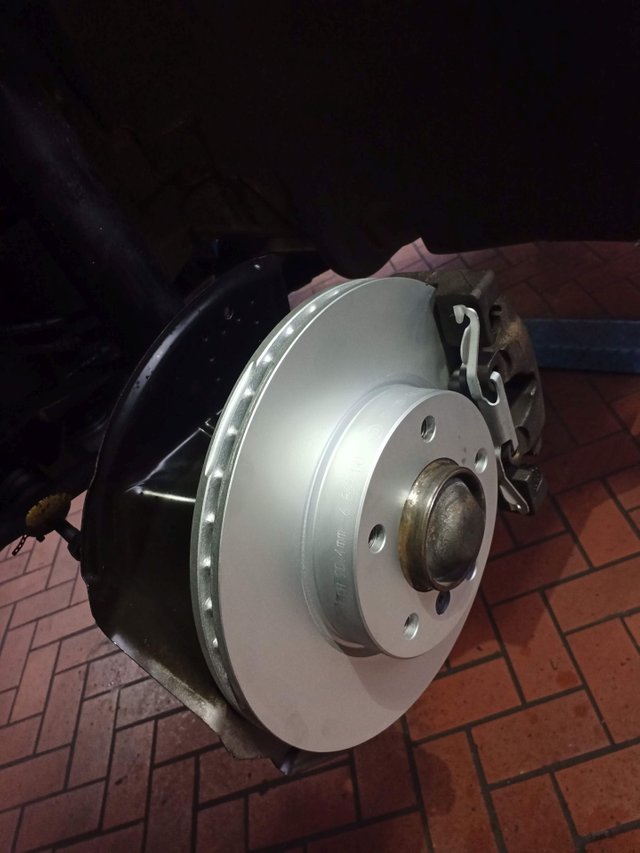
Looking quite nice already:
Next you want to use some large pliers or a specialty tool to push the brake caliper piston back into its zero position, it needs to go back all the way!
Now clean and lubricate the brake pad rails on the caliper and push the inside brake pad into the caliper until it clicks.
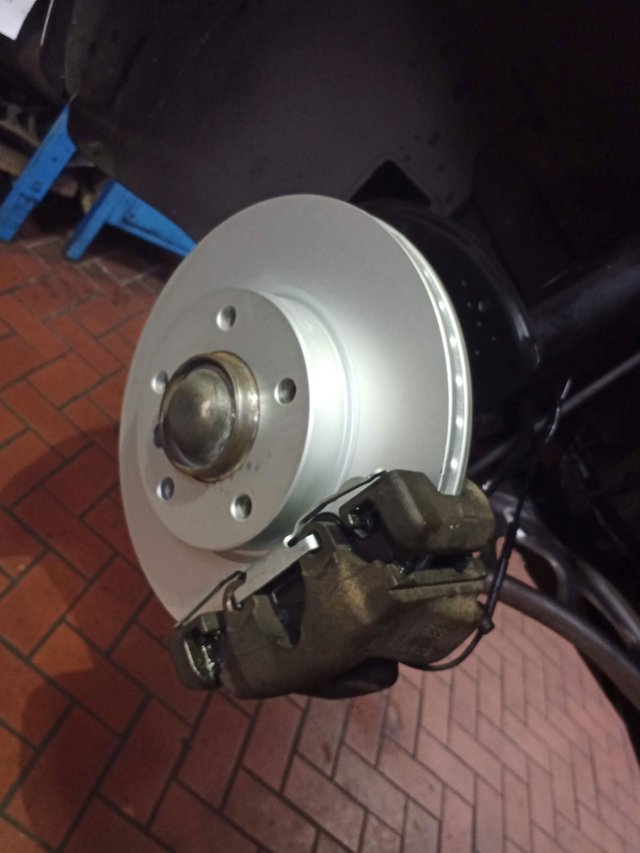
You can now slide the caliper back over the new disc into position, you can also snap on the brake caliper arresting spring now:
Next up take your guiding bolts and lubricate them with Plastilube - do not put any lubricant on the bolt thread!
Slide the guide bolts back in and tighten them.
Caliper to Bracket Guide Bolts > Torque to 30NM.
Put the dust boots in - in my case I used new ones.
Now it's time to guide the new wear sensor from the connector box along the front strut through the vent screw on the caliper to the brake pad and that is it.
Brake is done - it should take no more than 2 hours for both sides.
You can now put the wheel back on and tighten the lugs to the regular 120NM.
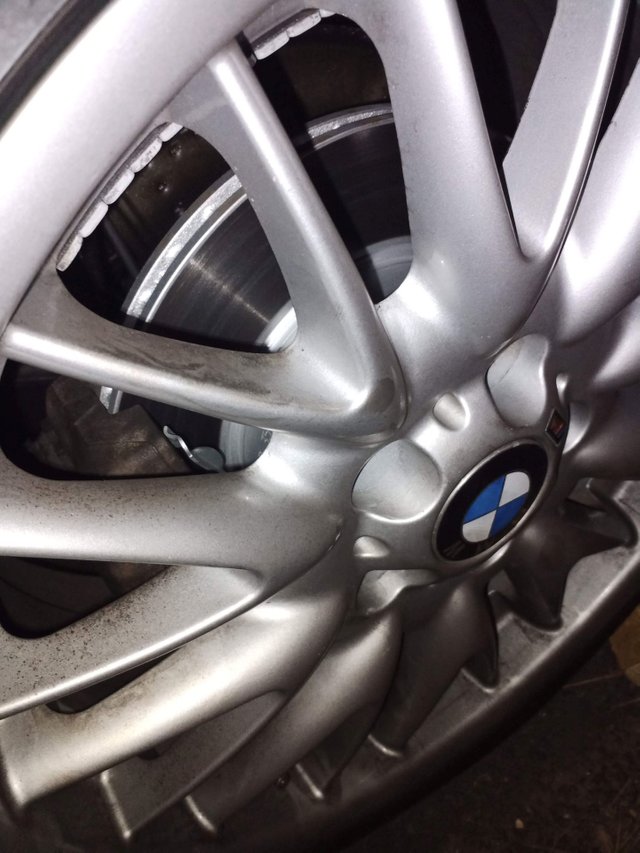
Now you should take a minute to marvel at your new brakes through the wheel:
Final steps
After lowering the car back down you need to get in and move the key into position 2 and carefully press the brake pedal a few times until you feel some resistance > do not push it in all the way.
You have just pressed the piston back against the disc and leveled the brake bluid level in the reservoir. You should now either add or remove fluid from the reservoir until it is level at the 'MAX' indicator.
In my case I actually had to pump fluid out which makes sense as my discs and pads were so worn that the piston sat further back with the new disc and new thicker pads.
Brake fluid should be changed every two years!
You can now reset the service indicator by bridging Pin 7 to ground (Pin 19) in the service connector:
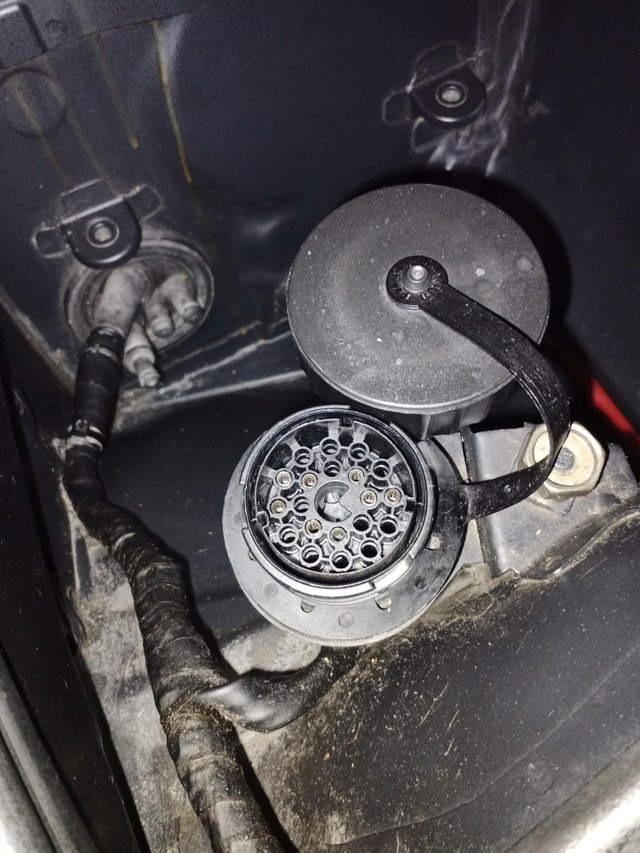
Ground Pin 7 for 12 seconds to reset the service and brake fluid light > The clock symbol you see in your gauge cluster is the symbol for brake fluid change overdue!
Here the cluster after reset and startup:
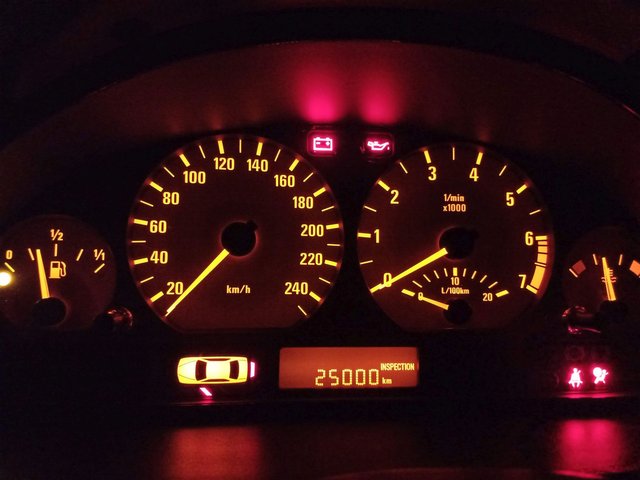
Here everything is reset including the oil service which I've also done on the same day and will document in the next part!
Join me again soon to go the 'last miles' with this car before it (hopefully) passes the TUEV and can go into a well deserved retirement from daily driving duties!
Steem on!
I've never repaired a car myself, and I don't understand it at all, should I follow this instruction?
Wheels aren't a consumable part of a car's construction, but sometimes it may be necessary to replace them. The reasons may be different: damage, worn appearance, or obsolescence. If replacement is dictated by aesthetics, it is the rule of personal preference. The main thing is to choose the right parameters for your car first, study how to choose the discs https://motorhungry.com/are-jnc-wheels-good/.
Wheel rims are subjected to corrosive environments. All this leads to rapid aging of the metal structure and the appearance of dents and cracks on the rim.