Why my spring break was great!!!
During my break, I finally had enough time to do something I put on the backburner for two weeks: Upgrading my PC! I was mainly doing it for more power for gta 5 but with the added storage I feel like I can do a few more things as well.
(Disclaimer: Any link here sends you to a product on amazon via their affiliate program. If you choose to purchase anything there is no extra cost to you)
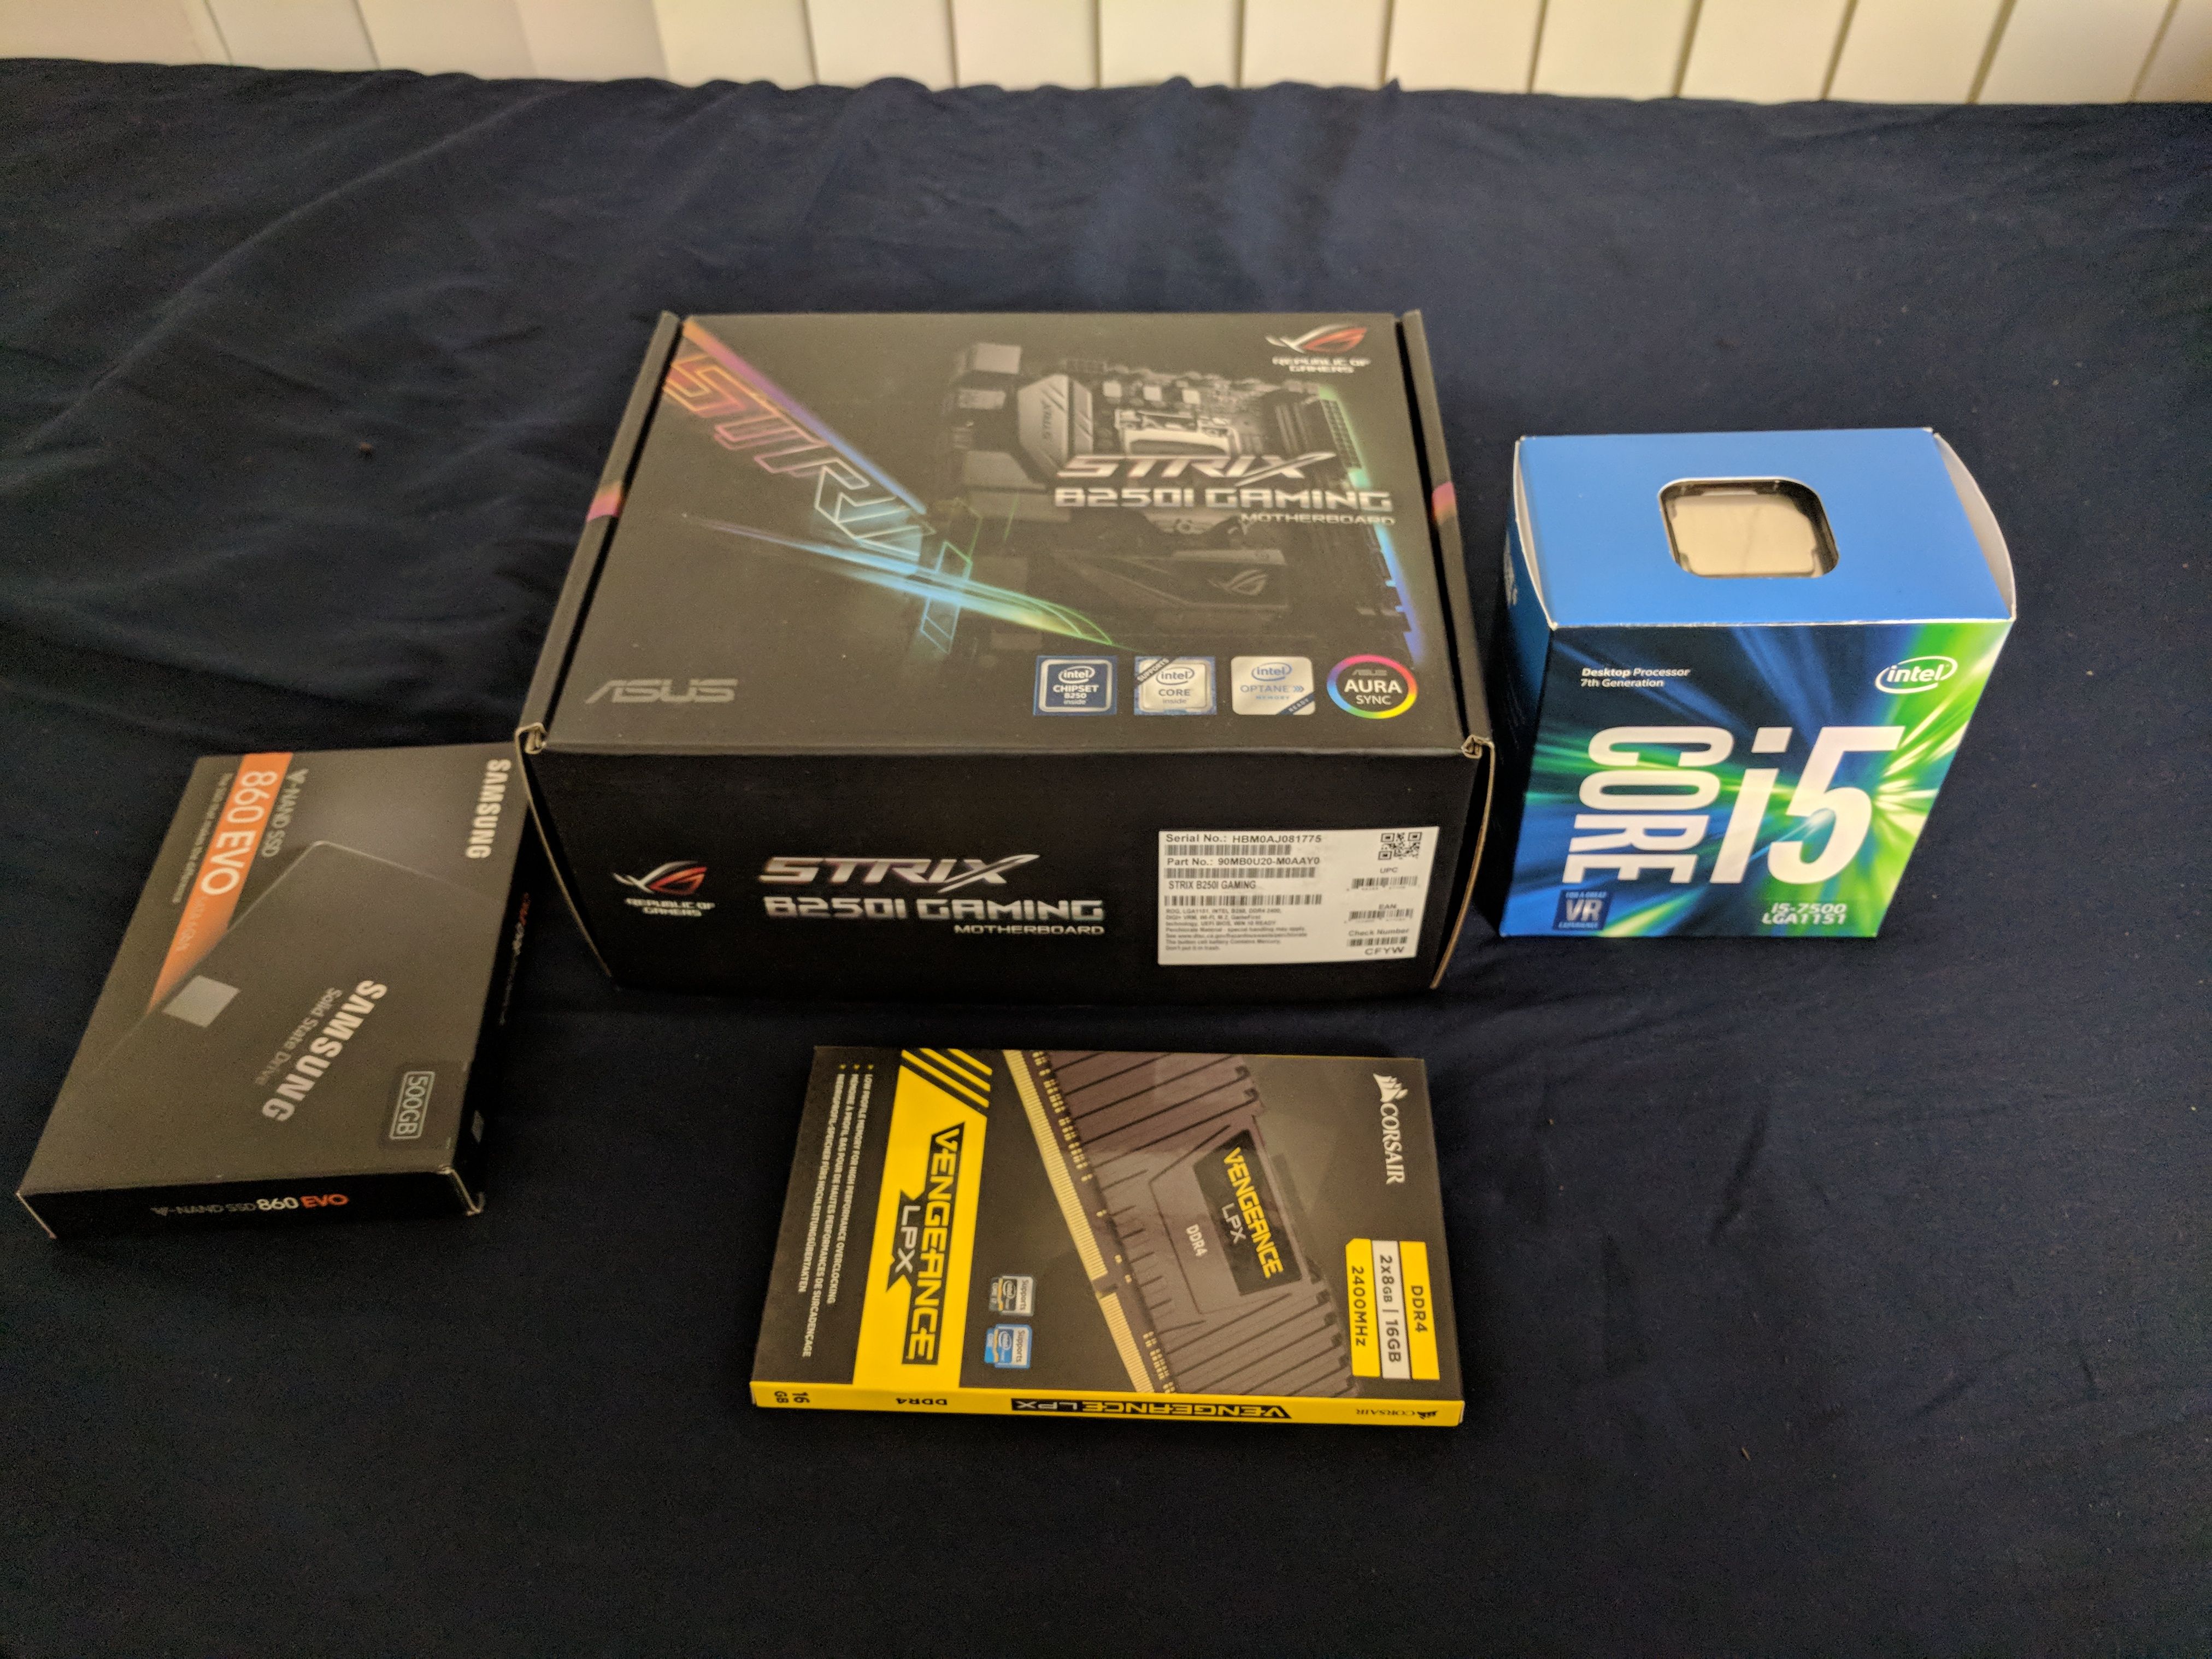
I chose these parts because they weren't too expensive and I could see a noticeable gain in performance. My startup build had a pentium G3528, which was good and had the potential thanks to overclocking, but multi-threaded performance was what I needed now. Therefore I went with the perfect balance of price/ performance, which was the Intel Core i5-7500.
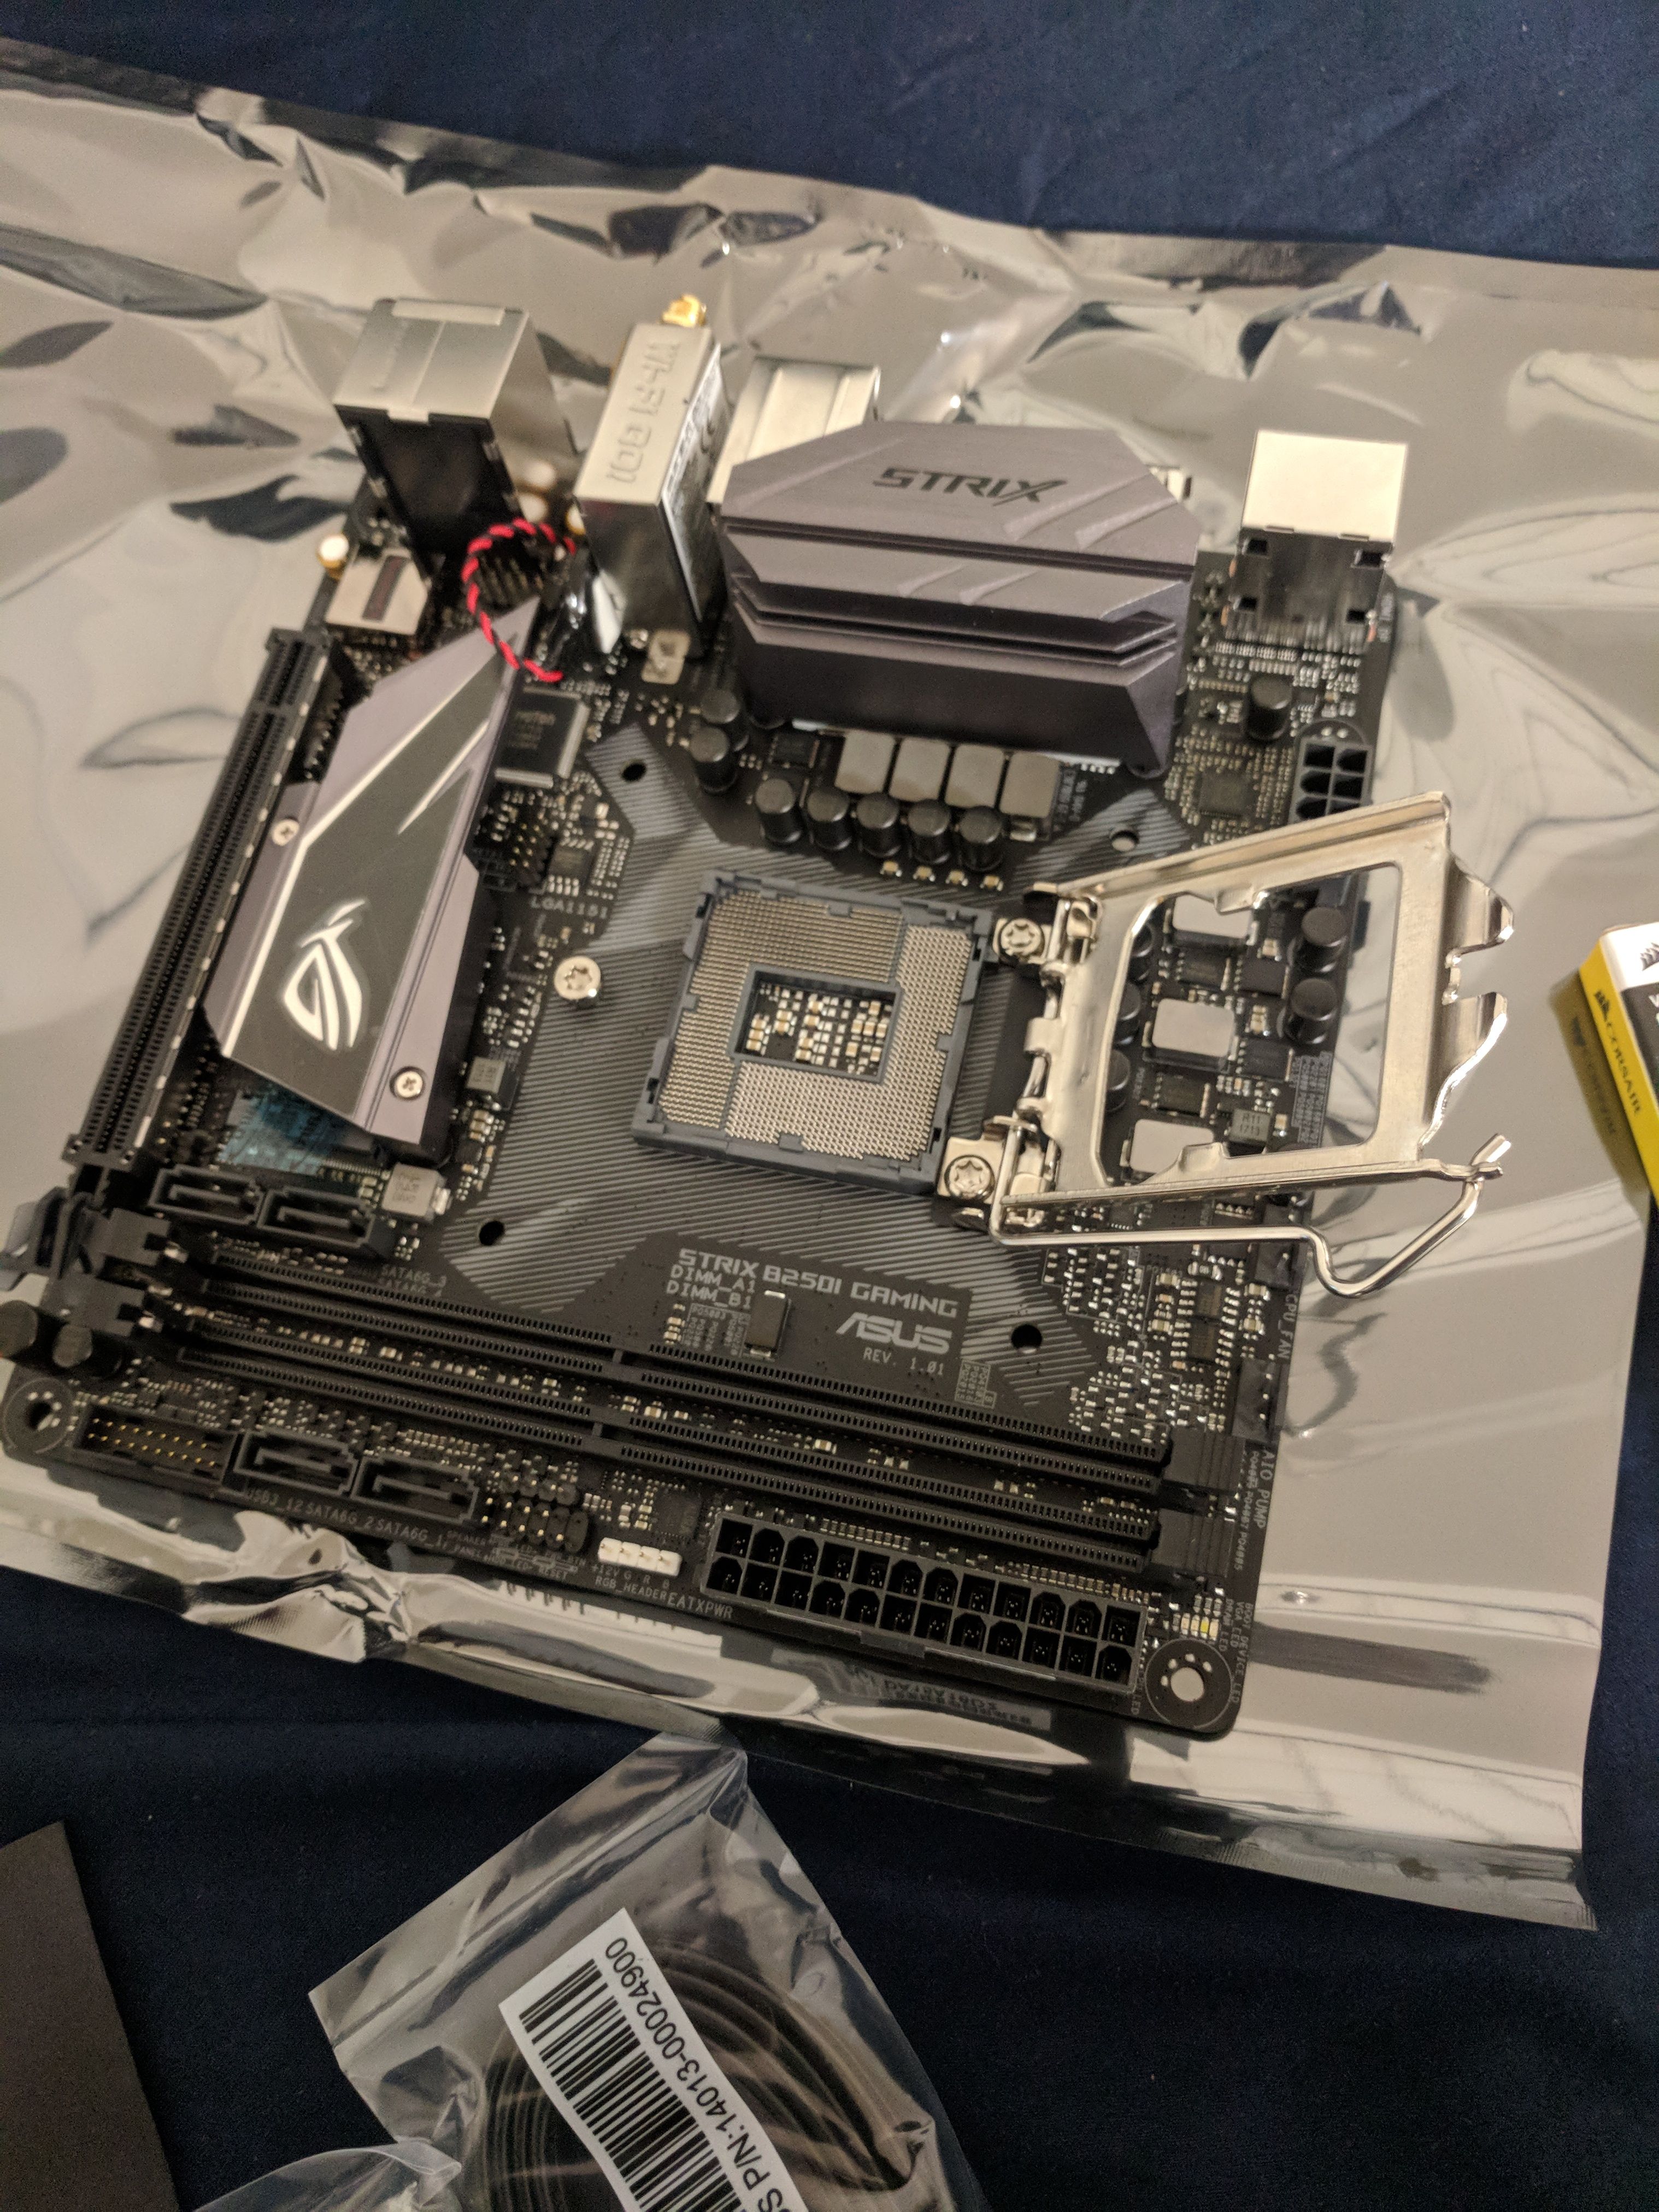

Because I wasn't looking for a zany motherboard that supported SLI I went with a budget motherboard which is called the ASUS ROG Strix B250I Gaming motherboard.
This is what held me back from upgrading for so long. I paid darn near twice for the same amount of ram
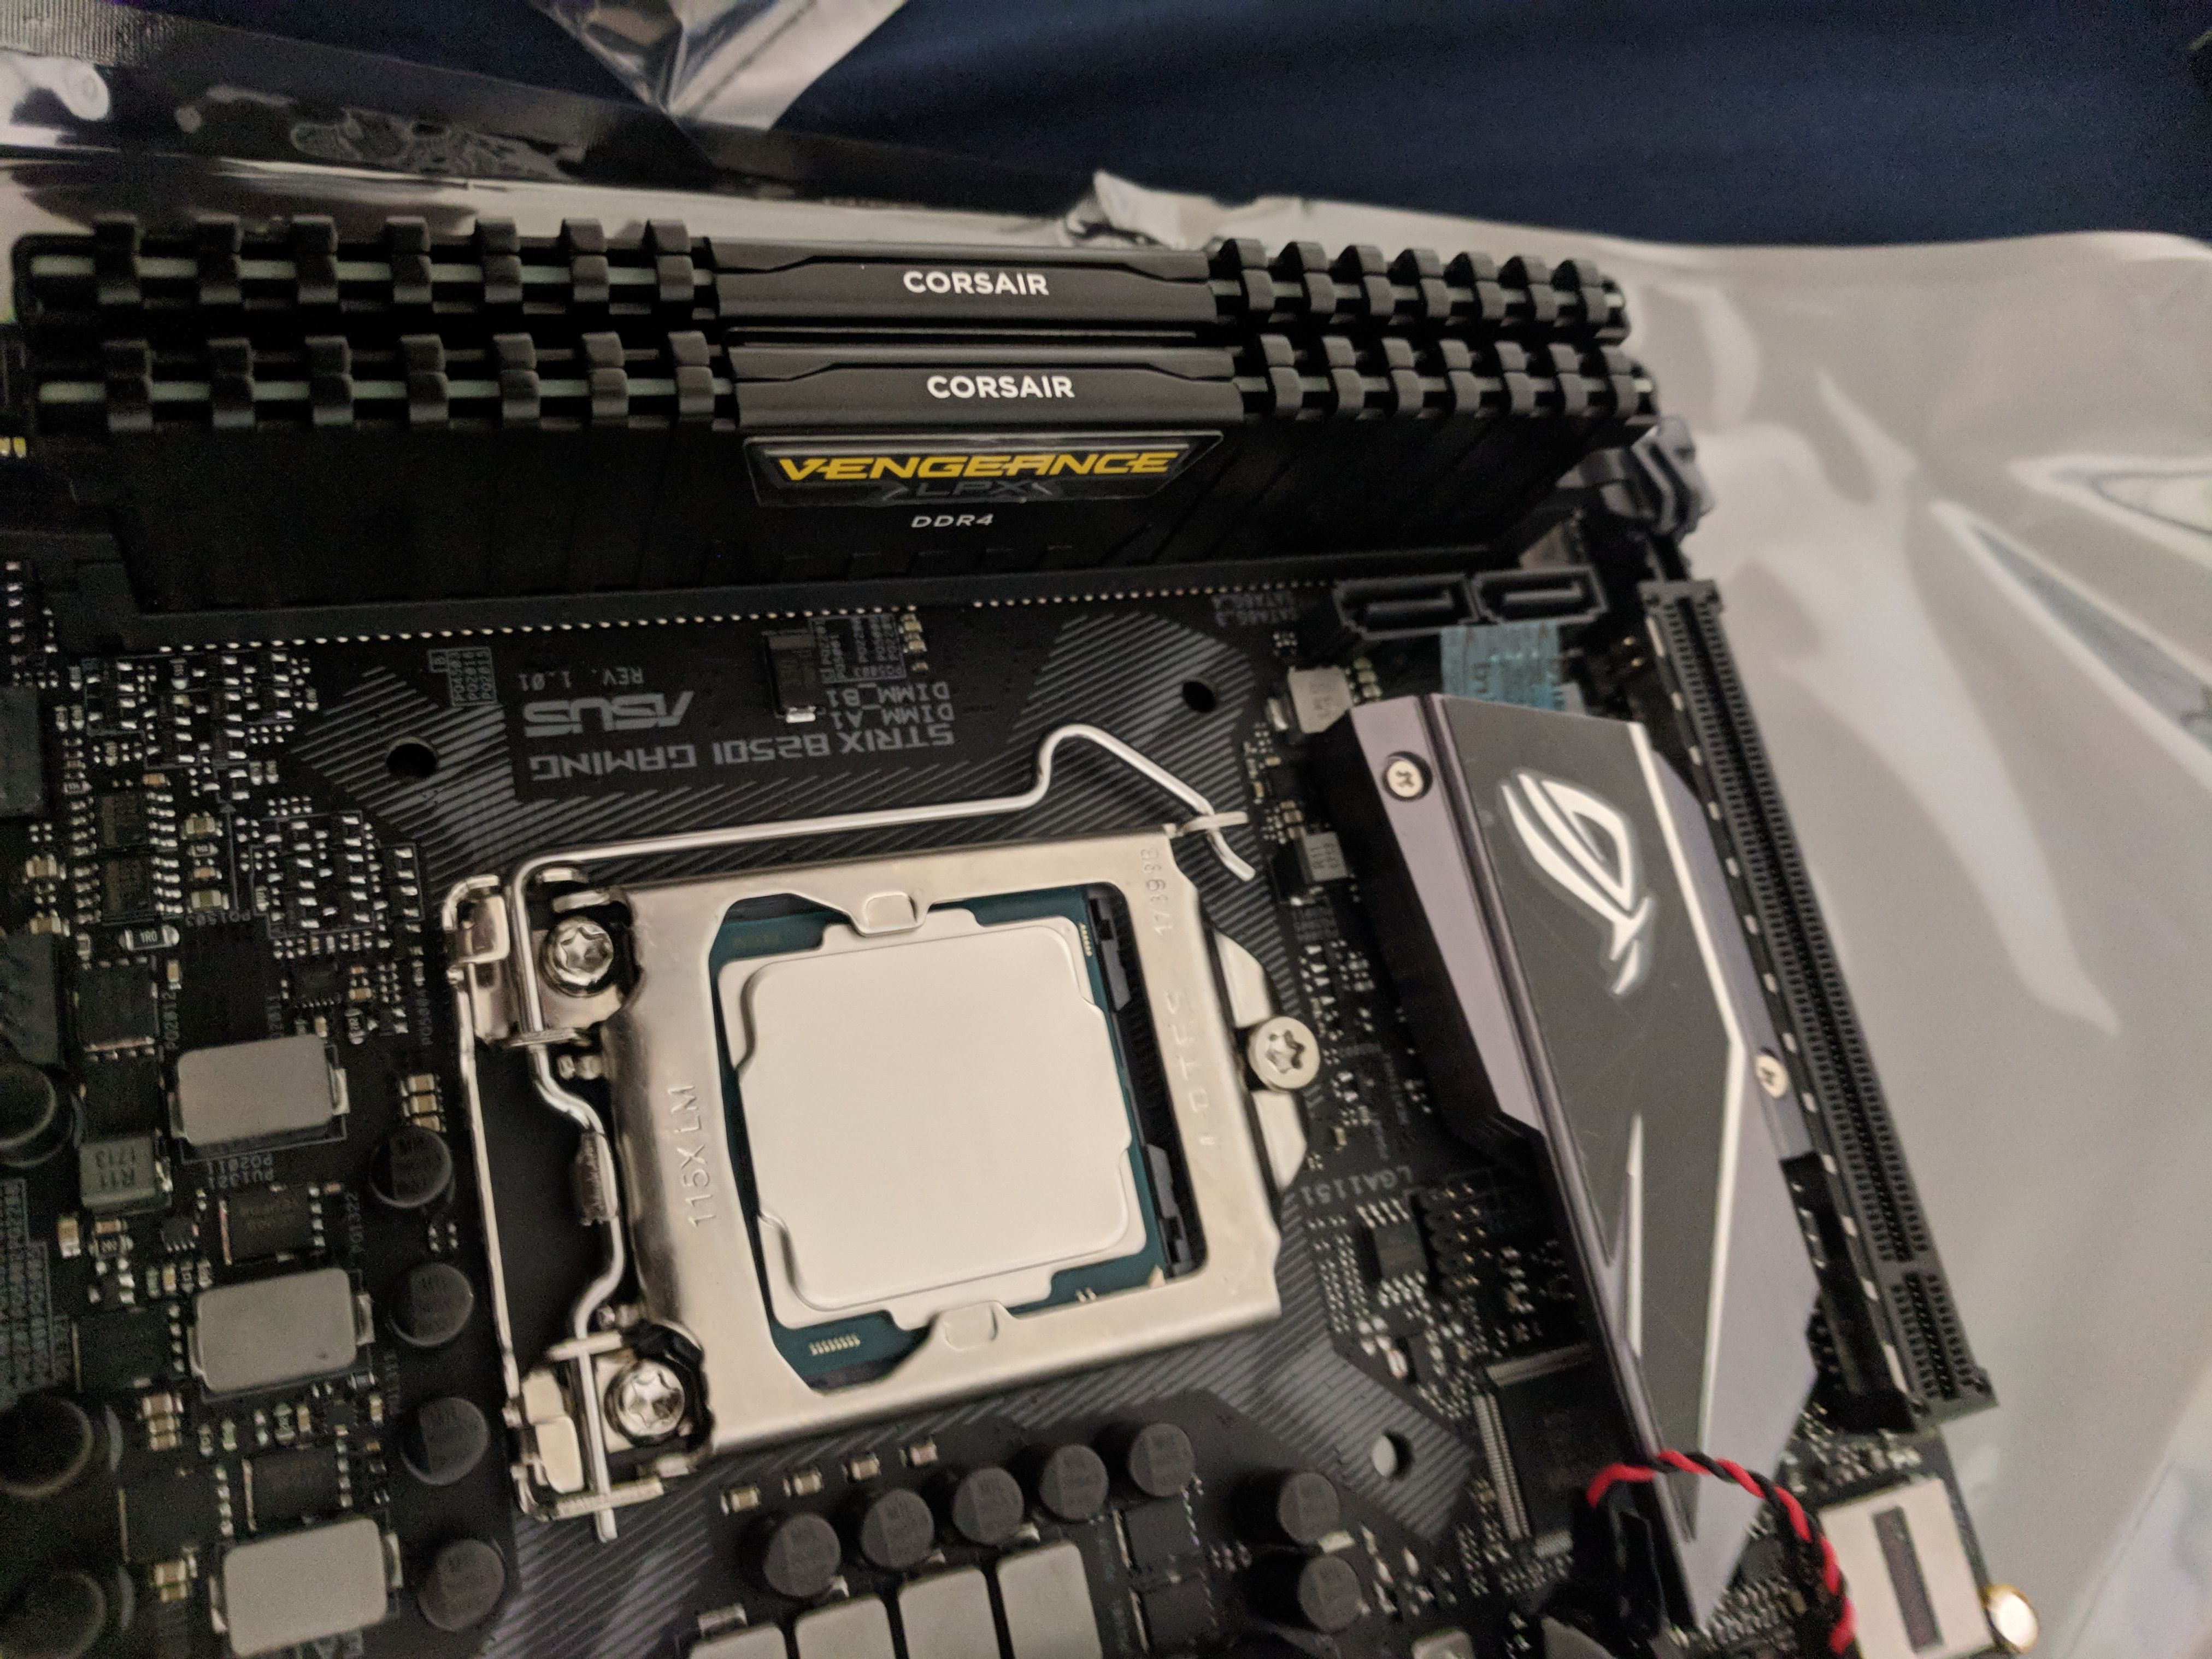
The CPU installation was making me nervous because on my first build my clumsiness caused the CPU pins to break. Even with trying to put them back in place via the tweezer method, it was still a no-go. The fact that you also have to put a bit of pressure on the clamp should be outlawed for the level of stress it induces.
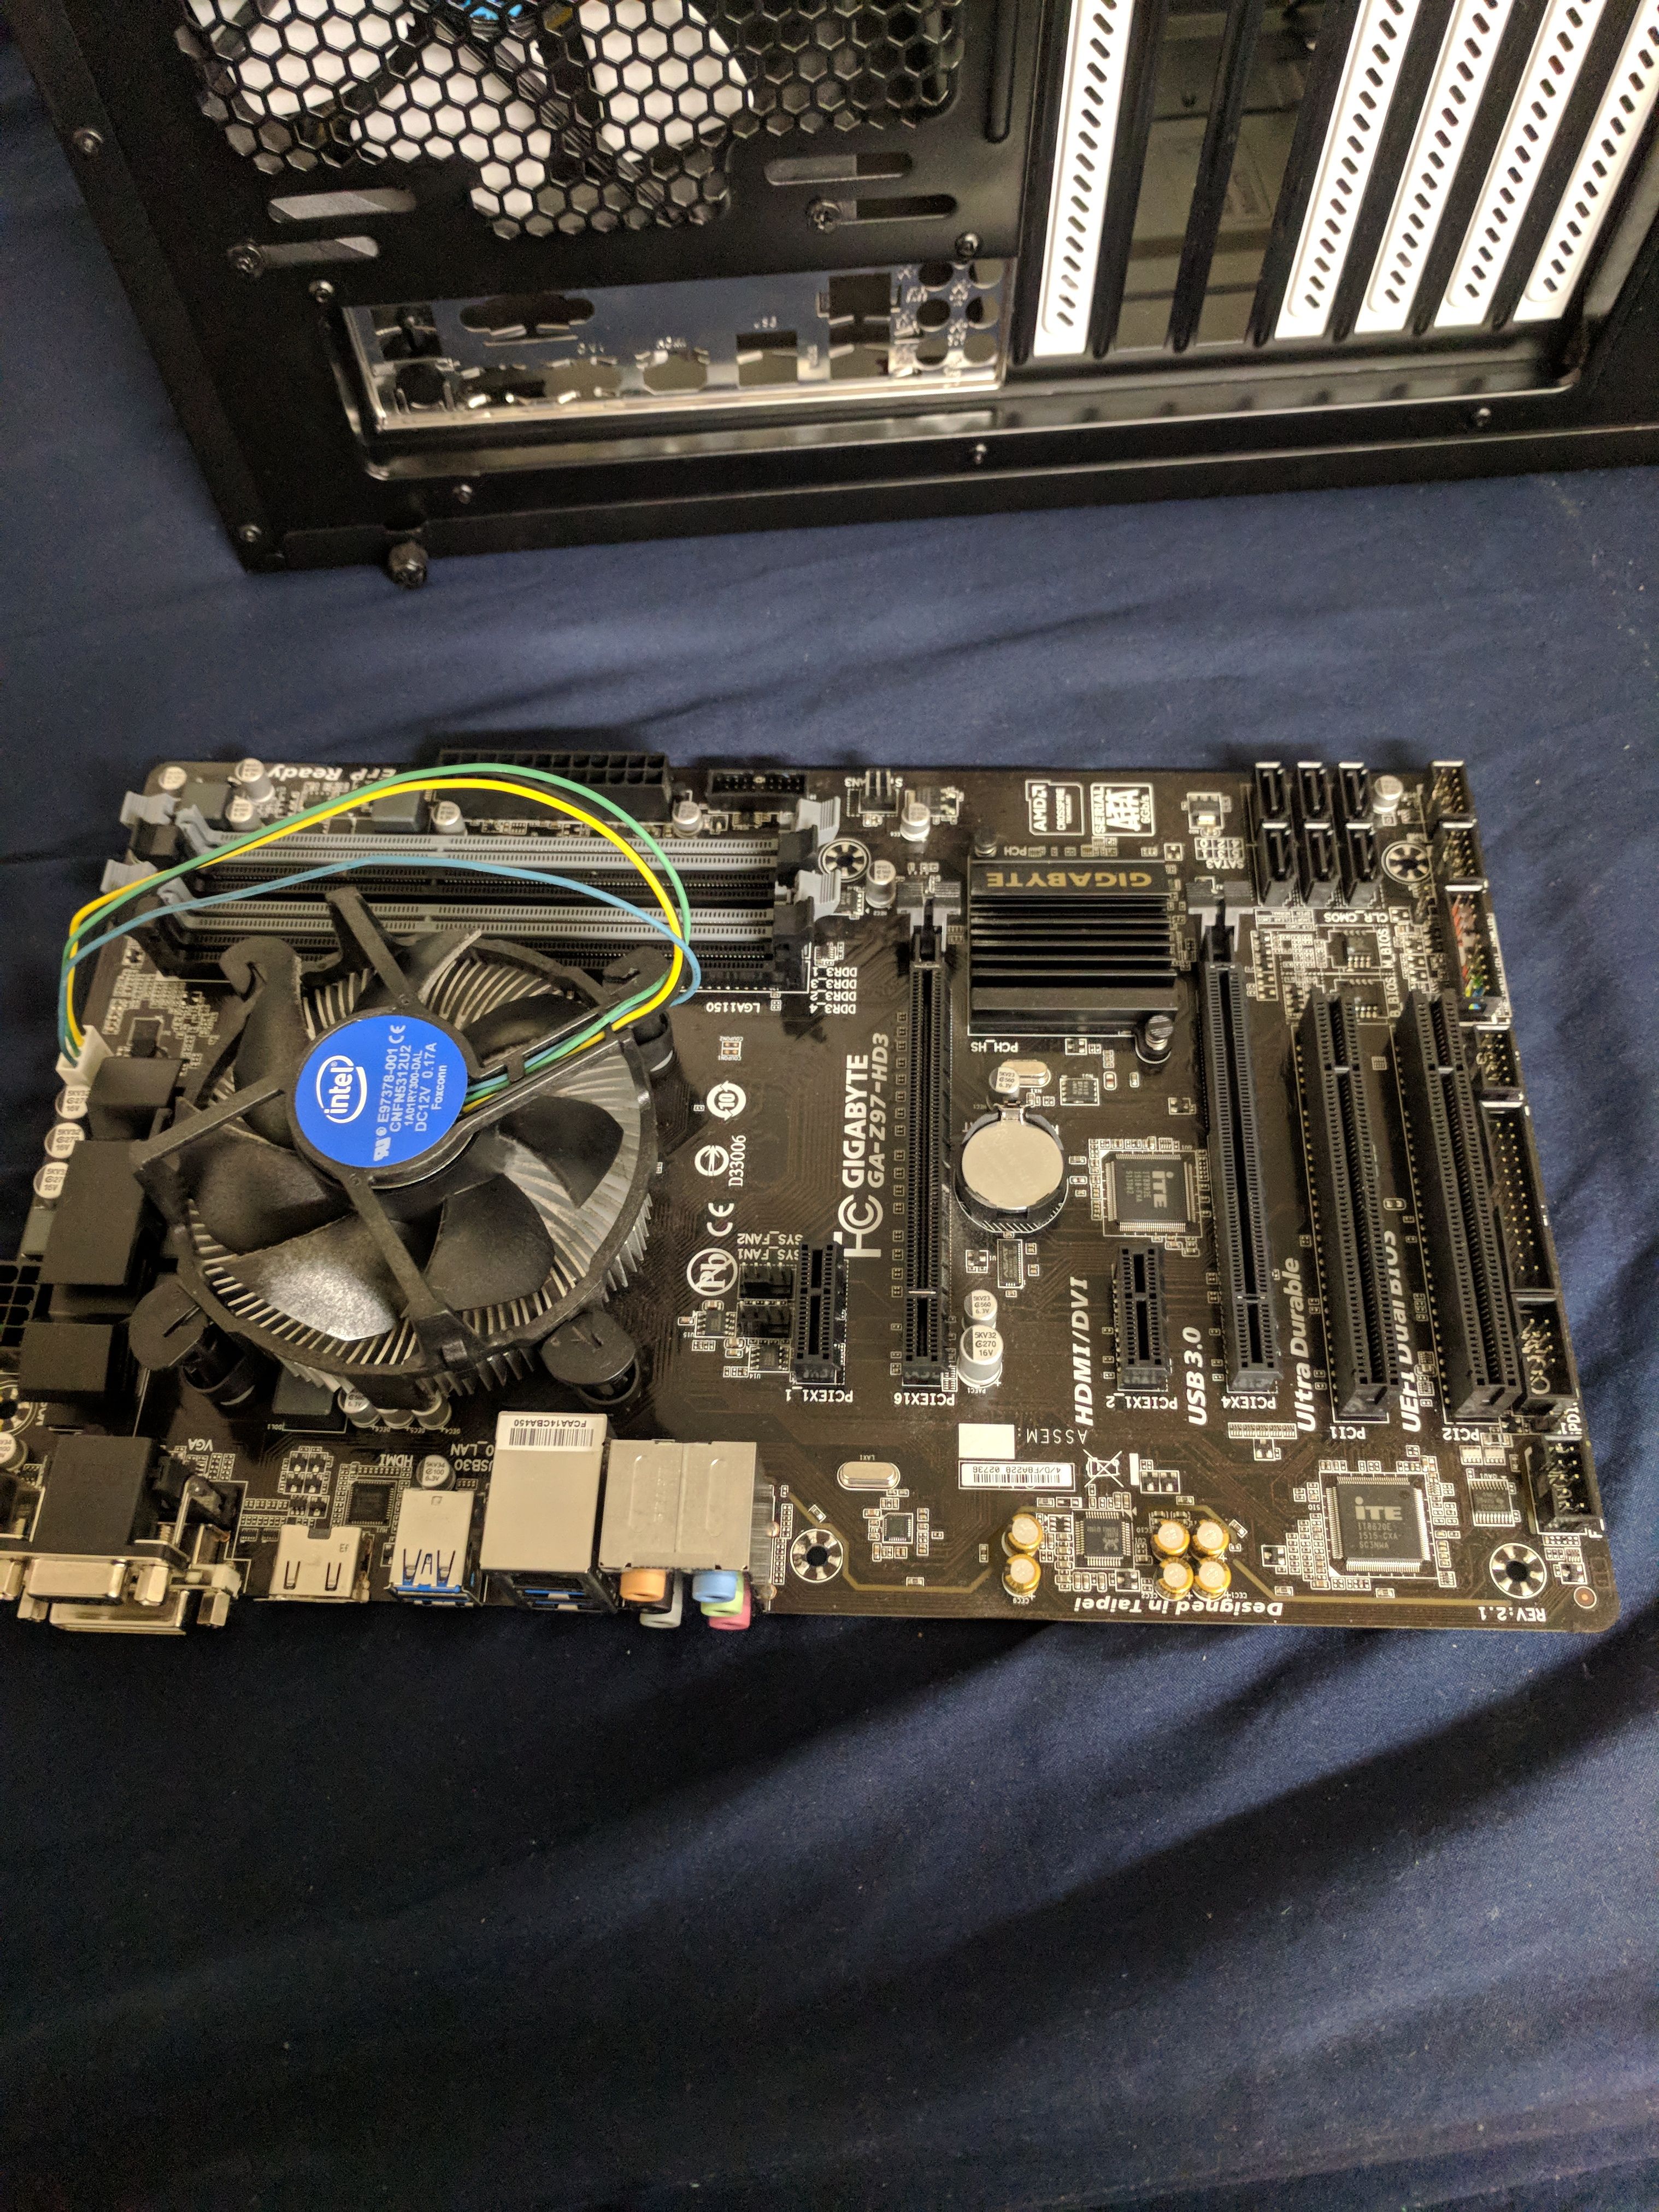
Here's my old motherboard, what I will miss about this is the clear labeling for all the connectors( It's crazy that in 2018 this isn't standard across the board) and the size for expandability but that VGA port had to go.
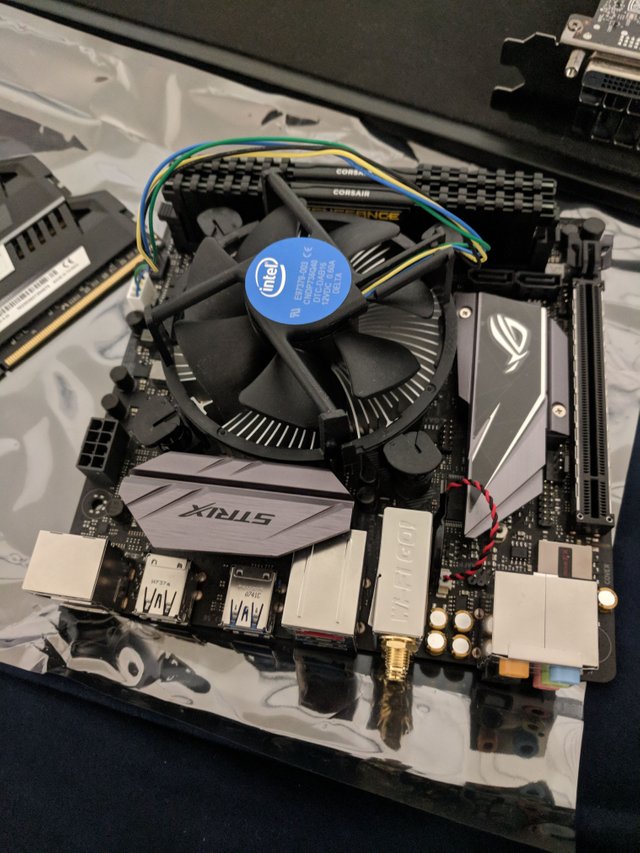
I then installed the CPU fan. It was a standard procedure so no problem there. I then proceeded to rip out the tab on the M2 shield (NOTE: thermal paste is also under there so keep in as much as you can)
This is the picture of the prior build where everything was fitted without hassle and had plenty of room.
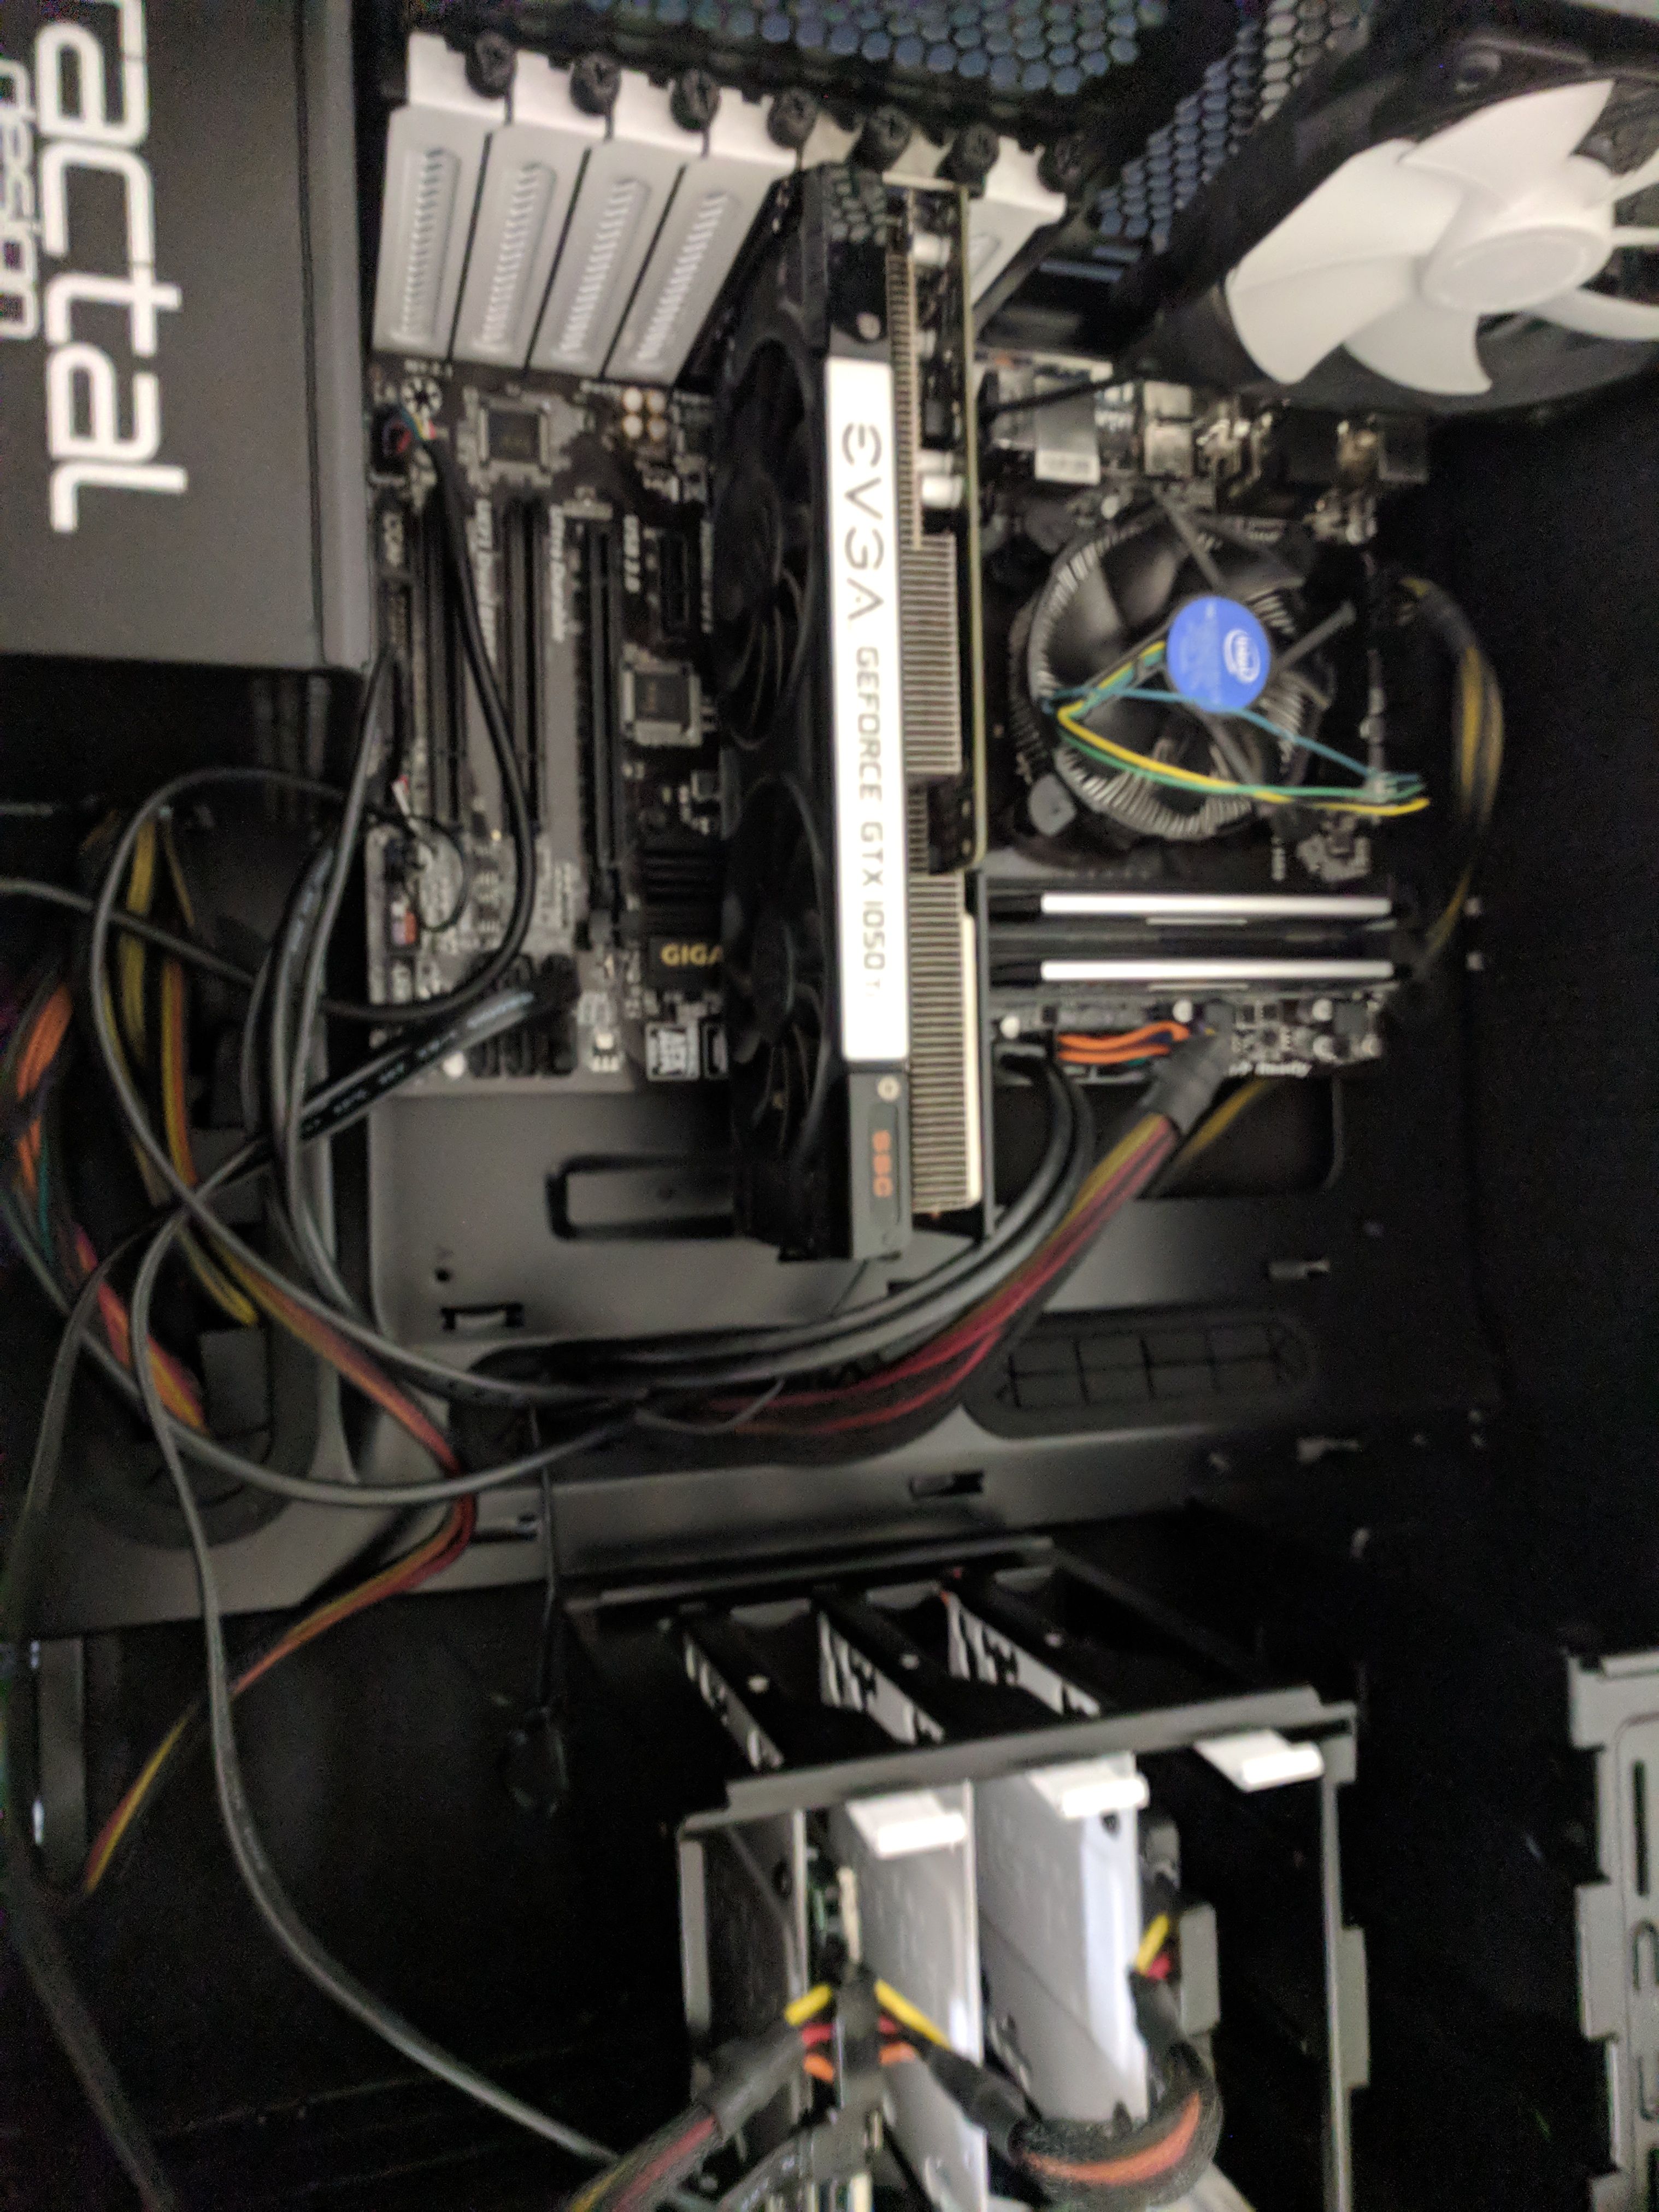
In comparison, the new motherboard was a PITA to move around in once I got the GPU installed. Couple that with the lack of labeling and I had to give up my plan on finding the correct pins for my front USB 2.0 ports.
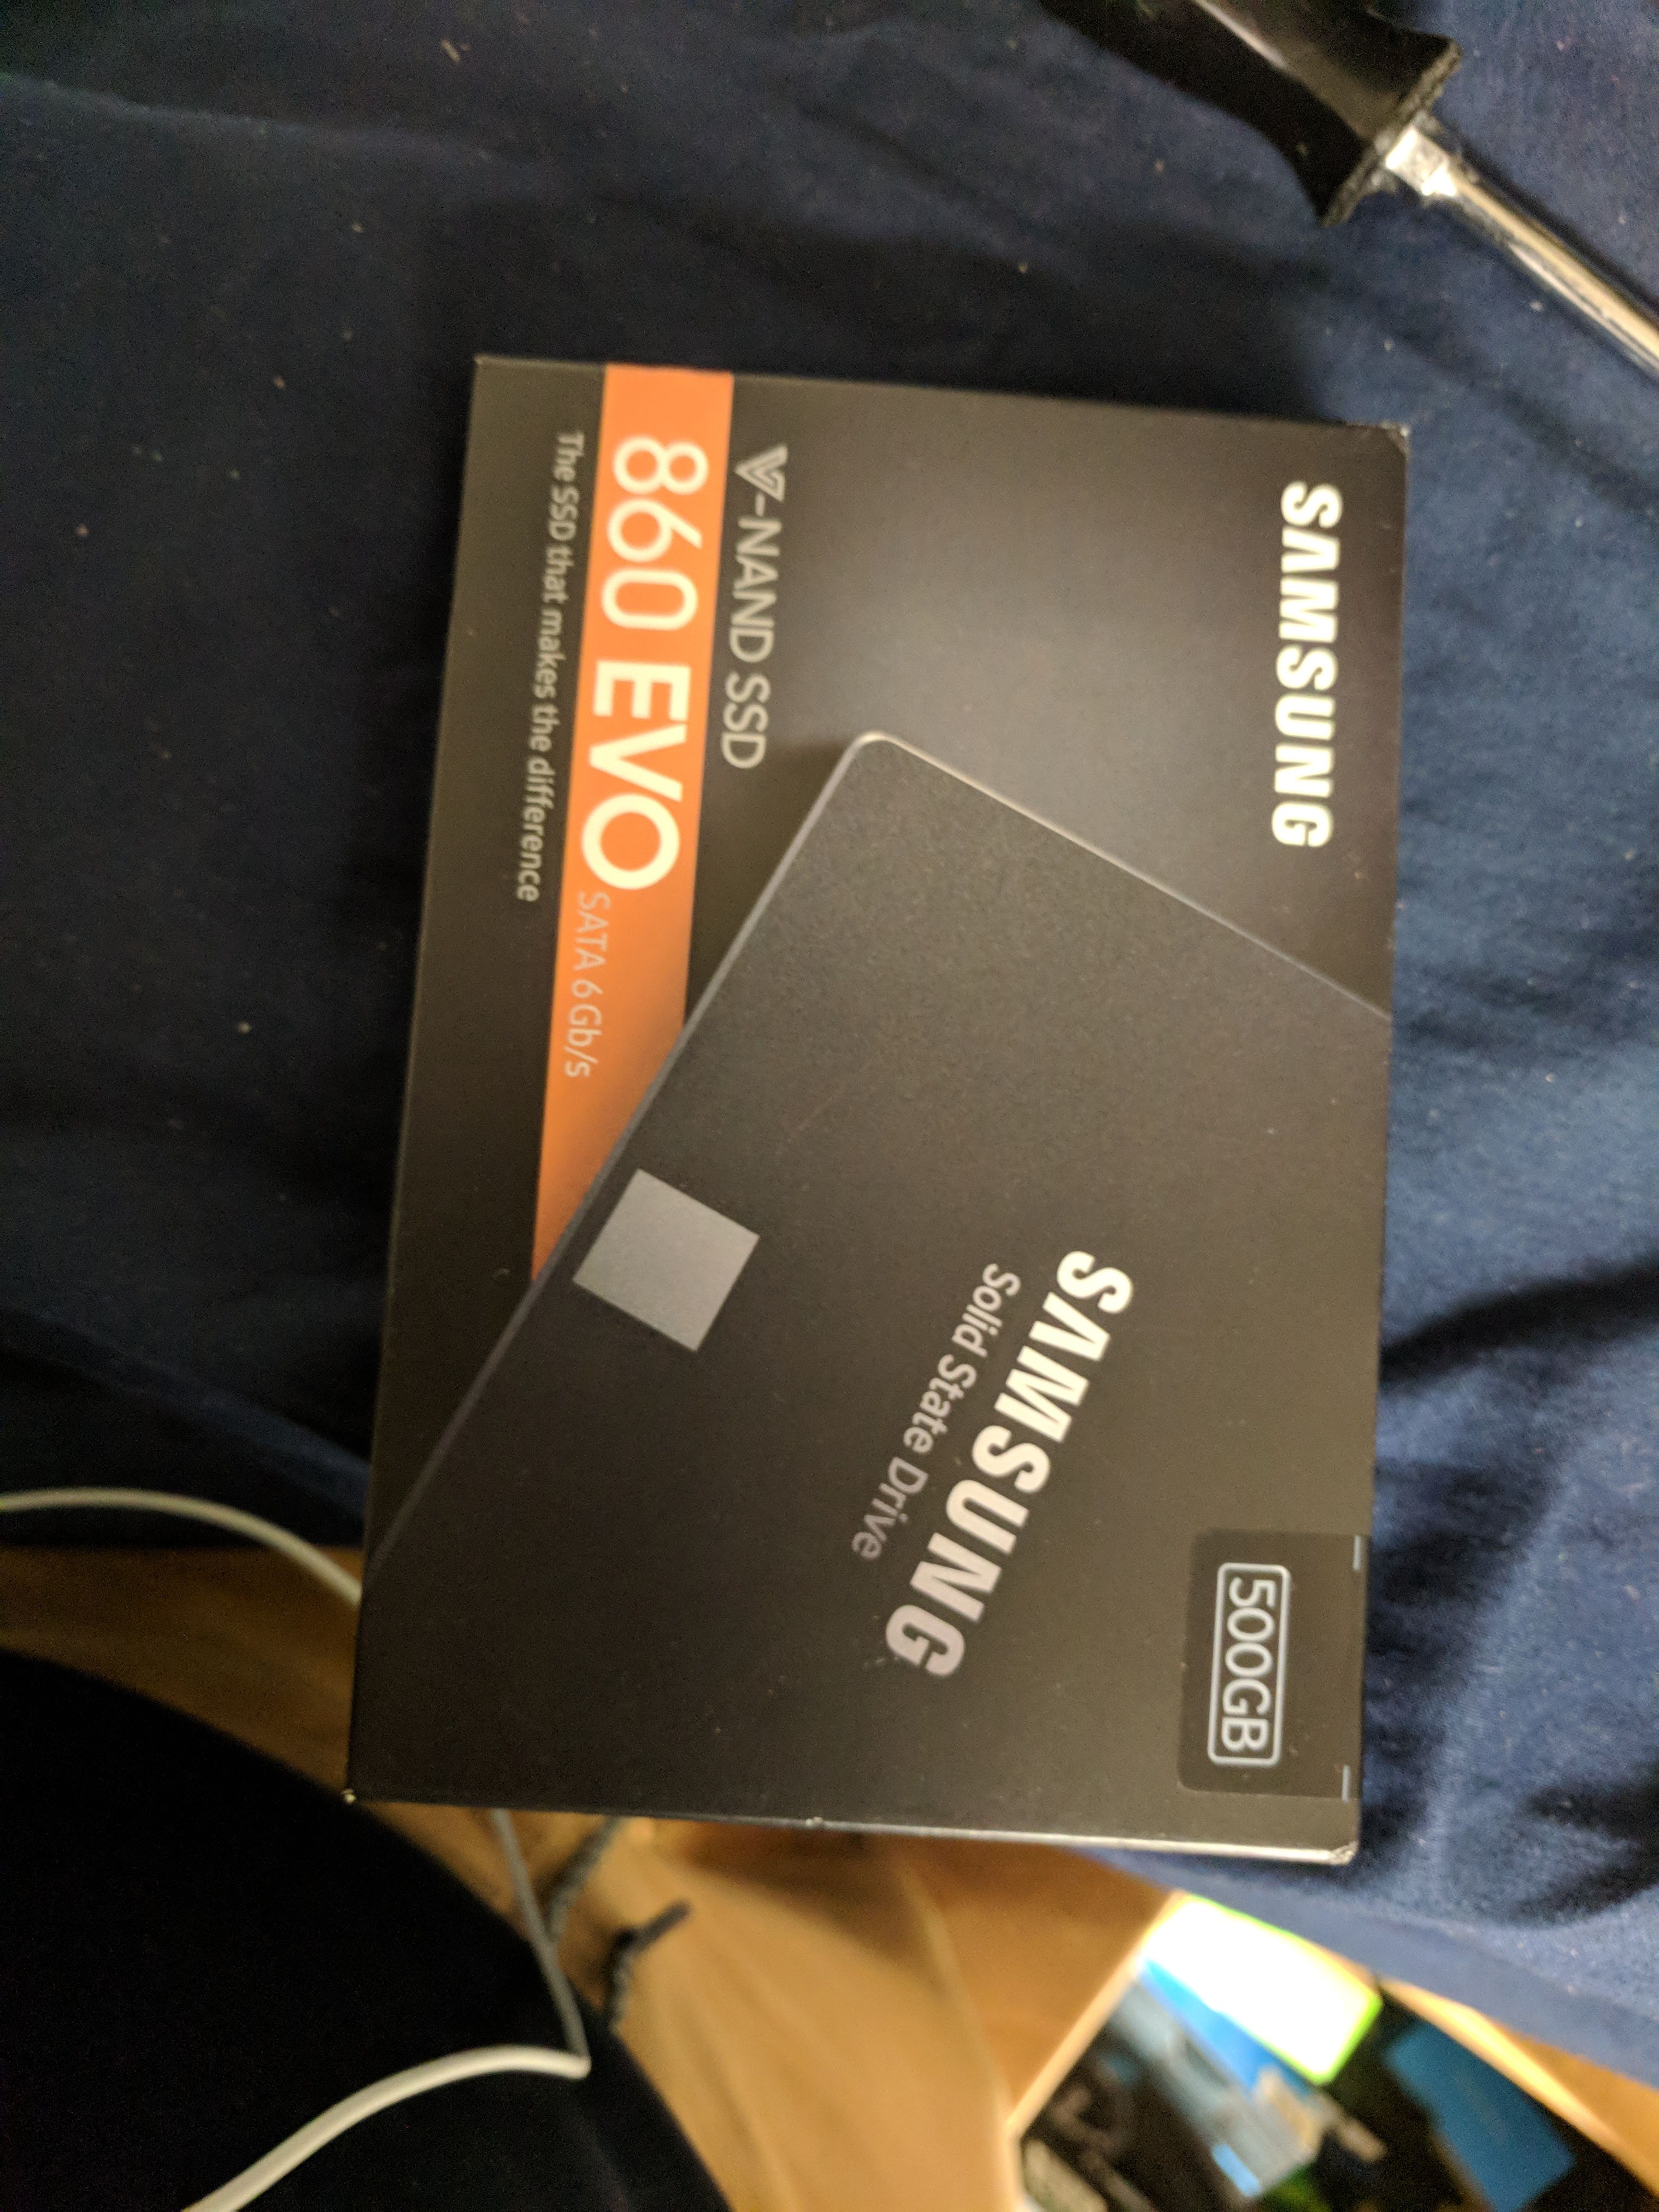
This Samsung 860 evo 500gb SSD

Luckily, because they're both sata drives, it was easy to just replace the hard drive with the SSD by screwing it in the same bracket and using the same cables.
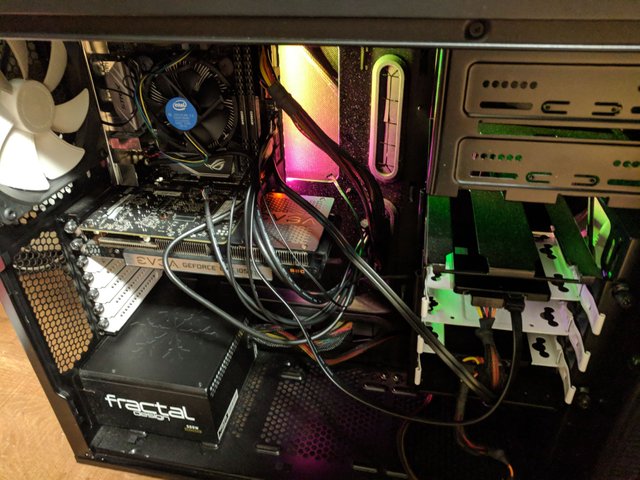
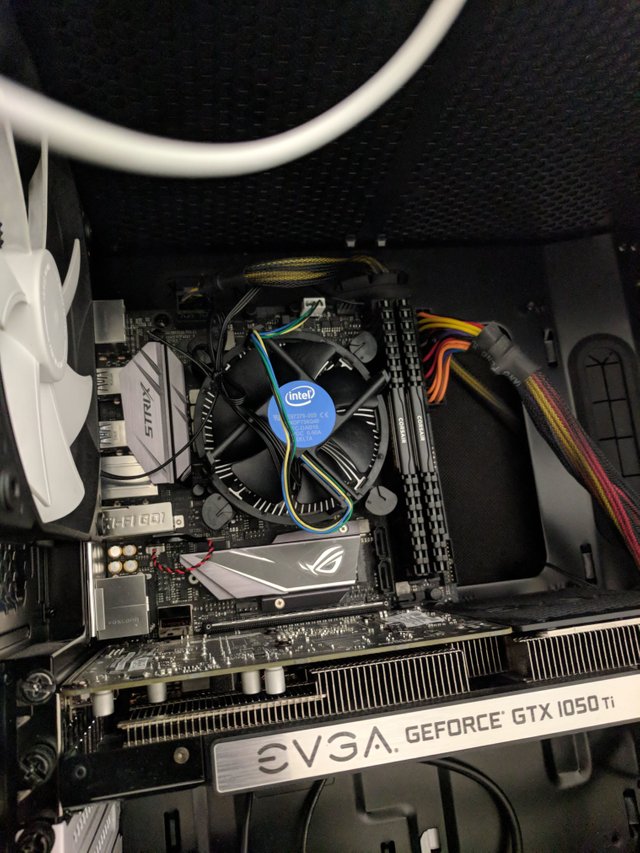
Here is when I had everything put in place. I swear that my room looks more organized than these cables...most of the time.
(If you are planning to budget for your build I highly suggest you spring up the extra cash for a modular power supply like this 550W Corsair or something similar
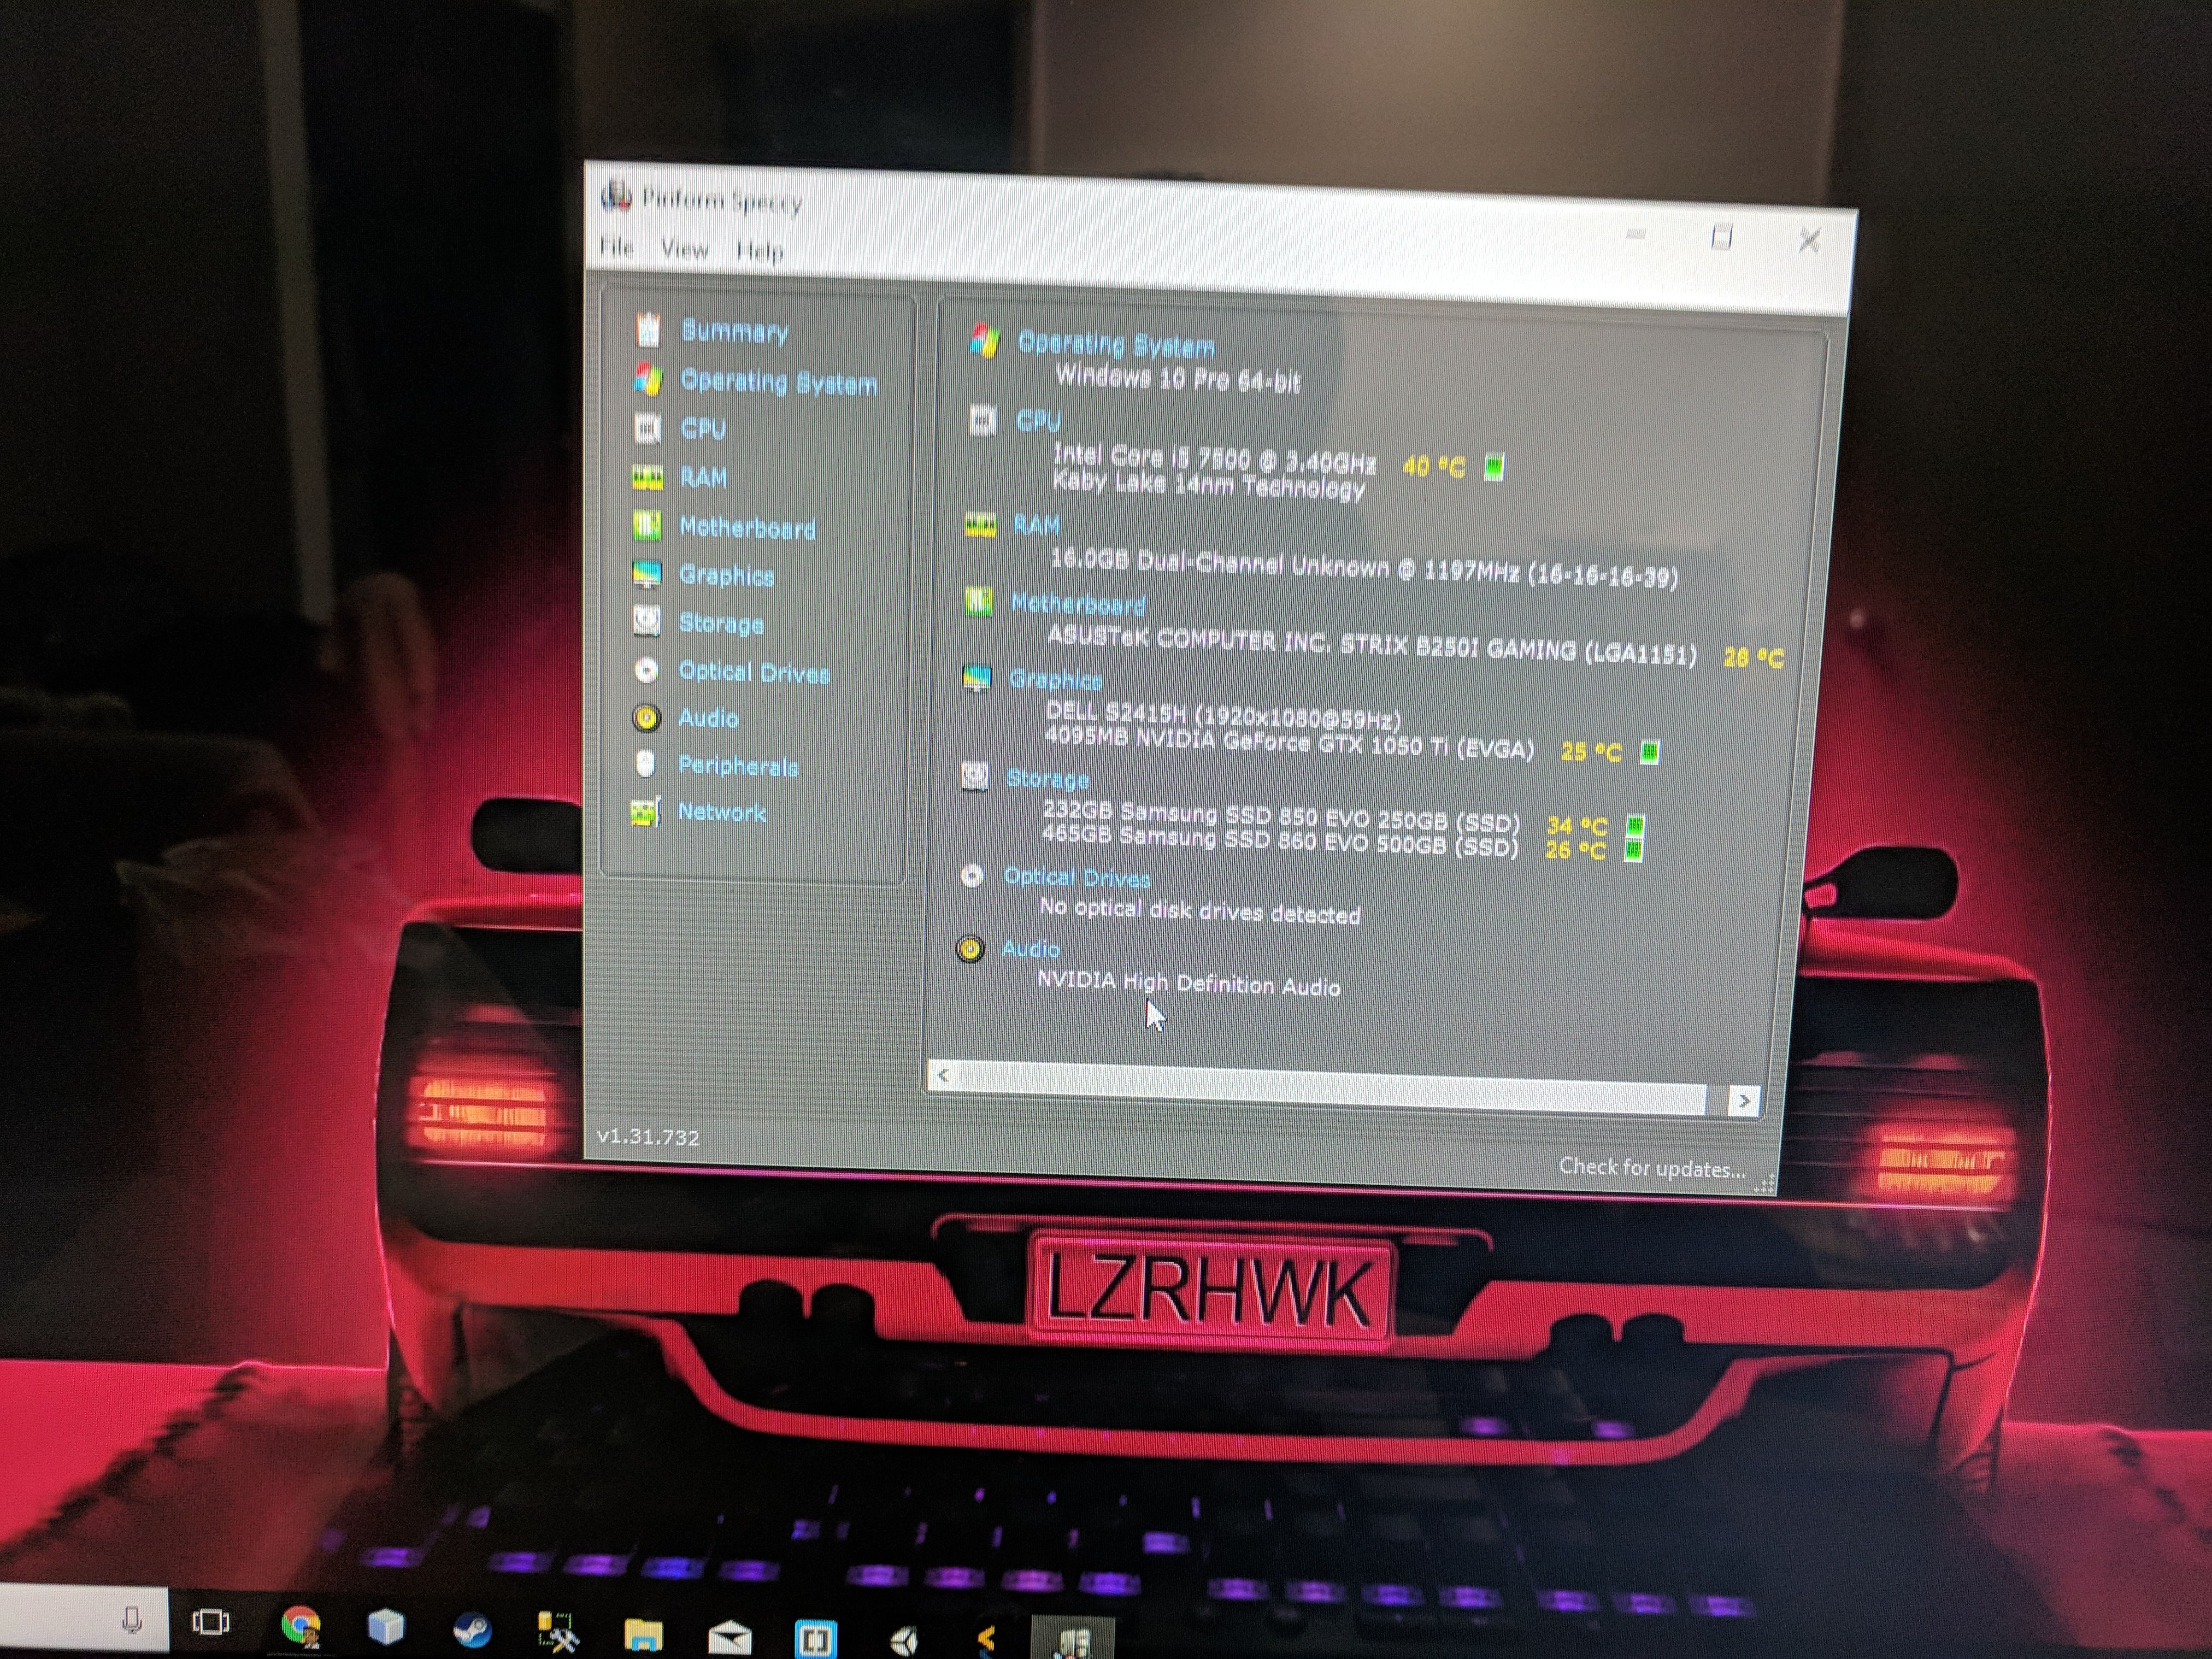
Success! It booted up without a hitch. In earlier versions of windows, you had to delete relevant files regarding the prior motherboard but Windows 10 didn't need that so it was literally a lego set from start to finish.
Hopefully for anyone interested this showed you that opening up a computer and rearranging the guts isn't that intimidating. Even if you're starting from scratch and need to do an OS installation it still is very doable to anyone with steady hands. Hopefully I can do a live video in the future to show everyone.
Thanks for reading my post.

Here's a link to my merch, check it out:
http://etsy.me/2FTlDM5
Charles W. is a participant in the Amazon Services LLC Associates Program, an affiliate advertising program designed to provide a means for sites to earn advertising fees by advertising and linking to amazon.com .
CONGRATULATIONS YOUR PUBLICATION HAS BEEN SHARED BY @Untapentuoreja, will be seen by 2888 steemians.
Congratulations - You were selected to receive a 100% up-vote from @fivefreeupvotes. Enter once a day