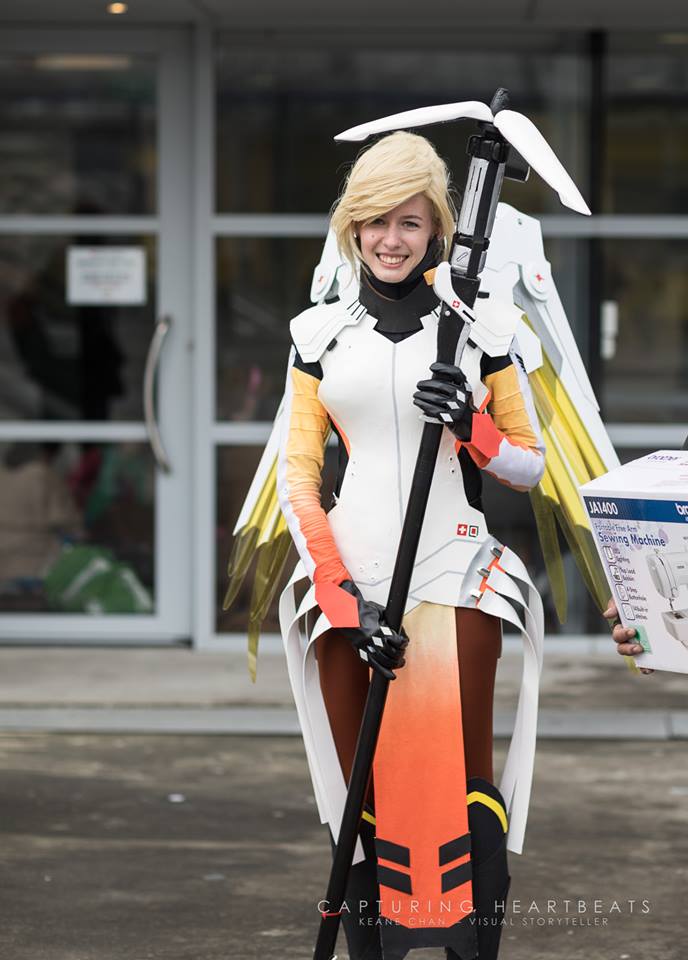
Making A Rotating Mercy Staff from PVC and XPS Foam
Mercy's primary weapon in Overwatch is her caduceus staff, and in this post I hope to show you guys one method of building it yourself for cosplay! =D
What you'll need:
- Large paper sheet
- PVC pipe
- XPS foam
- Craft knife/scalpels
- Sand paper (various grits)
- Thin craft foam
- Black, white, silver, gold, and red paint (+ primer)
- Small motor that makes a rotating motion
- Batteries + holders (longer thin ones instead of blocks)
- Switch
- Electric wire
- Velcro dot
- A plug the same/similair diameter as the inside of your PVC pipe
- Drill
- Glue
- Small screws
Step 1: Making the base
Before you start you'll need to decide how long you want your staff to be (I recommend around the same height as the person who will use it, or slightly longer by a few cm). Once you have this figured out cut a PVC pipe, that sits in your hand like you'll want the staff to sit, slightly shorter than this length (since you'll be adding more length onto it with the tip later).
Prime the entire pipe and paint it black (this is easily done with spraypaint).
.JPG)
Step 2: Draw your staff details on paper
Before you start making the pieces I found it super helpful to draw them out onto paper. This makes sizing them easier and also helps with assembly later.
.JPG)
Step 3: Start making the body pieces
Now you know approximately how big the pieces need to be, start carving them from XPS foam using a craft/hobby knife or a scalpel. Ensure the blade is kept sharp while cutting because otherwise it will result in the foam crushing instead of cutting, making messy pieces. Once you've carved the outside also hollow out the inside so that you can attach it around the pipe later.
Once you've cut out all the pieces you can sand them to get a smooth look, although be careful because you can also tear/crush the foam. Generally this type of foam likes to be sanded in one direction so take your time and be careful.
Don't paint/attach them just yet and there's no need to carve every little piece since some can easily be added on as detailing later (like the healing/boosting panel).
.JPG)
Step 4: Optional, cut your staff in half
If you are wanting to transport your staff you'll need to make it smaller and one way to do this is allowing the staff to be taken apart. If you cut your staff in half you can dissasemble it again when needed, and by using either a thread (those plastic coils you can twist onto each other) by gluing one end into each staff of two that can twist into each other, or another tight fitting pipe that you can jam into one side and tightly slide on the other one you can easily do this.
.JPG)
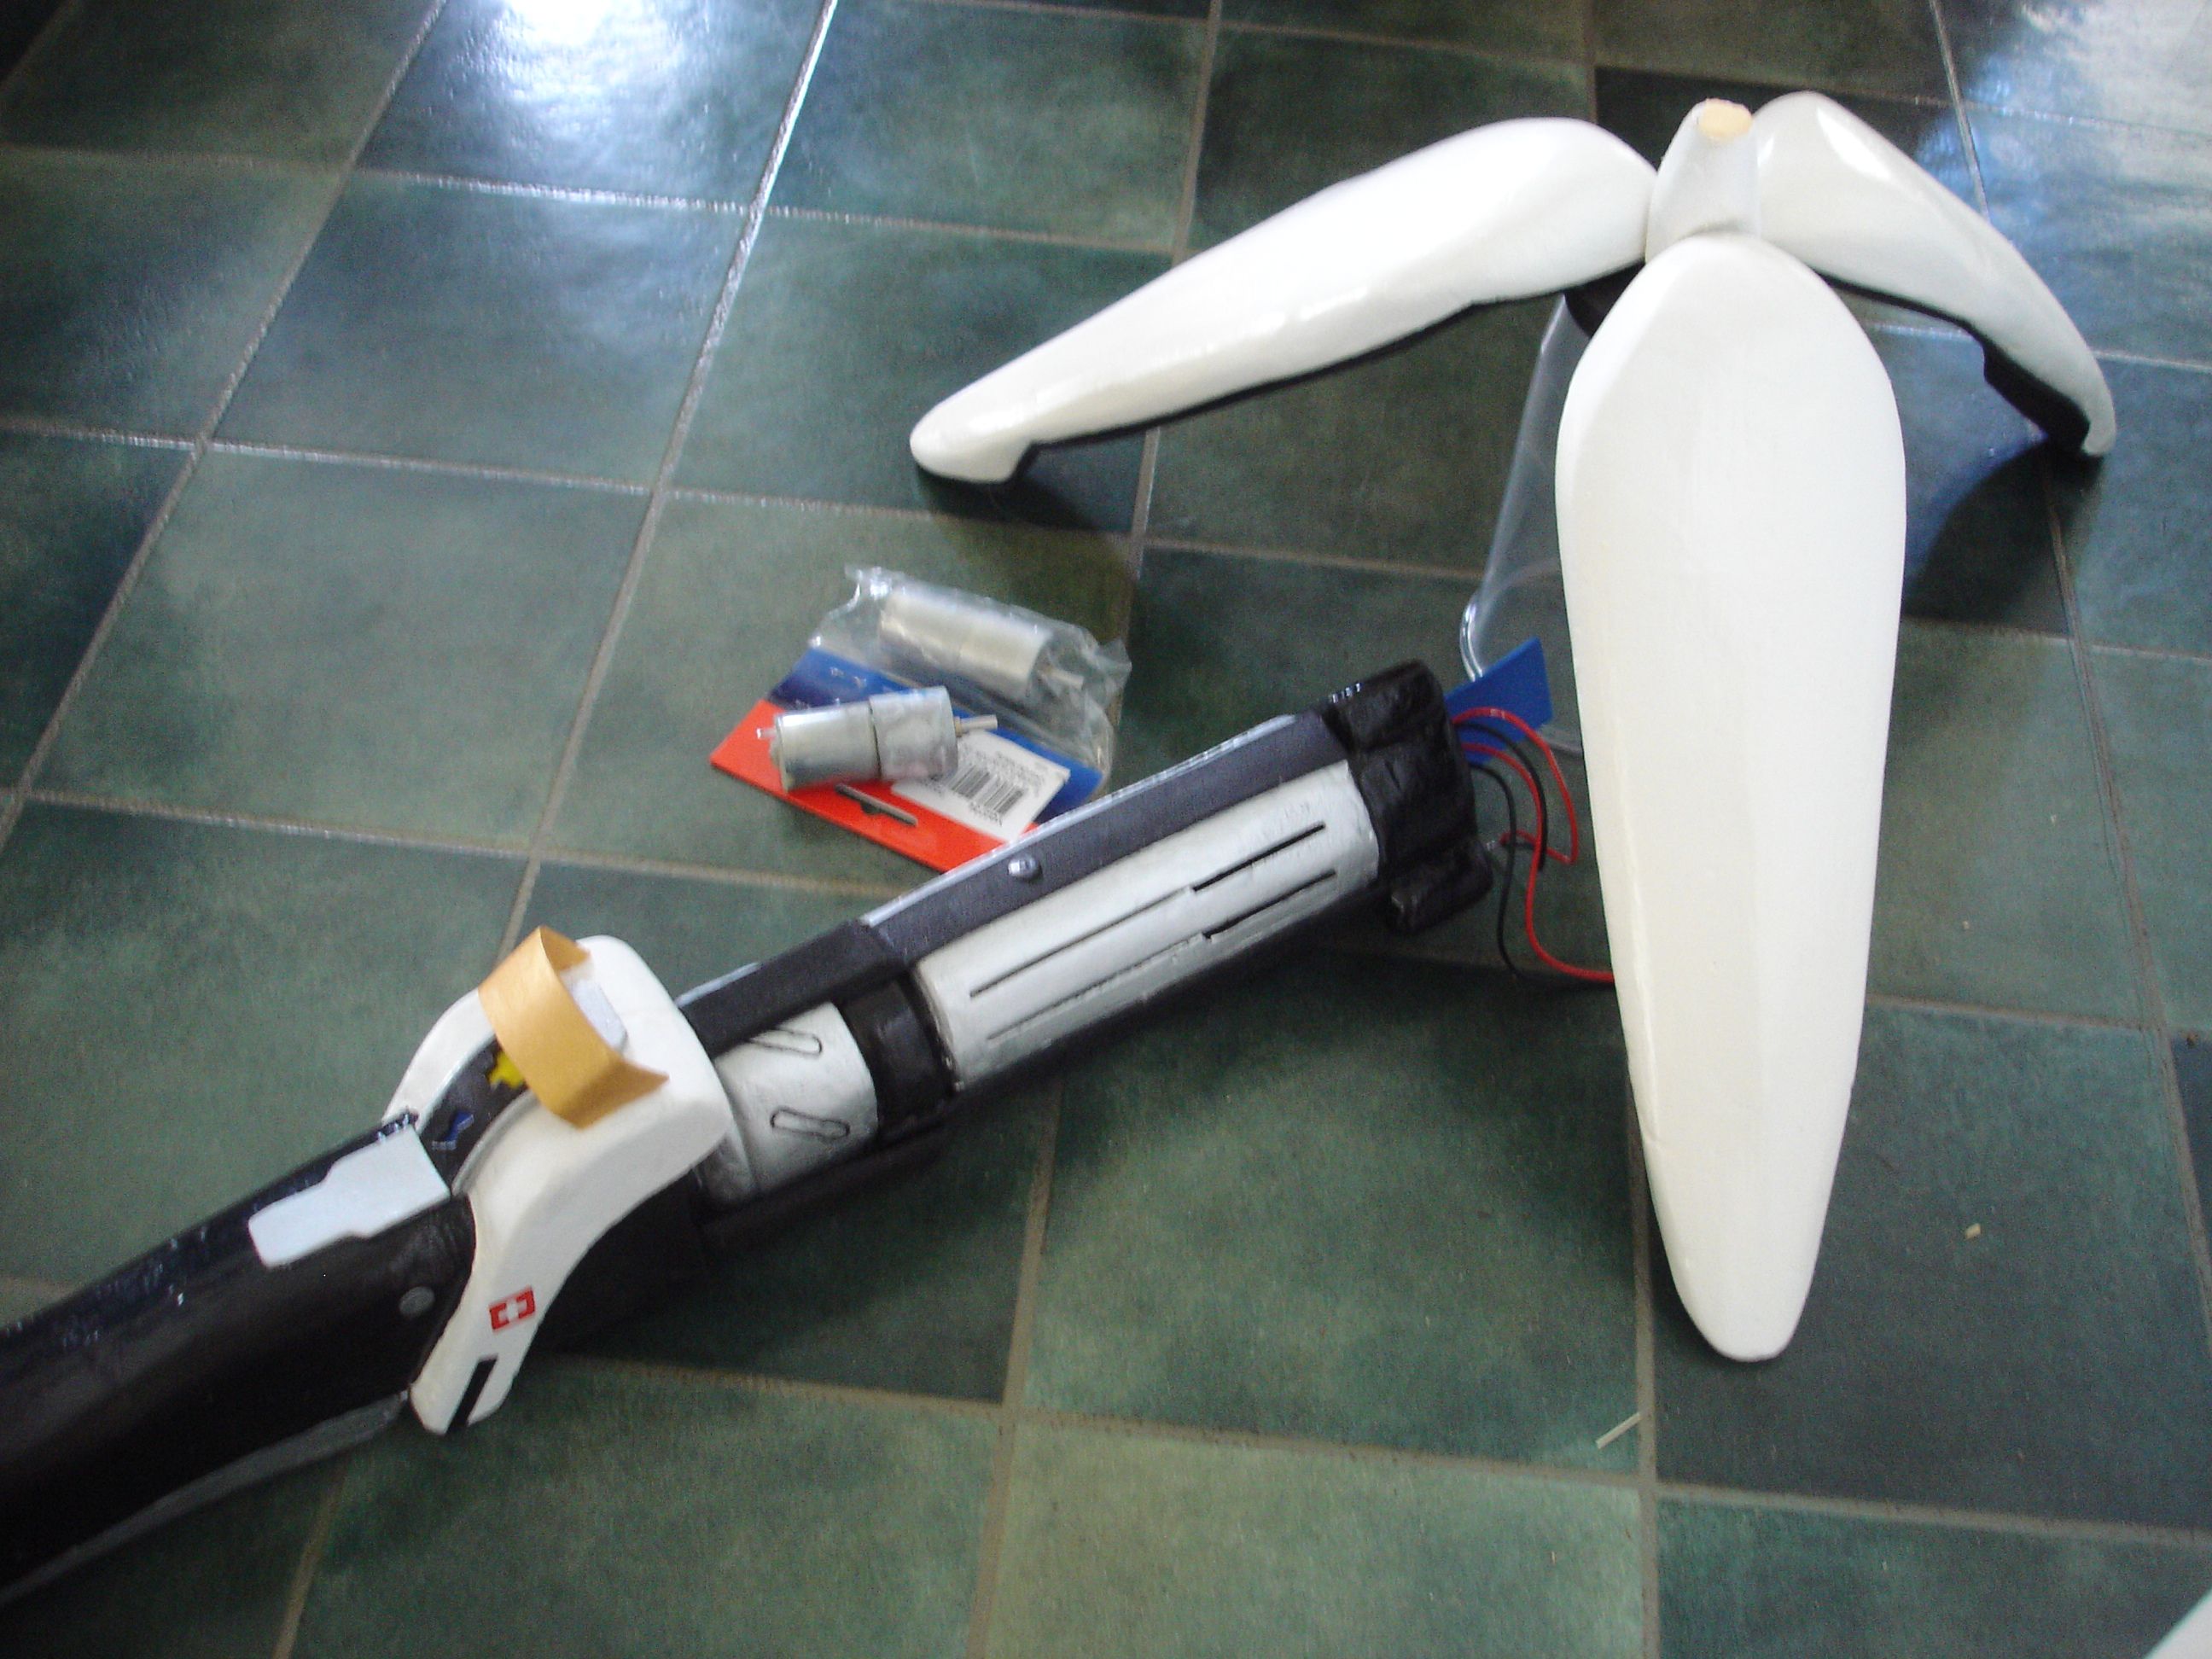
Step 5: Electronics
If you want your staff to spin you'll need to find a small rotating hobby motor that will fit into the end of your staff, a long switch, and some battery packs that are thin and long. The motor needs to be attached inside one end of the staff (you can glue foam around it to make it thicker and to make it stick tightly into the pipe), and you'll need to drill a small hole where your hand rest will be for the switch.
Set up your circuit so that the batteries can be in the bottom end of your staff (leave an extra long length so you can easily take them out), the switch at your hand rest location, and the motor up top before putting it into the staff. For the switch attach it tightly with a ring or some glue.
.JPG)
Step 6: Bottom end detailing
At the bottom end of your staff you'll want to insert a plug to prevent the batteries from moving around in the staff. Measure how deep your space will need to be into the staff to contain your batteries and put in a plug at this depth. This plug can be anything from a cork to an actual rubber plug, but with whatever you choose to use ensure you can get it to the right depth and that you can get it stuck there (using glue is possible, but if it's a tight plug this can be hard since the staff handle isn't super wide).
It only has to hold back a few battery packs which aren't especially heavy, but you still don't want it to move. Ensure you don't forget to make a hole for the wires leading from the batteries to the switch/motor.
Once you have this plug in place create the bottom details of the staff using some thin craft/EVA foam. After it's been painted later attach a Velcro dot to this piece as well as the staff to ensure the batteries are secure.
.JPG)
Step 7: Attaching main pieces + painting
Now that you have all your main pieces done it's time to attach them to the staff. Most glues will work for this, but before sticking them on ensure they are in the correct place (use your drawing for this) and that they connect to each other relatively well. You can use filler on any larger gaps, but the less of this you have to do the better.
With the piece where your hand will sit you have to carefully press the switch through the foam when attaching it. Be careful that your pieces are aligned for this since you'll want the switch to be on the side of the staff (this hides it between your fingers and allows easy operation).
Put some paint tape around the staff handle near the pieces to avoid getting unwanted paint on it and then prime all the pieces you've made before painting them.
.JPG)
Step 8: Detailing
Using craft foam create the smaller details such as the black stripes on the large cylinder piece, the small control panel with the + and lightning bolt symbol (you can simply makes these symbols by cutting the shapes out of the panel and sticking some blue and yellow foam behind them), the golden arch on the panel's piece, etc. I recommend painting these before attaching them to the staff.
.JPG)
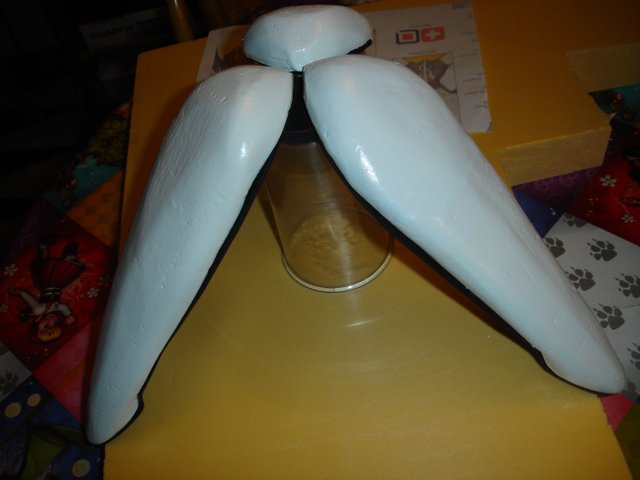
Step 9: Staff tip
Next you have to make the 3 'blades' that sit atop the staff. Carefully carve these from XPS foam (their shape is quite difficult so take your time) and sand them. After you've painted them later attach a thin piece of black craft foam to the inside/bottom of them or alternatively paint this part black (I prefer the craft foam personally since it gives it some depth and if your inside isn't super neat this also covers that up).
Create a small circle out of wood, layer a smaller circle on one side, drill a hole through the center, and attach the 'blades' to the larger circle using glue and a small screw for each. In the smaller circle drill a screw into the side which will be tightened around the tip of the motor to keep it in place. That way the tip can also be taken off for easier transport.
To finish off carve a small tip out of XPS foam, paint it black, and place it in the center of the 3 blades.
And you are finished! You can also add in LEDs in the tip and underneath the small panel (if you make them from coloured transparent plastic), although I personally didn't do this due to lack of time.
Hope you guys found this helpful and feel free to ask any questions! =D
Awesome craft! A huge number of hours to create costume is very cool)
I will follow you
Thanks! I'm glad you like it! =D
Amazing detail!! I can tell you worked really hard on this.
Thank you! =D