Ethereum multisig (GNOSIS wallet)
Hey, everybody.
Recently, I needed a multisig wallet for ETH, and I went to Google…
I found some review of multisig wallets for Ethereum and I was interested in the Gnosis wallet, in particular, the ability to hold a “light” wallet, a pretty good GUI and so far without any surprises in the style of Parity (if you know what I mean? *wink*).
There are two ways of using Gnosis wallet:
- through a web browser (paired with Metamask, Mist or Parity): https://wallet.gnosis.pm/#/wallets
- locally on your computer (https://github.com/gnosis/MultiSigWallet/releases)
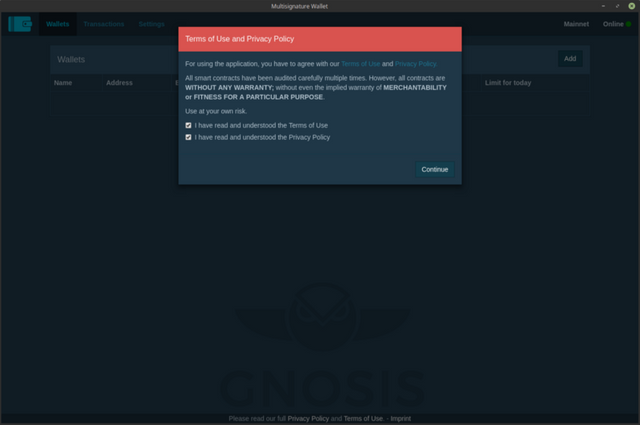
I don’t use web wallets and browser extension wallets. I am paranoid, but I have never lost a penny.In this manual we will look at the local use of the Gnosis wallet, and the principle of multisignature.I will not screen and describe the installation process. All is simple, go here: https://github.com/gnosis/MultiSigWallet/releases and download a wallet for your system. I have a Debian-based distro, so I downloaded the deb-package. Installation went smoothly and without surprises.Run the wallet, see the main window, tick the boxes and click “Continue”:
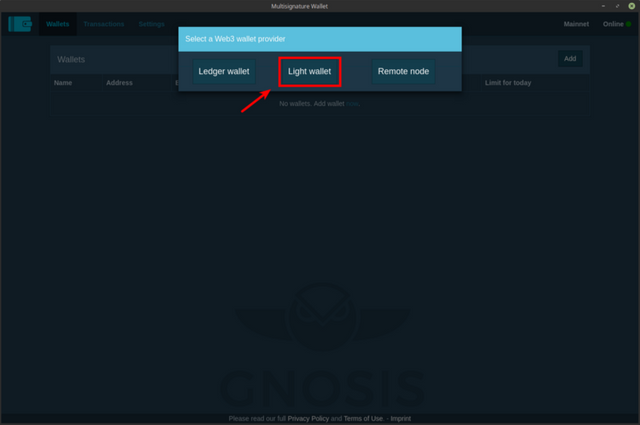
In the next window, select “Light Wallet” (if you have a Ledger or want to connect to a specific node, then select the appropriate options):
To avoid playing with the real money, you can choose a test network, which I did. I took the testnet ETH from here.
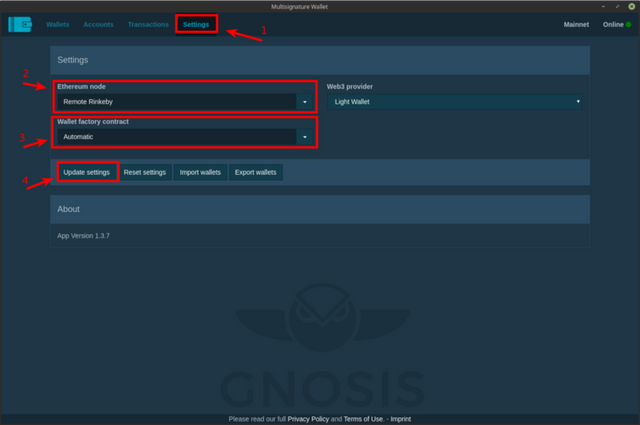
Go to “Settings” and in the section “Ethereum Node” change to “Remote Rinkeby”, press “Update Settings”, then restart your wallet:
***NOTE: Wallet factory contract → Automatic
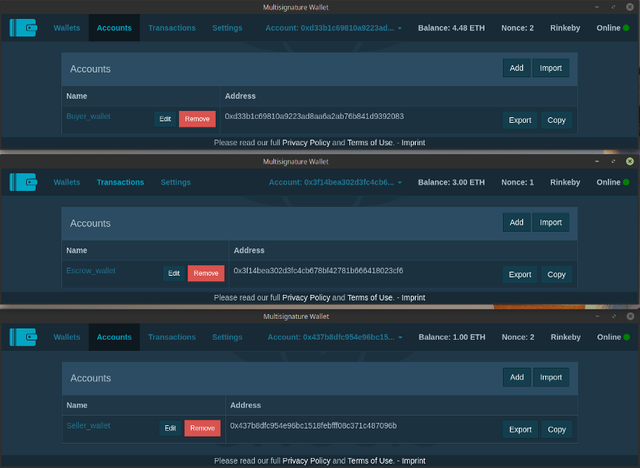
After restarting your wallet, go to “Accounts”. I already have test accounts, so I click on “Import”, select the keystore file and enter its password:
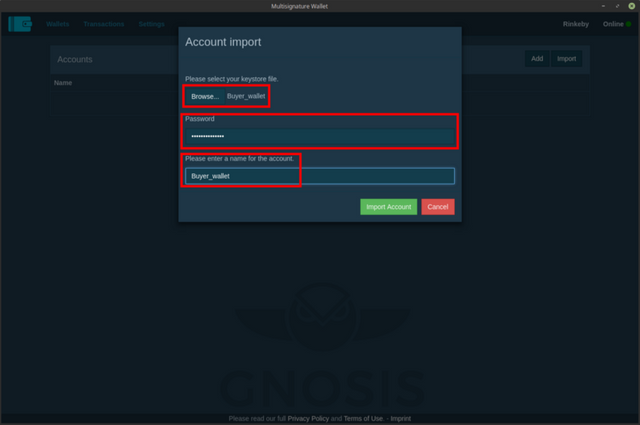
As all wallets are installed on the same computer, I repeat all these steps for each wallet. As a result, I have three wallets — the Buyer (Buyer_wallet), the Escrow (Escrow_wallet) and the Seller (Seller_wallet).
Creating a MultiSig Wallet
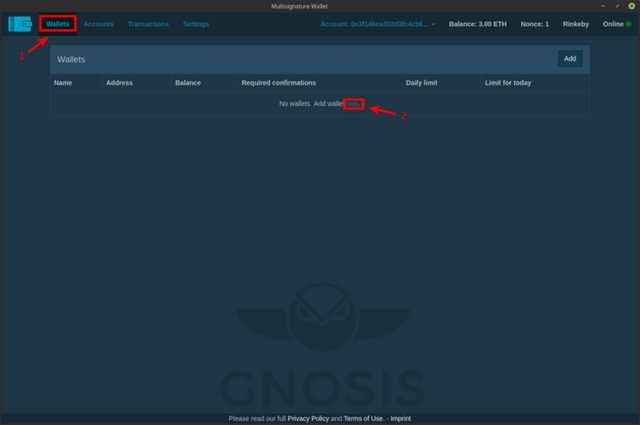
Let’s imagine the simplest situation — ETH will act as a payment option, the Buyer wants to buy the product from the Seller through the Escrow, using a multisig wallet.To create a new wallet, go to “Wallets” and add a new wallet:
Choose “Create new wallet”:

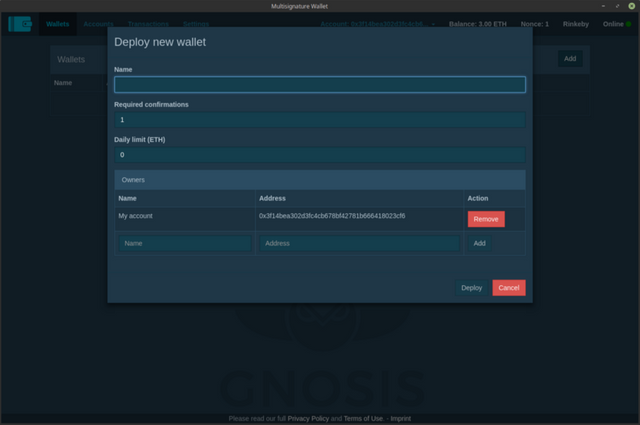
- “Name” — the name of the wallet (all parties of the deal can name in their own way);
- “Required confirmations” — how many confirmations (signatures) are required to perform the operation with this wallet;
- “Daily limit (ETH)” — daily limit of ETH withdrawal from this wallet;
- “Owners” — wallet owners (total number of owners);
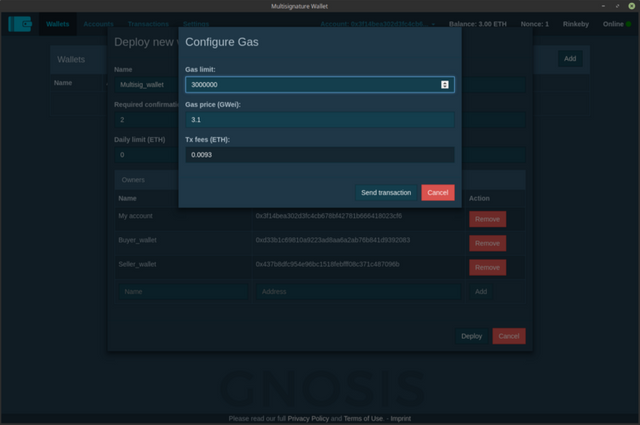
Okay, we got this figured out. On the following screen you will see my settings of creating a multisig wallet:
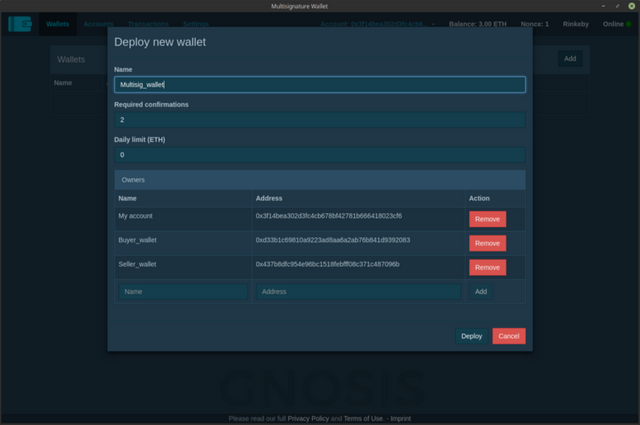
As you can see, the number of signatures is 2 and the total number of owners is 3. So, we have a scheme of 2 out of 3. Click “Deploy” and then “Send transaction”:
***NOTE. The account that creates the Multi-Sig Wallet must have a little ETH to pay for the gas.
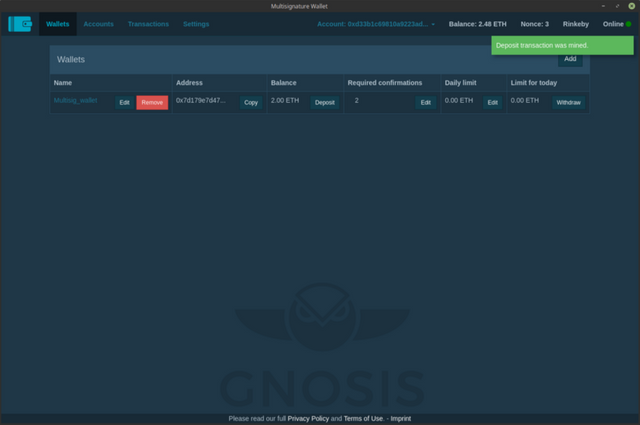
Go to “Wallets” and you’ll see a multisig wallet:
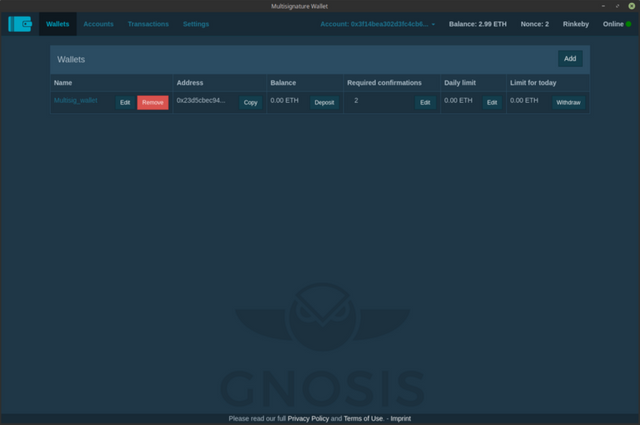
Click on the name of your wallet to see detailed information about it:
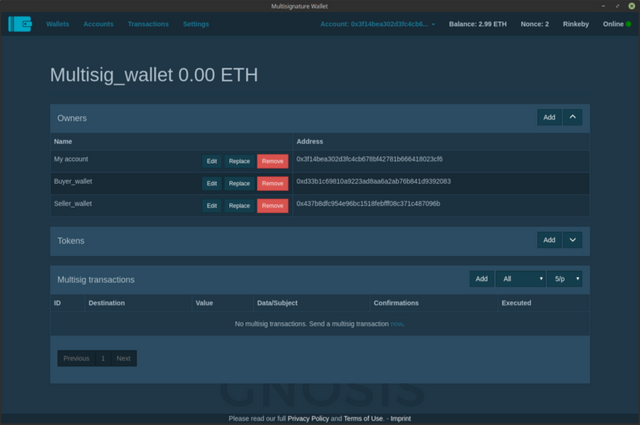
The wallet is still empty (0.00 ETH).
- In “Owners” — we see everyone who controls this wallet.
- In “Tokens” — you can add tokens
*****Important note.**
In this case, the multisig wallet was created by the Escrow. Now he (the Escrow) should share the multisignature wallet with two other co-signers (owners) — to the Buyer and Seller.
It doesn’t matter who creates the multisig wallet, the main thing:
* Properly specify the addresses of the owners (owners should carefully check their addresses, which were specified by the person who creating the wallet);
* To create/sign, you need to have an ETH on your balance to pay the cost of the gas (you can monitor here);
* After creating of the multisig wallet, the creator must share it with other owners (co-signers). They don’t have to create a new multisig wallet, but only import the already created.
Sharing a multisig wallet is easy. The person who created it should go to “Settings” and choose “Export Wallets”. The code you see does NOT contain private data and you can share it with other co-signers, that should to “Settings” and select “Import Wallets”, paste the code from the creator of the multisig wallet, and click “Save”.Here is the code of the multisig wallet that Escrow shares with the other two parties of the deal:
{“wallets”:{“0x7D179E7d4793210bd9a3CA1CfbF916Fd4f1A763E”:{“name”:”Multisig_wallet”,”owners”:{“0x3f14bea302d3fc4cb678bf42781b666418023cf6”:”My account”,”0xd33b1c69810a9223ad8aa6a2ab76b841d9392083":”Buyer_wallet”,”0x437b8dfc954e96bc1518febfff08c371c487096b”:”Seller_wallet”},”tokens”:{}}}}
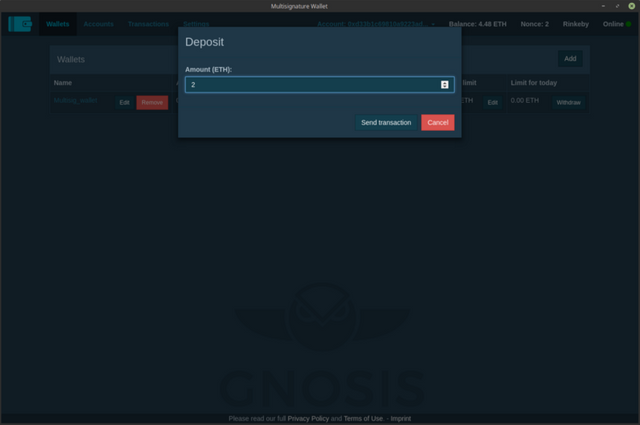
Let’s keep going…The Buyer sends 2 ETH to the multisig wallet:

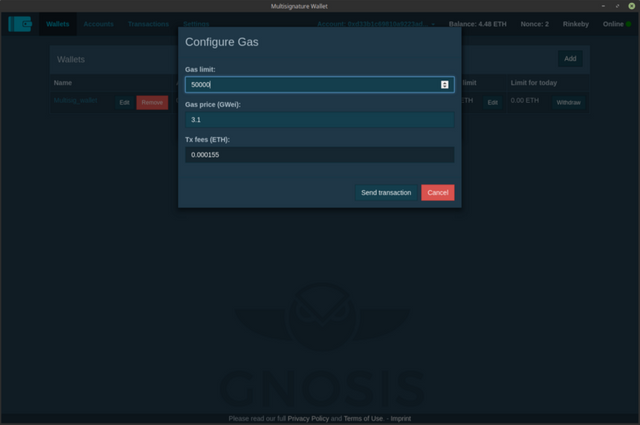
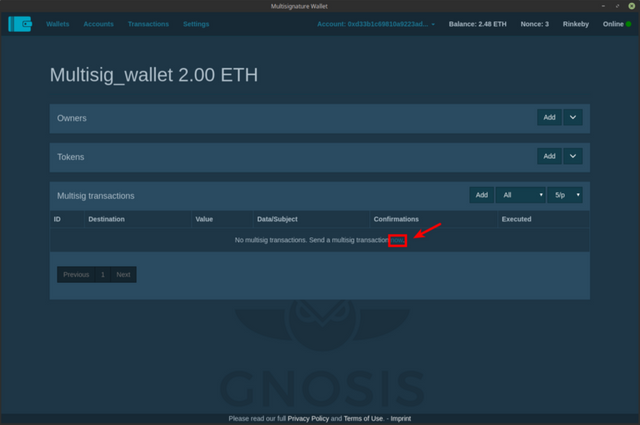
Let’s imagine that after the Buyer sends the transaction to the multisig wallet, the Seller disappeared. The Buyer wants to return the ETH to his personal wallet address. Since in this case, the scheme of 2 of 3, it means that someone must create a transaction, and someone just sign it.It does not matter who will create and who will sign. But it will be more logical if the Buyer will create a transaction, because he needs to specify his personal wallet address.The Buyer goes to “Wallets”, opens the detailed information about the multisig wallet and clicks on the “Send a multisig transaction now”:
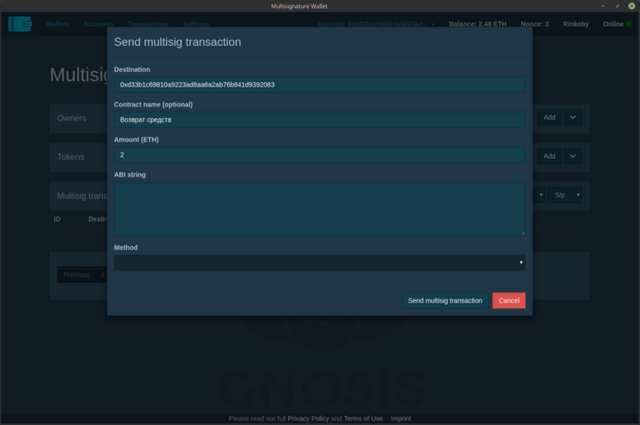
After that he indicates the personal wallet address, the amount of ETH and comment (optional):

The Buyer opens detailed information about the multisig wallet and sees:
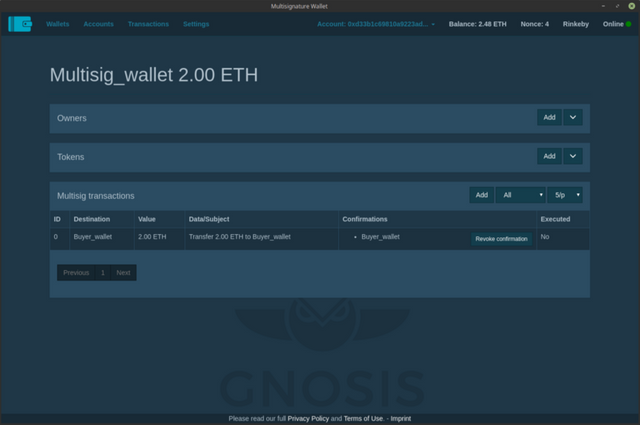
- Destination — to which ETH address will the ETH go (if you point the mouse you will see the ETH wallet address);
- Value — the amount of ETHs to be sent;
- Confirmations — who has signed the transaction at the moment (in this example you can see that the Buyer has already signed the transaction) and the Revoke confirmation button to cancel the signature;
- Executed — was the transaction sent to the network;
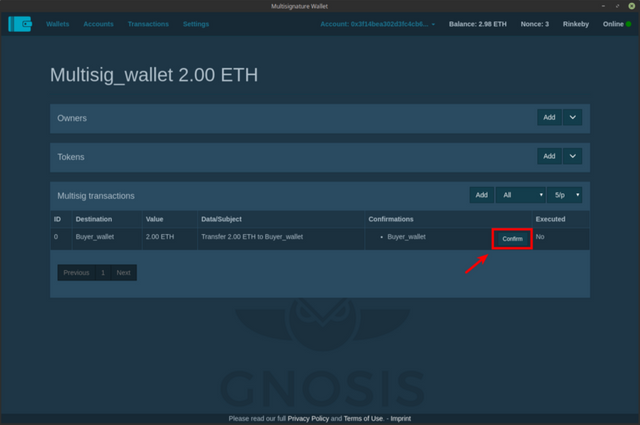
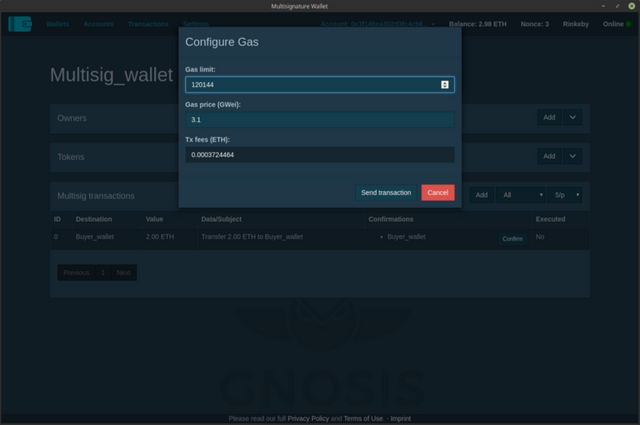
Well, the Buyer has created a multisig transaction, indicated the personal wallet address, the Escrow has only to sign.The Escrow opens his wallet, goes to “Wallets”, opens multisig wallet, looks at the details and sees almost the same thing as the Buyer (where and how much the ETH will be sent). In “Confirmations”, he sees that the transaction has already been signed by the Buyer, and also sees the “Confirm” button to sign the transaction on his part:
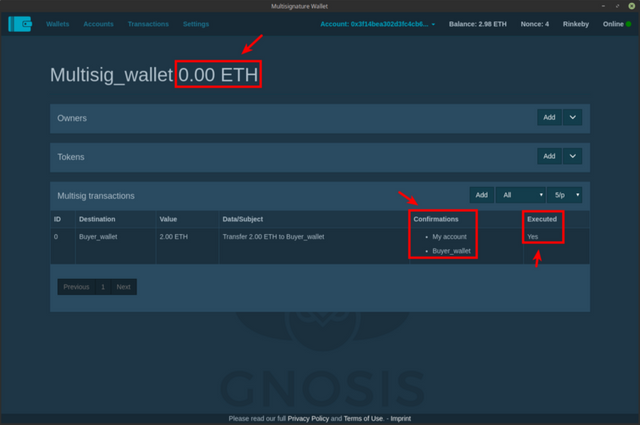
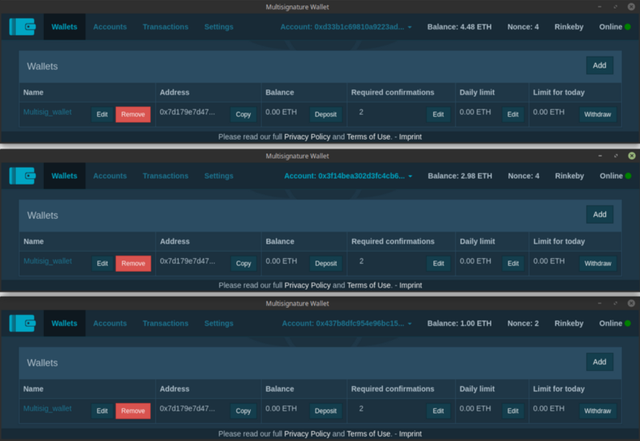
That’s how the multisig wallet looks now on the part of the Buyer, Escrow and Seller:
The buyer did not receive the goods/service from the seller and returned his ETH. The seller received negative feedback.
Use the multisignature and take care of your ETH.
Thank you for your attention.
If the article was useful to you, support the release of the next one.
 48asCffTPEMeqbxAf2XkP16qeuRTh7vxkQDhfXfbG5LgJ8YJeJEaUsrQ86dKyuyot2KfthhPuzFFRRqL7cFi2TCV1gBSLiF
 1MRDrYQfE6Vy1rqrWL6aN3iVCKofvvNA3w
 https://tippin.me/@thefuzzstone
 gVtQVSN8EzaTBboDFRgGMRZrbDDRpGu4wnFdjGVgzmfVbnVKRMn3
 0x0c30f1De9B30C9872d920200BB03aA3b67b7E300
 Ldt5cQLtaZid6oiwjM7rT6Ne2X5LjKyjpr
 0xbD55b072728865d37851bEfFD200EC3B5BBE91A7
Congratulations @thefuzzst0ne! You have completed the following achievement on the Steem blockchain and have been rewarded with new badge(s) :
You can view your badges on your Steem Board and compare to others on the Steem Ranking
If you no longer want to receive notifications, reply to this comment with the word
STOPTo support your work, I also upvoted your post!
Do not miss the last post from @steemitboard:
Vote for @Steemitboard as a witness to get one more award and increased upvotes!