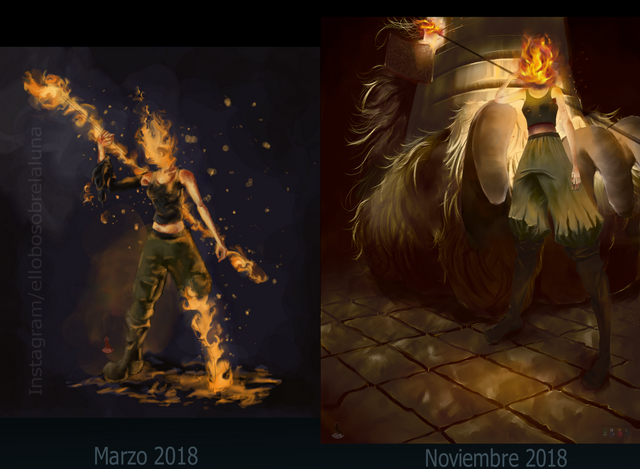
- Una vez más, mis queridos viajeros, les envío mis bonitos saludos. En esta ocasión, me dispondré a mostrarles el proceso de una ilustración que he realizado con el objetivo de poner de manifiesto el progreso que he obtenido en tanto dibujo, técnica, así como composición en los últimos meses. Para ello tomé una ilustración que data de marzo de este año (2018) y le he hecho una nueva versión. Opté por esta, porque, en su momento, fue mi mejor ilustración.
Nota: La entrada que están por apreciar no se trata de un tutorial, sino más bien de mis ganas de compartir con ustedes el proceso que llevo a cabo durante mis trabajos, y de esperar que quizá puedan serles útiles de algún modo. Comprendo que es la misma idea de un tutorial, sin embargo, aún con ello, repito, esto no es un tutorial.
Así pues, he aquí el procedimiento que he seguido con el fin de obtener el resultado final.
- Once again, my dear travelers, I send you my beautiful greetings. On this occasion, I will show you the process of an illustration that I have made with the aim of highlighting the progress I have made in drawing, technique, as well as composition in recent months. For this I took an illustration that dates from March of this year (2018) and I have made a new version. I opted for this, because, at the time, it was my best illustration.
Note: The entry you are about to appreciate is not about a tutorial, but rather about my desire to share with you the process that I carried out during my work, and to hope that maybe they can be useful in some way. I understand that it is the same idea of a tutorial, however, even with it, I repeat, this is not a tutorial.
So, here is the procedure that I followed in order to obtain the final result.

1.
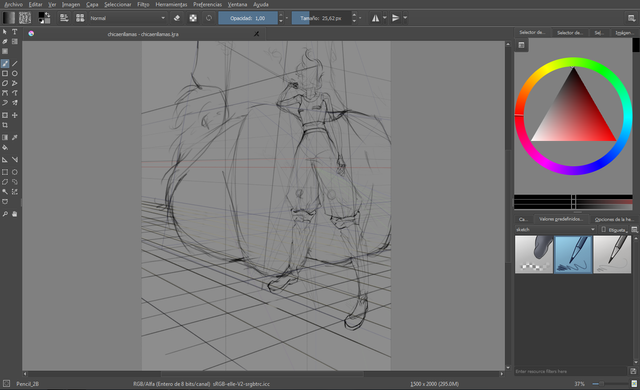
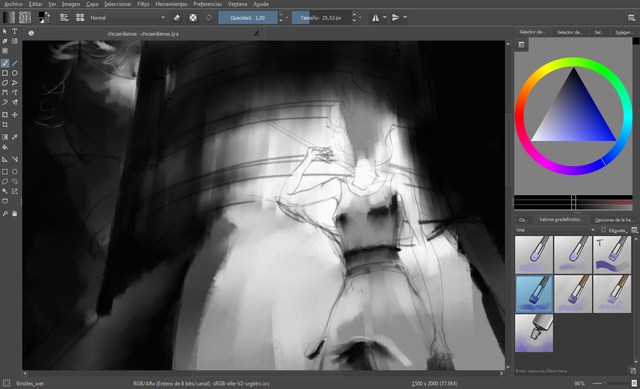
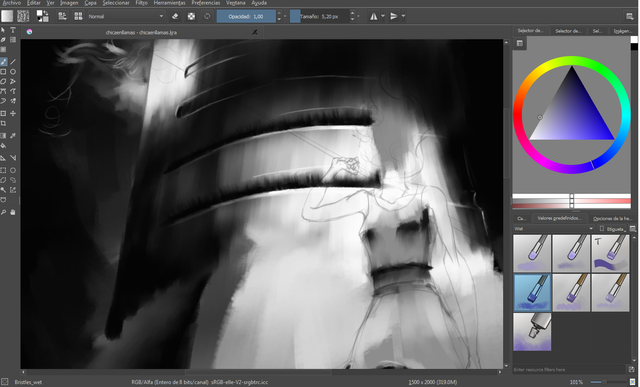
Comencé generando un boceto, utilizando para ello el lápiz 2B (disponible en el menú desplegable de pinceles, en la categoría sketch).
I started generating a sketch, using the 2B pencil (available in the drop-down menu of brushes, in the sketch category).
2.
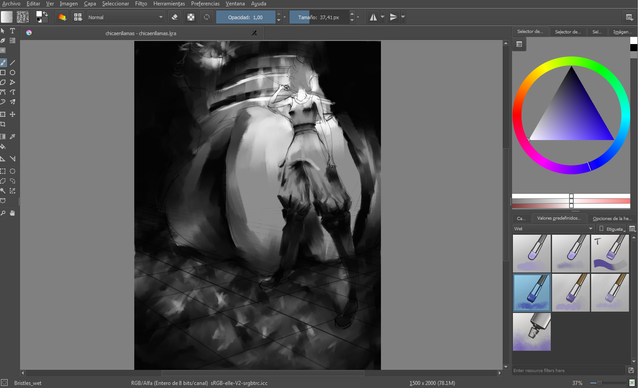
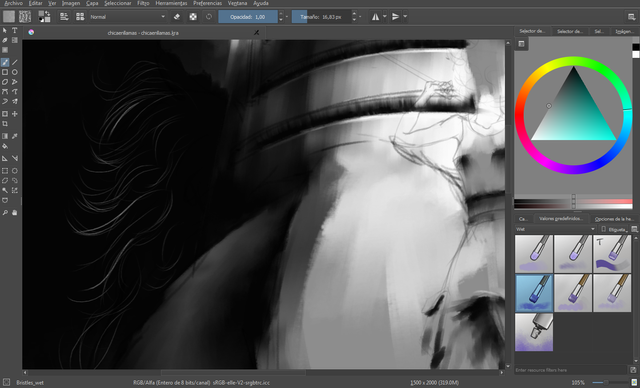
Seguidamente, con el pincel bristles wet (disponible en el menú desplegable de pinceles, en la categoría wet), mismo con el que continuaré por el resto de la ilustración, esbocé una mancha que me serviría como base para la escala de grises.
Next, with the bristles wet brush (available in the drop-down menu of brushes, in the wet category), with which I will continue for the rest of the illustration, I outlined a stain that would serve as a basis for grayscale.
3.
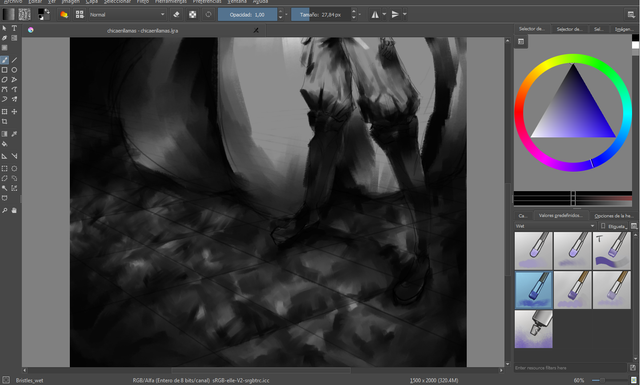
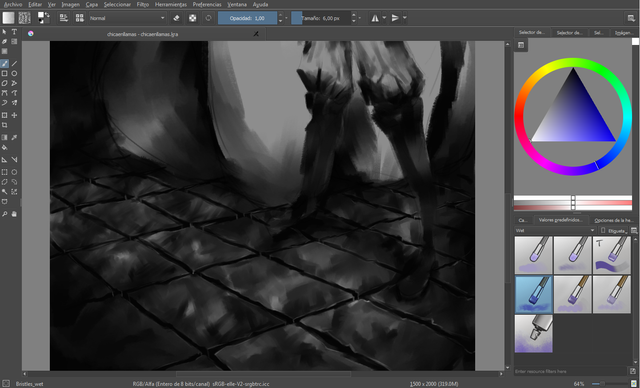
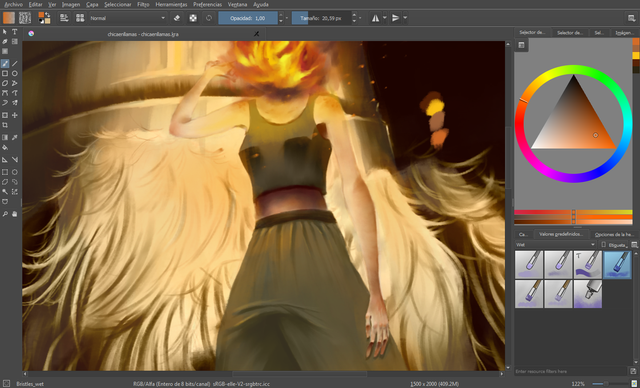
Continué definiendo la mancha, adaptándola a las diversas texturas inmiscuidas en la composición. Así para el metal tracé pinceladas rectas y en sentido vertical, con el fin de emular la dureza del material. En contraposición a ello, para la piel empleé una pincelada casi imperceptible, de mayor minuciosidad. Para las telas tracé pinceladas paralelas a la forma del ropaje, incluyendo pliegues.
I continued defining the stain, adapting it to the different textures involved in the composition. So for the metal I drew straight brush strokes and vertically, in order to emulate the hardness of the material. In contrast to this, for the skin I used an almost imperceptible brushstroke, of greater meticulousness. For the fabrics I drew brushstrokes parallel to the shape of the garment, including folds.

4.
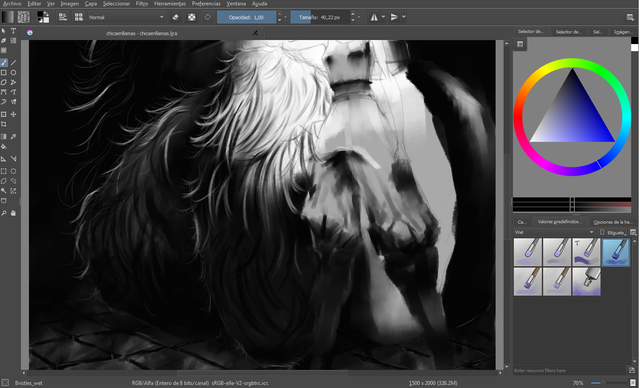
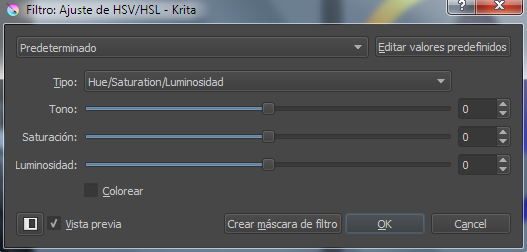
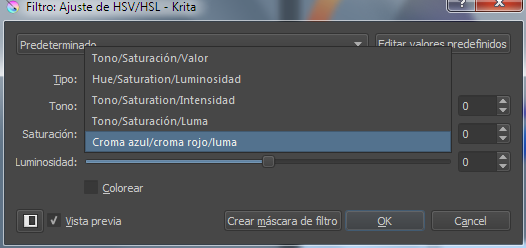
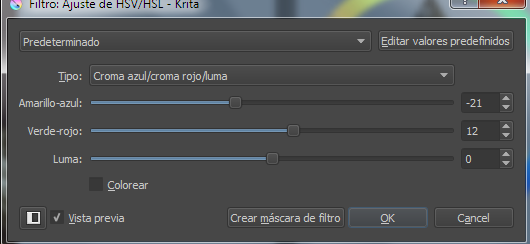
Una vez finalizado aquello, proseguí ajustando la capa de escala de grises, a una composición monocromática, en la que predominase un color amarillo-naranja, mismo que más tarde me serviría para matizar la escena. Para ello presioné CTRL+U en mi teclado > croma azul/croma rojo/luma > ajusté manualmente las opciones > OK
Once that was finished, I continued adjusting the gray scale layer, to a monochromatic composition, in which a yellow-orange color prevailed, which later would serve to qualify the scene. To do this I pressed CTRL + U on my keyboard> chroma blue / chroma red / luma> manually adjusted the options> OK
5.
Continué añadiendo los colores planos de los elementos de la ilustración, separando cada color en una capa distinta, en vista de que cada uno posee su propia luminosidad.
I continued adding the flat colors of the elements of the illustration, separating each color in a different layer, since each one has its own luminosity.

6.
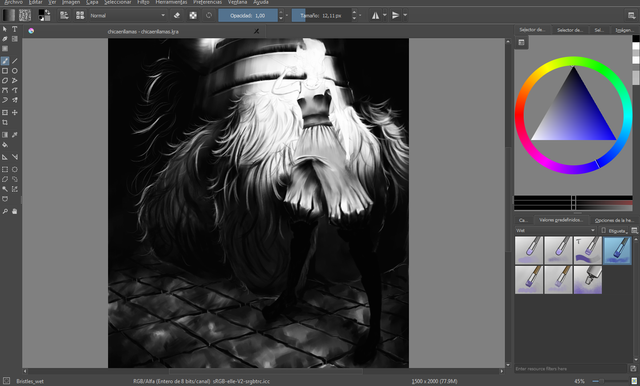
Proseguí añadiendo la iluminación del fuego, con colores naranjas, y amarillo-naranja.
I continued adding the lighting of the fire, with orange colors, and yellow-orange.
7.
Comencé a esbozar los matices de la piel con rojos, amarillos-naranjas y naranjas.
I began to sketch the nuances of the skin with reds, yellows-oranges and oranges.
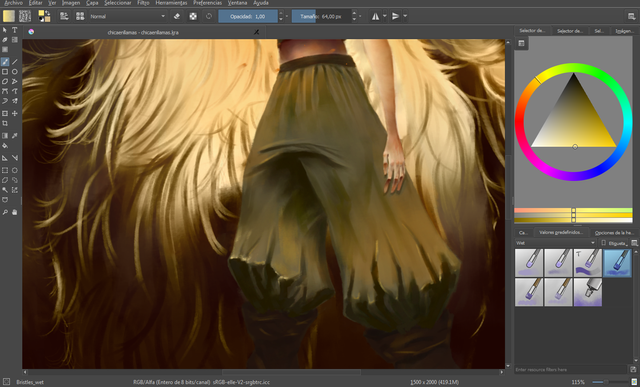
8.
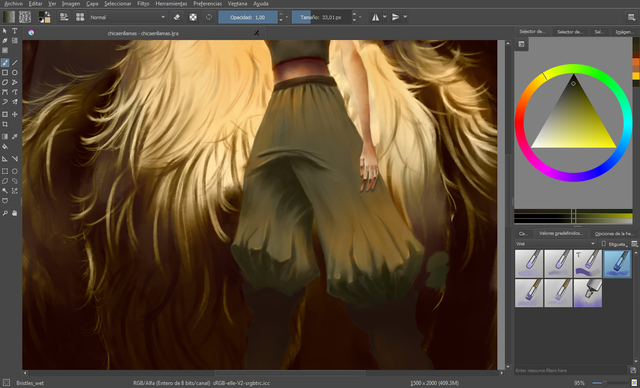
Añadí los tonos bajos del pantalón, tomando como guía la capa inferior (la de los tonos).
I added the lower tones of the trousers, taking as a guide the lower layer (that of the tones).
9.
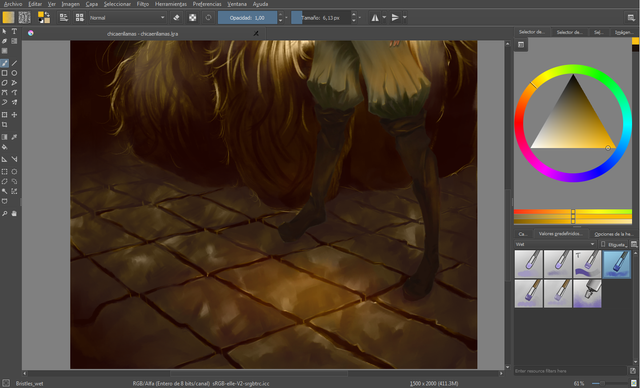
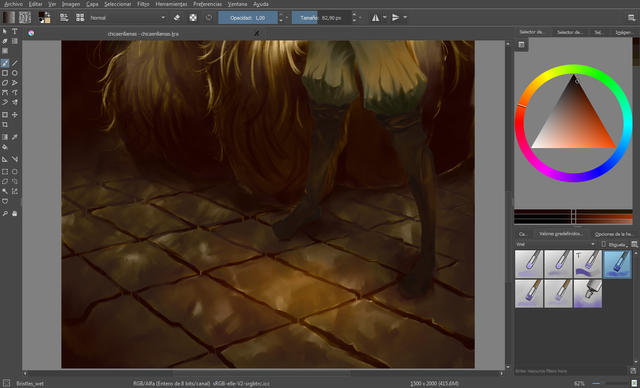
De igual forma hice con los tonos bajos del piso, así como de las botas.
In the same way I did with the low tones of the floor, as well as the boots.
10.
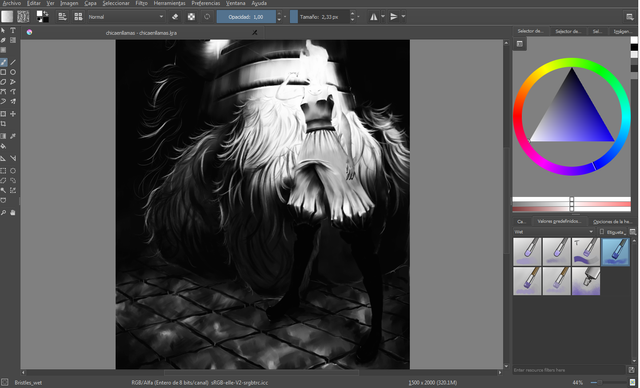
Seguidamente tracé la sombra que proyectan los elementos.
Then I traced the shadow projected by the elements.
11.
Decidí añadir más detalles al pantalón, utilizando para ello, amarillos-naranjas.
I decided to add more details to the pants, using yellow-orange for this.
12.
Comencé a crear las garras del felino, tomando como referencia las de un tigre. En este sentido, inicié manchando la forma de las mismas, para con posterioridad definir la forma y añadirle los tonos altos/bajos.
I started to create the cat's claws, taking as a reference those of a tiger. In this sense, I started staining the shape of them, to later define the shape and add the high / low tones.

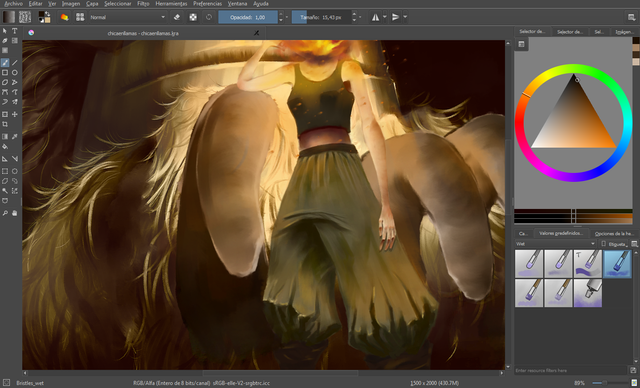
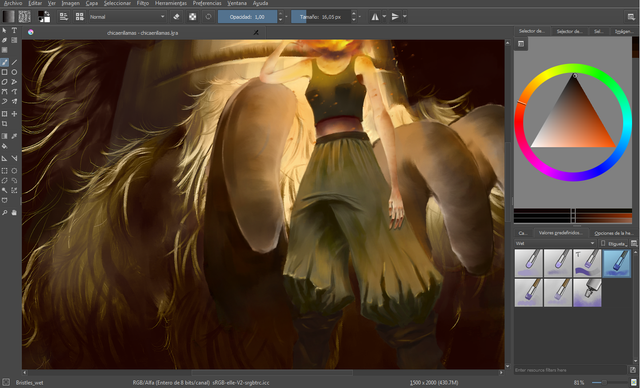
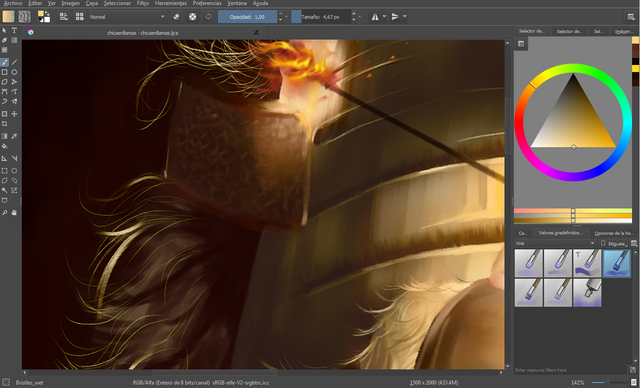
13.
Para finalizar, añadí detalles a la correa de la armadura del felino.
To finish, I added details to the strap of the feline's armor.
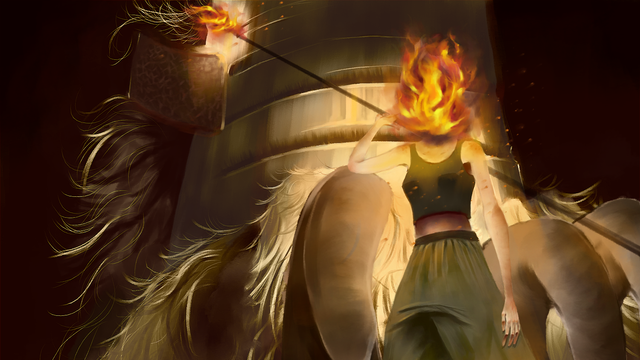
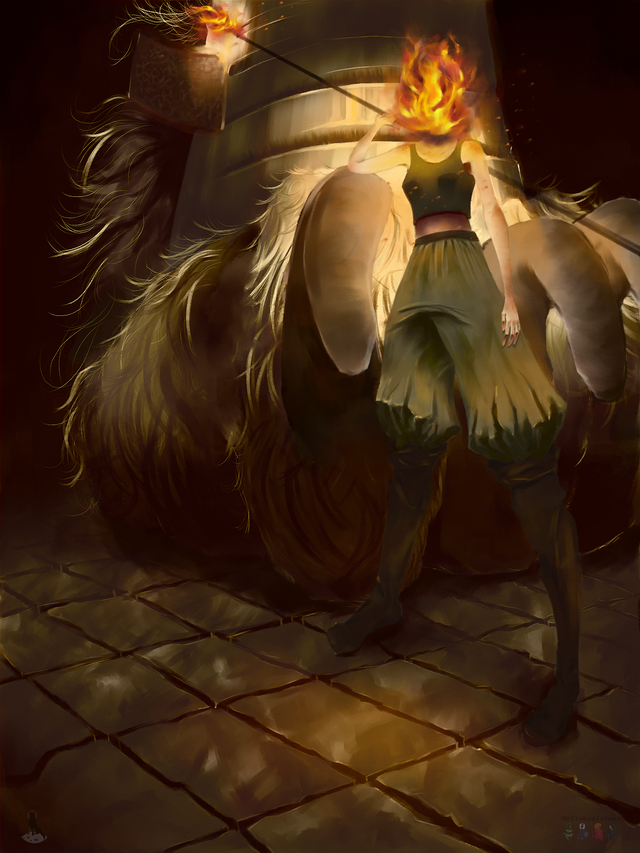
Yyyy, he aquí la ilustración finalizada. Gracias por leer hasta el final, viajeros; y recuerden que continuaremos subiendo entradas de este tipo, estén atentos. Se despiden con muchísimo afecto, amor, y esas cosas, el Lobo y la Luna. <3
P.D.: La ilustración fue realizada en el software LIBRE, genial, y amorcito, Krita 3.1.3
P.D.2: Nunca, nunca, nunca dejen de dibujar.
Aaaand, here is the finished illustration. Thanks for reading to the end, travelers; and remember that we will continue uploading tickets of this type, stay tuned. They say goodbye with a lot of affection, love, and those things, El lobo and la Luna. <3
P.D .: The illustration was made in the software FREE, great, and sweetie, Krita 3.1.3
P.D.2: Never, never, never stop drawing.
Facebook
Tumblr
Instagram
Deviantart
"This work is licensed under a Creative Commons
Attribution 4.0 International License"
Copyright @elsll - All Rights Reserved
brutal! me encanta tu trabajo!
¡Muchas gracias! Sobretodo por volver siempre querido viajero.
¡Está increíble tu ilustración! Un trabajo muy genial y un buen tutorial para aquellos que deseen seguir tus pasos.
¡Gracias por comentar! Sin embargo quiero aclarar algo, y es que, como dice al inicio del post esto no es un tutorial, es el proceso de nuestras ilustraciones. :)
Puffff Demasiado brutal es tu trabajo.
¡Muchas gracias!
I love it, @elsll :) This is a striking piece, with a cool character and a great composition <3 The colours are done super well, too ! And you presented your step by step so nicely, as usual <3
ahww thanks you for your sweet words <3
<3
Congratulations @elsll! You have completed the following achievement on the Steem blockchain and have been rewarded with new badge(s) :
Click here to view your Board of Honor
If you no longer want to receive notifications, reply to this comment with the word
STOPTe ha quedado genial.
¡Gracias!
Congratulations @elsll! You have completed the following achievement on the Steem blockchain and have been rewarded with new badge(s) :
Click here to view your Board of Honor
If you no longer want to receive notifications, reply to this comment with the word
STOPCongratulations @elsll! You have completed the following achievement on the Steem blockchain and have been rewarded with new badge(s) :
Click here to view your Board of Honor
If you no longer want to receive notifications, reply to this comment with the word
STOPwoww me encanta