How to Design a Minimal Reading Table with SelfCAD
How to Design a Minimal Reading Table with SelfCAD
Welcome to this tutorial on designing a sleek and minimalist reading table using SelfCAD. A reading table serves as a quiet sanctuary where you can escape into the pages of your favorite books, dive into work projects, or simply unwind with a cup of tea. In this tutorial, we'll guide you through the process of creating your own modern and functional reading table that seamlessly blends into any space.
Whether you're a bookworm searching for the perfect reading nook addition or a designer aiming to craft a stylish yet practical piece of furniture, you're in the right place. With SelfCAD's user-friendly 3D modeling tools, you'll be able to bring your vision of the ideal reading table to life.
To access the interactive tutorial to this article, visit https://www.selfcad.com/tutorials/5d1p322c4q281n2d214g1c1i5p125275c1n2
Once you’ve launched the editor;
From the 3D Shapes Category on the Toolbar choose Cube
Set Width to 150, Height to 130, Depth to 150, Width segment to 7, Height segment to 2, Depth segment to 4, Position y to 150
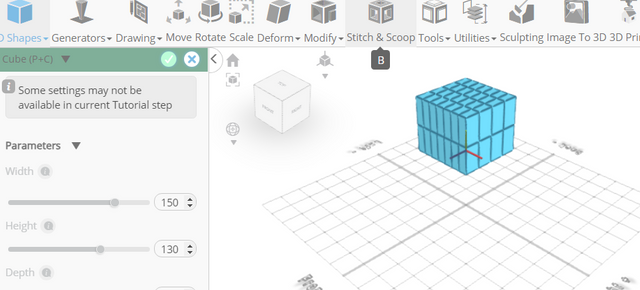
Click to finalize Cube
Click Solid + Wireframe button to set rendering mode
From the 3D Shapes Category on the Toolbar choose Cylinder
Set Top Radius to 140, Bottom Radius to 140, Height to 172, Vertical segments to 3, Position x to 32, Position y to 136, Rotation x to 90, Rotation y to 18
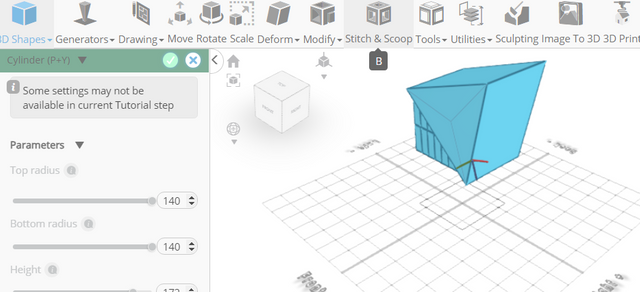
Click to finalize Cylinder
Click on mesh 4 to select it
Click Stitch & Scoop on the Toolbar. From the Tool panel choose Difference
Choose mesh 8 to subtract
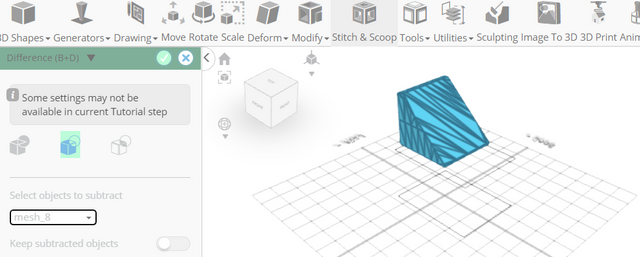
Click to finalize Difference
Click to activate Polygon selection
Click on highlighted region to select it
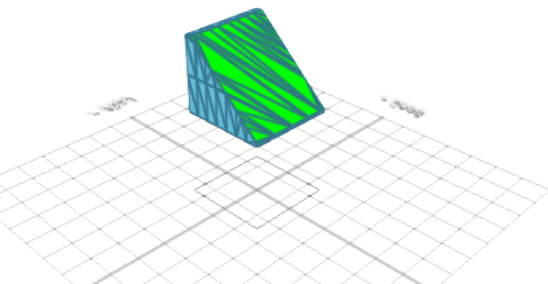
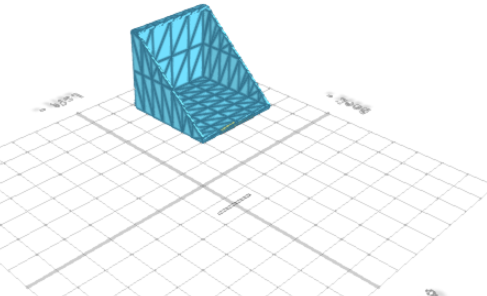
Click Delete button to delete selected object
From the Modify Category on the Toolbar choose Add Thickness. Set thickness to -5
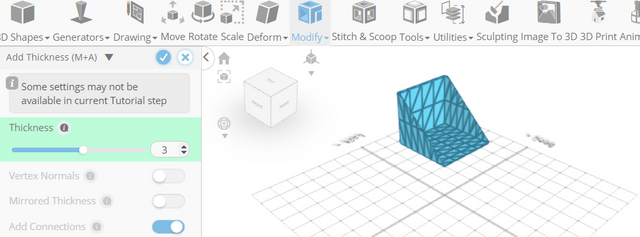
Click to finalize Add Thickness
Click to activate Face selection
Click on highlighted region to select it
From the Modify Category on the Toolbar choose Inset
Click Add Option to add next macro step
Set Operation to extrusion. Set Amount to 40
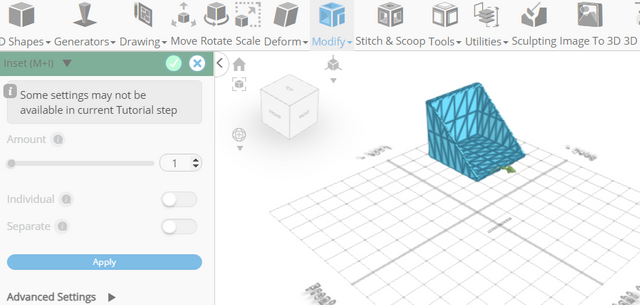
Click to finalize Inset
Click on highlighted region to deselect it
From the 3D Shapes Category on the Toolbar choose Cylinder
Set Top Radius to 5, Bottom Radius to 3, Height to 156, Horizontal segments to 22, Vertical segments to 4, Position x to 32, Position z to -63, Rotation x to 9, Rotation y to 40
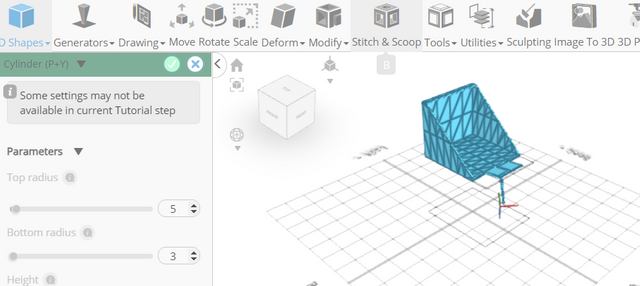
Click to finalize Cylinder
From the Utilities category choose Mirror
Set Create Copy to true. Set Offset to 50
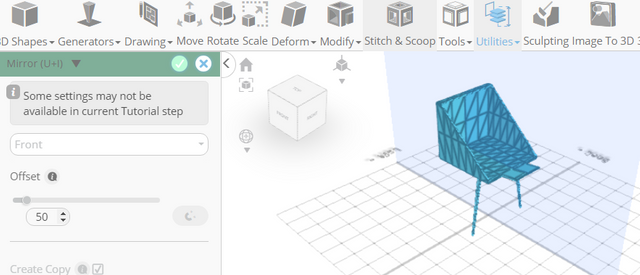
Click to finalize Mirror
Click highlighted part on selection cube to turn off region selection
Click on mesh 12(1) to select it
From the Utilities category choose Mirror. Set Create Copy to true. Set Direction to left, Offset to 40
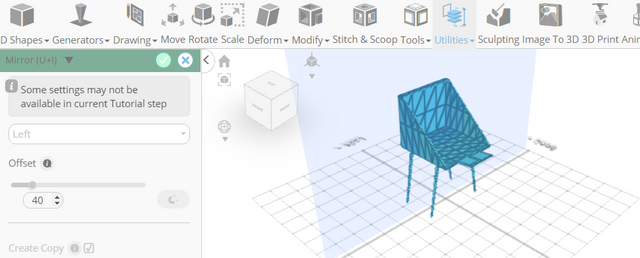
Click to finalize Mirror
From the Edit Menu on the Top Toolbar choose select All
Click Stitch & Scoop on the Toolbar. From the Tool panel choose Union
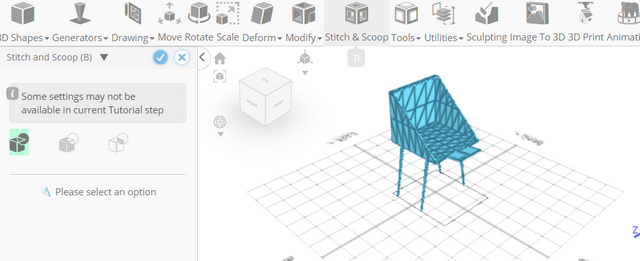
Click to finalize Union
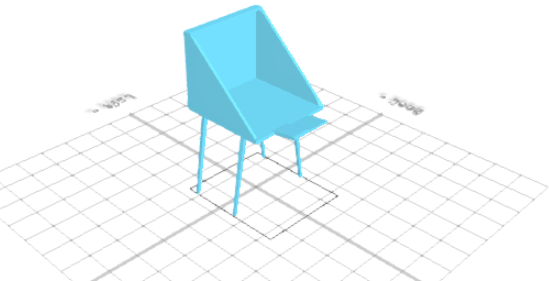
Click Solid button to set rendering mode
As you continue honing your design skills, remember that SelfCAD offers a wealth of resources to support your learning journey. To deepen your understanding and explore more advanced features, consider checking out the interactive tutorials (https://www.selfcad.com/tutorials) available on the SelfCAD website. The tutorials page provides a treasure trove of guides, tips, and tricks that cater to designers of all levels.
More structured learning experience can also be accessed at the SelfCAD Academy (https://www.selfcad.com/academy/curriculum/), https://www.youtube.com/@3dmodeling101, and 3D Modeling 101 series (https://www.youtube.com/playlist?list=PL74nFNT8yS9DcE1UlUUdiR1wFGv9DDfTB). This comprehensive resource offers in-depth courses taught by industry experts, allowing you to master the intricacies of SelfCAD at your own pace.