An Uplifting Experience - Part 3 (Final)
Alright, so most of this post is about yesterday, but some of it was today, including the best part, testing the lift, but first we have to start from the beginning. When I woke up I felt like complete garbage. My head was completely plugged up and I could barely breath. After spending most of the morning clearing that out of my nasal passages and recovering from the stomach issues, I couldn't resist getting back to work on the lift, so out in the shop I went.
With the columns in place and the overhead beam assembled, it was time to put that thing up there. I realized that it was silly of me to leave the limit switch and arm in place while doing this step because it would be cumbersome, so I removed them. I put the first end into place with some super long carriage bolts I had in my hardware stash.
I learned this trick from doing automotive stuff in tight spaces. The extra long bolts let you slide the piece into place while being guided by the shafts of the bolts toward the bolt holes on the other mating surface. This allows you to align everything while you get a few of the factory fasteners into place. Then you switch out the aligning hardware for the correct stuff once the pieces are joined. This worked great, but I ran into a problem on the other end however.
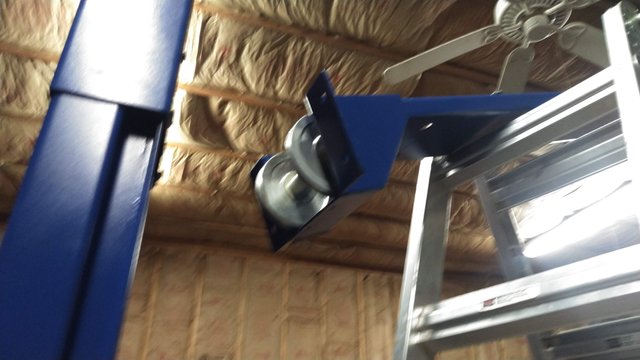
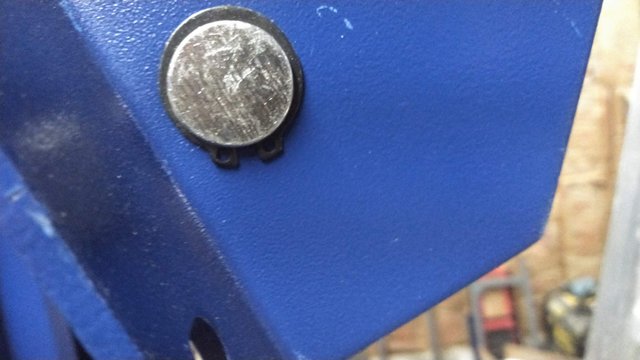
These pulley wheels were keeping me from swinging the other end into place. I removed the snap ring holding the pin in, drove out the pin and then reassembled once the beam was bolted into place.
Next step according to the instructions was to route the balancing cables. Due to the nature of hydraulics, a cylinder with a super long hose won't go up at the same rate as a cylinder with a short hose. Since the power unit is installed on one of the columns and this necessitates the cylinder on the opposite side to have a very long hose while the one on the same column as the power unit is very short, this problem must be mitigated mechanically somehow. This is where the balancing cables come in.

The pair of cables is routed through a series of idler pulleys from side to side in such a fashion that each carriage must go up at the same time no matter the differential in force applied to each lifting cylinder. It's a neat little design that's beyond the scope of this blog post, but very interesting nonetheless. If you're into that sort of thing, I recommend looking at it. It reminds me of how a stabilizer bar works on vehicle suspensions.

Once the cables were in place and routed according to the diagrams they were tightened just enough to keep everything in place. They were adjusted to the proper tension later on. The instructions on how this should be done were rather vague. They basically said you should adjust it like a banjo string, with moderate force being able to move it an inch from side to side. This is a completely ridiculous way to describe a process, but ultimately I tightened each cable until I could make it sing. That is, I could pluck it and it had enough tension to make a low tone that was audible to the human ear, which should be somewhere around 35-50 Hz depending on whose ears hear it. I'm not sure if this is completely correct, but that's what I did, and it seemed to work well. I adjusted each side a little bit at a time, doing the exact same number of turns on each. When I ultimately tested the lift I thought something was wrong with one of the safety catches because they clicked at almost exactly the same time and I thought I was hearing just one of them. That's a testament to the build quality of this lift considering that they would have to be exactly the same lengths of cable with each of the columns built to the exact same tolerances in order for my method to have yielded such a result. This kind of thing gives me confidence that the build quality is good enough that I don't have to worry about my safety while using it. the people who manufactured it took great care to make sure it would perform well.
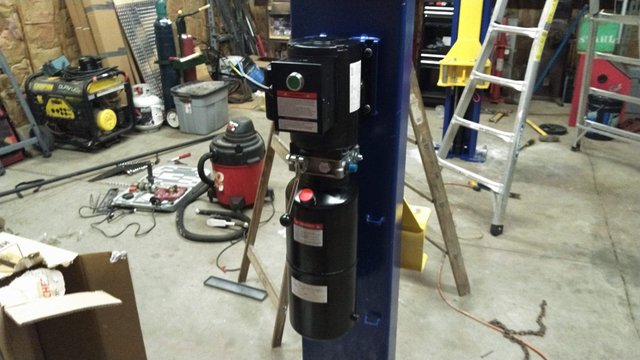
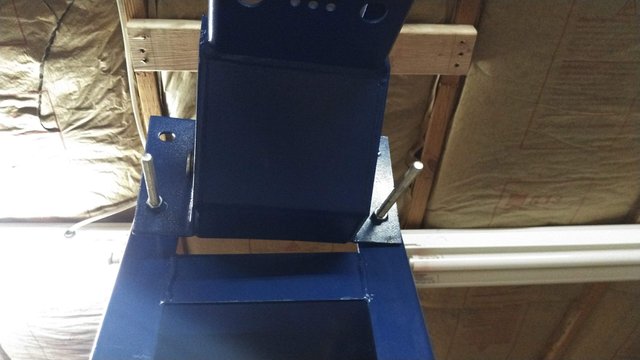
I then hung the power unit on the column. Another indication that the designers and assemblers of this lift have an attention to detail, notice the little opening at the top of the mounting bracket like a t-slot on a milling table. This made it possible to mount the top-heavy power unit by first installing the top two bolts on the power unit, then sliding them down into those slots once it was lifted into place. I greatly appreciate things like this because they are often neglected details that, without them, would make holding this awkward thing up while fumbling with fasteners frustratingly difficult. In a YouTube video I watched on another lift installation, the host had a difficult time with this step for this reason.
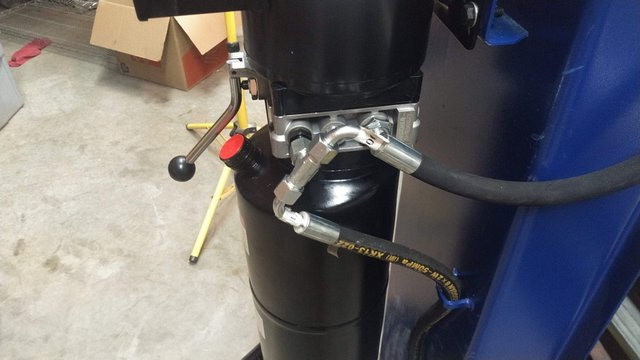
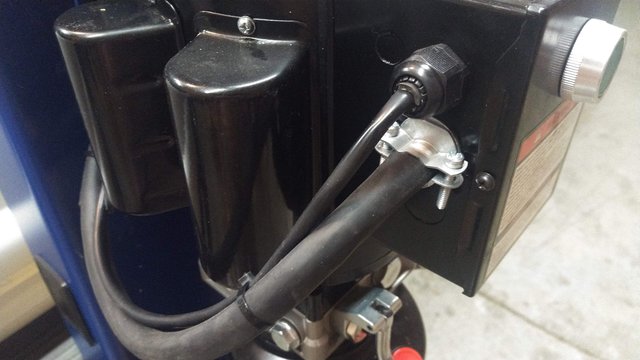
Once the power unit was into place it was time to plumb in the hydraulic hoses. This was pretty straightforward. Again the instructions weren't very good, but it was easy to see where they were supposed to be routed based on the way the brackets were welded to the posts. Notice the 50 MPa rating on the hose. That's 7250 psi hose for a system that's only going to put out about 2250 psi. Nice!
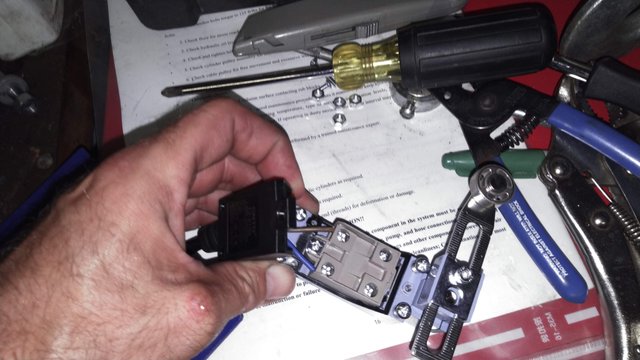
Next I needed to do the wiring. This consisted of first wiring up the limit switch. The limit switch is normally closed and opens the circuit when the arm swings up or down. Once it's wired between the circuit that supplies power to the main relay, it'll shut down power to the lift when a vehicle gets too high on the lift and hits the mechanism. Simple yet effective. I also put the switch back into place along with the limit bar and adjusted it appropriately.
Next was giving power to the lift via a 30 amp 220 volt circuit as it called for in the instructions. I'm not sure why it needed this much juice considering that I found info inside the packaging of the power unit itself that says it only draws just under 15 amps. I'm not an electrician, but it seems like a 20 amp circuit would be more than enough for this install. I guess it's better to have too much than not enough. It will give me less line loss at the very least. This is a common theme I'm noticing with this product. It seems that wherever I look, everything is just a little bit overbuilt. From an engineering perspective, this may be a failure, since it ends up costing more for nominal or no gains, but overbuilt products tend to last a lifetime too, so there's that.
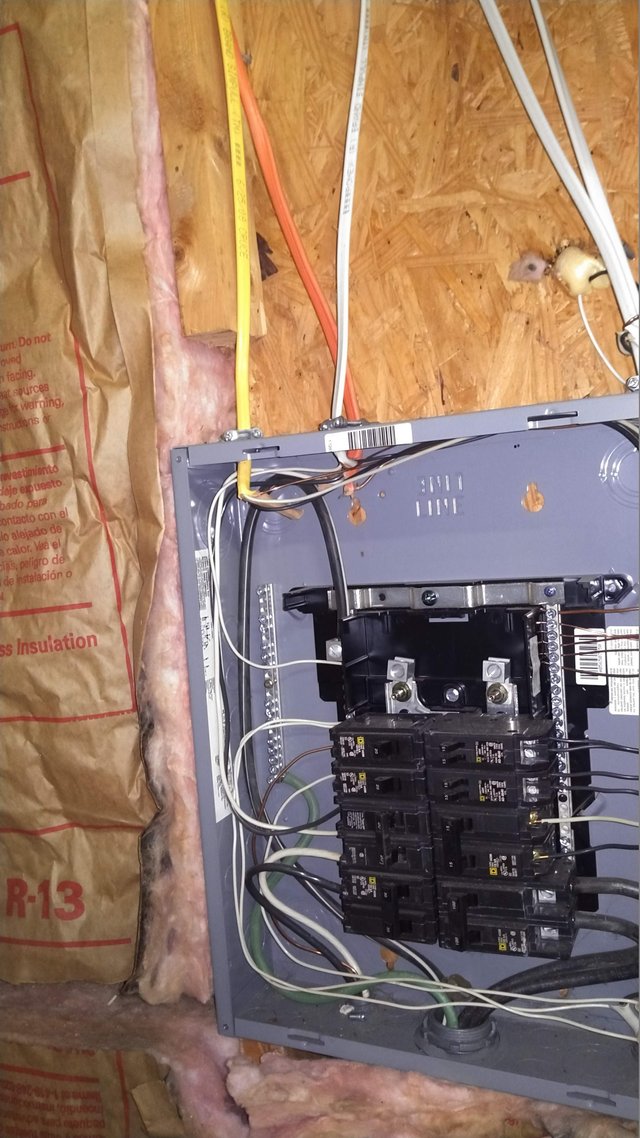
When I started poking around in the wiring of this building, I found some very interesting things indeed. For one, the supply ground in the panel was just hanging out on its own bus bar with none of the other grounds mated to it. I'm going to consult an electrician on this, but I'm pretty sure I need to put that one on the to do list. Also, notice that stud just hanging out there above the panel? The person who installed this decided that since the width between the studs was too narrow, that he'd just chop that stud in half so it would fit. It seems that no attempt was made to fix the resulting structural problems that this created. I was taught by pros how to do framing, so I know for sure I need to add that one to the to do list as well. Fun!
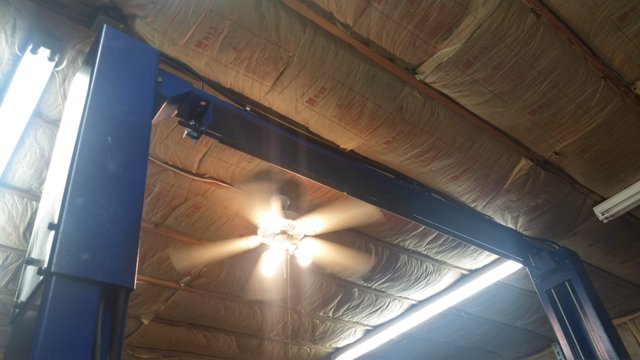
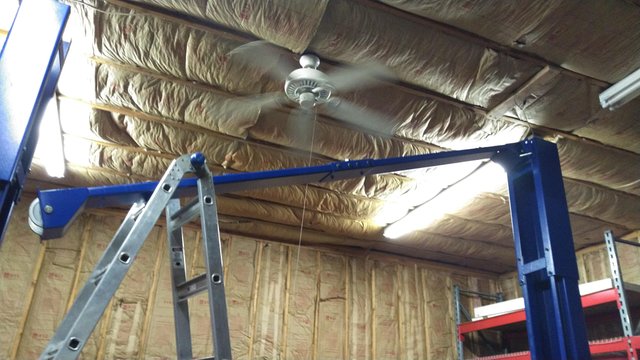
I'm sure you saw this ceiling fan in earlier images. I had to move this because the blades were just low enough so that they'd hit the top of the lift. When I went to remove it, however, I found some more interesting electrical wizardry. Up in that section of the ceiling it was a bit on the dark side, so I couldn't see what was above the fan, so I stuck my hand up there to feel around a bit. Instead of an electrical enclosure of some kind, my hand felt bare wire instead. I'd venture a guess that the same person who decided to saw the wall stud in half to fit the breaker panel also decided to install this fan with no electrical box. Wires just hanging out there in the breeze, waiting to electrocute the next unsuspecting guy feeling arounnd in the low light situation. No need to add this one to the to do list since i had to move it. It's got a light box on it now.
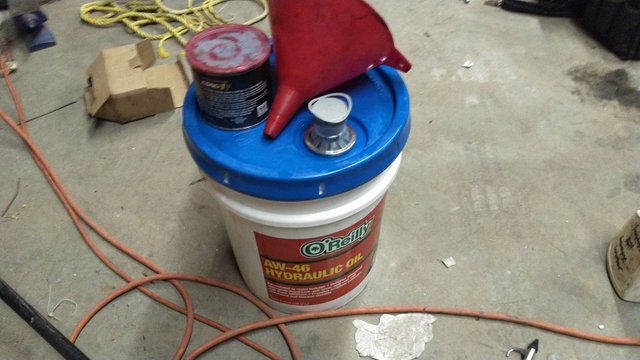
Now for some good hydraulic fluid.
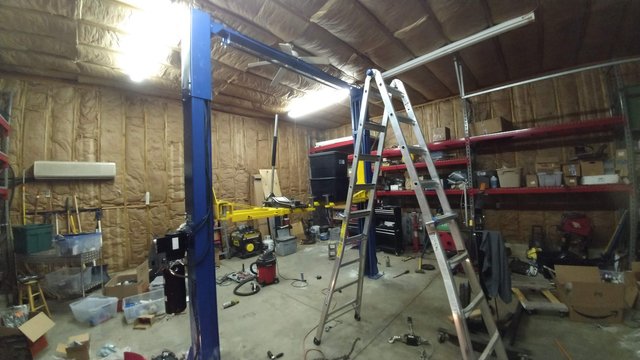
The lift was in place and adjusted, so I ran it up and down a few times. It was taking forever with no load to lower during the steps required to remove air from the hydraulics, so I added some heavy stuff around the shop to weigh it down. It was approaching 3 AM at this point so I decided that it was a good time to quit for the night. Well, my body decided. I was asleep on my feet and I couldn't go any more, so the rest for the next day.
As inglorious as it seems, I spent the spare time I had today cleaning up the shop from the mess I'd made during install and then organizing things into some coherence around the shop. A lot of the tools I used during the lift install were still in boxes from the move that I dug out with things scattered all over the floor at the end, so it became apparent that I urgently needed to find places for all of those tools and hardware. I didn't want to be testing something so dangerous with a bunch of clutter under foot.
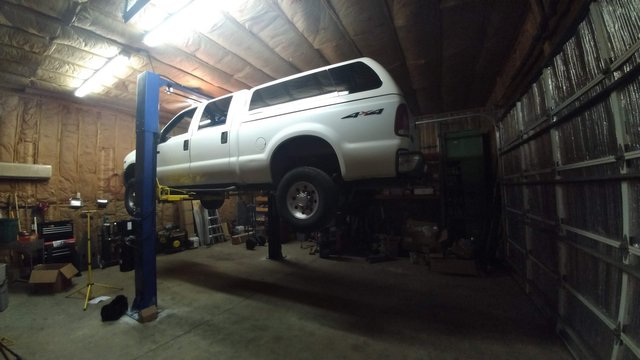
This is my first test of the lift. I did it with the heaviest vehicle that will be on it, probably ever. I figure that if it's going to fail, it better happen now, so I'm going to really put it to the test. The lift picked it up like it wasn't even there. I did notice that being such a long vehicle that it wobbles quite a bit, so I didn't have enough courage to walk directly underneath the truck while it was up there. Turns out they make stabilizing safety stands for this problem, so I'll be investing in a couple of those before I rebuild the rear end and re-gear this beast. Until then, thanks for sharing my journey, and Steem On!
P.S. - I originally wasn't going to mention the brand of this lift because it's new and I haven't tested it yet in any rigorous way, so I didn't want to imply an endorsement. I'm so impressed with the build quality, however, that I've decided to share the make and model. It's an APlus model HW-10KOH, 10,000 lb clear floor lift. I can't speak to reliability, but my initial impression is that this unit is very well engineered and well put together given the price. Everything seems well made and I'm honestly impressed with everything except the installation instructions.
Hi randr10,
Visit curiesteem.com or join the Curie Discord community to learn more.
Thank you!
Wow!
5 days ago you published that you had received your elevator.
And ... you already installed it. incredible!
It was worth waiting for as you told at the beginning of your story ... 30 years ...
Congratulations...
hy dear @randr10, a really beautiful post !! you are a man with golden hands :-)) you work with machines for work or for passion? I hope it's also your job so that your talent is recognized, and everything you do in a garage can be shared with those who need it! keep on, congratulations on your curie rating
Thank you for the kind words. It's a bit of both. I do enjoy working with machinery but it's really a matter of necessity that I do it so much. I save myself more money than I could make given the amount of time I invest in these projects. For example, I saved somewhere between three and five thousand dollars by replacing the engine in my car myself. I currently have no other way I could make that kind of money in a weekend, and I already have the expertise required to do the job, therefore it's well worth my time.
I think you've found the right solution! being able to use your talent to make / adjust things not only can save you money but I think it's also a great satisfaction !!
Hello! A pleasure :)x
Wow, I am also very impressed with the professionalism in the design and its quality of work, congratulations on your vote Curie and also, I anticipate that I liked reading your article, so I can inform myself little by little in this area
Greetings from Venezuela
Thank you :)
What a great talent you have! Everything you can do is amazing. I need someone like that ... hahahahaha. Very good post. A big hello @randr10
I think maybe you're exaggerating, but thank you for the compliment.
Congratulations @randr10! You have completed the following achievement on the Steem blockchain and have been rewarded with new badge(s) :
You can view your badges on your Steem Board and compare to others on the Steem Ranking
If you no longer want to receive notifications, reply to this comment with the word
STOPVote for @Steemitboard as a witness to get one more award and increased upvotes!
Thank you for using the recommended tags. We have rewarded this post from our @build-it.curator account with BUILD tokens in the form of an upvote.
Build-it is a central hub for DIY and How-To projects. It's an opportunity to find and share the latest in DIY, and How-To tutorials. The recommended tags required when creating a DIY article are #diy, #build-it. #how-to, or #doityourself. Please read our guide
Need help? Live technical support on Discord or Telegram
This project is run and supported by our witness @gulfwaves.net. If you like what we do, click here to vote for us