DIY: Puzzle with recycling material (step by step pictures)
Hello friends, I am a mother of two girls (15 months and 34 months) and a preschool teacher (currently not working), I am at home with the girls, my oldest daughter is already entering this next school year at the first level, they have not gone to nursery school, so I have dedicated myself to teaching them at home, always respecting their rhythms. I love to do varied activities for them, where all 3 of us have fun, dance, play, sing and fight too, but we have a great time and I know that they are happy, that as parents is the most important thing.
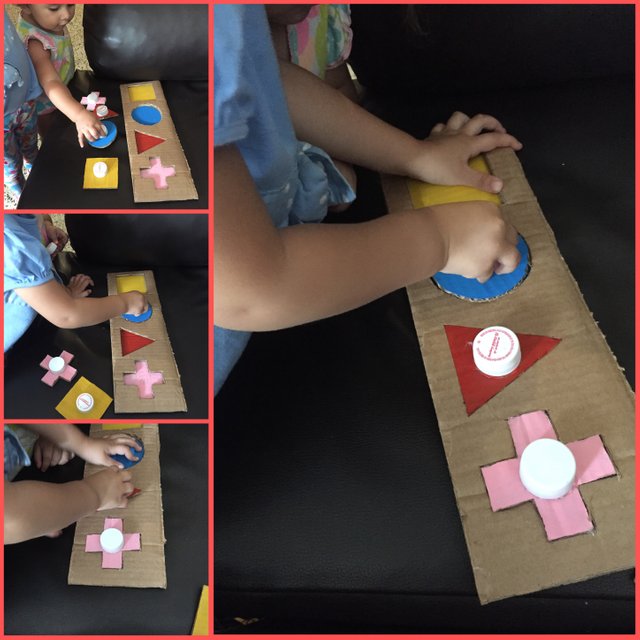
Today I bring you an educational activity for the children of the house: a puzzle, and the best part of all is that it is made with recycled material.
A puzzle consists of an activity where we must place the figures within others as appropriate, making use of the capacity manual oculus, this means that the child must synchronize their movements to make the lace correctly, making discrimination.
This type of game allows them:
🌀Learn to solve simple problems.
🌀Activate creativity and concentration.
🌀Work on the concepts same - different.
🌀Get to know geometric figures.
🌀Recognize colors.
🌀Increase self-esteem.
🌀Work on fine motor skills.
🌀Practice association
It is recommended for children from the age of 2, however, it can be done with younger children under adult supervision.
To make this set use 2 strips of corrugated cardboard, taken from a cardboard box.
One of the covers is the base of the game, and on the other cover we make the figures we are going to work with. It's something that won't take up much of our time and they'll love it.
Materials we're going to need:
🌀Scissors
🌀Rule
🌀Pencil
🌀Brush
🌀Painting
🌀Cutter
🌀Silicone gun
🌀Plastic lids
Procedure:
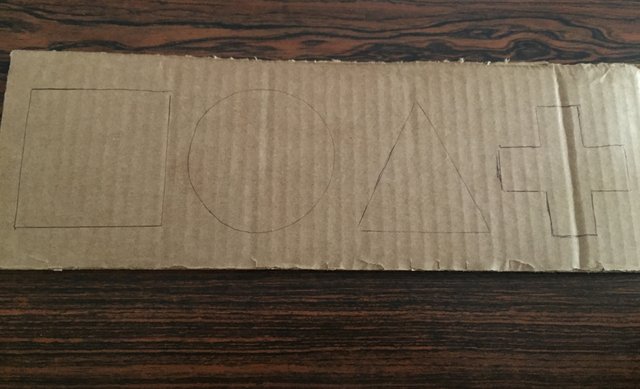
On one of the cardboard strips we will draw the figures we will work with.
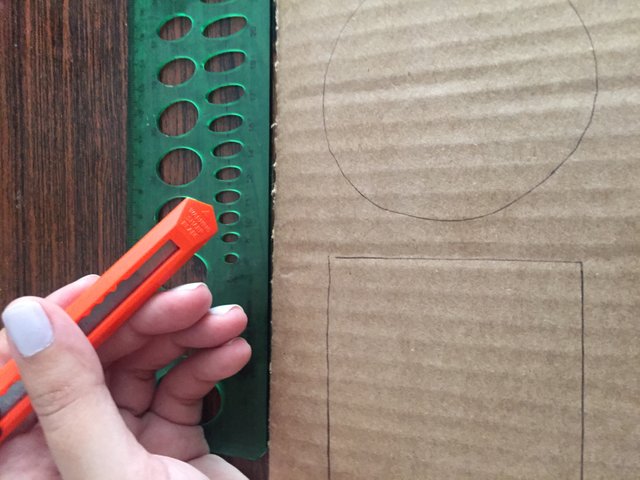
We cut each figure with an cutter.
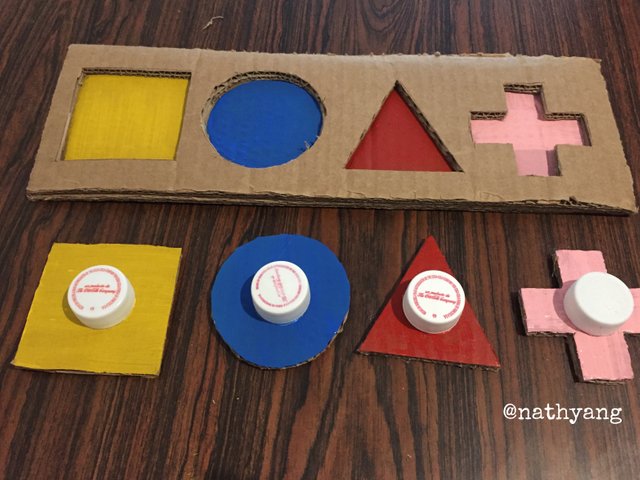
We drew the figures on the other cardboard cover, I did this to paint each figure the same color as shown below:
To finish, we stuck the two covers with hot silicone, and we stuck a plastic cover to each figure to facilitate the grip.
I hope this information is useful for everyone, you will surely have someone you know who needs it. Let's use creativity and introduce children to simple games to activate their creativity.
Thanks for reading me. See you in an upcoming post.
Own photos taken with an iphone 6
Excelente! me gusto la idea, lo voy a hacer para mi bebe
Hello @nathyang, thank you for sharing this creative work! We just stopped by to say that you've been upvoted by the @creativecrypto magazine. The Creative Crypto is all about art on the blockchain and learning from creatives like you. Looking forward to crossing paths again soon. Steem on!