DIY - Save your 6 Cylinder BMW from the Crusher - Exhaust Manifold / Cats - Removal - Step by Step (E46 M52/M54)

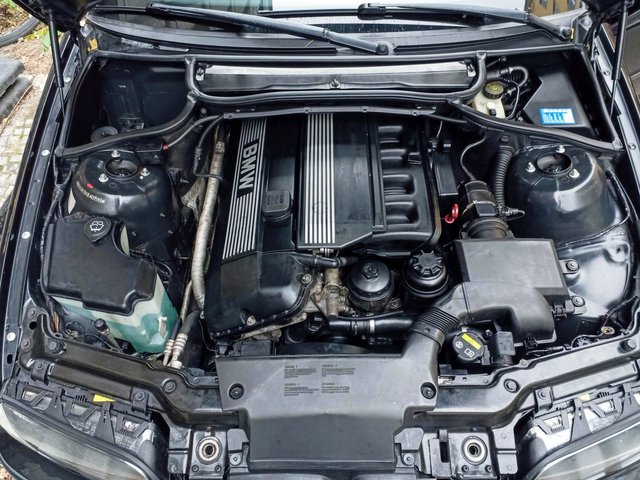
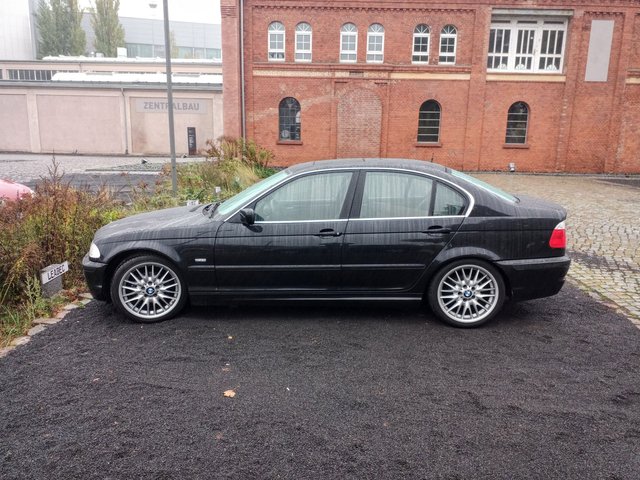
Welcome back Steemians! This year I'm doing my workshop diary in reverse, starting with the most recent repair and going back to the beginning as I haven't had a chance to write down much of anything regarding ongoing repair and maintenance on my (still) daily driver '99 BMW 320i with the venerable M52 straight 6 engine.
Today I'll take you on a tour of one of the most dreaded and painful repairs you could do on this platform which is replacing the exhaust manifolds with built in catalytic converters. Most shops will turn away, chase you off the yard or charge you a cool 2 grand which could possibly go up to 4 grand or outright suggest crushing the car - needless to say none of those options work for me.
Most shops and mechanics (including my own mechanic who I've built several cars with) outright refuse to do this because there's a risk of one or more of the exhaust studs breaking off during disassembly. If this happens in the wrong place the cylinder head has to be removed in order to retrieve the broken stud and replace it with a new one! This would also require to remove the timing chain and disassemble almost the entire engine!
So let's do try to avoid that and get it fixed - afterall, who'd want to crush one of the most beautiful BMWs ever made?

Still any ownership experience asks for some sort of economics and spending that much money on a replacement of an exhaust seems excessive to say the least so I got into the topic and prepared accordingly.
Let's get into it shall we?
The Issue & Preperations
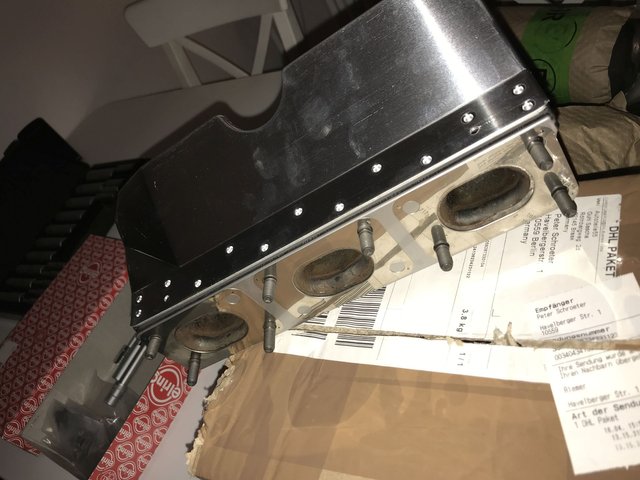
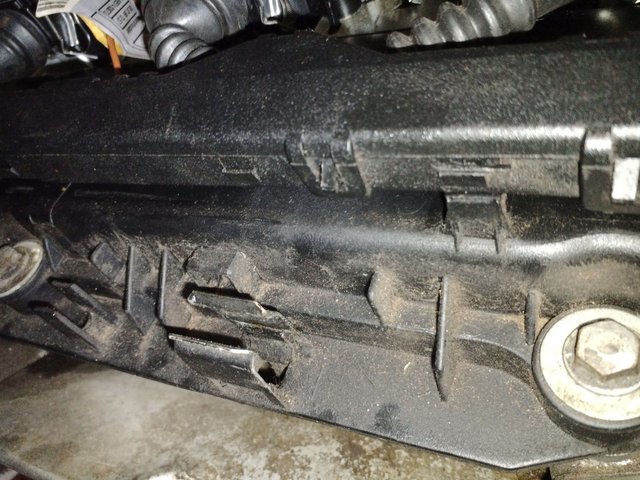
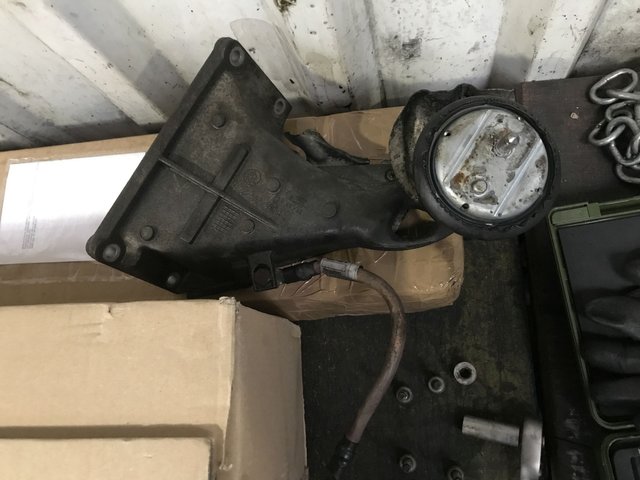
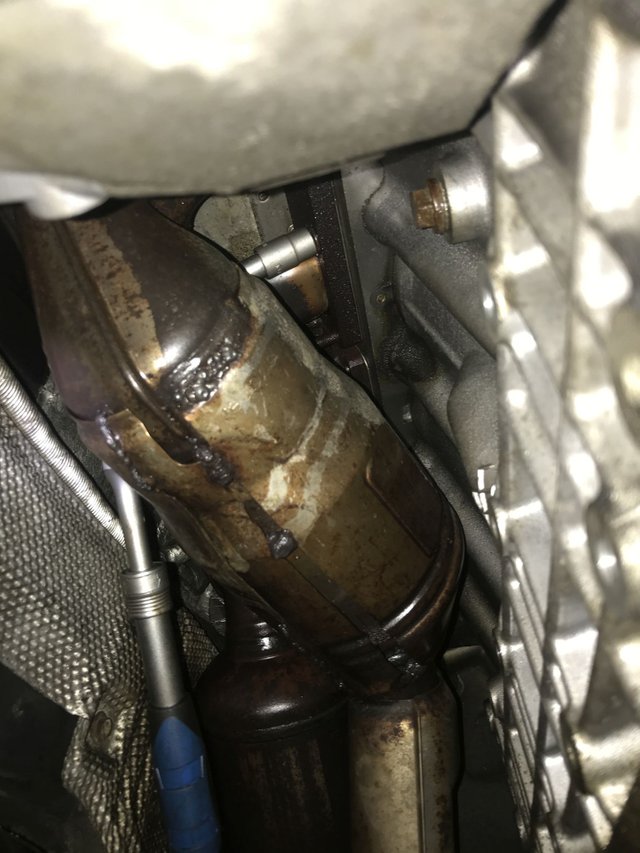
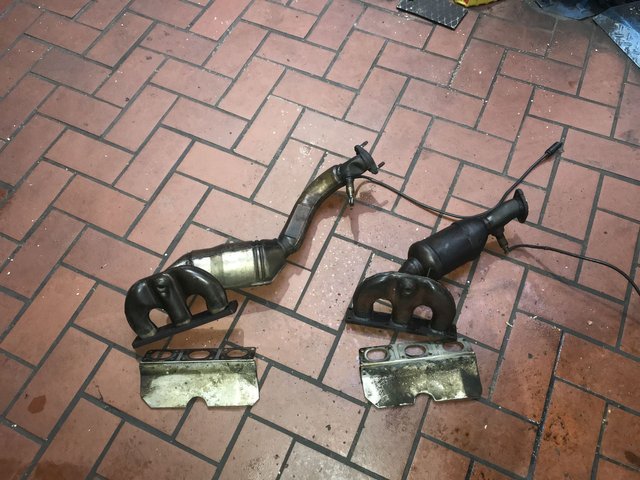
Here's our culprit:
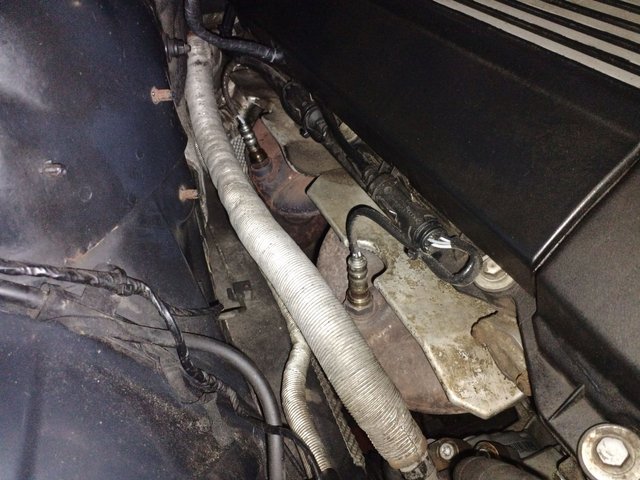
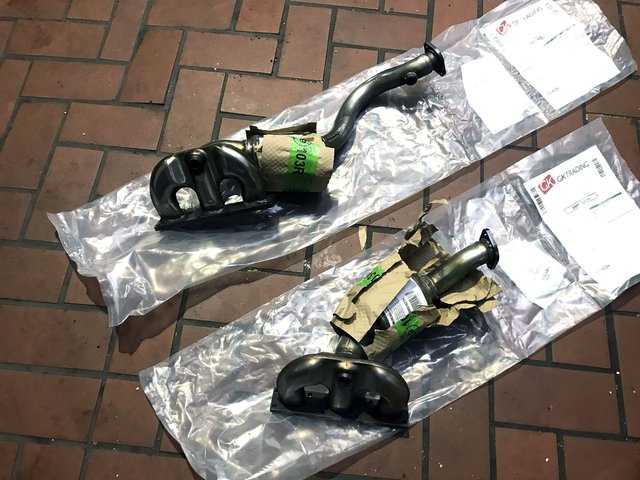
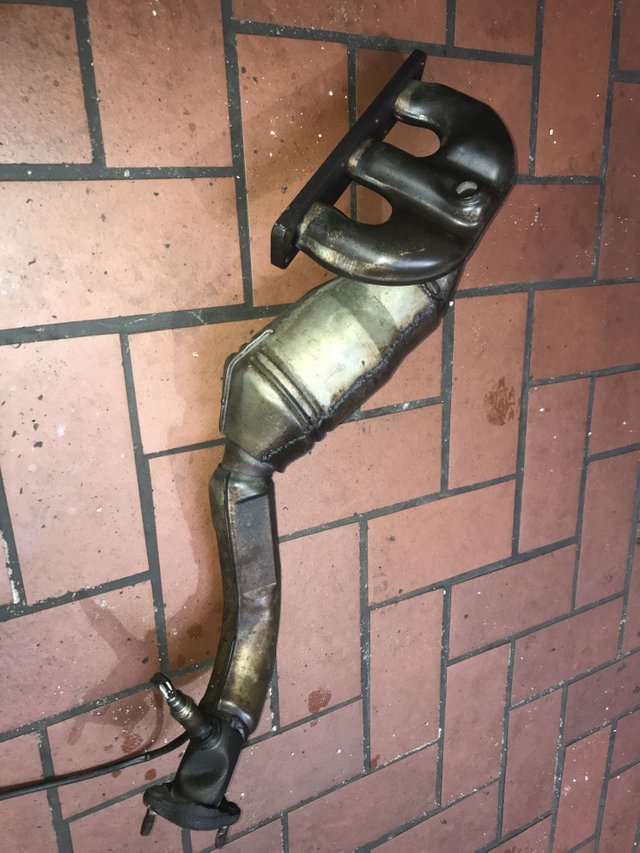
Looks fine you might say and it does but the issue is mostly invisble - but not inaudible. This engine uses two exhaust manifolds with built in catalytic converters. Below you can see the new ones I bought from a company in the UK which I highly recommend called 'autoteile-classics-shop' which you can find on ebay UK and Germany.
Overtime the catalytic converter casing deteriorates and eventually rips open but usually below the outer shell so it is not immediately visible. Initially you will perceive a classic leaking exhaust sound, increasingly leading to pops and ever louder blowing sounds until the engine sounds like an old and broken airplane. Worse still, the car will not be able to pass emmission tests because the exhaust is not cleaned appropriately and a circle of doom starts to unfold:
- air is leaking into the exhaust manifold which over time kills the pre cat lambda nodes
- exhaust fumes enter the cabin from the engine bay
- the fuel air mixture calculation based on the lambda nodes is off and leads to less power or higher consumption or both
- the post cat lambda nodes eventually fail as well
- the engine, specifically the ignition and fuel system is put under increased strain
- all kinds of follow up issues are to be expected
Long story short, you cannot delay or avoid this repair it has to be done and it has to be done right. Some people weld the exhaust this is only a temporary fix as it will leak elsewhere shortly thereafter. Due to the circle of doom the longer you delay the more you'll end up having to replace.
Here a video of the sound you can expect at the very end of the manifolds lifetime and this is only idle and minimal throttle, if you get to around 3.000rpm it just sounds dreadful:
Now if you look online you will find maybe 3 videos in total of people who have done this (worldwide) so needless to say this is either a very rarely documented or rarely attempted job. One of the most useful is from youtuber '50skid':
https://www.youtube.com/c/50sKidAuto/videos
Guy is a genius, mind you he's done the job without a lift. Something I would not have even thought about so huge respect to him!
I did find a few blog posts of people and started the parts hunting, next to the manifolds themselves you'll definitely need these parts:
- exhaust manifold gasket (2x) both identical
- mainfold bolts and nuts (16x each)
- flat gasket and nuts for the exhaust system (4x total)
Definitely test fitting before going to the shop:
And do a general fitting test with the parts as they go onto the engine if possible to avoid surprises when under the car:
My manifolds actually came with all the nuts and gaskets but to be sure I bought them all original from BMW since I intend to only do this job once:
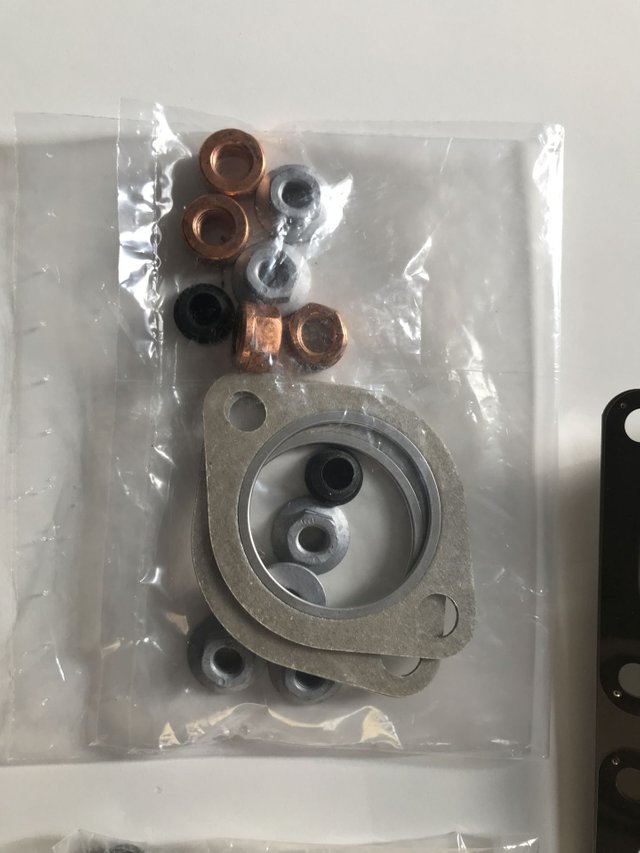

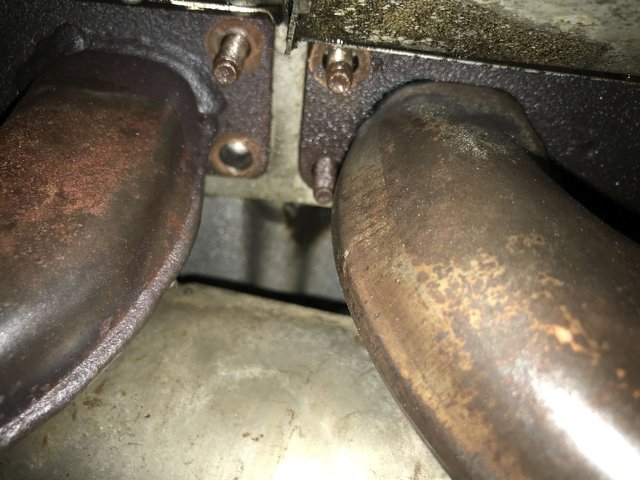
One thing I forgot is that the original manifolds come with threaded studs whereas the replacements ones come with bolts and nuts so if I had to do it again I'd buy 4 bolts and nuts from BMW as the ones that came with the manifolds were very long and so handy to install:

You can see the left side manifold has threaded studs and the right side requires bolts from the factory - not sure why they did that probably for fitment purposes at the assembly line.
Next to these parts you'll probably need 4 new Lambda nodes, two pre- and two post- cat. These parts can be fitted later as well but especially the post cat ones should be done prior to installation for ease of access.
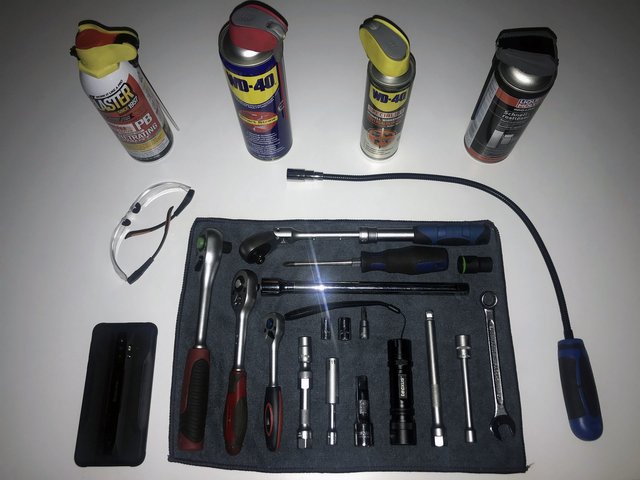
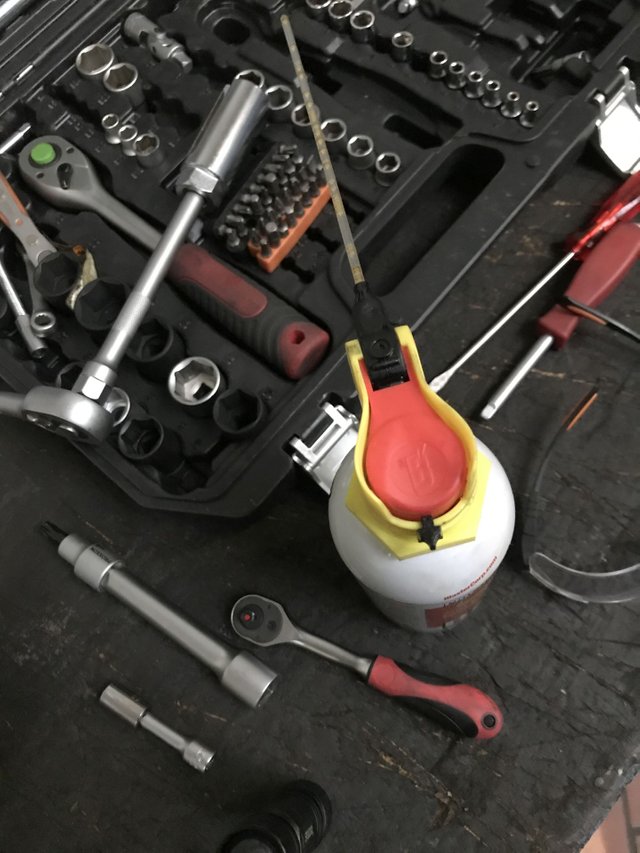
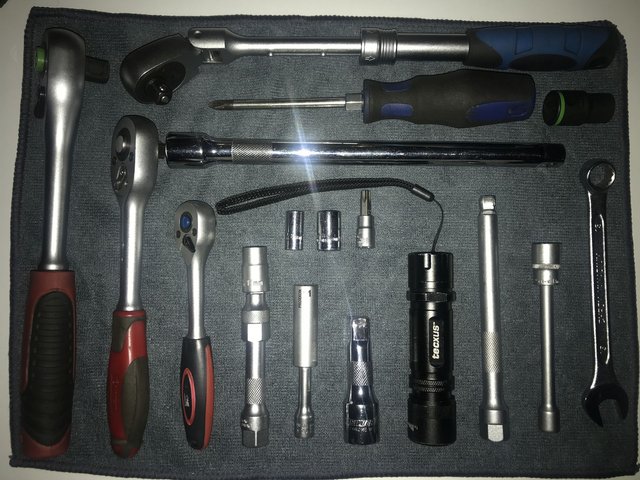
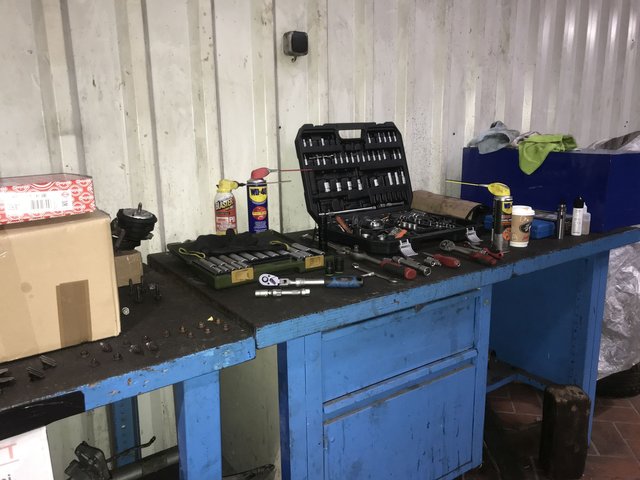
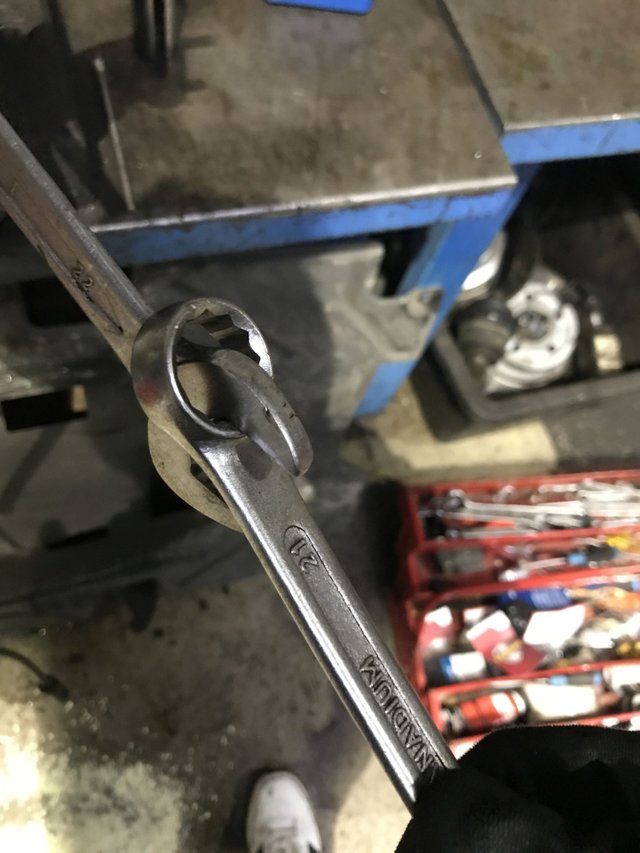
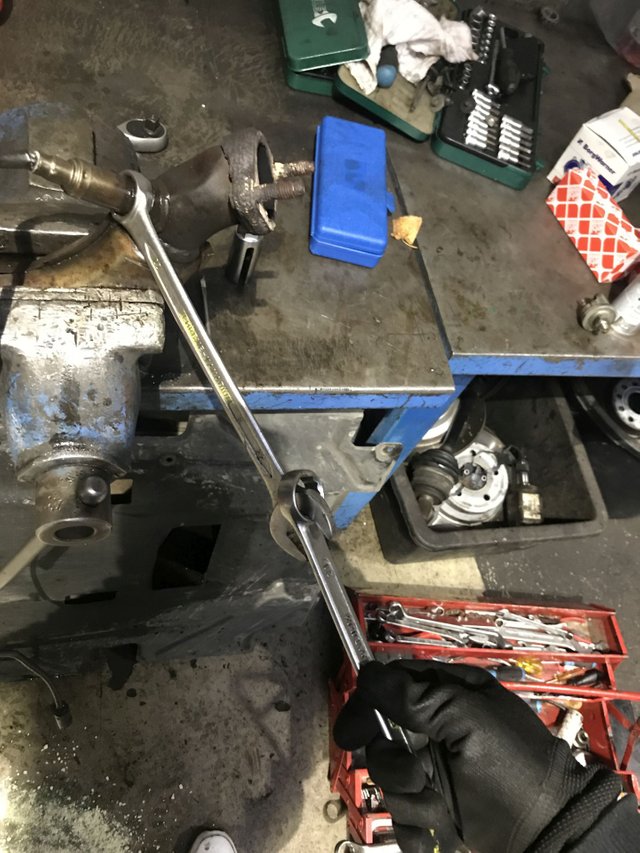
In addition to the parts you'll need the following tools, this is easily the most important part of the job as without these it will be either painful or very lengthy or simply impossible:

Next to these you'll need some special sprays I bought off of Amazon:
Specifically this one:
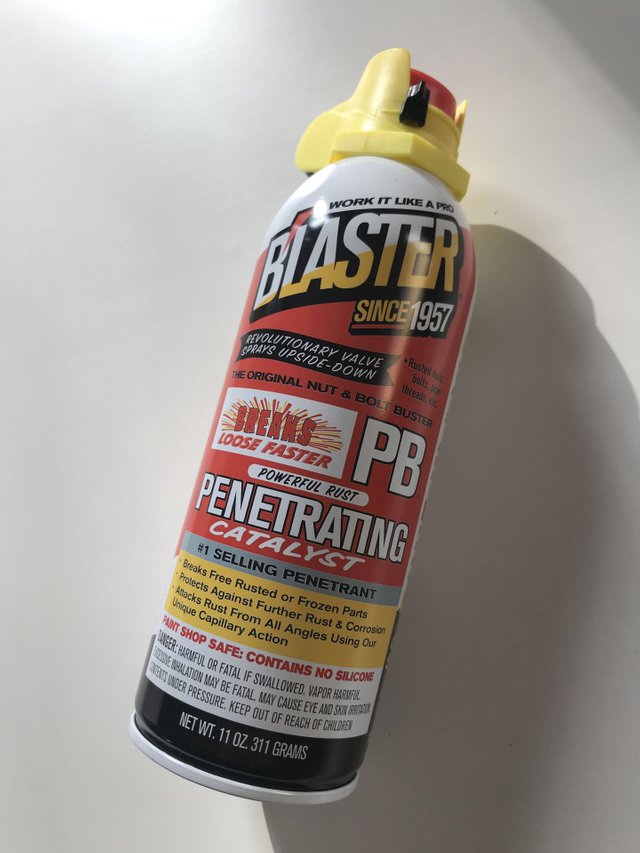
50skid actually recommended it and it is by far the single most useful losening anti rust spray you could every buy!
A week before the actual operation I started spraying the nuts or at least the area around them as far as it's accessible from above/below with everything still installed with this stuff from LIQUI MOLY:
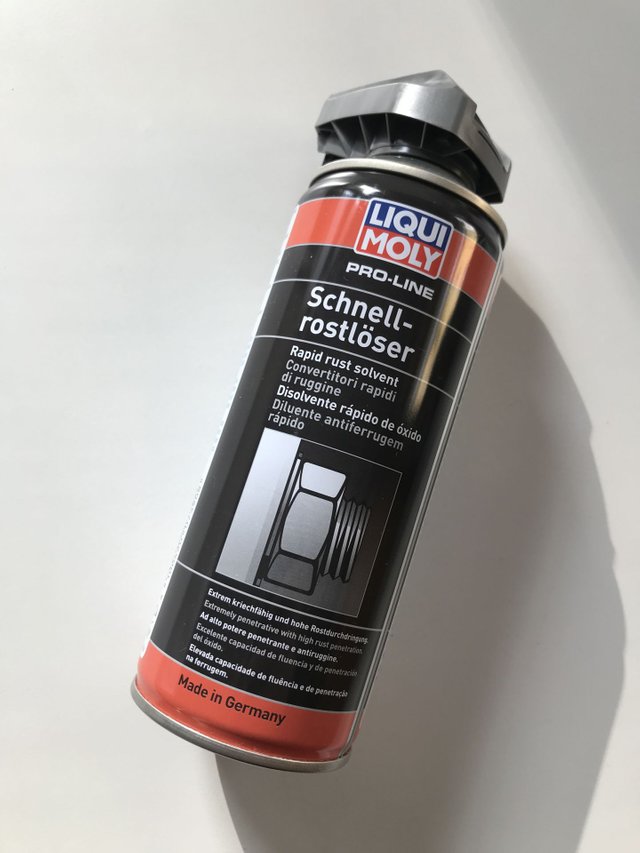
I don't know how much it eased the process in the end but the PT Blaster is definitely more powerful and intense which you can also smell when using it!
Total cost for parts, tools, manifolds with cats and lubricants was around EUR 650 with the manifolds making up the bulk of it at EUR 400 - quite steep but also miles away from the shop estimate or the value of the car in addition to the fact that no one actually wants to do this for any money at all.
With all the parts and tools ready...let's get it on shall we?
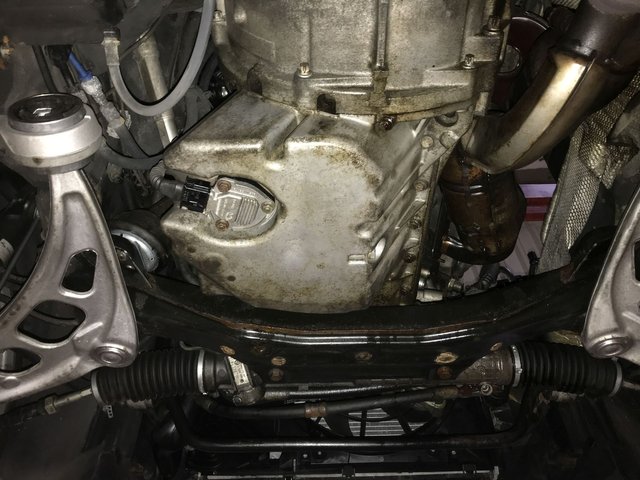
Removing the Manifold - Making Room
Before we get to the actual removal process we need to make some room first. The washer bottle on the lower left has to go. Mounted with a size 10 nut it is easily removed, ideally drain it before.
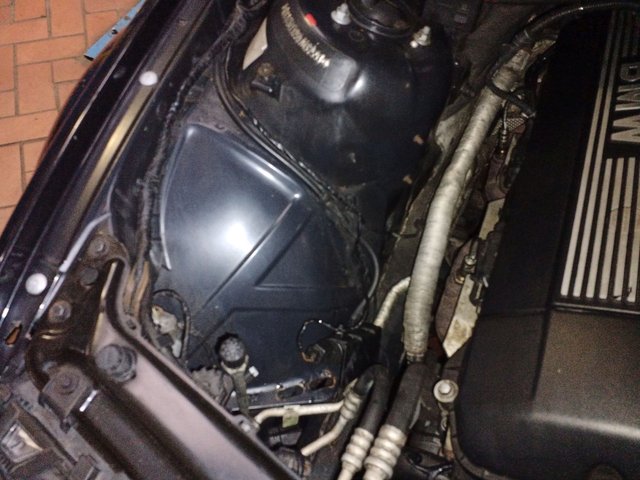
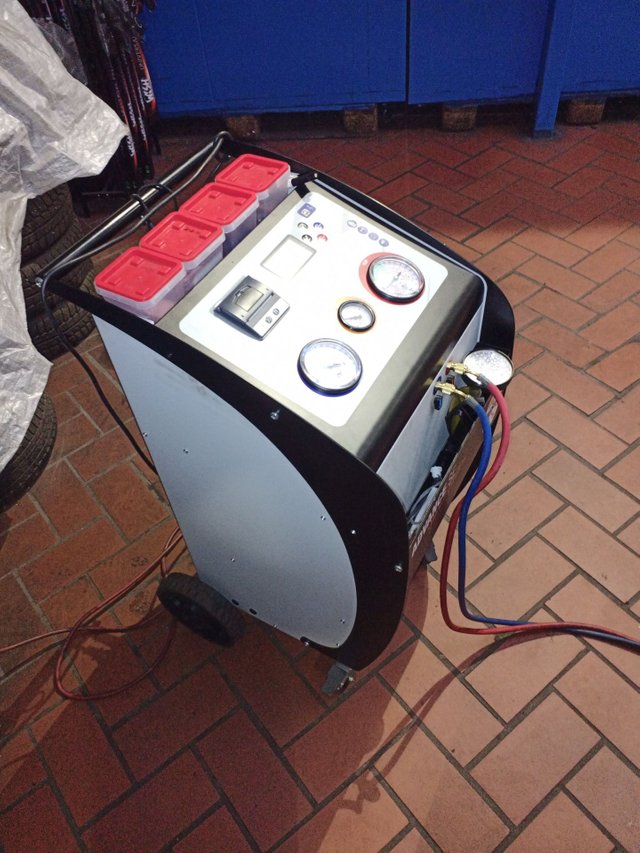
The AC compressor can stay in, some people recommend removing it but I actually didn't find it in the way much. That said, the AC line from the compressor to the valve near the firewall definitely has to go. So it's on to evacuating the AC system:
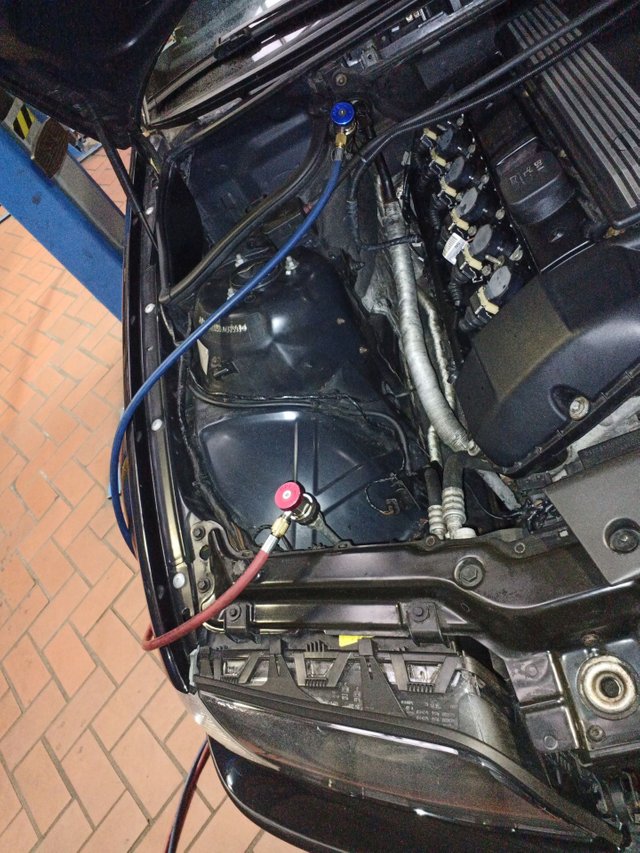
I always had a weak spot for these little R2 units:
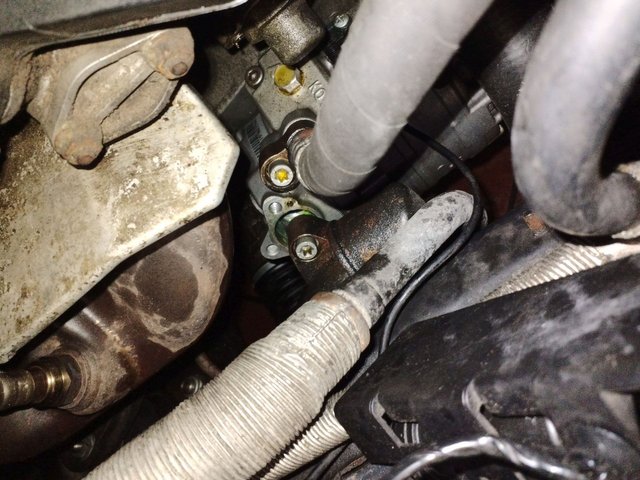
Once the evacuation is done remove the fillister screw on the firewall side (below the dark line):
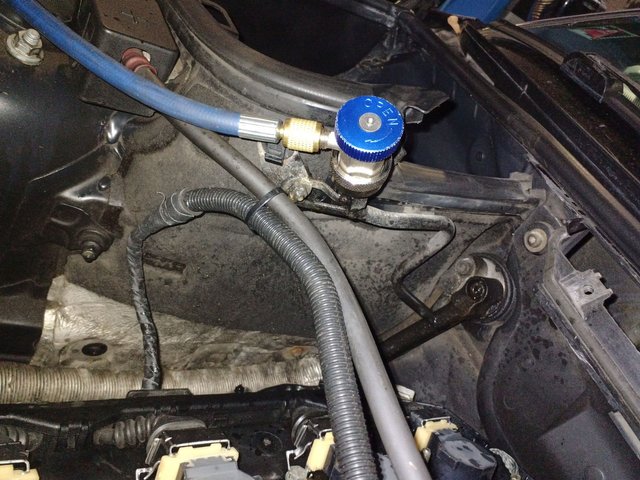
And also the AC Compressor side screw and remove the line:
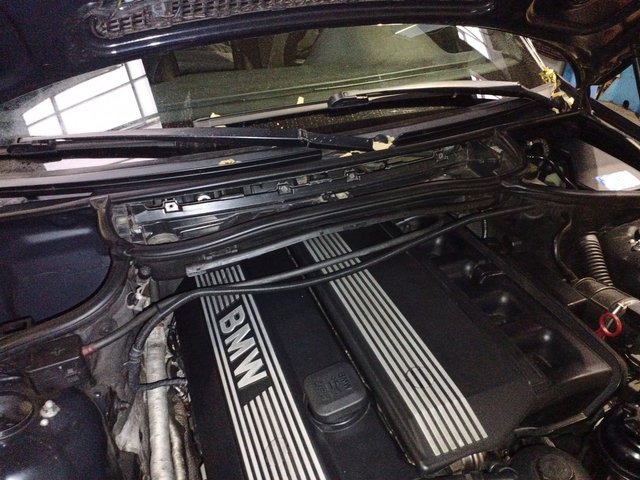
As we'll remove the entire top row of manifold nuts from the topside engine bay we also have to remove the cabin air filter housing, before you can remove it release the cable canal cover and extract the two cables.
To make it even more accessible I also removed the valve cover.

**Finally remove and mark (very important so you don't mix them up later) the pre cat lambda nodes that run along the edge of the cylinderhead above the manifolds and below the valve cover:
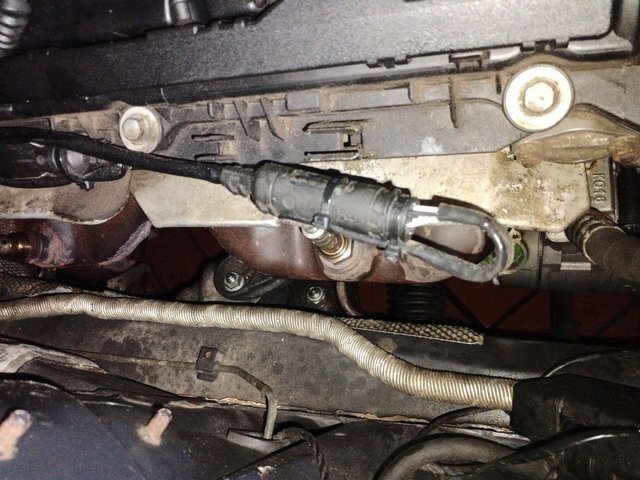
I simply put one cable tie on the bank 1 node and 2 on the bank 2 node, before you get confused always remember cylinder count starts at the front passenger side so in this case the engine runs 1-2-3-4-5-6 from front to back. Firing order is 16-34-25 ;).
Now this is about as much room as we're going to get in terms of access from the top, now would be a good time to put the PT Blaster to good use by folding up the exhaust heat shields upwards and 'blasting' all the nuts you can see or find and then enjoying a hot coffee before commencing.
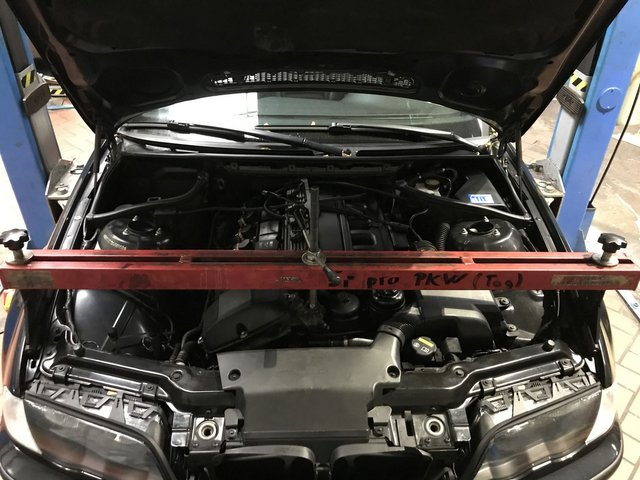
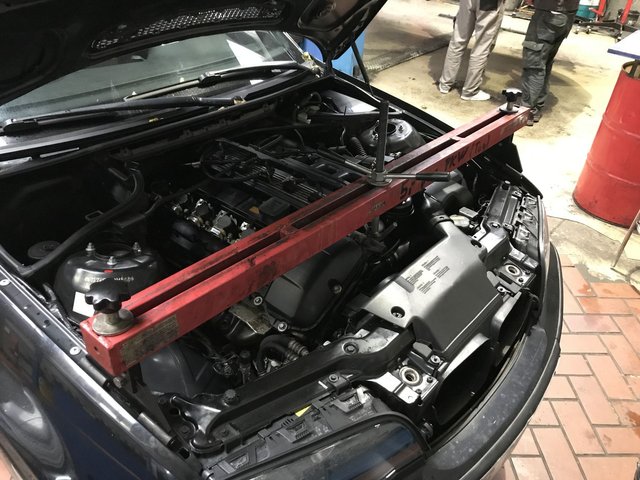
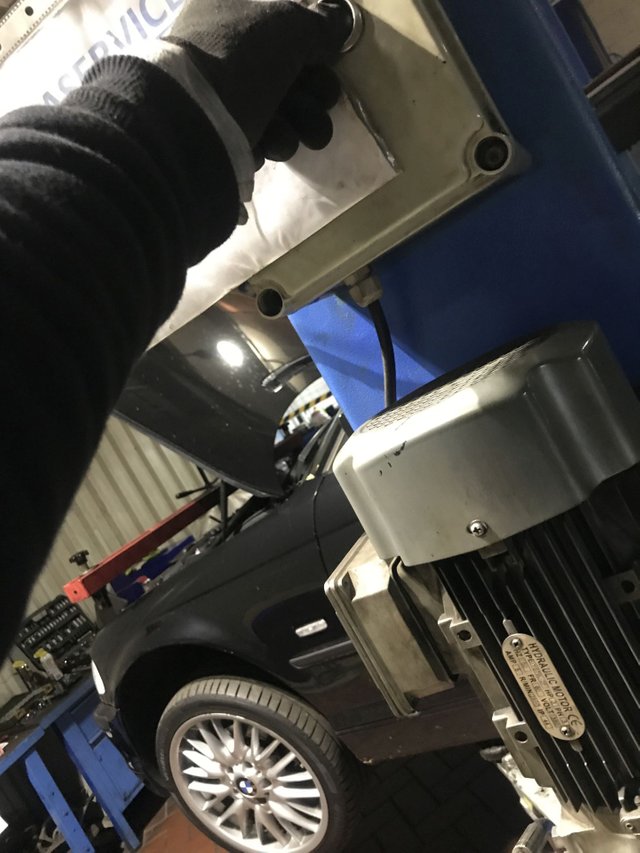
I had the car up on the lift raised from the ground slightly to have better access and to save my back from breaking :).
Removing the Manifold - Topside
For the next 4-8 hours these 4 sockets and extensions will be your best friend:
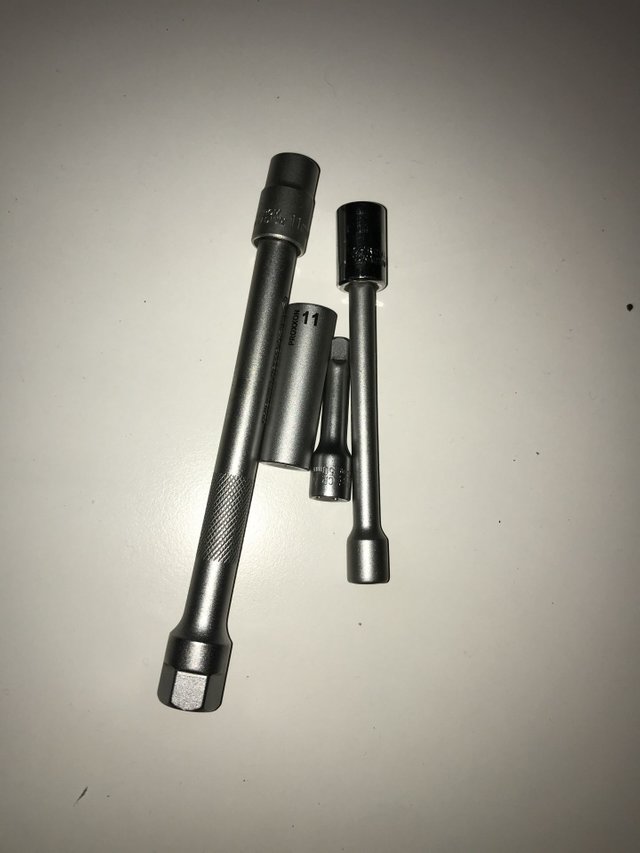
- 1/4" long size 11 socket
- 1/4" short size 11 socket
- 3/8" short size 11 socket
- 1/4" short and long extensions
- 3/8" short and medium extensions
I used these mostly with two ratchets:
- small 1/4" ratchet
- 3/8" ratchet with flexible head and variable extension
- 3/8" ratchet
The flexible head extendable ratchet was easily the most useful and I don't think I could have done it without it.
At this point I started using my rugged Blackview phone (which I can highly recommend by the way) the way it was intended to be used:
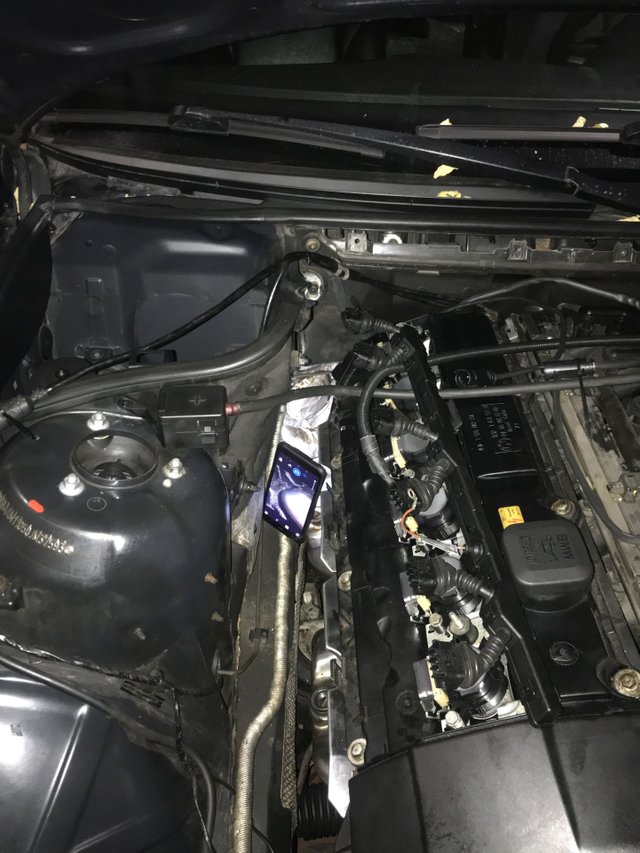
This thing was such a life saver! Using the permanent flash in combination with the video camera helped me ensuring that the socket sits firmly on the nut!
Remember the most important point here is to NOT rip off any of the studs so correct fitment is key here.
Unfortunately for the top row photos I had the flashlight and the flash on which lead to severe overexposure but you get the drift of things below:
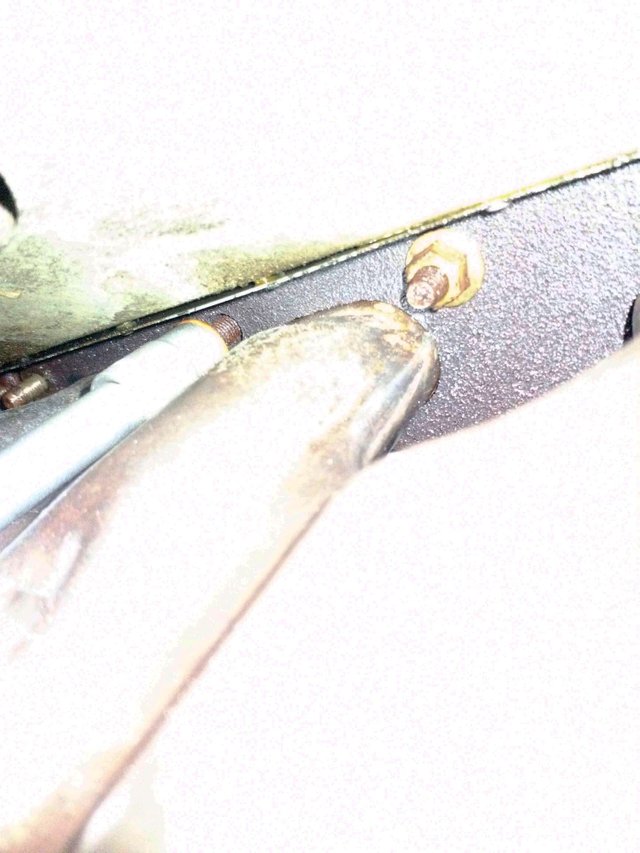
As you can see here some of the nuts will actually come out with the studs attached so that you're actually screwing the stud out of the cylinder head instead of the nut off of the stud, that is fine as we'll be inserting new studs come reinstallation:
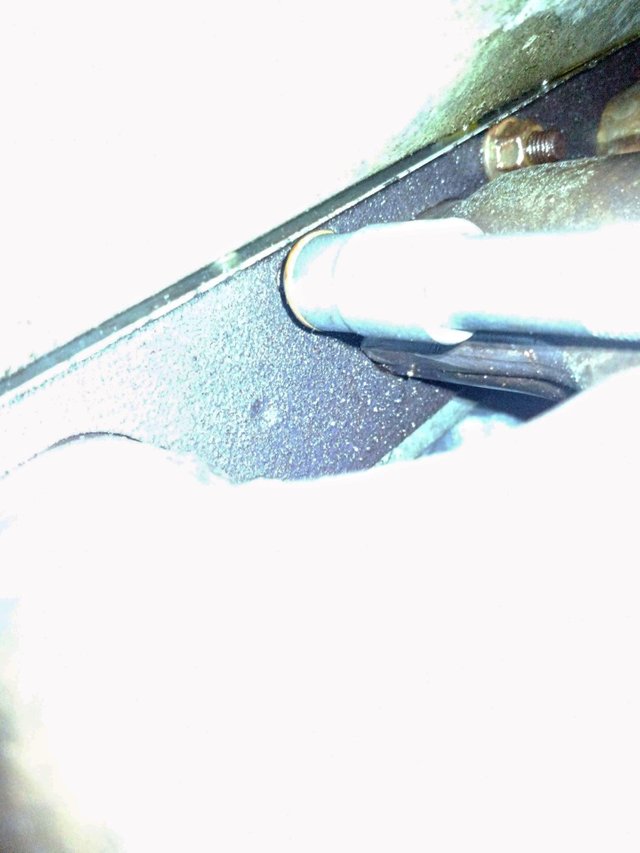
As you get closer to the firewall and around cylinder 6 things will get really tight:
- 3/8" flexi ratchet
- small extension
- short size 11 socket
With this combination I got to all of the top row nuts and even some on the bottom row:
As you can see a number of studs came out but at this point I was delighted that none had caused me any undue stress in terms of not moving or ripping. Here my results at 11:30am which was 3 1/2 hours into the operation:

I also found that one of the studs didn't have a nut attached, it looks like this has been the case for a good 10 years at least:
Either it fell off or was never really attached?!
All in all I give credit to the PT Blaster as every nut except for one almost instantly clicked with minimum force applied.
It is a bit of a feel issue when you first start to apply pressure to see if more pressure should be applied or if you want to put some more blaster or rust remover on it and give it a few minutes before going back. In my case and most of what I read online BMW studs actually do not tend to break that easily so most of the times when the initial release is harder to achieve, use a bigger/longer ratchet and give it a good nudge, most likely it is just the stud releasing from the head as the nut is rusted completely to the stud.
If you're still with me at this point then you're now ready for the bottom row and removal...
Removing the Manifold - Bottom Row
The work from under the car actually starts at the top because we need to install an engine hoist to hold the engine when the passenger side engine mount is removed. There is no way around this as the engine mount, more specifically the bracket that connects the mount to the engine block, sits right below the exhaust manifold and it is impossible to remove with the bracket still installed.
I had actually bought an engine hoist from Amazon relatively cheaply for around EUR 60 because I didn't know if the shop had any available on the day I was there. Turns out they did so I used theirs as they are equivalent and good for a weight up to 500kg at least.
Once it's secured in place we can raise the engine slightly by around 2-3cm or 1 inch and finally raise the car up.
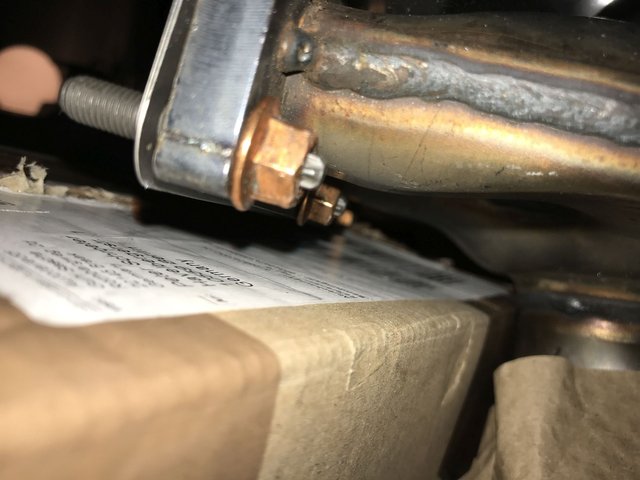
Next up remove the exhaust system and detach it from the manifolds, these screws will be the hardest to losen:
In my case I had some work done on the driveshaft at the beginning of the year when they were first losened so this time it took me around 2 minutes. If you have rusty/crusty nuts and bolts there don't even bother with spraying them with anything, instead heat them up with a blowtorch until they're glowing red and then remove them.
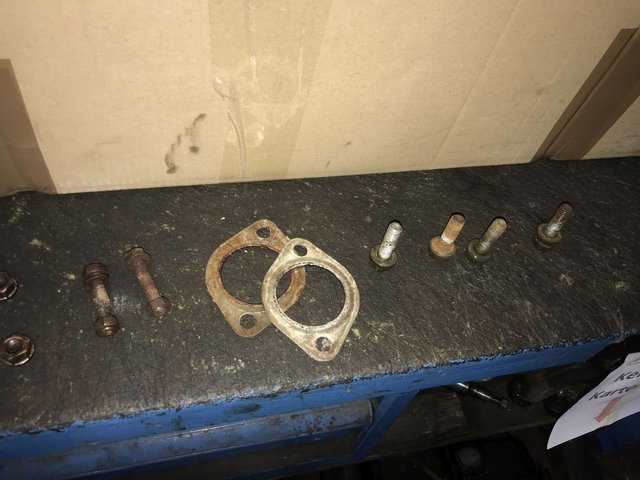
Before removing the exhaust system you need to remove the center structural support beam the rear one as the front one of the two stays attached to the exhaust:
With that out of the way you can release the exhaust from the transmission exhaust clamp and then simply remove four nuts at the rear and have someone help you to wiggle it out of the manifold and put it down on the floor.
Here the rear exhaust gaskets and old nuts and bolts, I replaced them all.
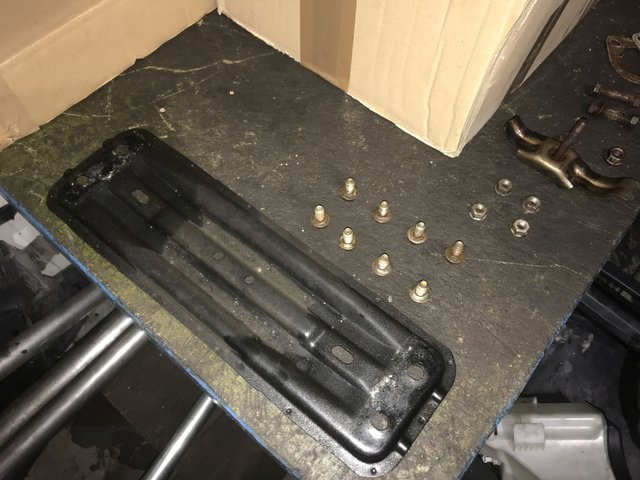
If you have it you need to now remove the reinforcement bar with part number 31 11 1 096431.
We can now remove the lower passenger side engine mount nut:
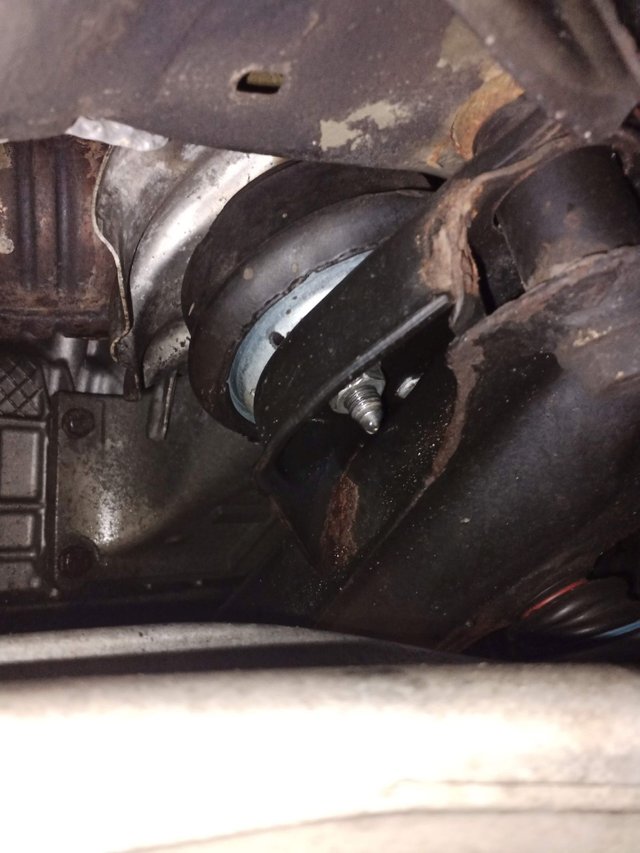
There is a ground cable attached to the bracket and I recommend to remove the cable from the carside so you can just leave it attached and pull it out altogether!
Finally remove the 4 bolts that attach the bracket to the engine:
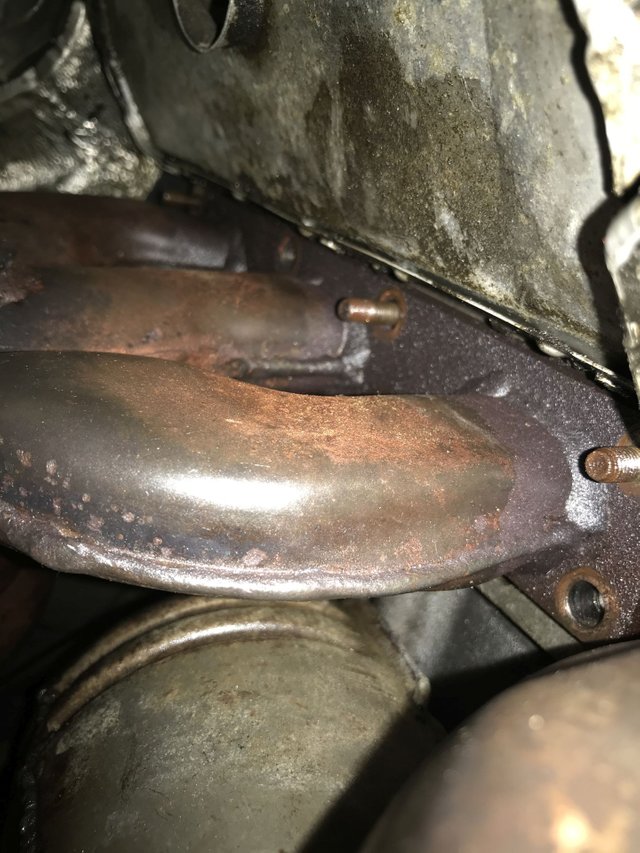
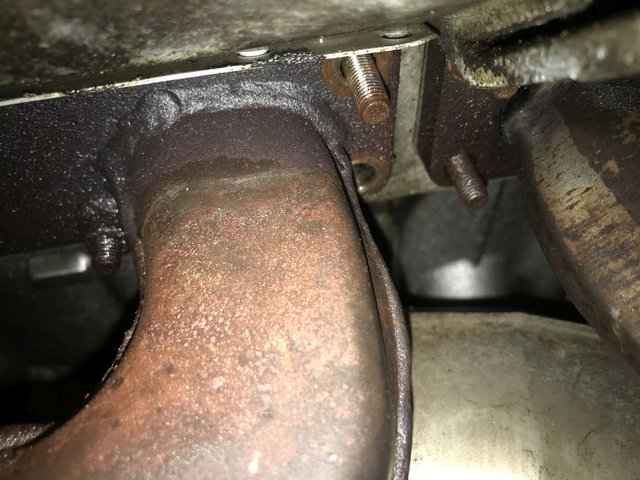
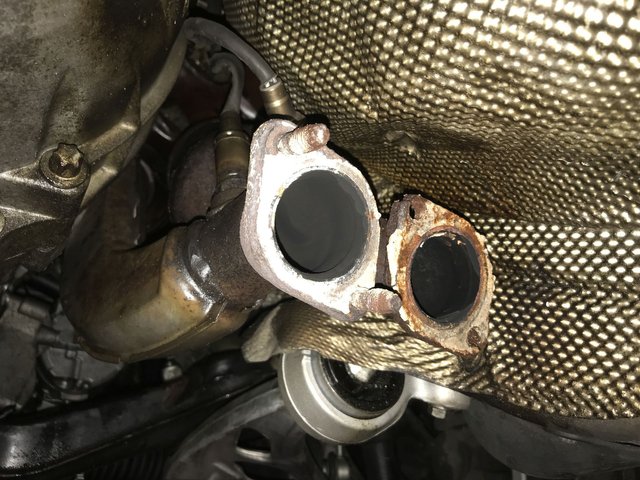
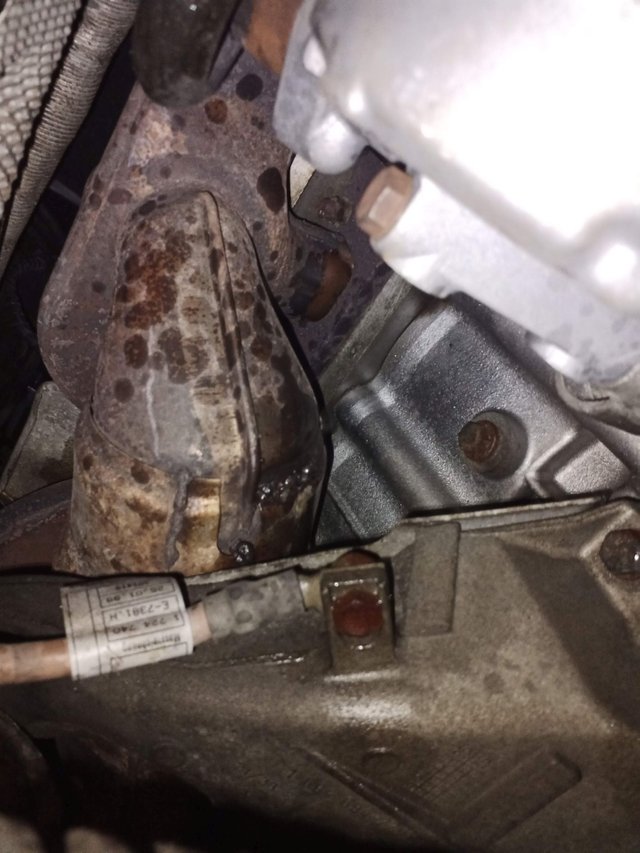
Also note the 'excellent' condition of the original cat!
With this out of the way...
...as a final step you should remove the fuel rail engine cover on the topside and pull the post-cat lambda node cables and connectors out so that you don't forget about them later and unnecessarily break or stretch any of the cables.

Here a glimpse of the workbench by now:
Do a final check on the correct fitment of the engine hoist and leveling of the engine, do not pull it up too far otherwise you'll actually reduce your access to the nuts and bolts:
And up it goes again:


As you can see there is now relatively free access to the manifolds and their bottom row of nuts that couldn't be reached from above:
At this point it is 1pm and with a few brakes 5 hours into the job.
NOTE: The front manifold (Bank 1, Cylinders 1-3) has to come out first otherwise you're unable to reach the bottom row nuts for the rear manifold and also couldn't extract it even if you loosened that first.
Below you can see how I reached and fitted the socket onto the nuts and successfully removed all of them, some with the studs attached:
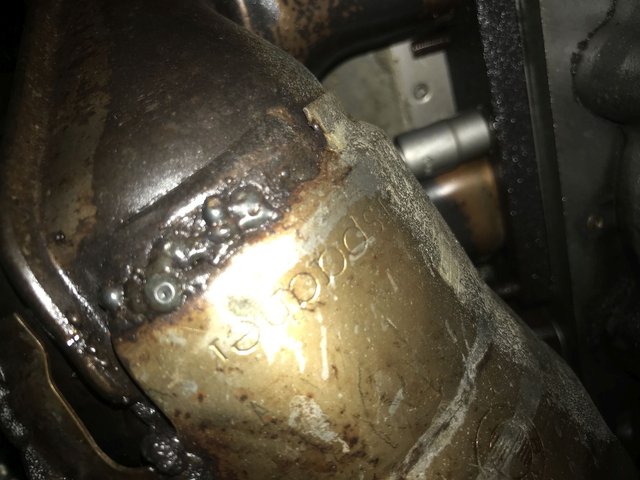
Note above the 'EBERSPAECHER' stamp on the cat housing - original manifolds installed in 1999.
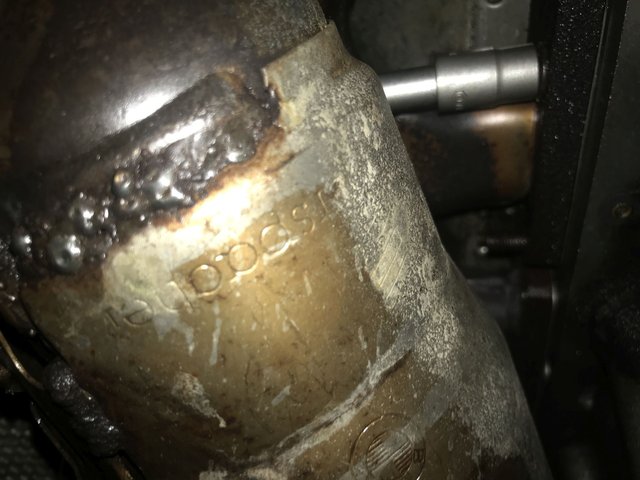
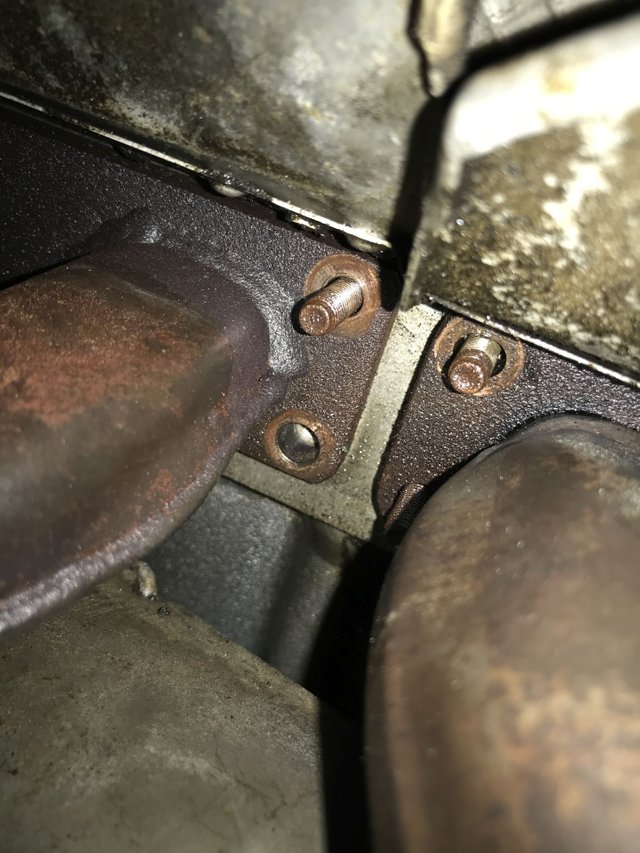
Here is the most forward bottom row nuts:

Once all the nuts and/or studs are removed you can now wiggle the manifold until you feel it start to move.
Remember to now pull the lambda node cable down from behind the engine until it is completely loose.
You can now pull the manifold slightly to the passenger side off of the studs and down and back out of the car.
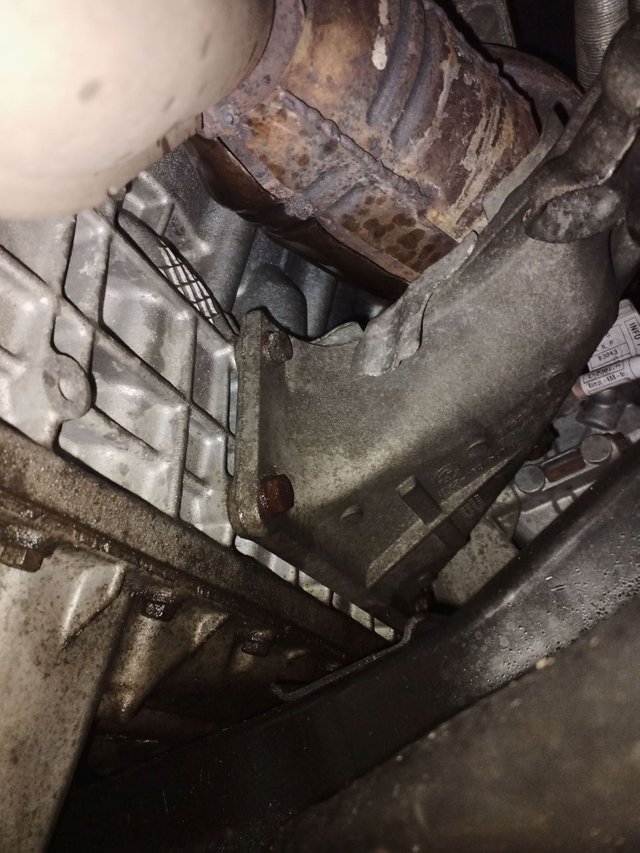
This removal gives you good access to the Bank 2 manifold as can be seen here:
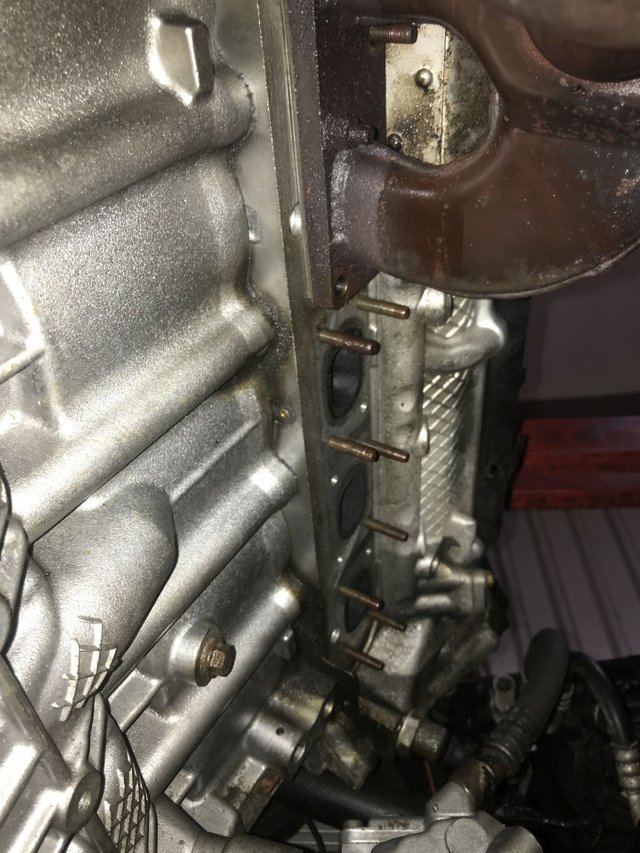
For some reason all the studs stayed in the cylinder head for the front manifold:
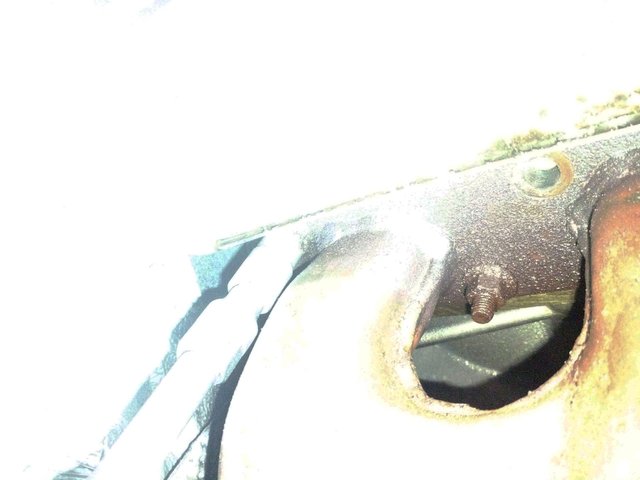
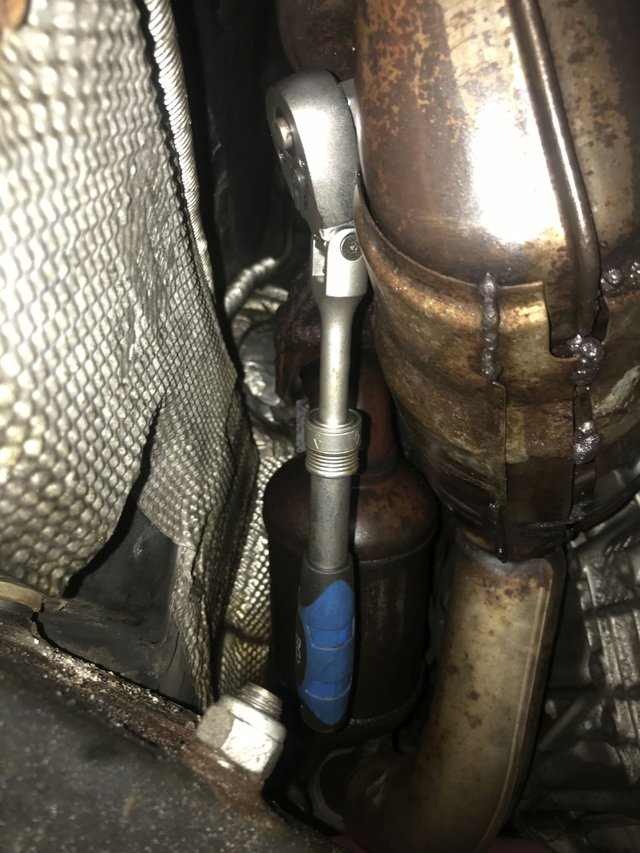
Onto the rear then, below the most rearward studs and nuts, again around cylinder 6 it gets extremely tight and I was only able to use the smallest 1/4" ratchet with the extended size 11 socket to reach it. The hardest part was actually fitting the socket onto the nut.

Note the socket attached correctly in the lower right of the image, I'm shining a flashlight on the spot as it is also completely dark in that corner.
It may look inaccessible but you have a clear line of sight onto the entire bottom row if you look up straight from beneath. Even though this design is not ideal they at least thought of that! :)
And with the rear one out, both manifolds were extracted by 2:15pm - 6 hours and 15 minutes into the job.
Preparing Installation
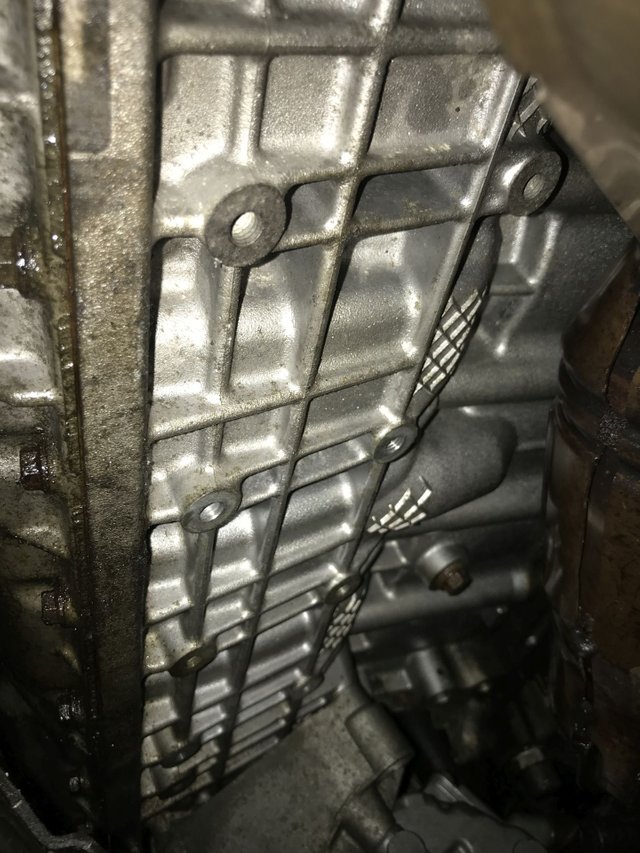
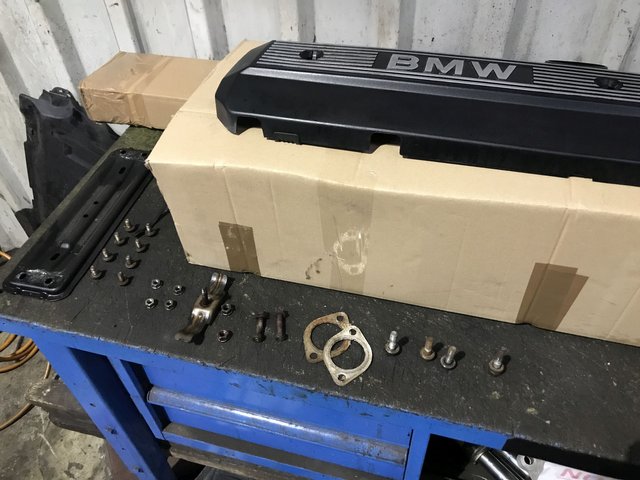
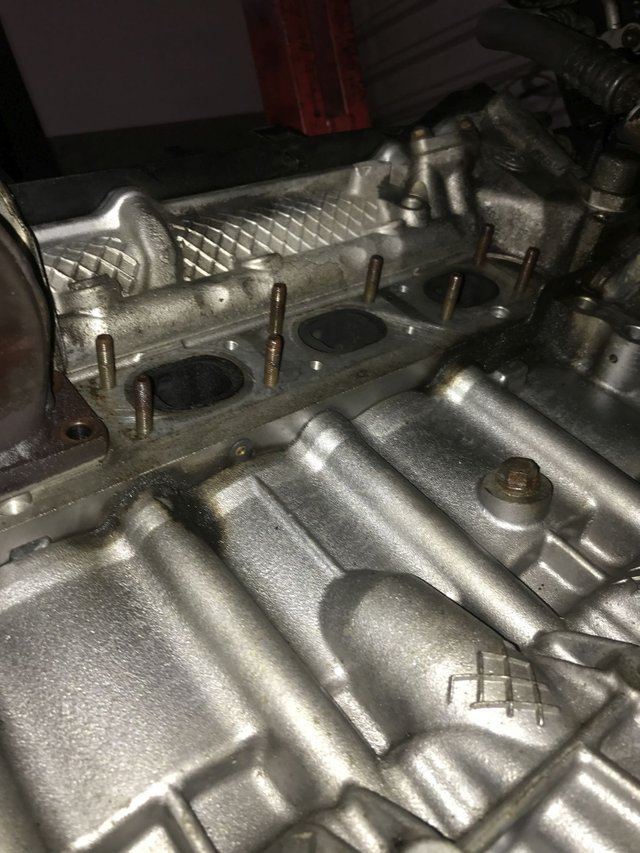
With both manifolds removed successfully we can now clean the gasket surface area ideally with some microfibre towels and brake cleaner. You can use sand paper but keep it fine as to not accidentally make the surface uneven which would lead to sealing issues later on.
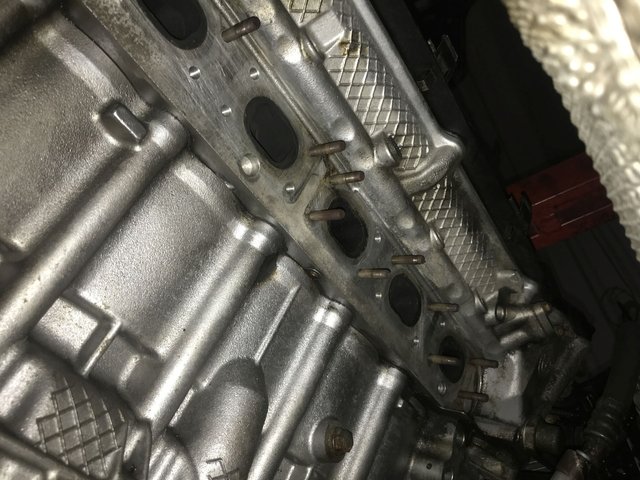
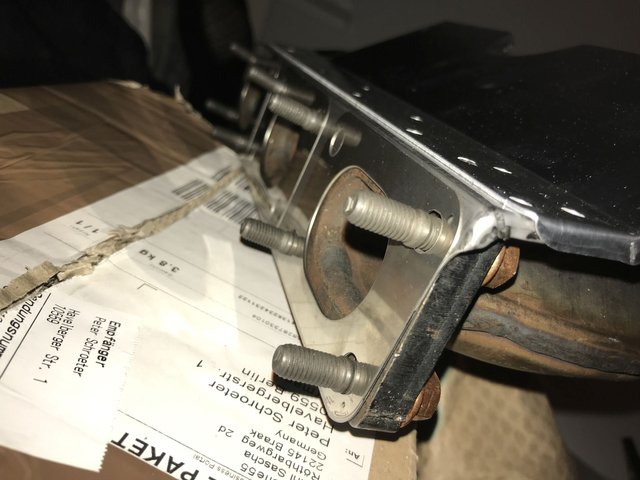
I then fitted the new studs from BMW, they have a torx head so you can screw them into the head and a thick extrusion around the gasket area so I just turned them in until they were safely arrested and wouldn't move anymore by hand.
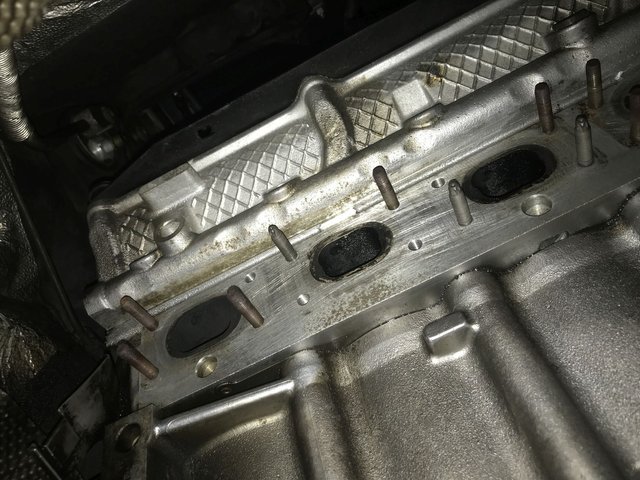
I don't recommend and don't see a point of replacing any of the old ones, simply clean them and make sure the thread is free from dust, dirt and grime.
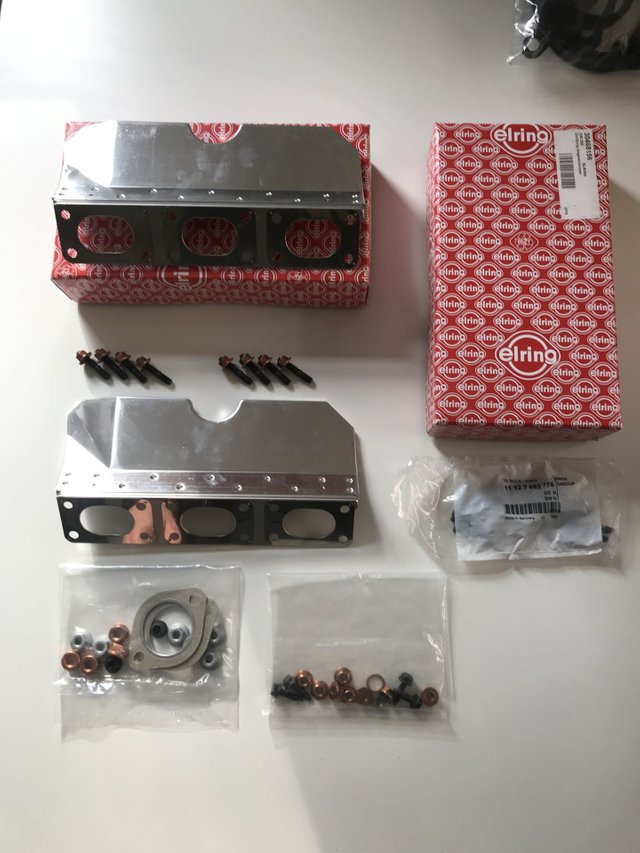
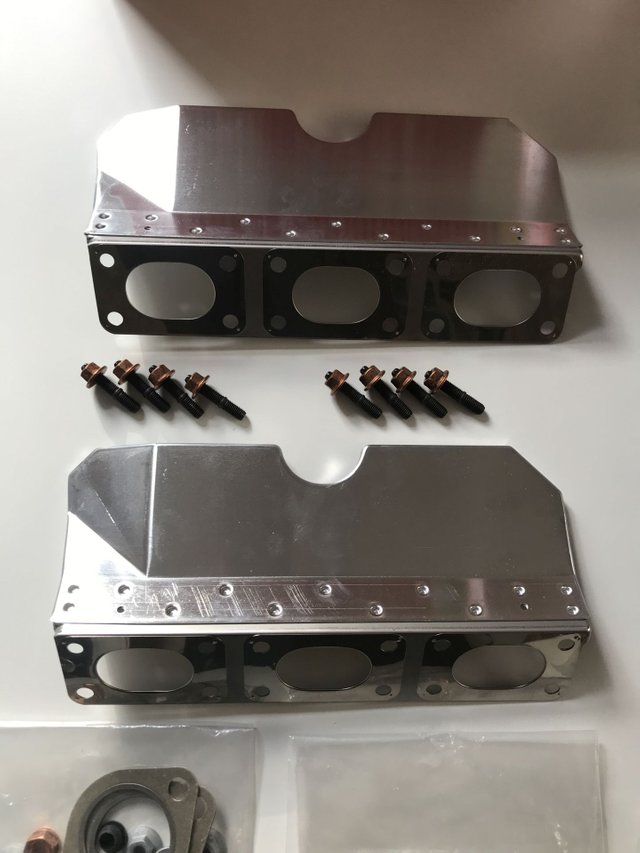
We can now fit our shiny new heat shields courtesy of ELRING:

Looking marvelous!

At this point and after another break it is 3pm - 7 hours in.
Before we're ready for the installation the rear or post-cat lambda nodes need to be fitted as it will be painful to impossible to turn them in with the manifolds installed.
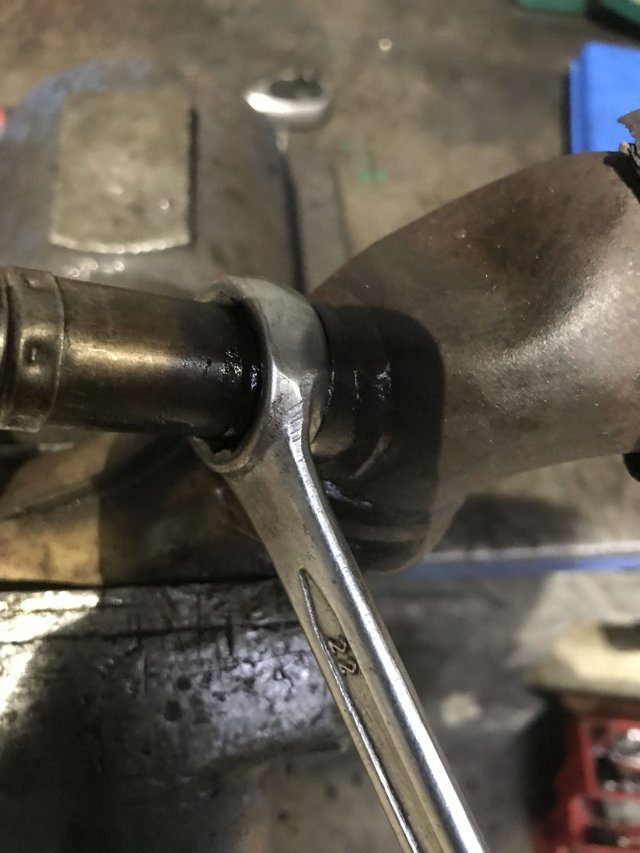
To do this I put the old cats into a vice and successfully extracted one of the nodes without any damage but the other one cost me an easy 30 minutes and I had to use two wrenches interlocked to generate enough pull to get anywhere.
Even when I got it loose the node came out with a destroyed thread that wouldn't fit into the new manifolds.
A quick call to the local parts shop and EUR 140 later I was back at the shop with two brand new lambda nodes, one from BOSCH and the other from some other company as they didn't have two of the same brand. Beggars can't be choosers afterall so I went with what they got and was back at 4:45pm - 8 hours and 45 minutes into the job.
Worse still, the shop closes at 8pm which leaves me 3 hours and 15 minutes to put it all back together.
Join me in the next part to find out if I made it and more importantly if the issue was fixed after all the hard work!
Steem ya later!