Do It Yourself - Front & Rear Strut & Damper Replacement on a BMW (Damper, Spring, Mount) 2020 Update Part 1
Welcome back everyone!
Following my extensive 2019 Update on all the work done on the car I'm happy to bring you this year's updates, upgrades and general fixes and also happy to report that we're nearing the end of this near-restoration of my 1999 BMW 320i Limousine.
As some of you may recall I titled this series 'On the Road to 400.000km/250.000mls' in the beginning and to give you a spoiler > it's done:

More on that milestone later. For today I'll focus on the first fix I did this year which was the complete overhaul of the front struts. Additionally, I'll give an overview of factory wheels and tires for the E46 (summer/winter).
Before we get into that let me recap what happened in 2019 which was the most work intensive year on the car yet but a good half of it was also preventative or cosmetic.
- front and rear stab coupling rods replacement
- front and rear stab bushings replacement
- rear spring pad replacement
- driver door lock assembly
- oil level sensor
- transmission oil change
- thermostat replacement
- water pump replacement
- temp sensor and aux fan replacement
- general repairs on the cooling system
- some cosmetic stuff
- engine mounts
- transmission mounts
- removing and installing the roof liner
- replacing all seats (leather upgrade)
- propeller shaft center bearing
- flexdisc
- exhaust seals
- replacing all door panels (leather upgrade)
In terms of reliability the only parts that really failed were one engine mount, the water pump sealing (replaced the pump as well), the driver door lock and the propeller shaft center bearing. The door lock failed after 21 years and 400.000km being operated millions of times so that's fine with me. Everything else was either preventative or an upgrade. I say that as there is a lot of nightmare stories out there about BMW and German car ownership in general and most of that is that you never hear the good experiences. This car has been very reliable and extremely affordable in terms of parts prices and overall DIY friendliness.
Wheels - Rim & Tire Combinations
\
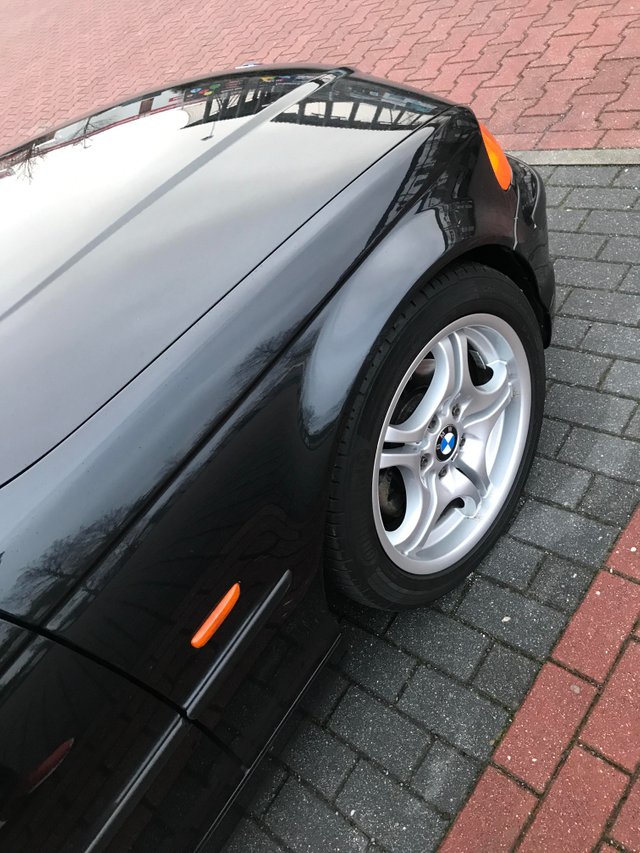
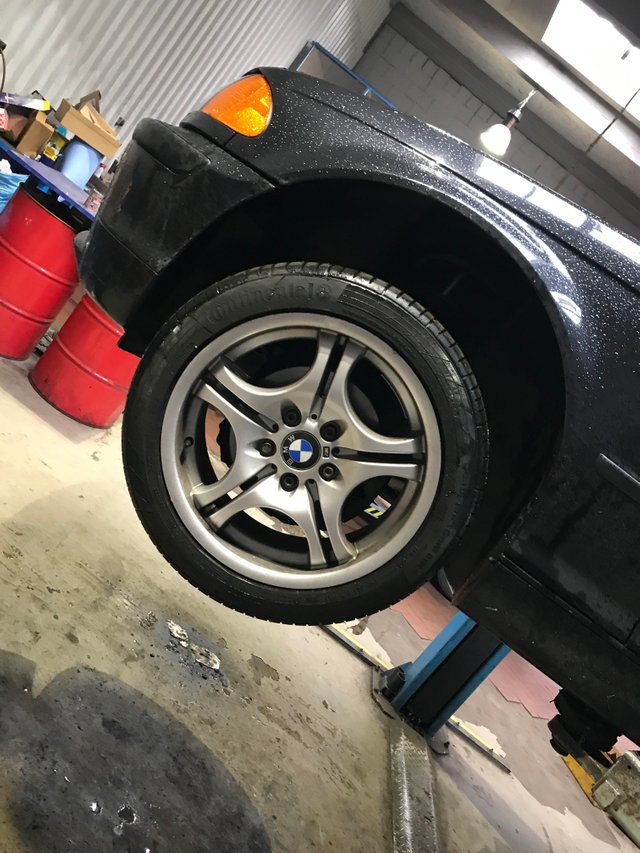
18" Cross Spoke 72M
In January the car sat on these beautiful 17" BMW wheels, internal code 68M, on factory tires 225/45-17 in front and 245/40-17 in the rear.
The car came with these wheels when I bought it and fit it extremely well. You'll also not the amber signals all around. I replaced the white ones with these as I kept getting a lightbulb malfunction in the instrument cluster due to a bad ground in one of the lightbulb plates in the rear lights.
With these standard ones I had no malfunction.
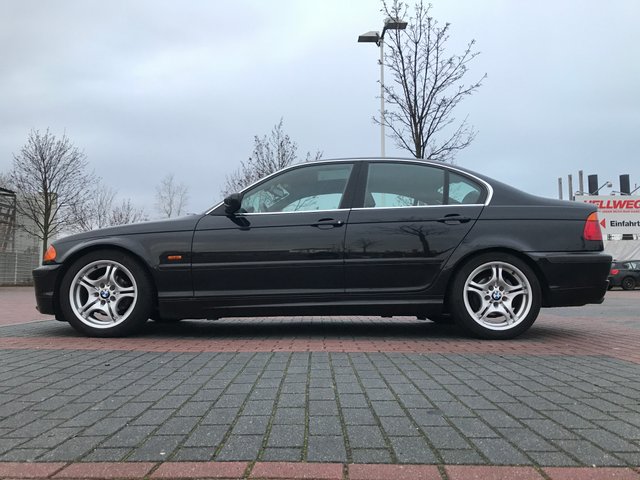
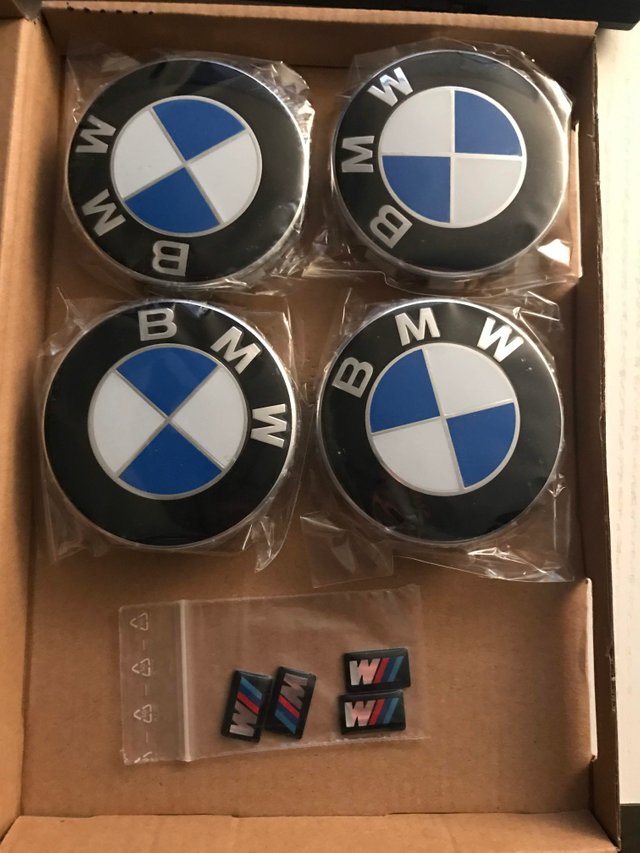
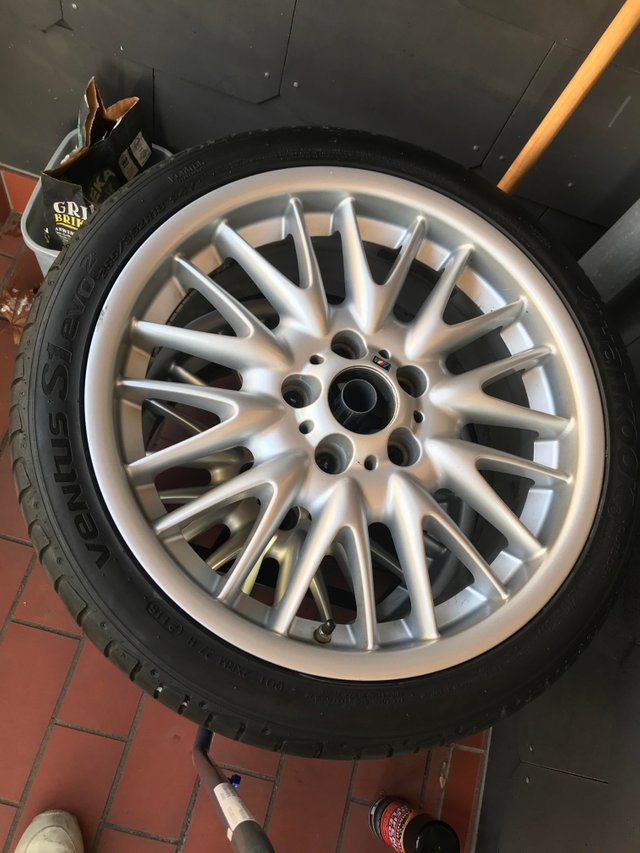
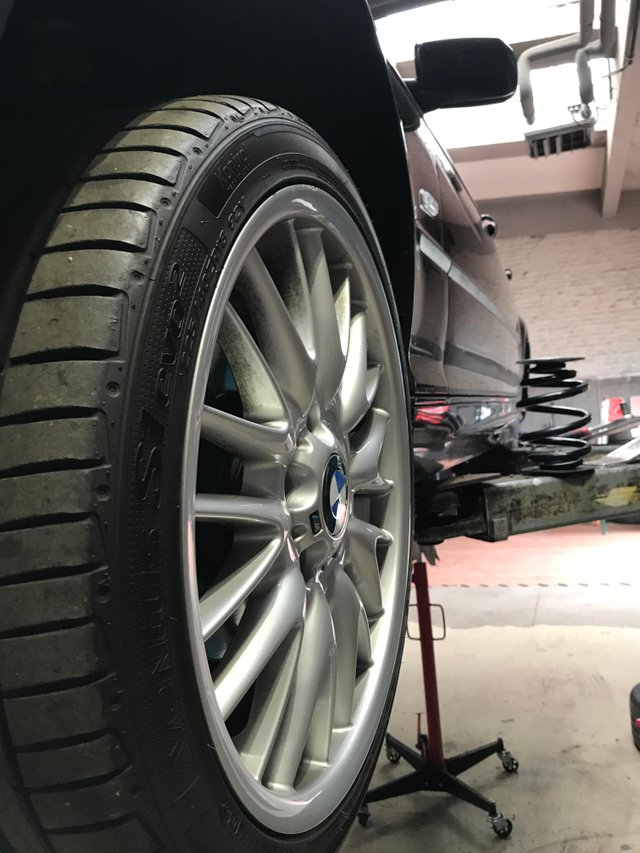
In March of 2019 I managed to get a really good deal on a set of mint 18" wheels, V-Spoke 72M. I always liked them even though they're not staggered just very wide. Design wise they pay hommage to the classic cross spoke wheels of the late 80s and early 90s but with a fresh take. They create a unique look and are era specific as they came out for the E46 330Ci back in 2000. Got some new logos all around as the old ones were very worn.
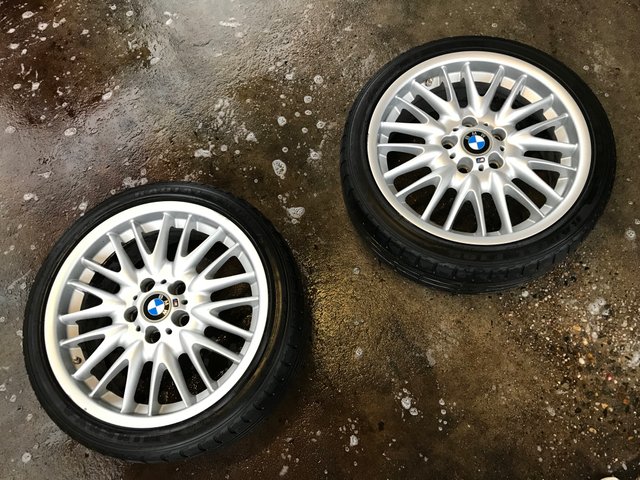
I let them sit in the basement for almost a year until I started to look for tires. I had very good experience with the Hankook Ventus S1 Evo2 summer tire and found matching dimensions pretty quickly. These are no Michelins or Pirellis but in terms of value for money and thread look as well as wet/dry capabilities you can't beat them. Also they are extremely quiet at speed.
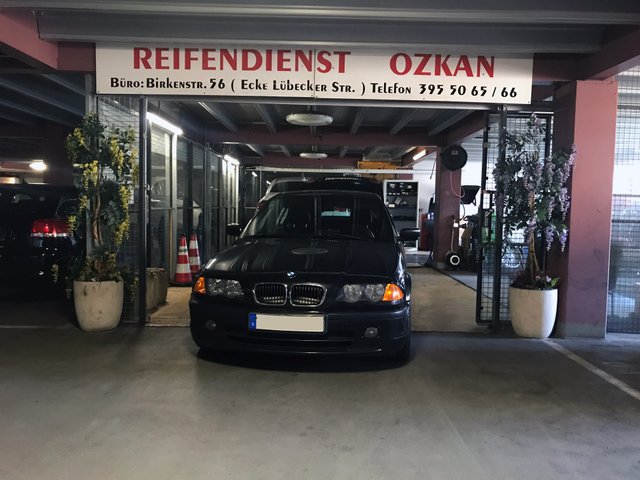
Off to the tire guru to have them installed then, if you're ever anywhere in Berlin and need tire related road side assistance call this guy! Best in the business.
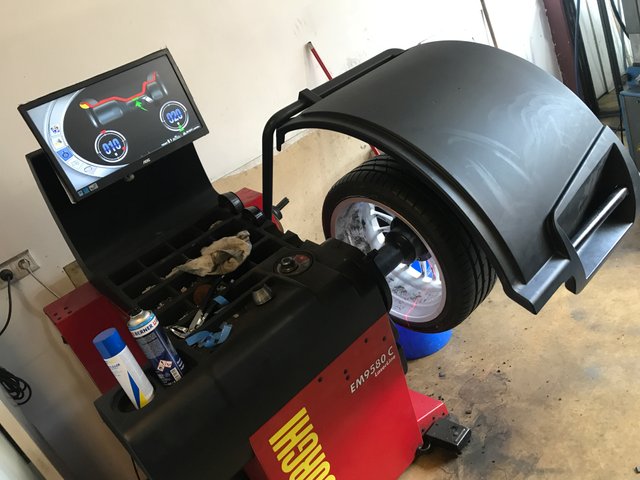
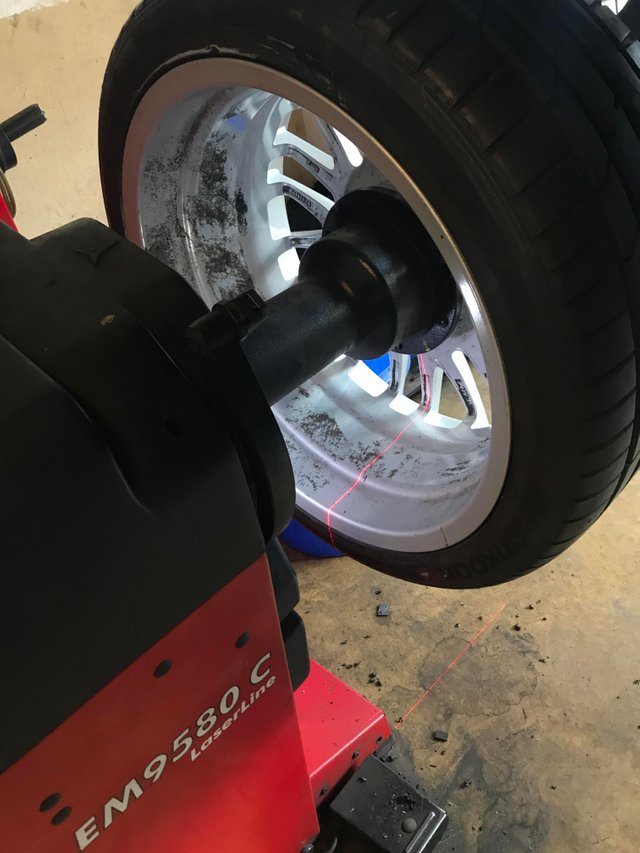
There were no issues with the weighting but I later noticed that starting at 80mph there is a slight vibration in the steering wheel that I didn't have with the 17" wheels. I assume that the higher mass of the 18" wheel makes the suspension just that much more prone to bring out even slight misalignments so I'll have a look at that soon.
That's good to go then:
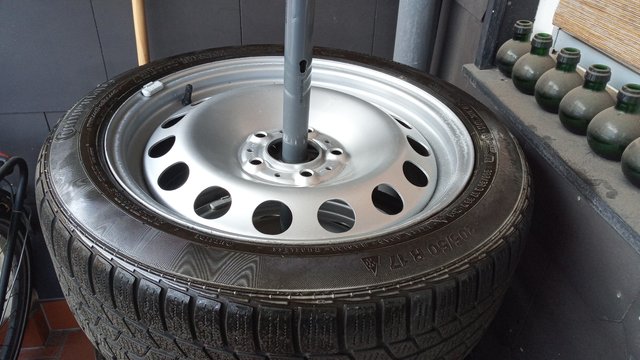
17" BMW Steel Wheel
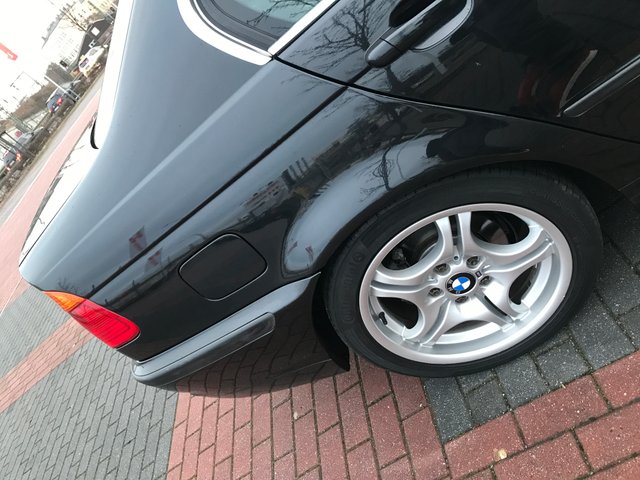
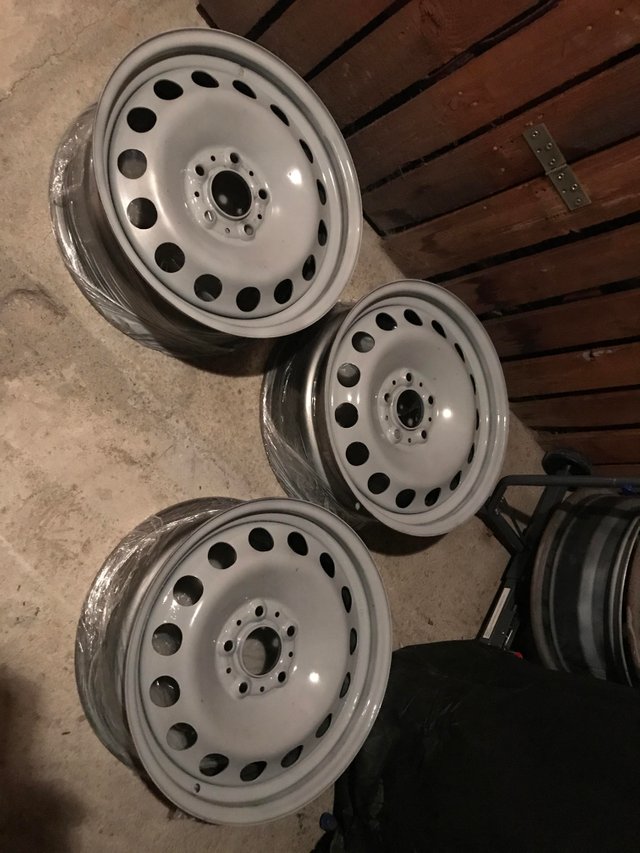
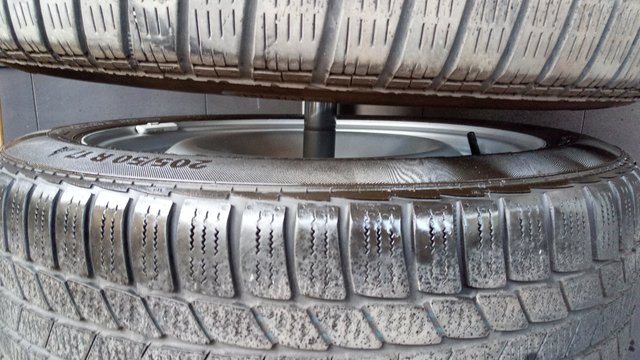
Then there's the 17" steel rims for the winter, originally sold for the E46 330i and Ci models as the brakes wouldn't fit under a standard 16" steel wheel. Probably one of the coolest looking and no doubt heaviest wheels ever made.
They started to show some surface rust and one of the wheels was especially bad so I got two rust free used ones, got rid of the rusty wheel and repainted the 5 wheels in and out with just some primer and spray paint. You can see the result here and for winter steel rims I wouldn't want to invest any more time or money to make them look good to be honest.

I refitted the tires thanks to the tire guru and then winter never came. 2019/2020 is the first year ever I didn't even fit any winter tires as it snowed only once and temps were very mild throughout.
So they're sitting in storage:
Front Strut Replacement
\
1. Parts Acquisition
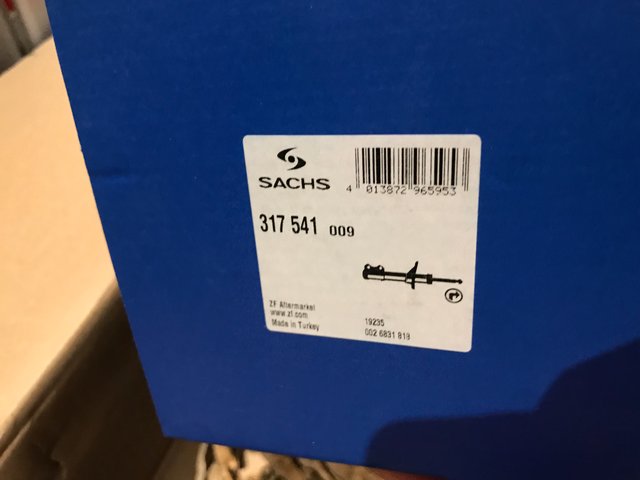
Most of the parts for this repair of the front and rear struts are easily available and you can source them from a variety of vendors but getting the right dampers can be challenging. If your car has the M-Suspension like mine does you'd need Sachs Advantage Dampers front and rear with the following parts numbers:
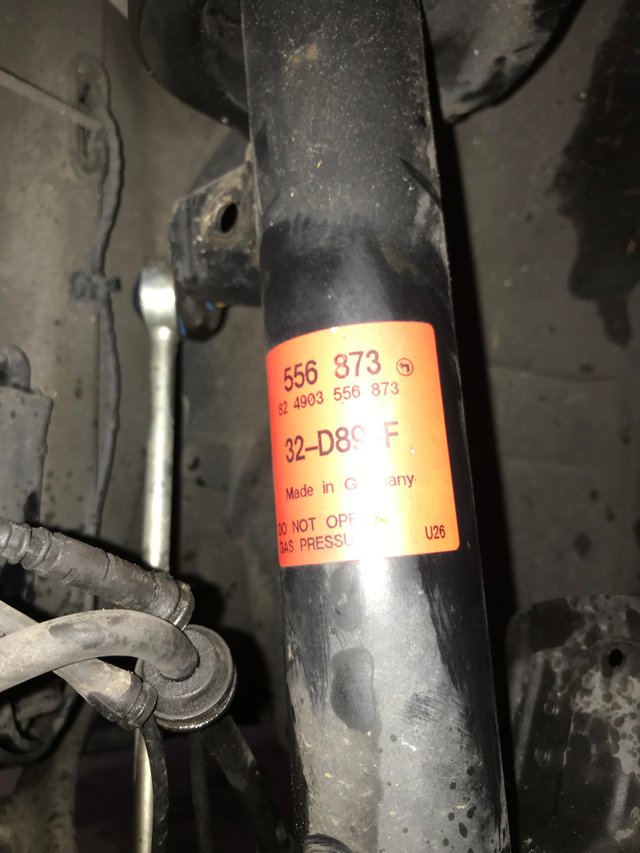
- Front Left 556 873
- Front Right 556 874
- Rear Left 556 882
- Rear Right 556 883
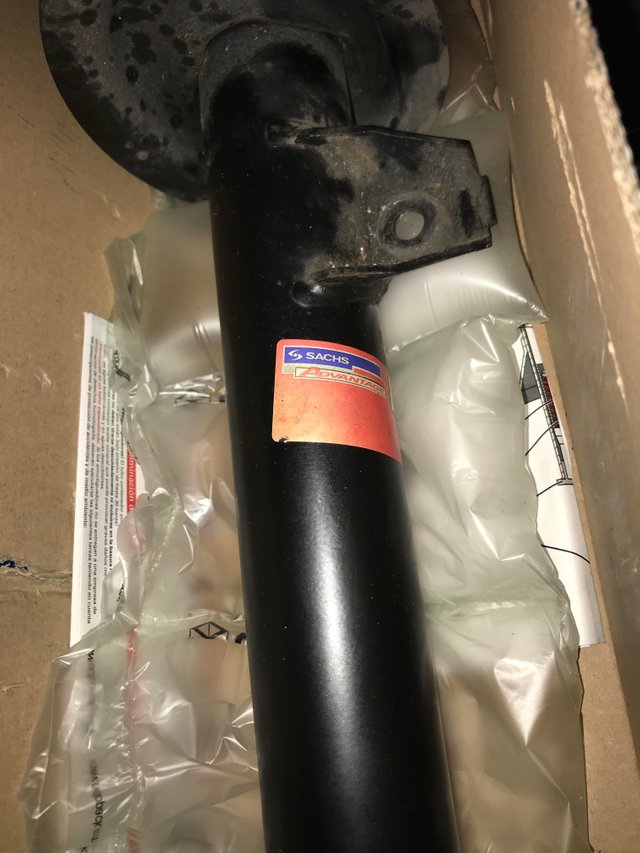
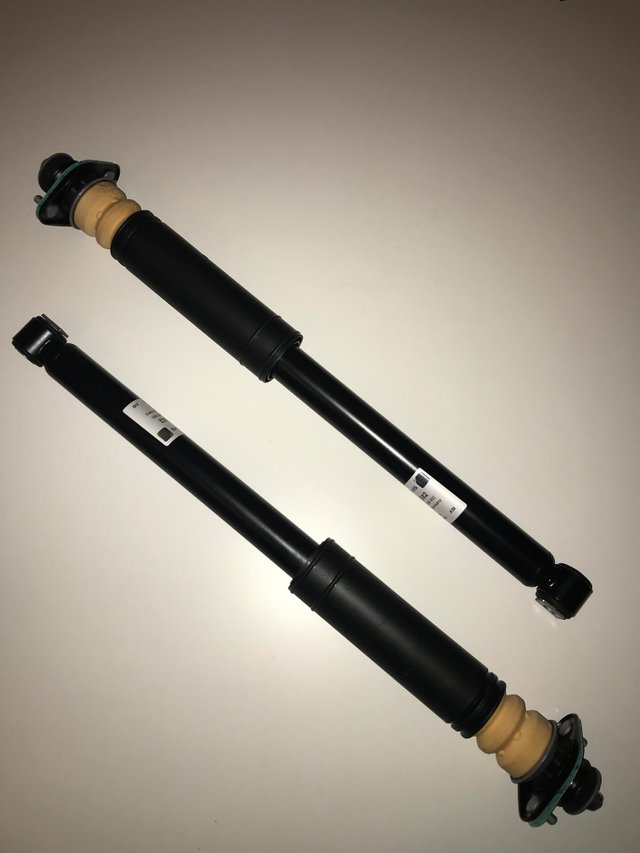
I'm listing these as Sachs discontinued the original dampers for the rear a few years back and replaced them with a model called 'touring' which according to Sachs is equivalent. I sourced both left and right from the same vendor and they came in standard packaging:

Now for the front I ordered the part numbers above and this arrived:
This is not the correct part and in fact the stock strut for the regular suspension. The vendors will tell you that the parts are equivalent but they are not. I had to order 3 struts from 3 different vendors and return one of them until I had the correct parts ready for installation. If you're buying used you can easily identify the right ones by a red sticker with the correct number:
Ordering the parts online also offers a nice glimpse into the dreadful state of the packaging and shipping of parts nowadays:
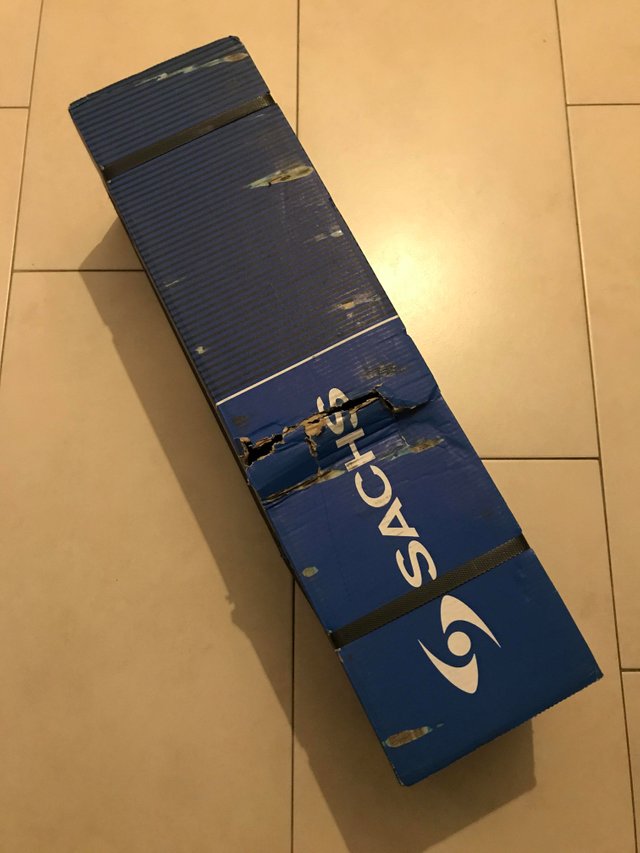
This is what happens when you throw a front strut into a cardboard box without any dampening materials...
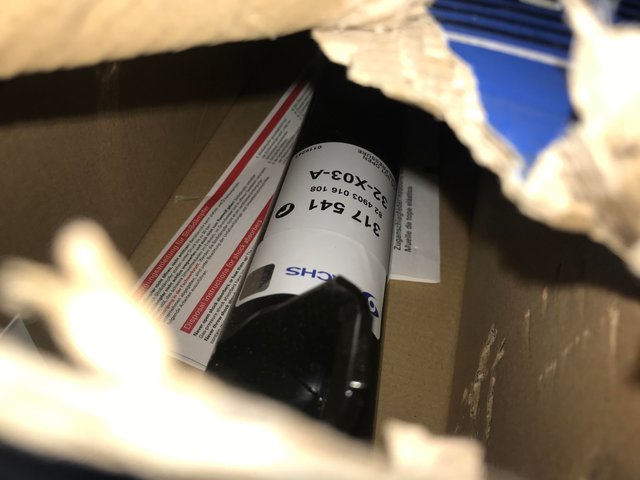
Absolutely unbelievable. It ripped open so wide that I could check that it was the wrong part without opening the package :).
Anyway once you get these main parts the rest is quite easy. I definitely recommend to replace the following parts once you're at it:
- Strut mounts front and rear
- Bump stops and dust covers front and rear
As a preventative and to avoid having to reinstall faulty parts in mid-repair I sourced the following as well:
- All nuts and bolts related to the damper/strut
- Rubber spring pads top/bottom front and rear
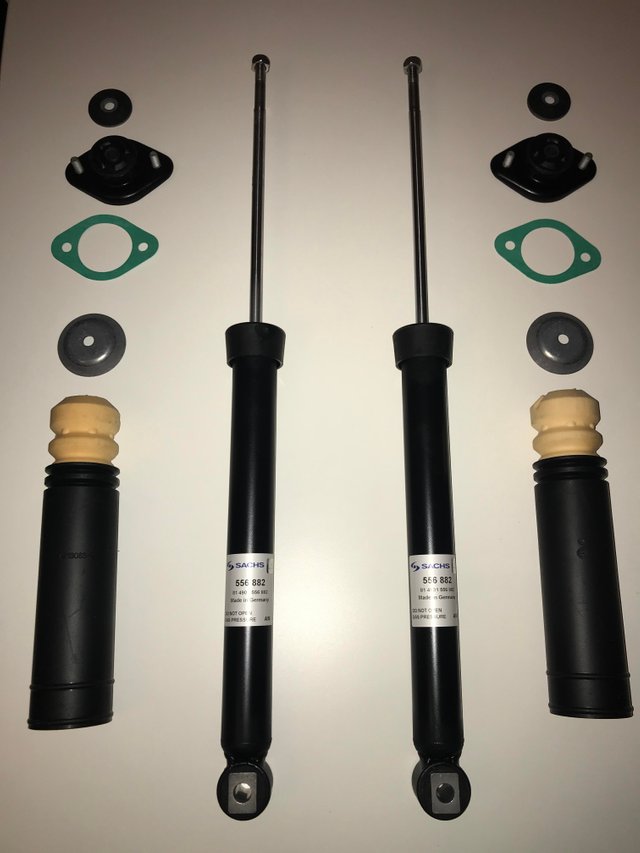
This is what you need for the front:
And for the rear:
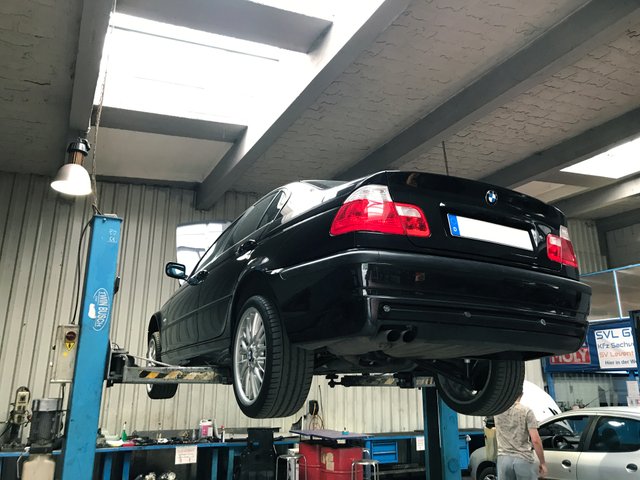
Armed with these parts and my new wheels I made my way to the shop thinking I'd be gone for a few hours...and never expected it would be 8 of them!!
2. Stut Replacement Front Axle
Right, up on the jacks and ready for action, first thing is removing the wheels and as ususal put some gloves and protective glasses on ;)
Front first...
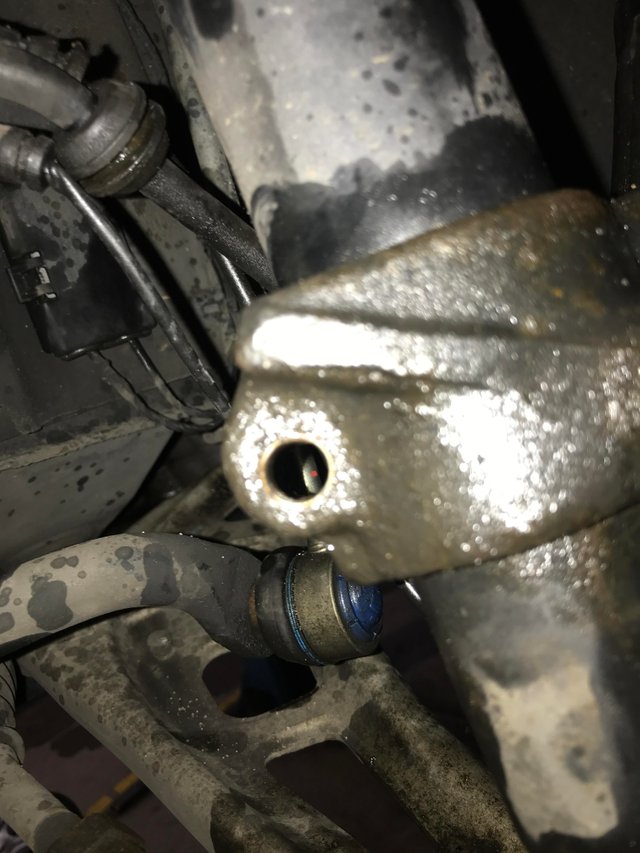
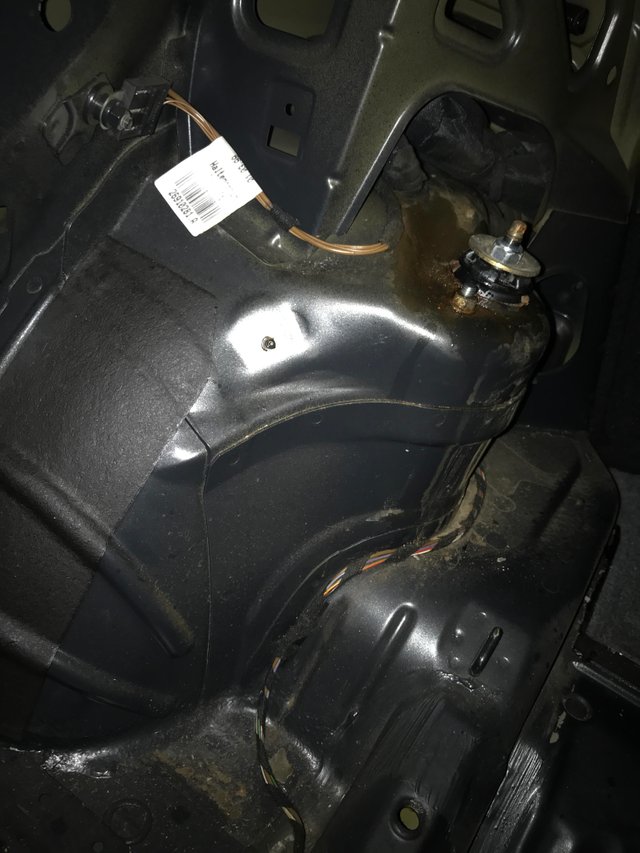
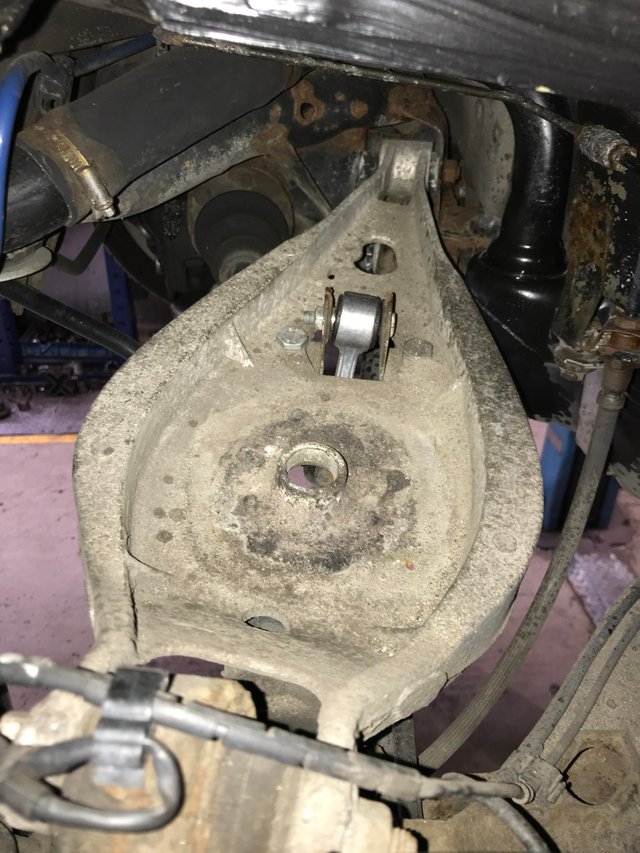
Once the wheel is off we immediately see our culprit:
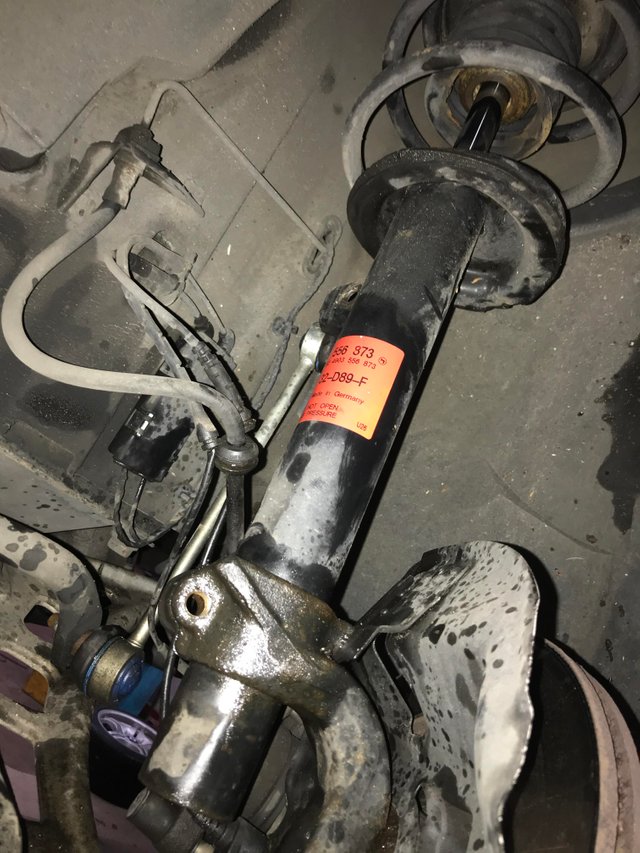
You can see the wet spots, it is well advised to cover every screw, nut and bolt you're going to touch with WD40 before you start.
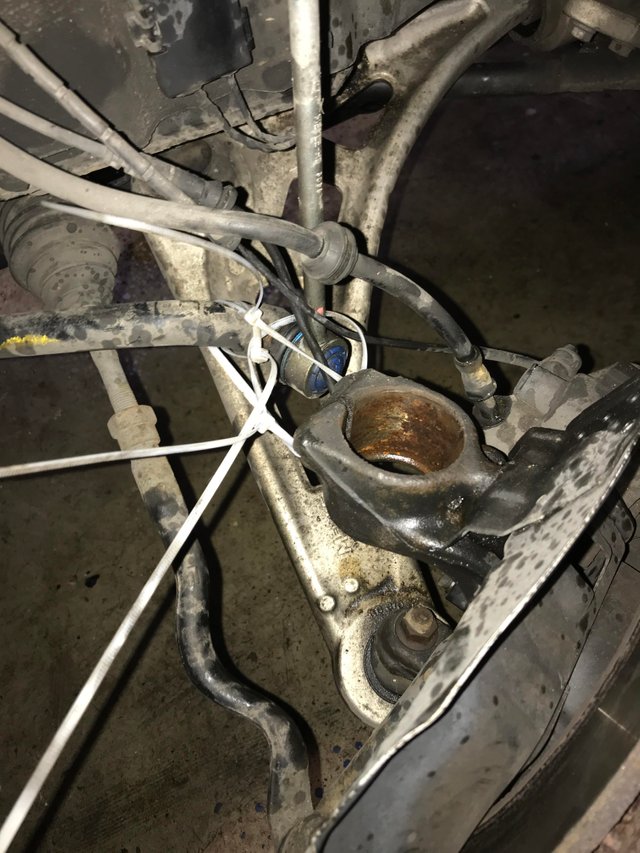
Note of caution: you will rotate the wheel carrier from side to side a few times to get access and that will lead to power steering fluid overflowing in the reservoir. I recommend to drain the reservoir with a pump before you start and top it up again once you're done!
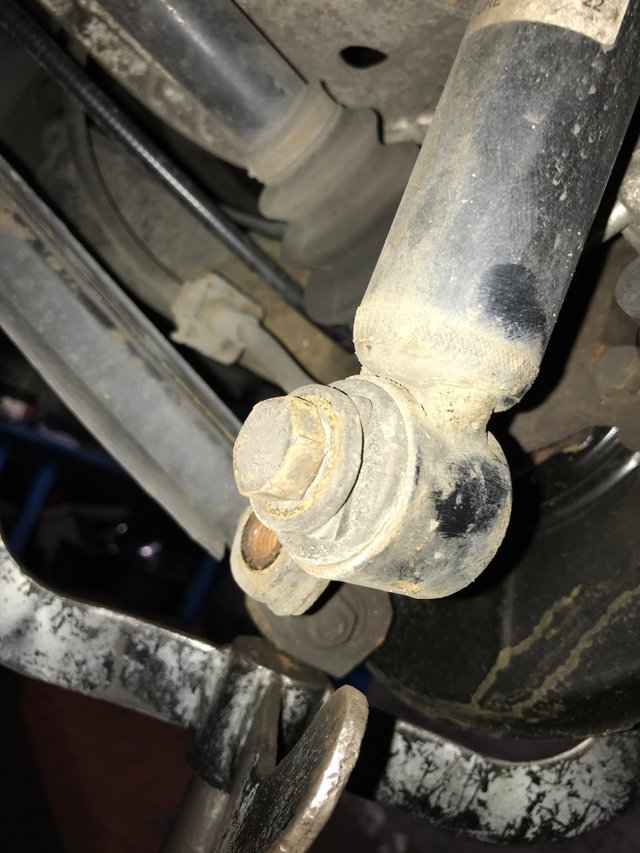
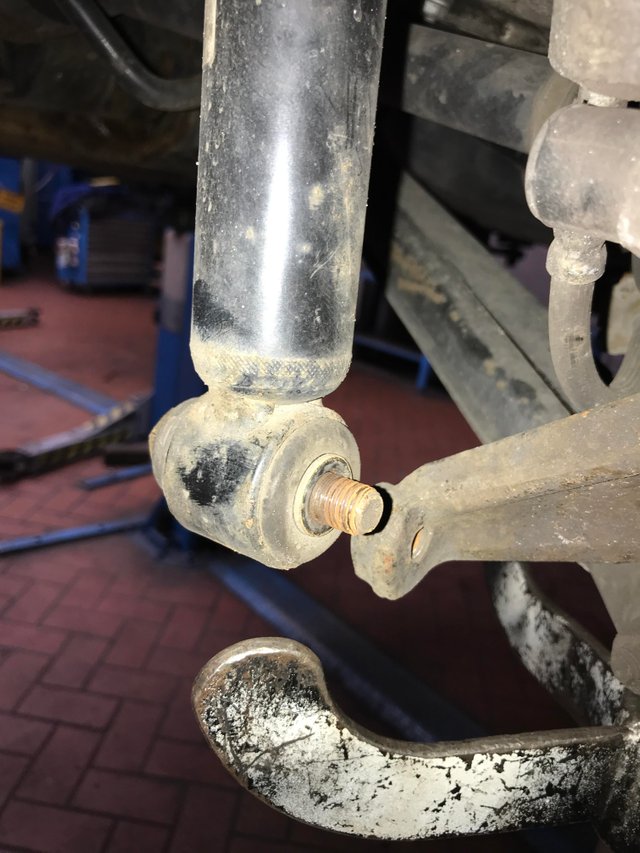
After removing the arrestor bolt you need to remove the stab rod from the strut:
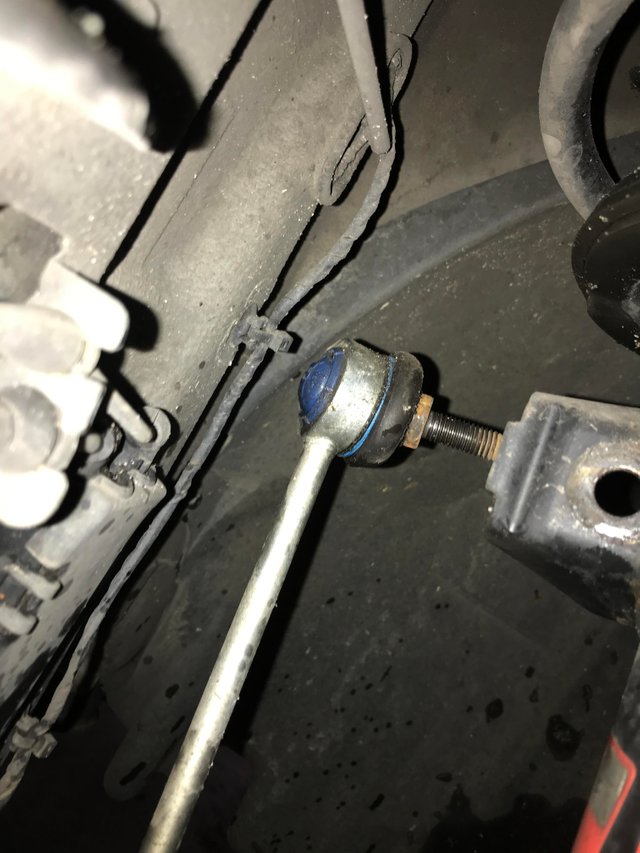
Remove it completely by detaching it from the stabilizer or leave it on, makes no difference except easier access:

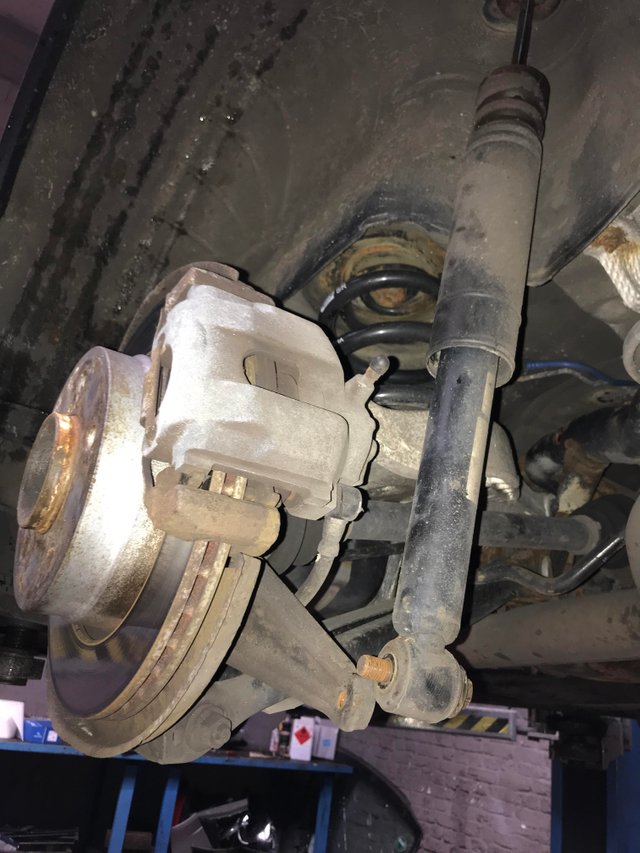
Now drown the area where the strut goes into the wheel carrier in WD40:
Before removing the strut use some large cable ties to hold the wheel carrier in place so that you do not over stretch the brake lines:
The front strut will need to be pulled from the wheel carrier, here you can see it fully arrested:
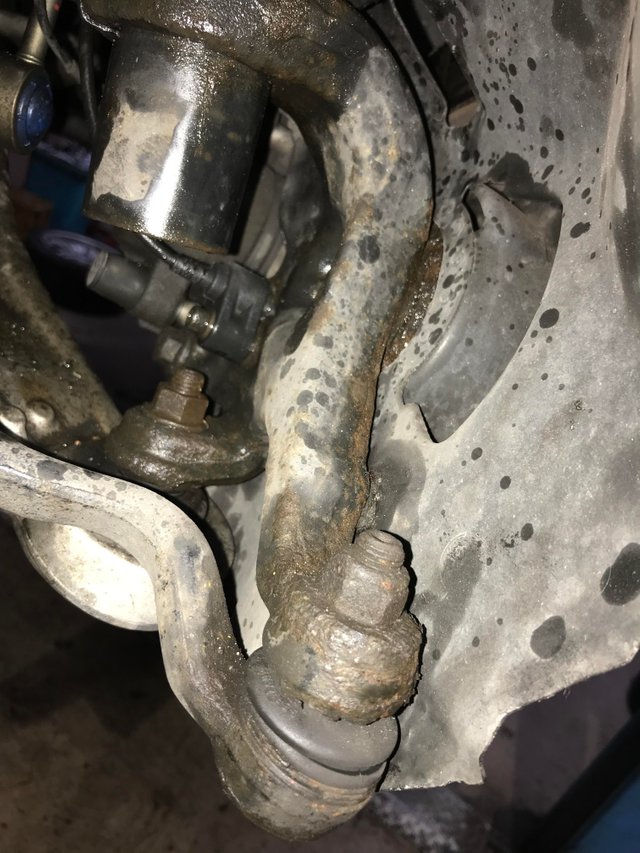
You need to pull it from the wheel carrier before losening the 3 strut mount screws on top!
You'll need a ladder to get to those. In my case I losened the top screws first then figured out I couldn't get the strut out of the carrier, then reattached it to the body with the top screws, got it out of the carrier and then loosened it on top so do it in the right order and you'll save 20 minutes.
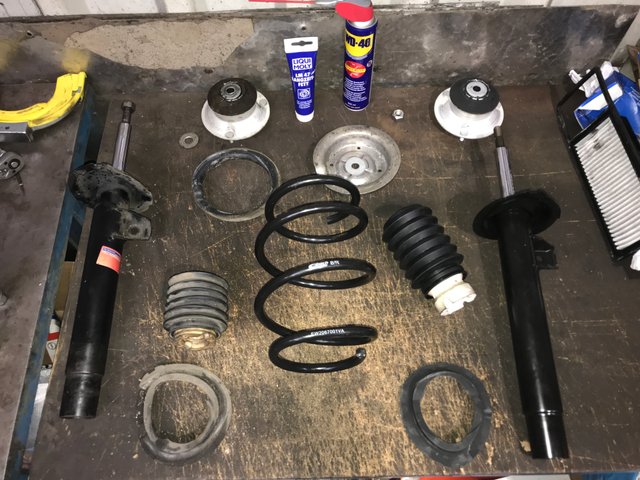
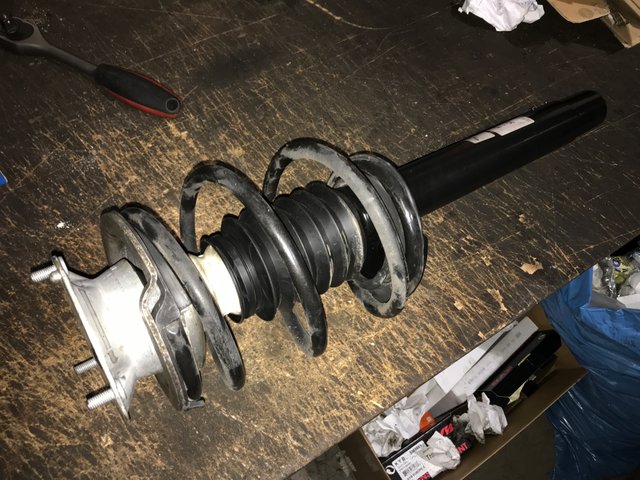
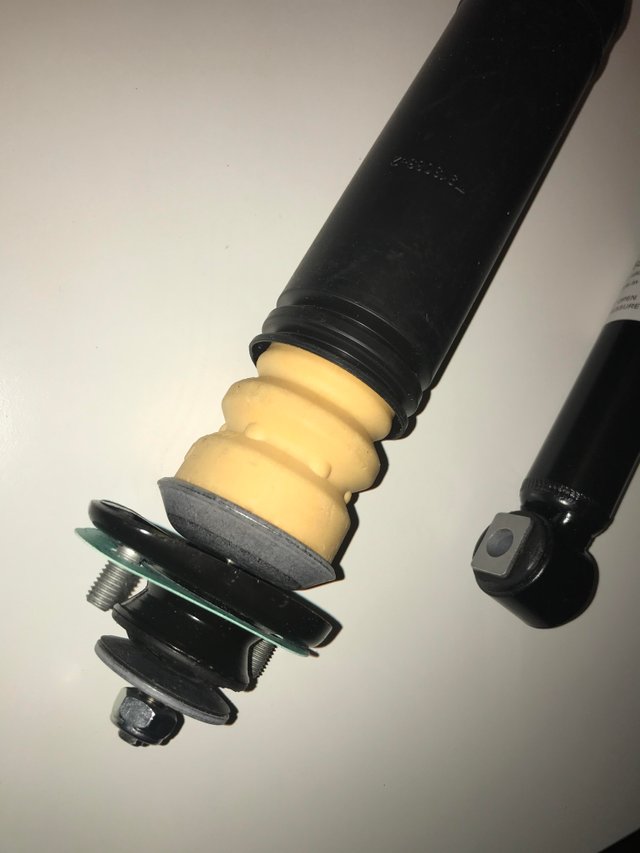
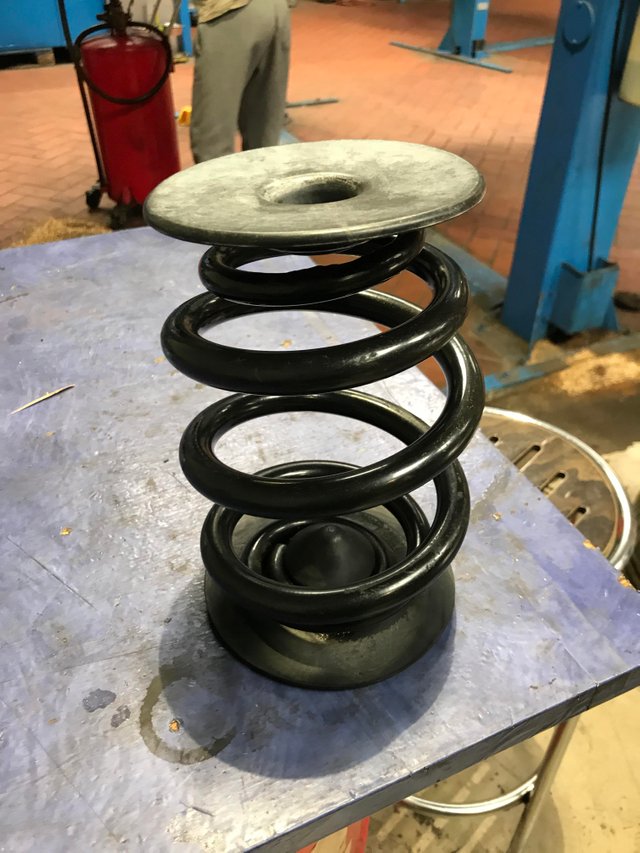
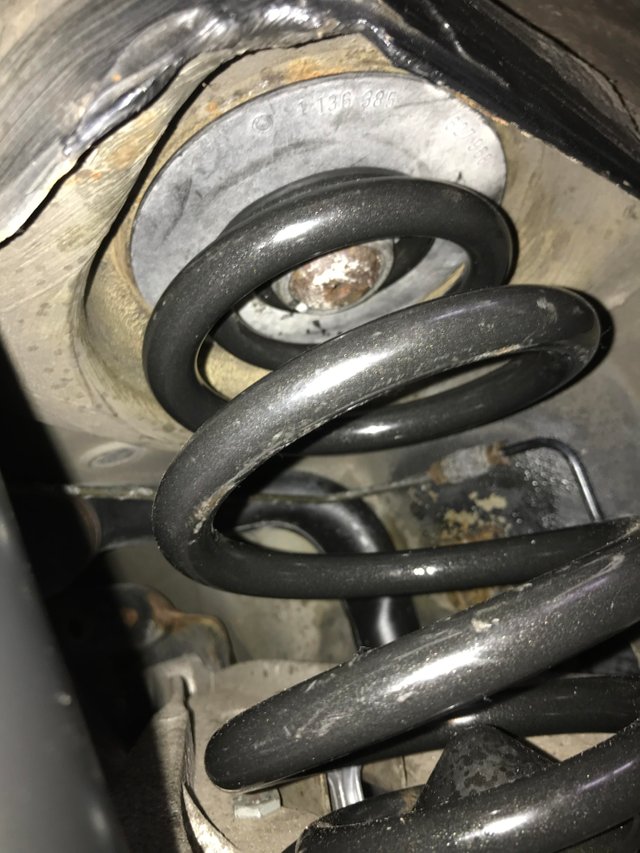
Once you pull the strut you need to compress the spring using a spring compressor tool and simply remove the screw on top of the strut bearing then slowly decompress the spring and you can take it all apart.
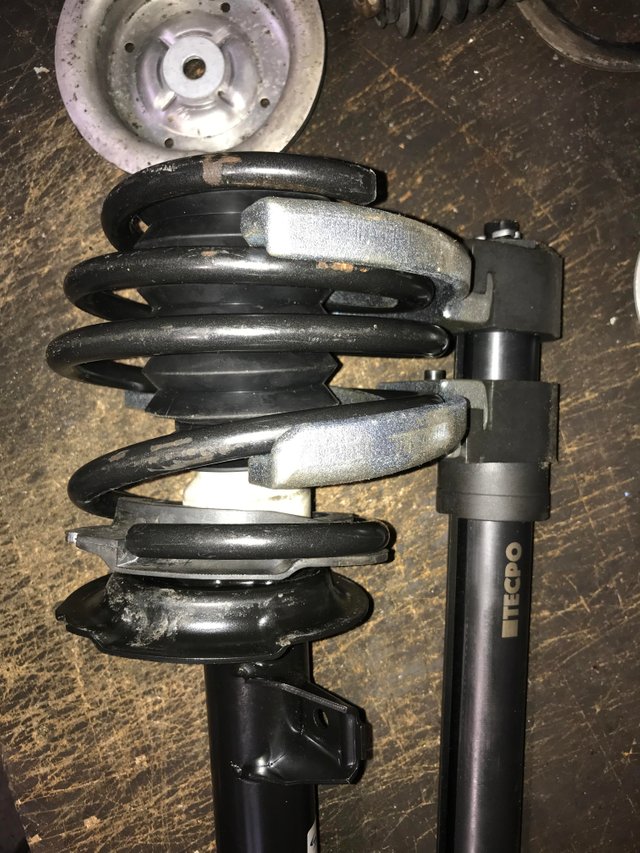
And here we are:
From top to bottom:
- strut mount nut (needs to be replaced)
- strut mount
- strut mount washer (needs to be replaced)
- spring plate (I cleaned them, no need to replace)
- rubber spring pad top
- bump stop
- bump stop dust cover
- spring (Eibach spring, check your spring condition!)
- rubber spring pad bottom
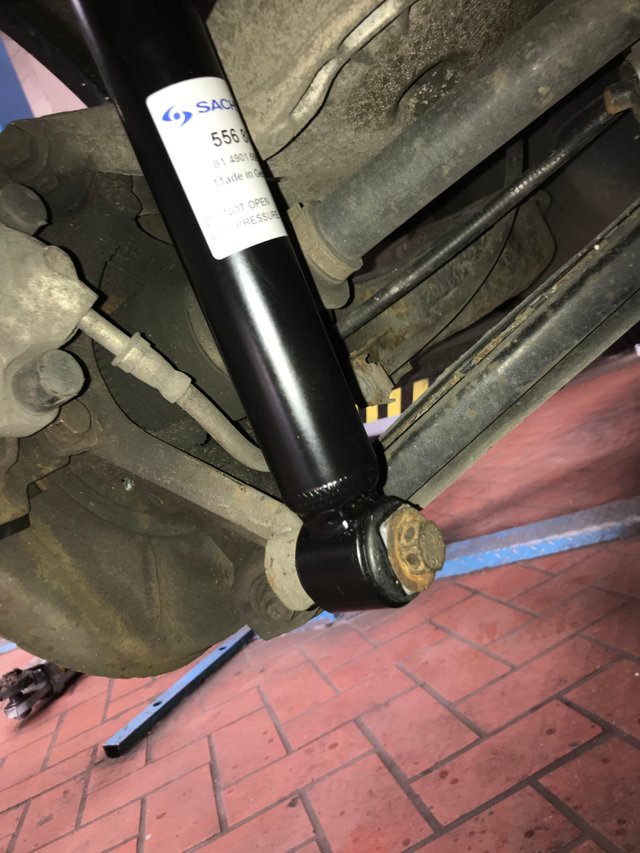
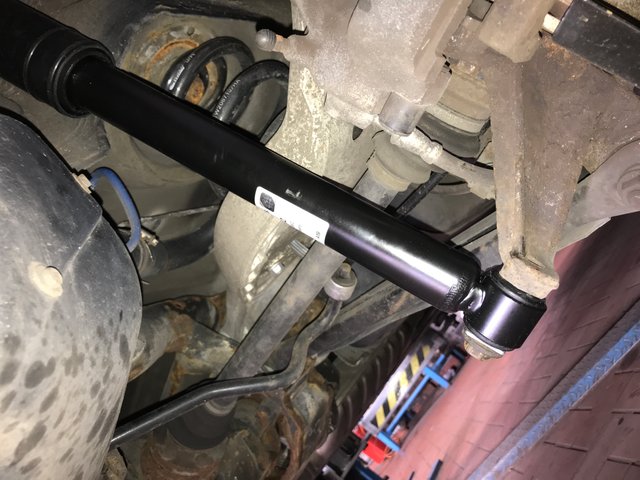
- strut (new one has no red sticker but is correct part)
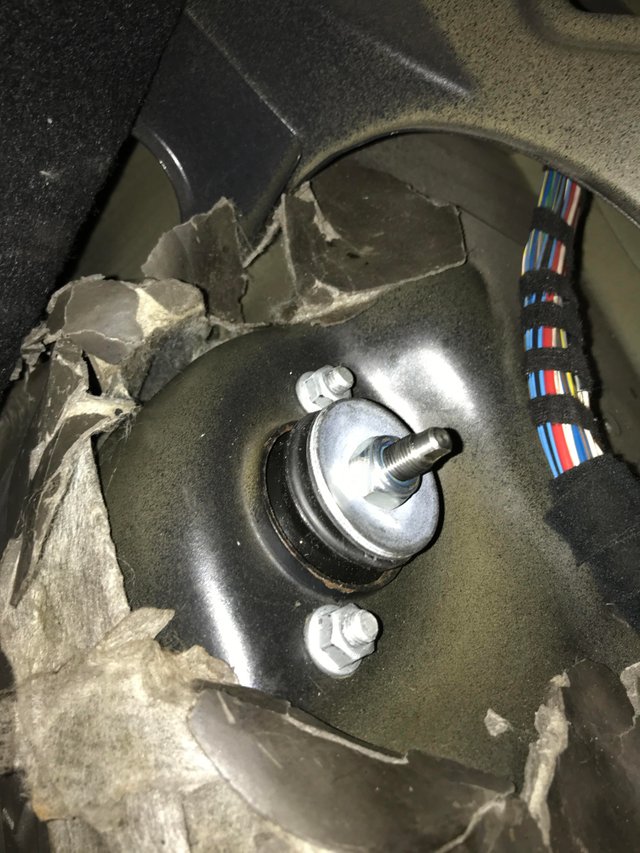
Front Strut Reassembly
The process is basically the same in reverse.
Before you reassemble put the bump stop and dust cover together:

The top indentation slides into the strut mount, the rubber bump stop goes on top!
You mount the bottom spring pad and the spring on top of it, compress the spring and mount the top rubber spring pad, strut mount and washer and arrest the nut.
In the case of the E46 BMW, especially with sporty (>shorter) struts the spring has to be extremely compressed in order to be able to mount the strut mount and arrest the nut! This whole process took me 7 1/2 hours. The other side took me 25 minutes. You need to use two spring compressors.
This single one didn't work:
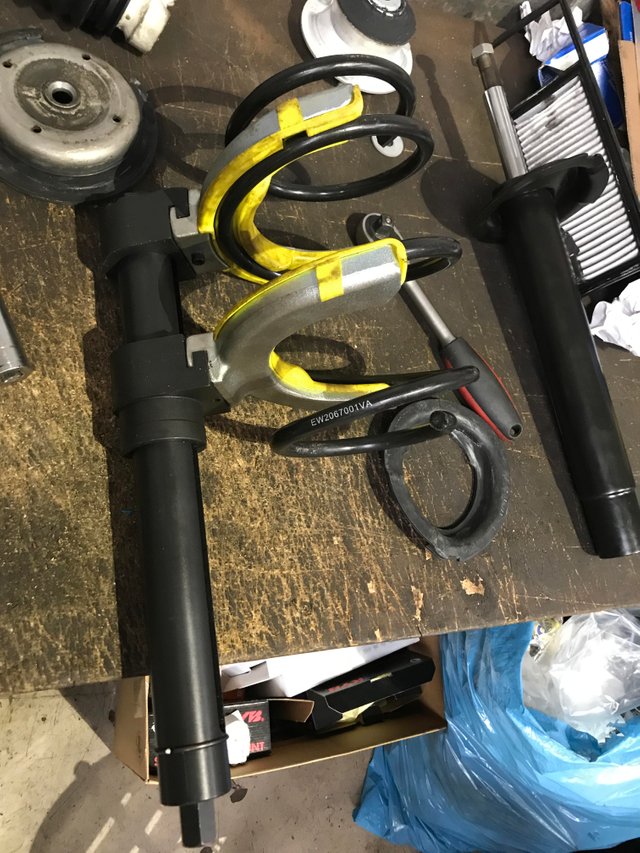
This single one didn't work:
These two together did!
There's 5 hours between the first and last picture. I ended up borrowing a spring compressor from the shop and removed the plastic covers from my own spring compressor for this to work.
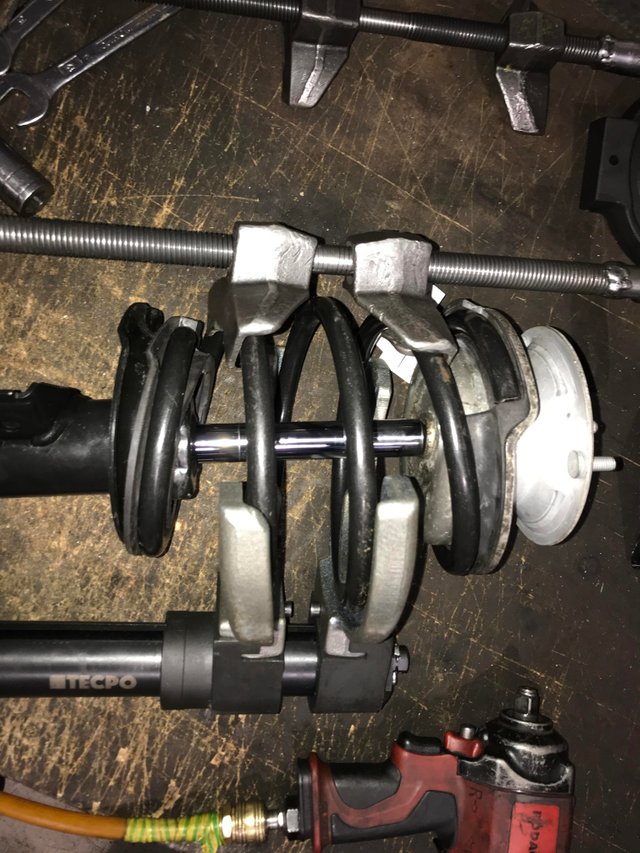
To be clear here is the order of assembly:
- compress the spring as much as possible
- insert the strut with bottom rubber pad and attach to the spring
- do not forget to now mount the bump stop and dust cover ( I did as you can see above)
- mount top spring pad with strut mount
- put washer in and tighten the strut mount nut
- decompress the spring
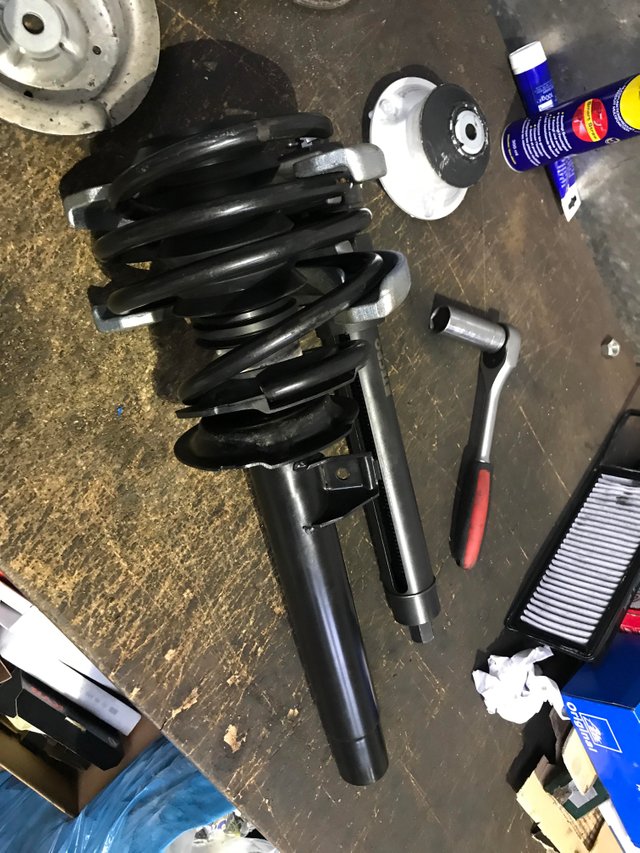
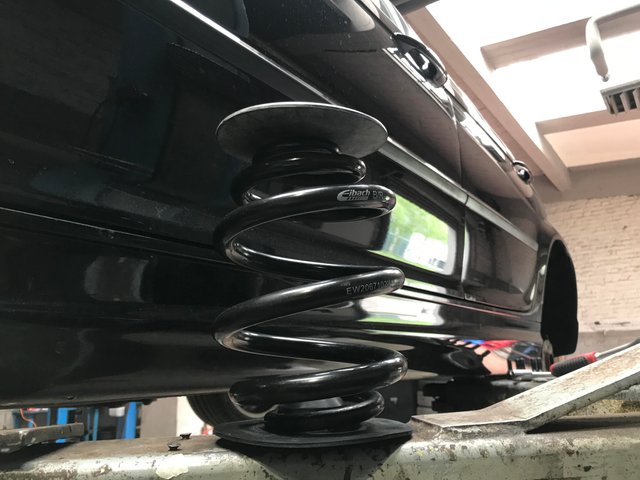
ready for installation
Here is the left side as it should be:
Again, attach the the strut to the body before maneuvering it into the wheel carrier:
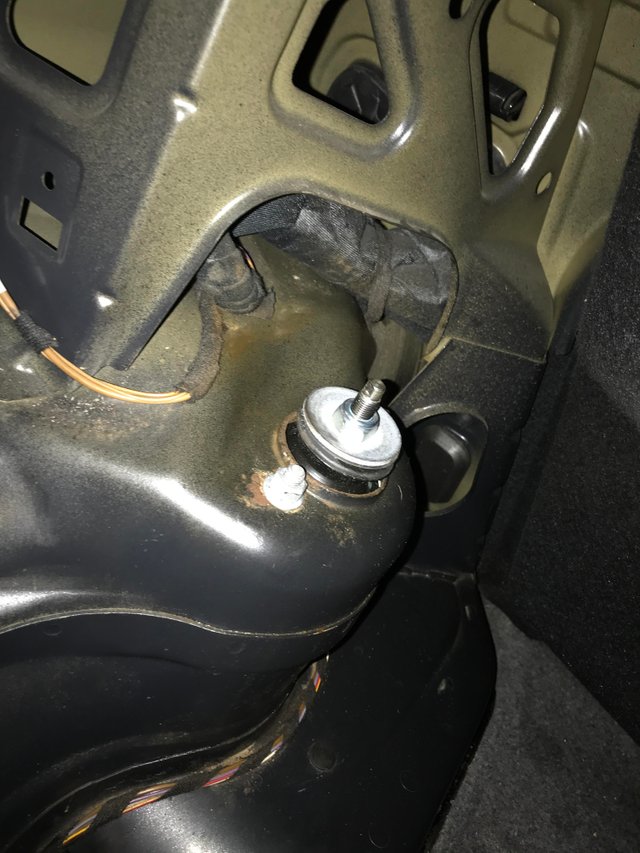
Note, on M/Sports struts you have a pin next to one of the strut mount nuts. If you install these dampers and your car did not come with an M-suspension from the factory you're going to have to remove that pin from the strut mount in order to fit it.
Now you can reinsert the strut into the wheel carrier, remove all cable ties, mount the screw and once that is done reattach the coupling rod. And that's it - you're done. At this point I was out of energy to take any pictures so the other side was smooth sailing now that I knew how to compress the spring and it took a mere 25 minutes from removal to reassembly - welcome to the crazy world of DIY!
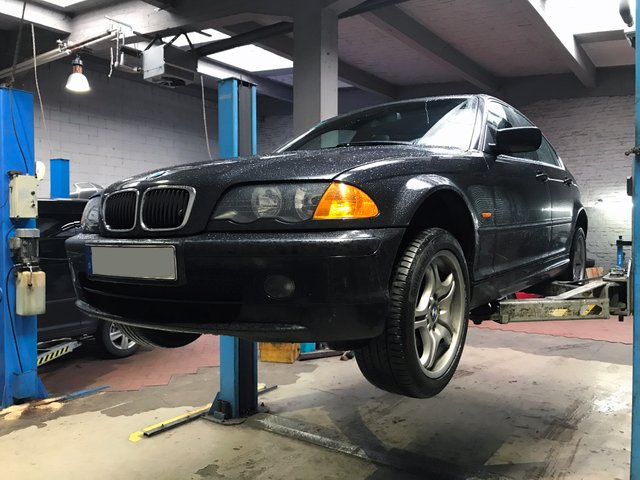
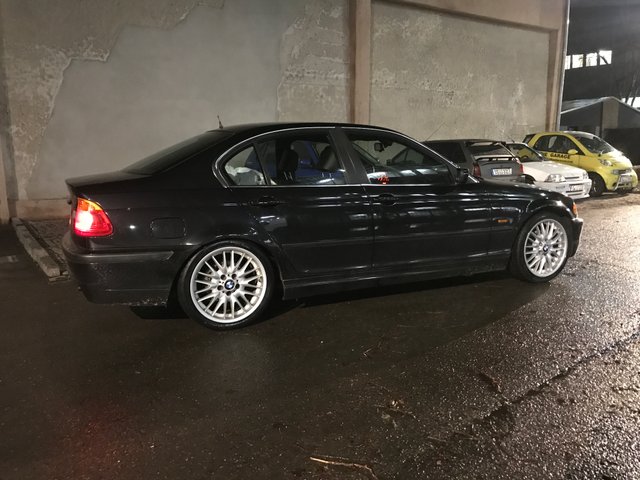
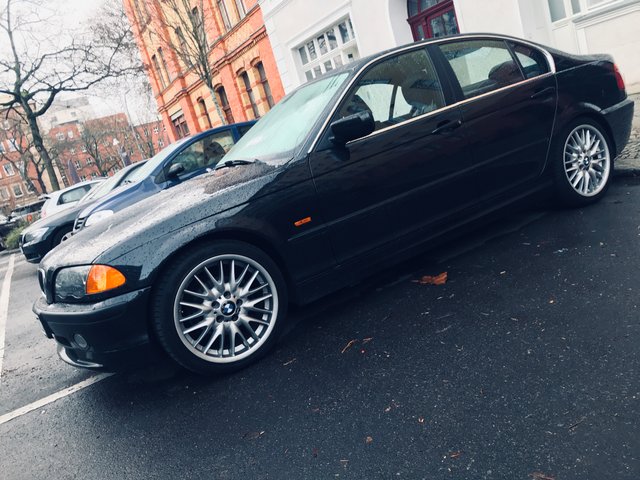
I installed my sparkling new 18" 72V cross spoke wheel and here is the motivation shot we've all been waiting for, she's doing alright:

As the shop was about to close I had to postpone the rear to another day...
Next day in broad daylight you can see how badly my front strut mounts had deteriorated as the car sat much higher in front as before:

Here's before:

I actually think my old front struts were still good as they were neither oiling nor rusty but due to fatigue and frustration I left them in the trash...
Maybe someone picked them up and reused them :).
Ready for the rear? It is a 30 minute job and actually went as planned!
##Rear Damper & Spring Installation
About a week later I went back to fix the rear end. Damper replacement as well as spring pad replacement were on the menu for that day.
I recommend you pre-assemble your rear dampers as you can put the whole thing together ready for installation at home in the garage...

From the above you can quickly go to this:
I replaced everything so if you plan to reuse any of the parts you'll have to wait for the removal. It cost me a few Euros/Dollars so I recommend renewing everything.
In order:
- mount nut
- damper mount and sealing
- rubber bump stop
- dust cover
- damper
The center nut is tightened by mounting a size 6 wrench on top of the damper and then tightening the size 14 nut like this:
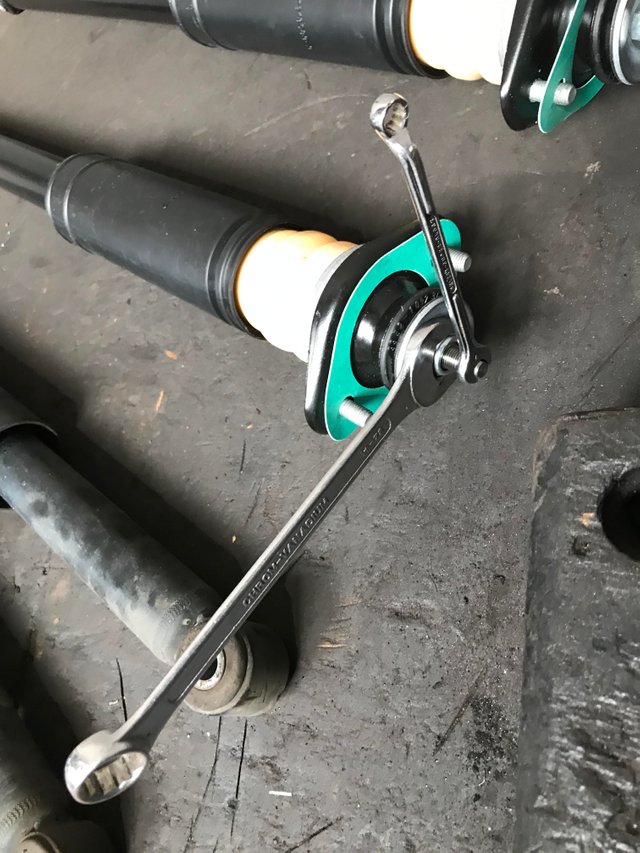
You can find the torque values here, it's 14NM for the main nut.
And it's ready to go in:
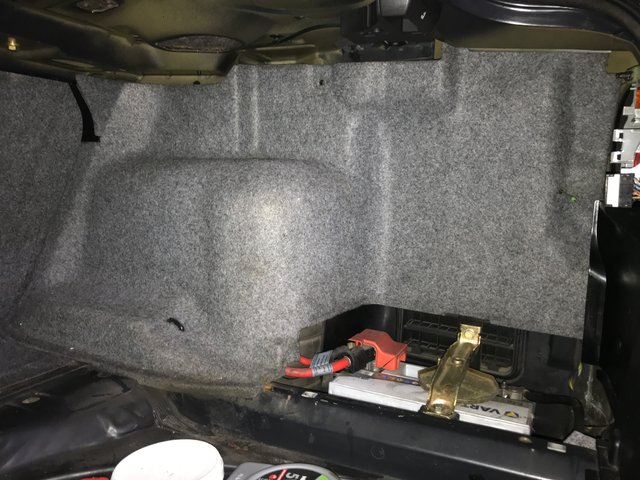
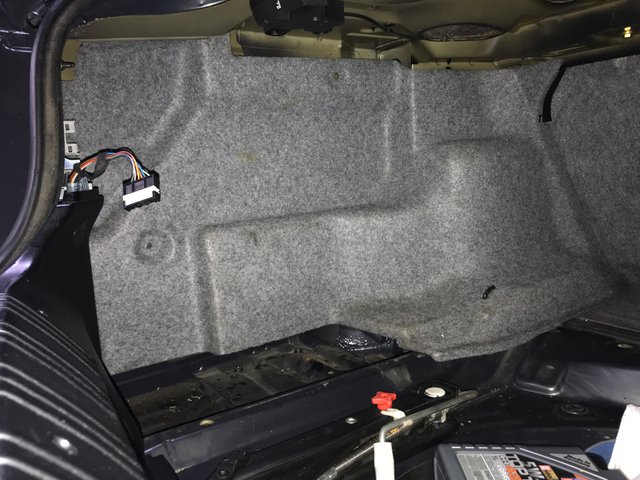
Once the car is up on the lift you need to remove the trunk floor and both, left an right, trunk covers to gain access to the damper mounting screws:
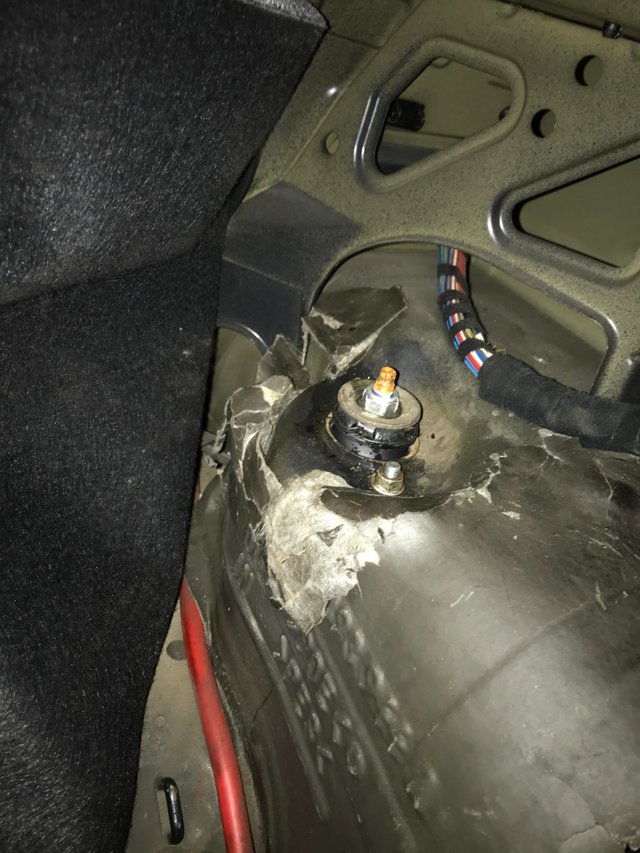
Here you can see the dirty and surface rusty old topside:
Left above and right below:
I cleaned the entire area around the damper and right down to the trunk floor and battery case on the passenger side as well as tray area on the driver side.
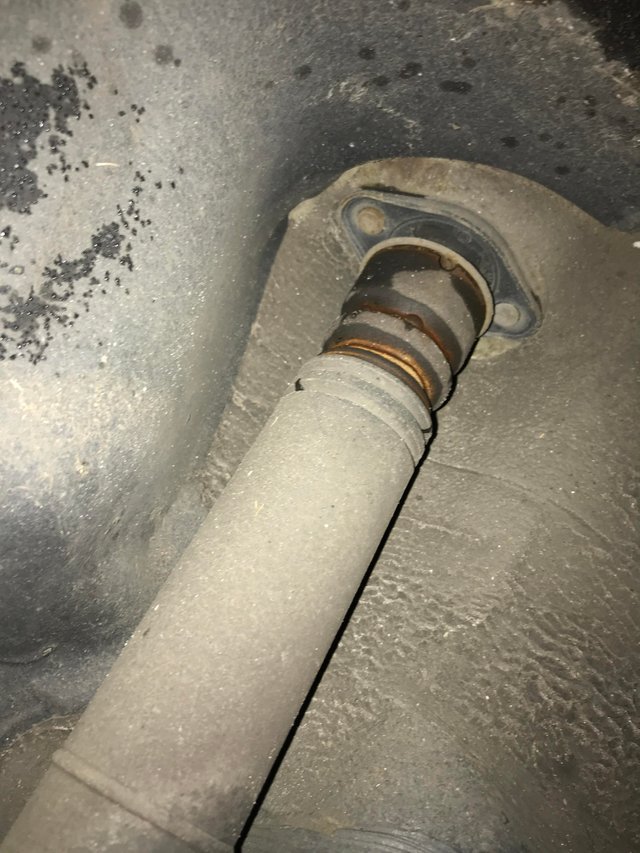
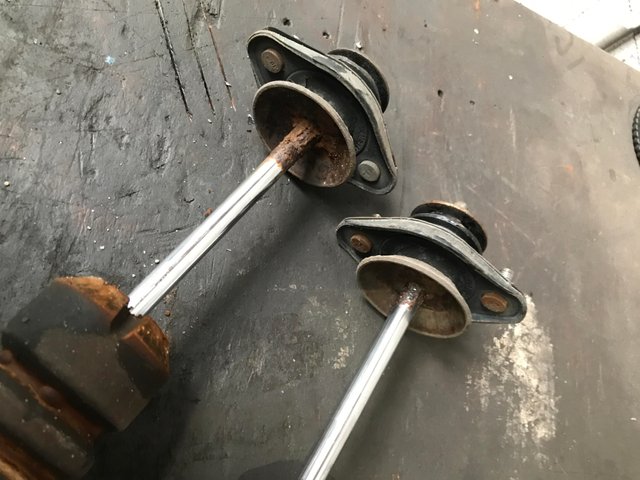
The rusty damper rod is a bad sign already! These dampers were installed for around 60.000km/37.000mls.
The entire rear axle swing is held in place by the damper bottom so support the swing with a transmission lift on the wheel carrier and loosen the size 18 bolt connecting the damper to the wheel carrier.
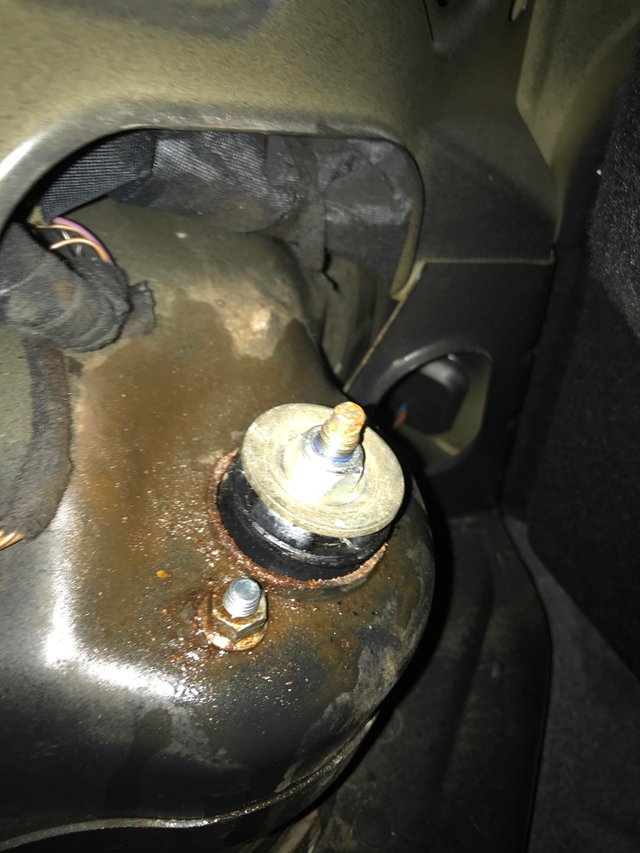
Here you can see the outside of the damper top:
Once the wheel carrier is secured and the bottom side of the damper is disconnected you can use a ladder to remove the topside of the damper from the bodyshell and simply take them out.
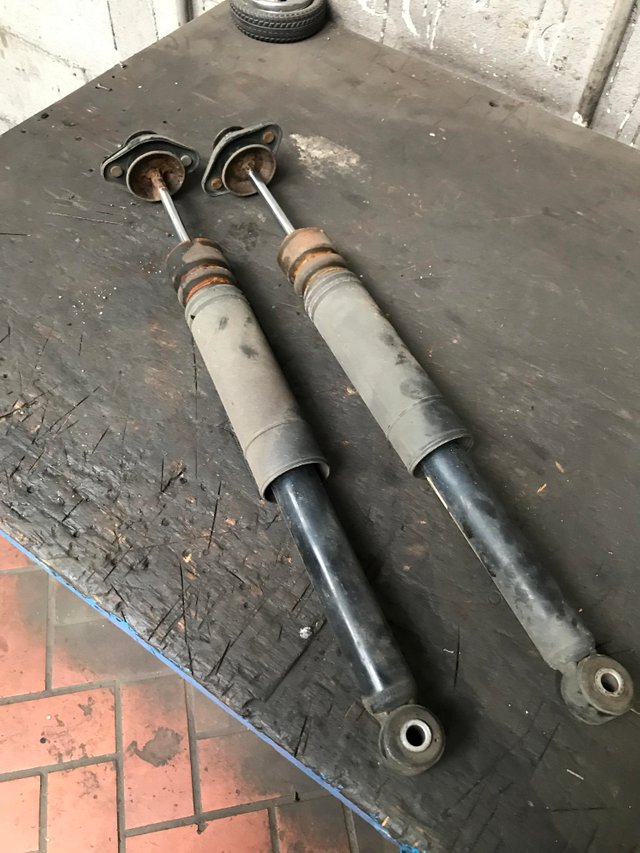
They look quite strained, again the rusty damper rod is not a good sign at all.
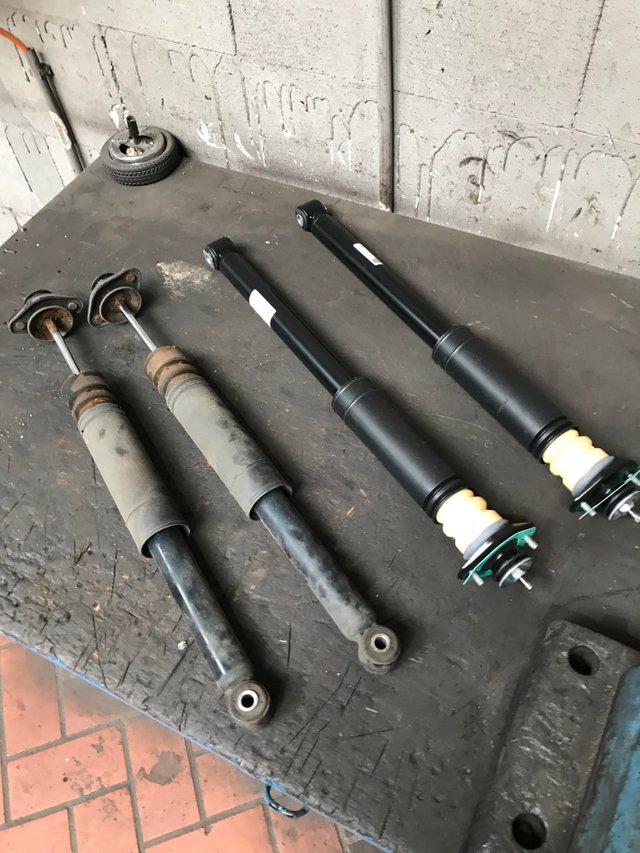
And next to the new ones:
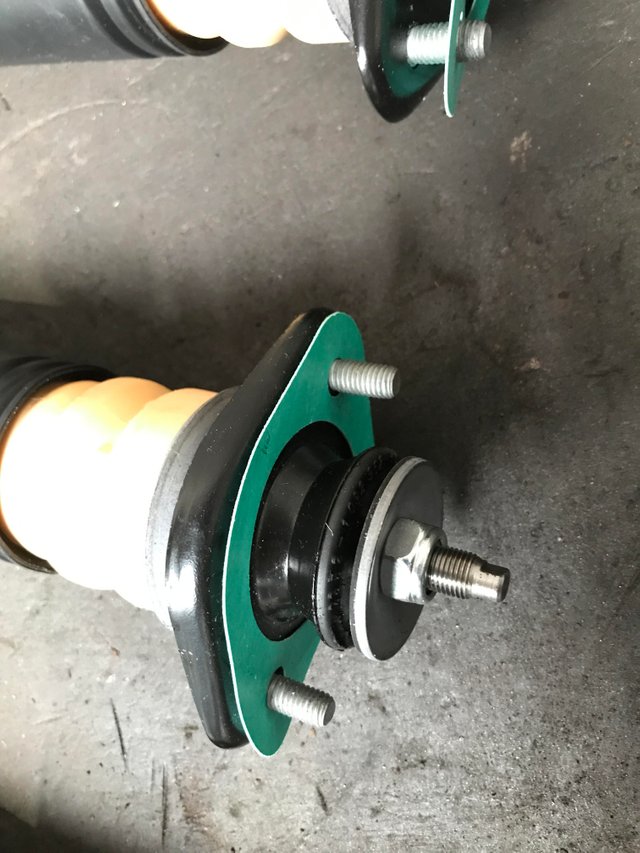
Spring (Pad) Installation
Before putting the dampers back in we'll use the occasion to replace or, in my case, install the top rubber spring pads. These were not installed in my car. I'm not sure if there were never there or just forgotten in one of the spring replacements but it is definitely advised to put them in!
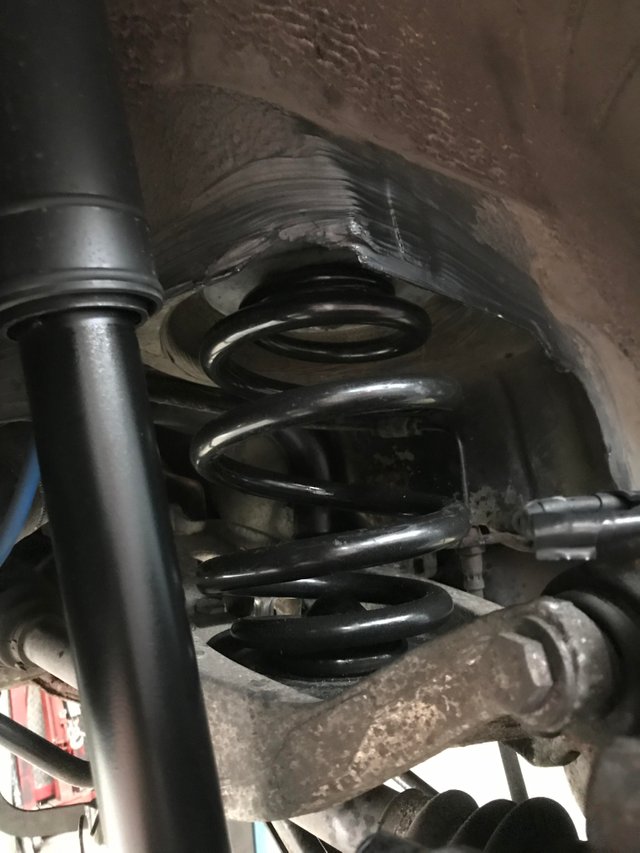
With the damper either removed or the bottom side detached from the wheel carrier you can simply pull the cross member down and remove the spring by pulling it out:
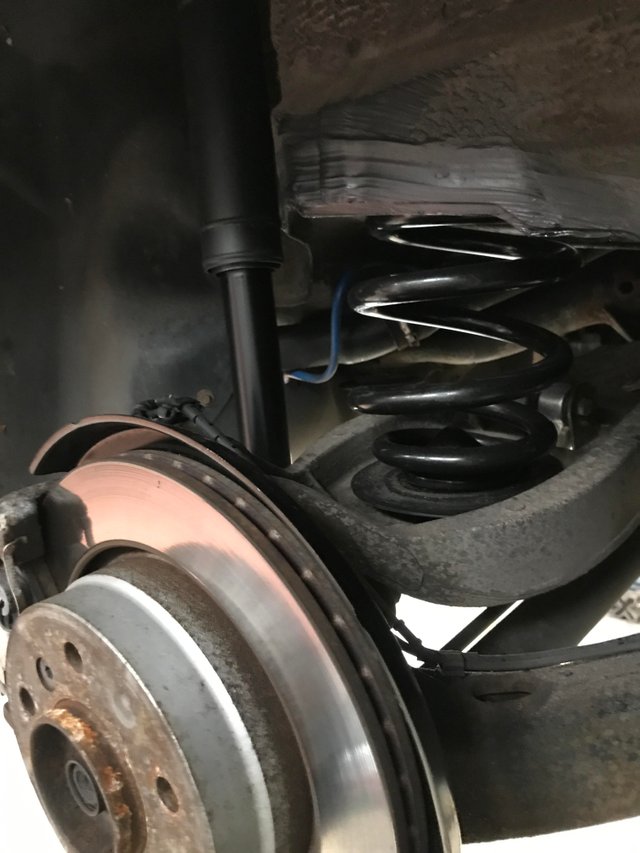
This is how the rear spring should look before installation:
You can clearly see top and bottom rubber spring pads. You can find part numbers here:
You'll need numbers 15 and 18 and I had both the whole time without realizing that I hadn't installed the rear.
Nice perspective with the front wheel in the foreground:
The spring pad with the opening always goes on top!
Slide it in with the pad over the top nudge on the bodyshell and the bottom into the opening in the cross member:
You can now attach your damper starting with the top:
With both left and right hooked up on top you can now ensure correct spring position between body and cross member and then reattach the damper to the wheel carrier:
And you're back in business:
Make sure you've torqued everything correctly and put your trunk insulation and floor back in.
You can clearly see the raise in suspension levels front and rear following the complete overhaul:
The only things remaining now suspension wise are the mounting of the rear axle carrier and the front wishbones which seem to be worn out after around 50.000km.
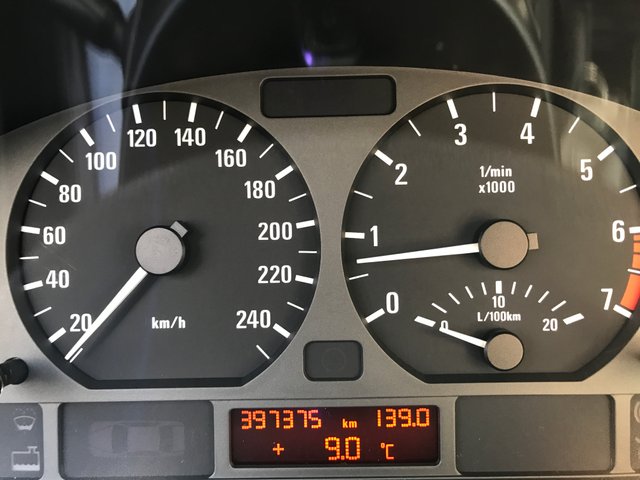
At this point I was still quite a ways from the magical 400.000km:
Join me next time for another 2020 update on this complete restoration of my daily driver before it becomes a really old and rare car!

Steem on!