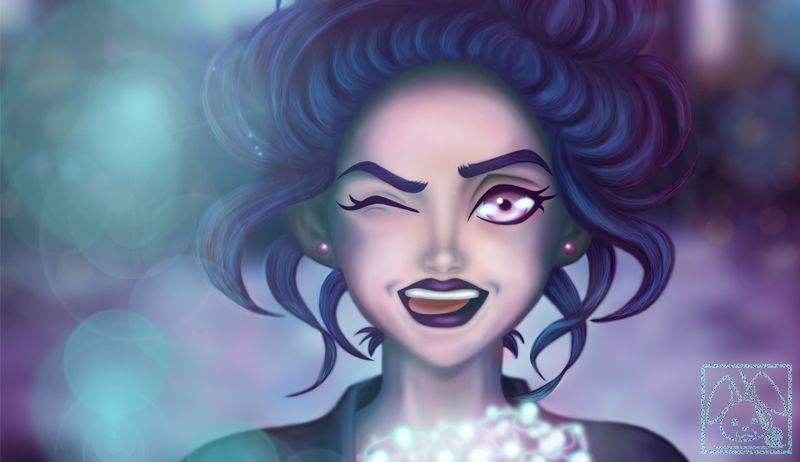
Drawing Challenge#9 - Lighted Girl
Hi everyone! 😊
This is my entry for the drawing challenge hosted by @helene. The theme for her 9th drawing challenge or contest is "light".
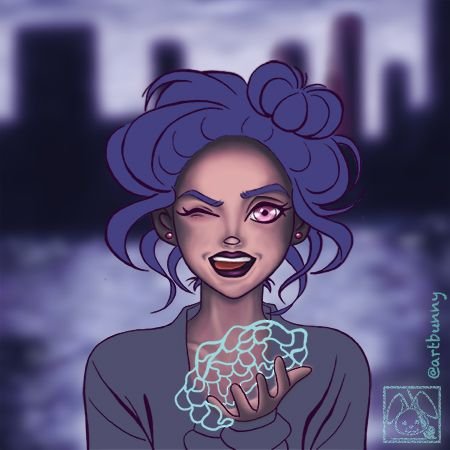
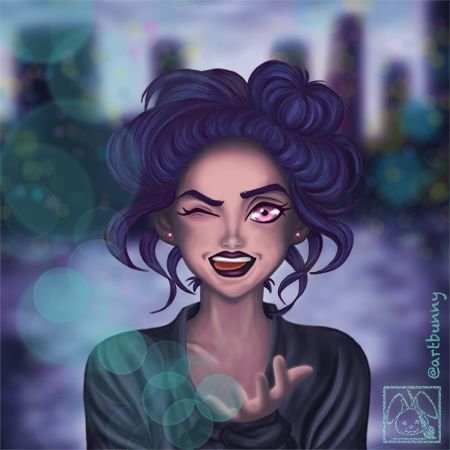
The Painting - Lighted Girl
Do you know the photographer Brendon Woelfel? If not, you should definetly check him out on Instagram under @brandonwoelfel.
Either way - it was his photography, which popped into my mind, when I read the theme "light". I really like, how he plays with the light in his photographs and make "his" girls look so beautiful.☺️
Thus, it inspired me for this painting. I used several photographs by him - for reference purposes.
But now - let me show you my drawing process:
Step 1: Sketch
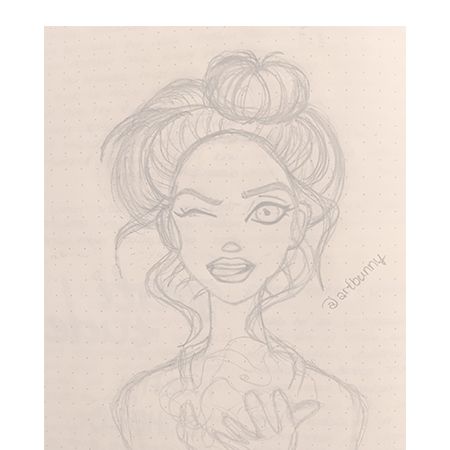
I started with a - very rough sketch - on paper.
Please excuse the poor proportions... I had to fixed many of them during the linework.😣
Step 2: Linework
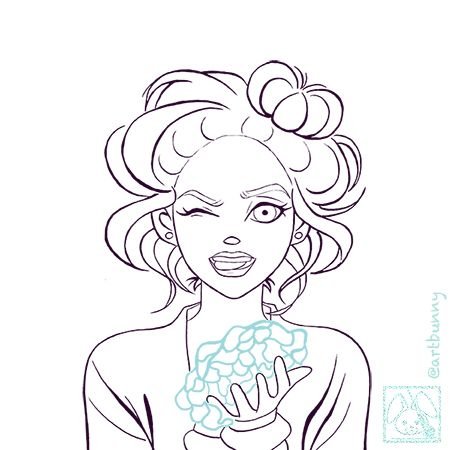
I made - a LOT of - changes to the initial rough sketch in this phase.
I wasn’t quite happy with the proportions and also the hair bothered me.😥
Therefore I pretty much fixed everything - I didn't like - during this phase.
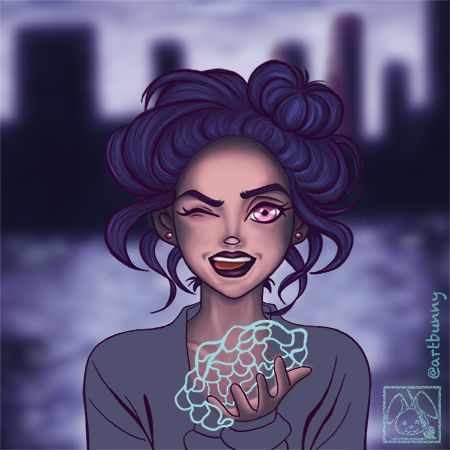
Step 3: Base Colours

Here I blocked in the base colours.
I chose to seperate the girl and the background into two different layers, as the light effects would be the main focus of the painting.
Little did I know - at this point, as I had to add many more … later on.😅
Step 4: Face
Over to the face…
I used a very soft brush for painting the skin in coop with the "airbrush" feature, in order to create a smooth surface. For the finishing touches - I also applied the filter "gaussian blur”.
For the eyes I chose a pink colour, as I wanted them to be piercing bright.😉
Step 5: Hair
So - now to the hair.
First I started with a large soft brush by shading in different sections of hair.
Then I continued with a smaller soft brush and added more defined shadows with a darker colour.
After that I added some highlights with a textured-painting-brush.
Step 6: Outfit
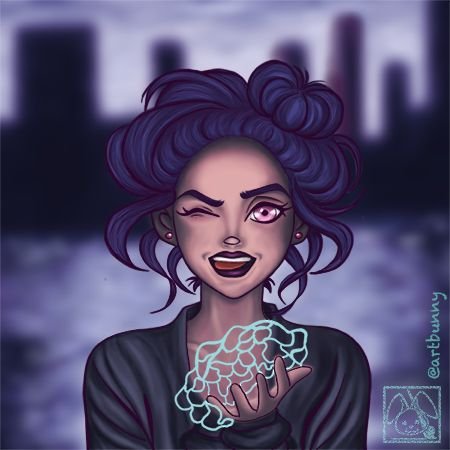
I wanted to keep her sweater very simple.
Therefore I just shaded with darker colours, in order to give it a 3-dimensional feeling.
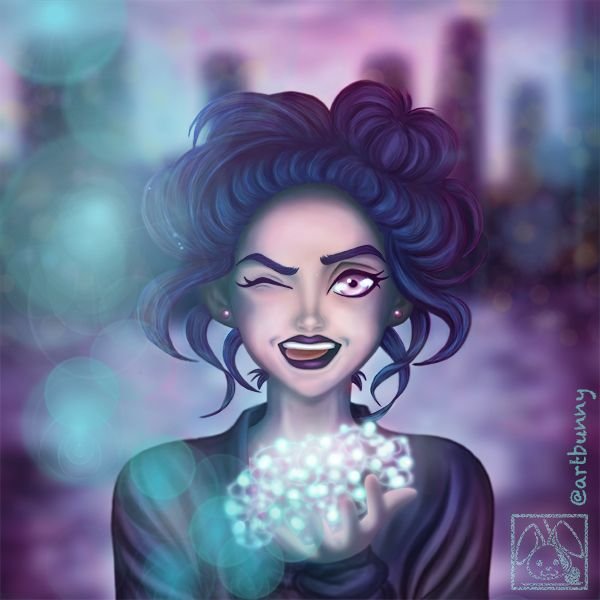
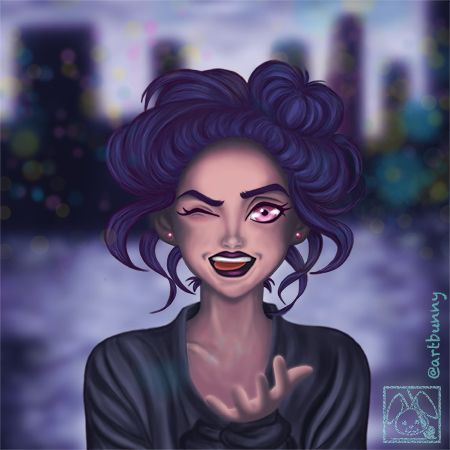
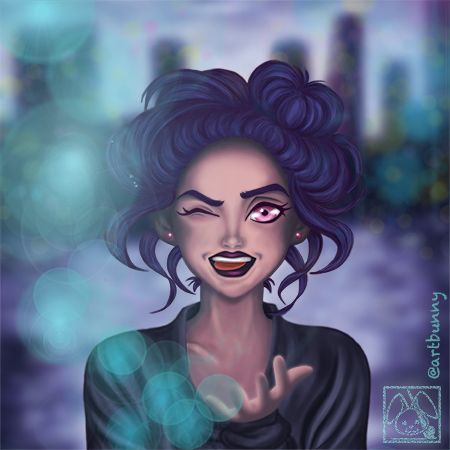
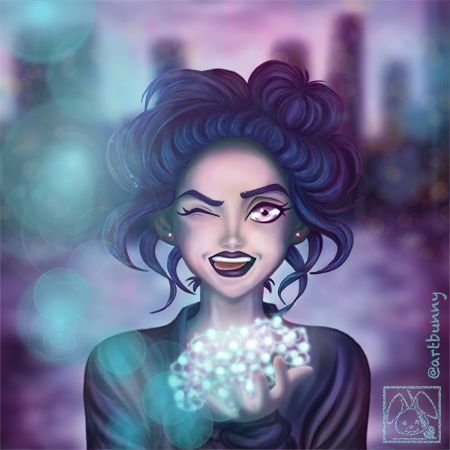
Step 7: Background
And now - to the LIGHT.
It was quite a challenge to imitate the light effects, which are quite unique in Brandon Woelfel's photography.
In this phase - I experimented a lot and ended up with way too many layers.😅
I also turned off the linework layer at this stage, as it looked more natural this way.
And that's it.😉
I had a lot of fun creating this one - thanks to @helene for hosting this contest!☺️
If you enjoyed my painting, please follow and upvote.
Thank you so much for reading,
@artbunny 🎨🐰
Your a very good digital artist! She looks awesome!
Thank you very much, @wix! ☺️
Really a stunning work it's really amazing effort
Thank you - kindly, @syedabuadillah!😊
I love the progress pics. They are great stand alone pieces..
Thank you so much, @jameshsmitharts! I truly appreciate it. ☺️
I love this.
Your drawings are wonderful
Welldone
Thank you, @tormiwah! So glad that you like my drawing.😊
Very nice. I love Phototshop, and showing your process is very cool and somewhat inspiring. Well done!
I am happy to hear that you find my painting inspiring. Thank you kindly - for your comment, @lyeshel!☺️
Congratulations @artbunny! You have completed some achievement on Steemit and have been rewarded with new badge(s) :
Click on any badge to view your own Board of Honor on SteemitBoard.
For more information about SteemitBoard, click here
If you no longer want to receive notifications, reply to this comment with the word
STOPI simply love your articles, what great content and quality of posting you offer the community here on Steemit and abroad.
Thanks a lot :)
Thanks, that is very kind of you! 😊