Back Acres: Making an A-Frame Level for Staking the Garden Terrace Contour Line
I'm adding a garden terrace - beside the cabin to grow fresh veggies and herbs. Where I want to add the garden is on a hillside with a 30 degree incline - too steep for the garden rows and the snaking permaculture irrigation ditches that I will be digging. Gardening, harvesting, and moving around in the garden will be easier on level ground, so I am forming a garden terrace. Terraces are like flat steps on a hillside with retention walls helping to keep the vertical part of the step from being washing down the hill with a heavy rain.
There is less digging and moving of dirt, rocks, and clay when the terrace runs along an elevation contour line. The terrace also has a more natural look and impression. A contour line is an imaginary path along a hillside where it does not go up or down the hill, just along the side of the hill. The screen capture below is an example of a topographical map showing the elevation contour lines. You can see the contour lines are marked with elevations at set increments, and how they decrease as they go down the hills. On the map below you can see the creek and marshland. Notice how the contour lines make it easier to see how water sheds down those hills to the creek and marshlands.
Topographical Map Source: https://www.ontario.ca/page/topographic-maps
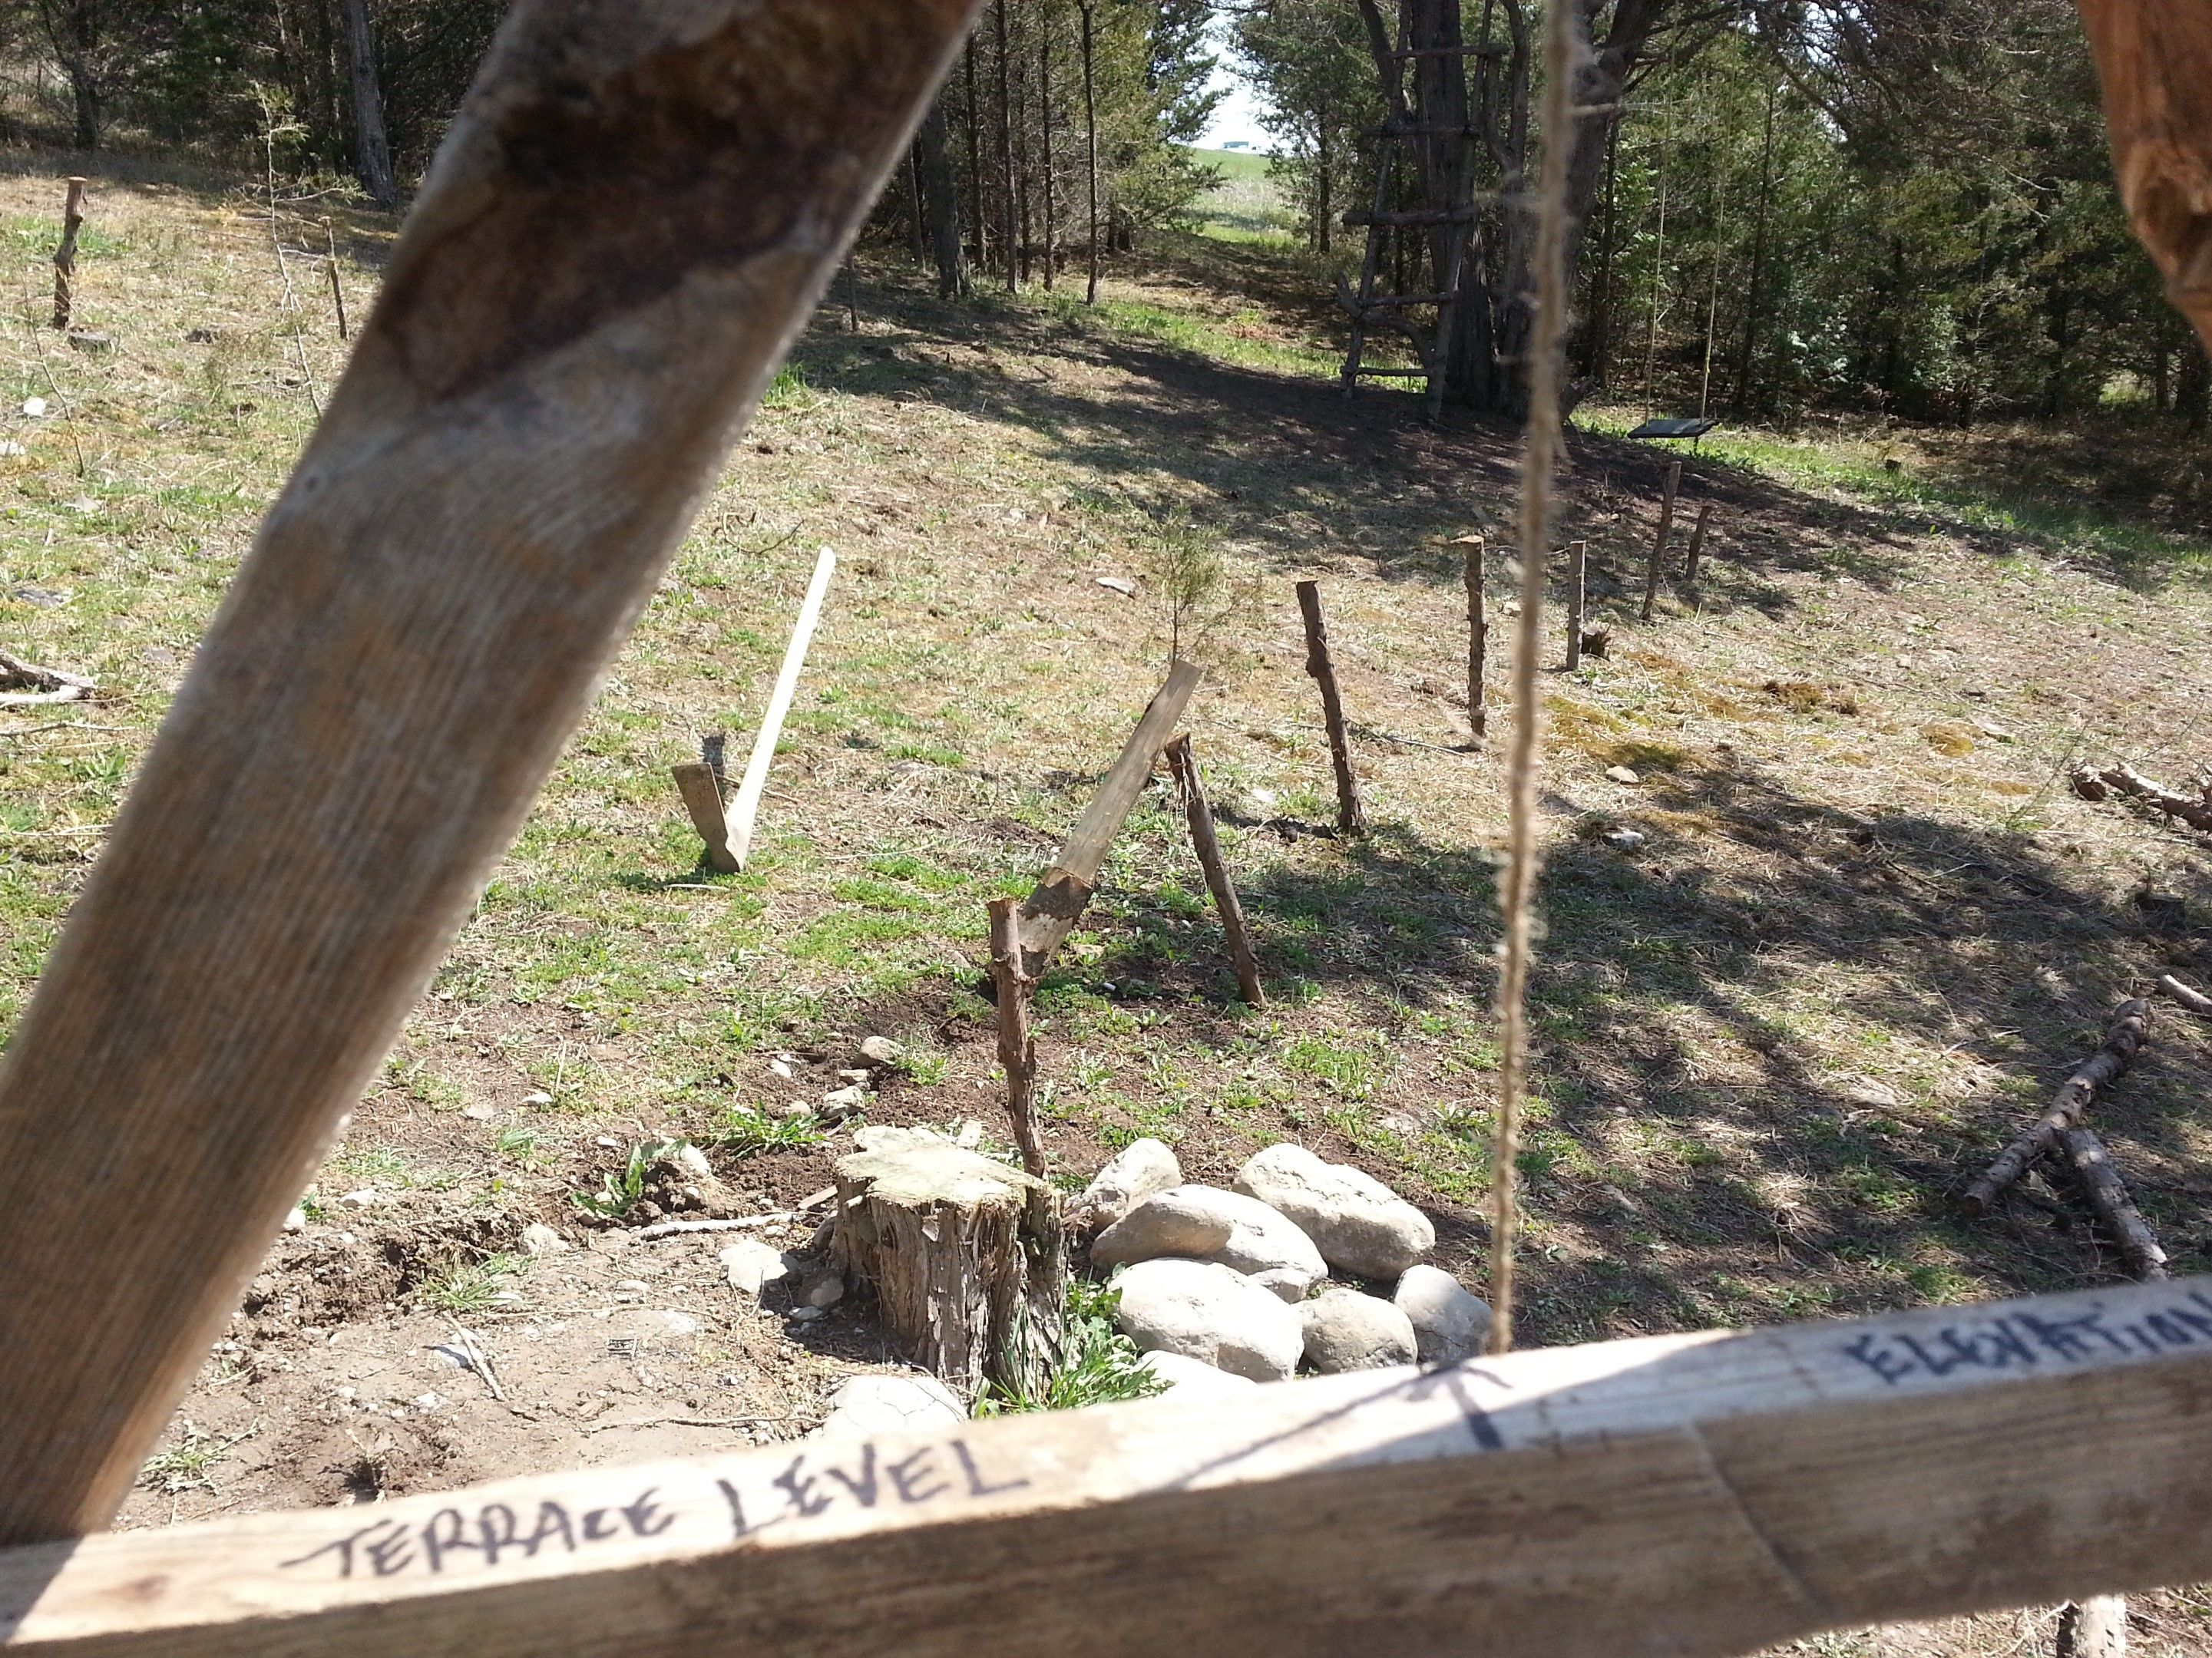
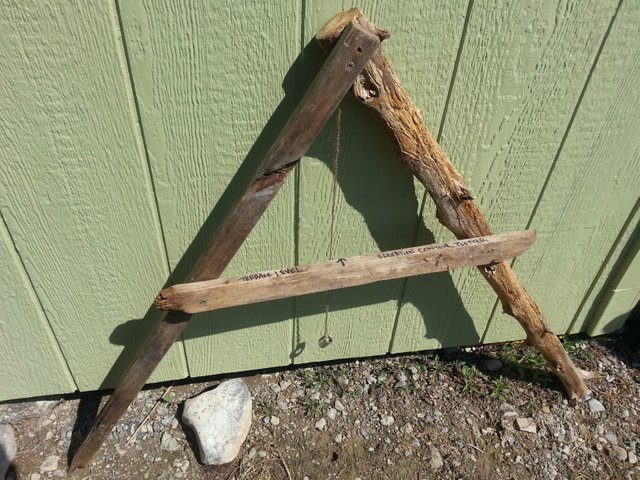
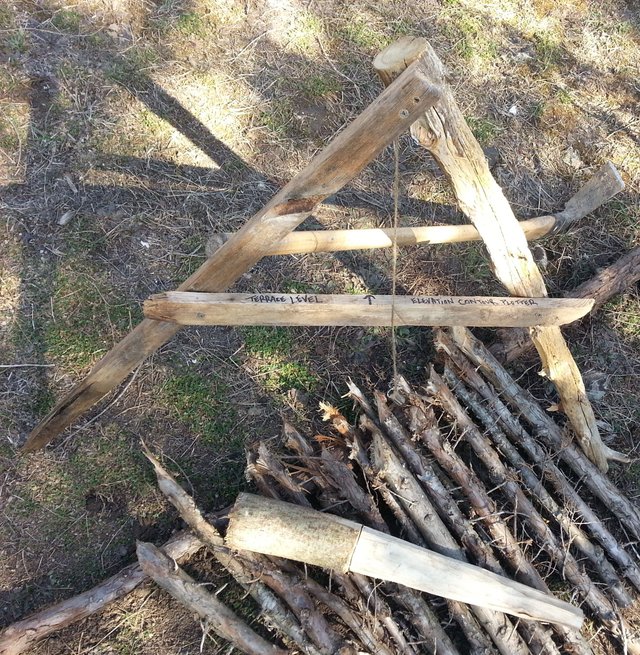
To help stake the contour line above the garden terrace, I built an A-frame Level. One A-frame leg is placed where the contour line will be - then pivoted on until the other A-frame leg is in an equal elevation position - with the plumb string lined up with the arrow on the A-frame shelf - see picture below.
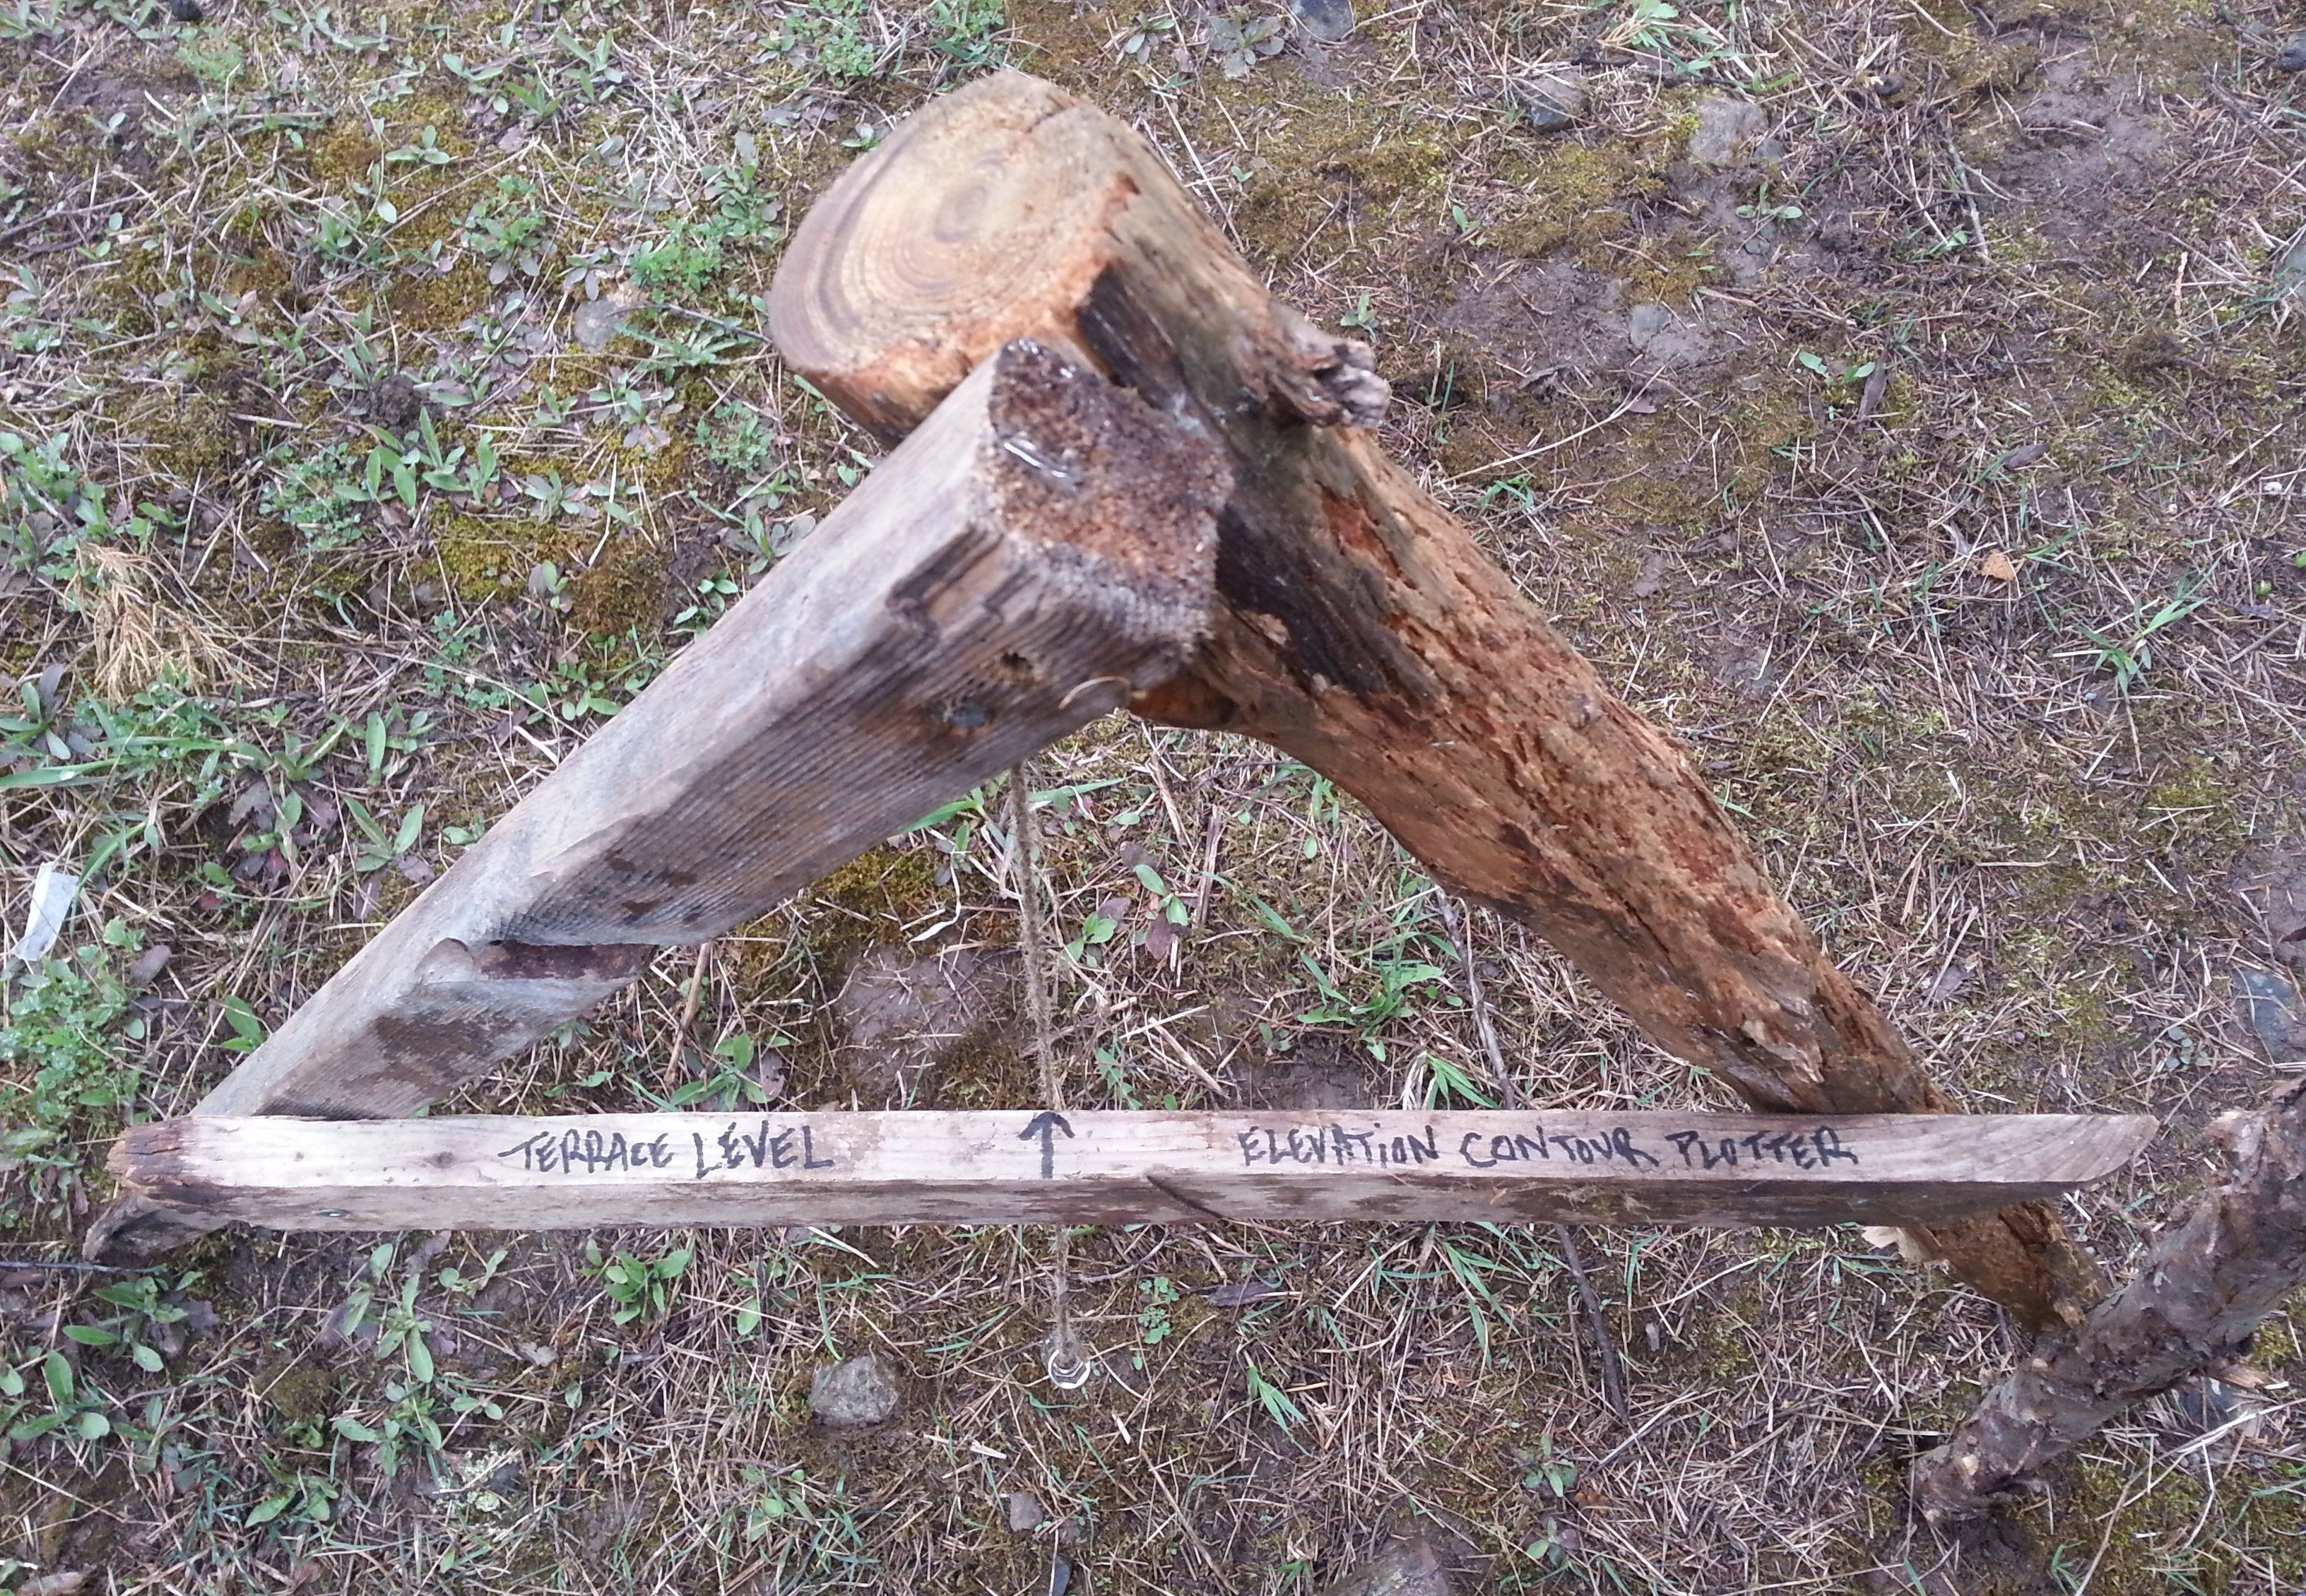
Making an A-frame Level
Making an A-frame level is very easy and doesn't have to be exact, imperfections are washed away with the final calibration of the A-frame.
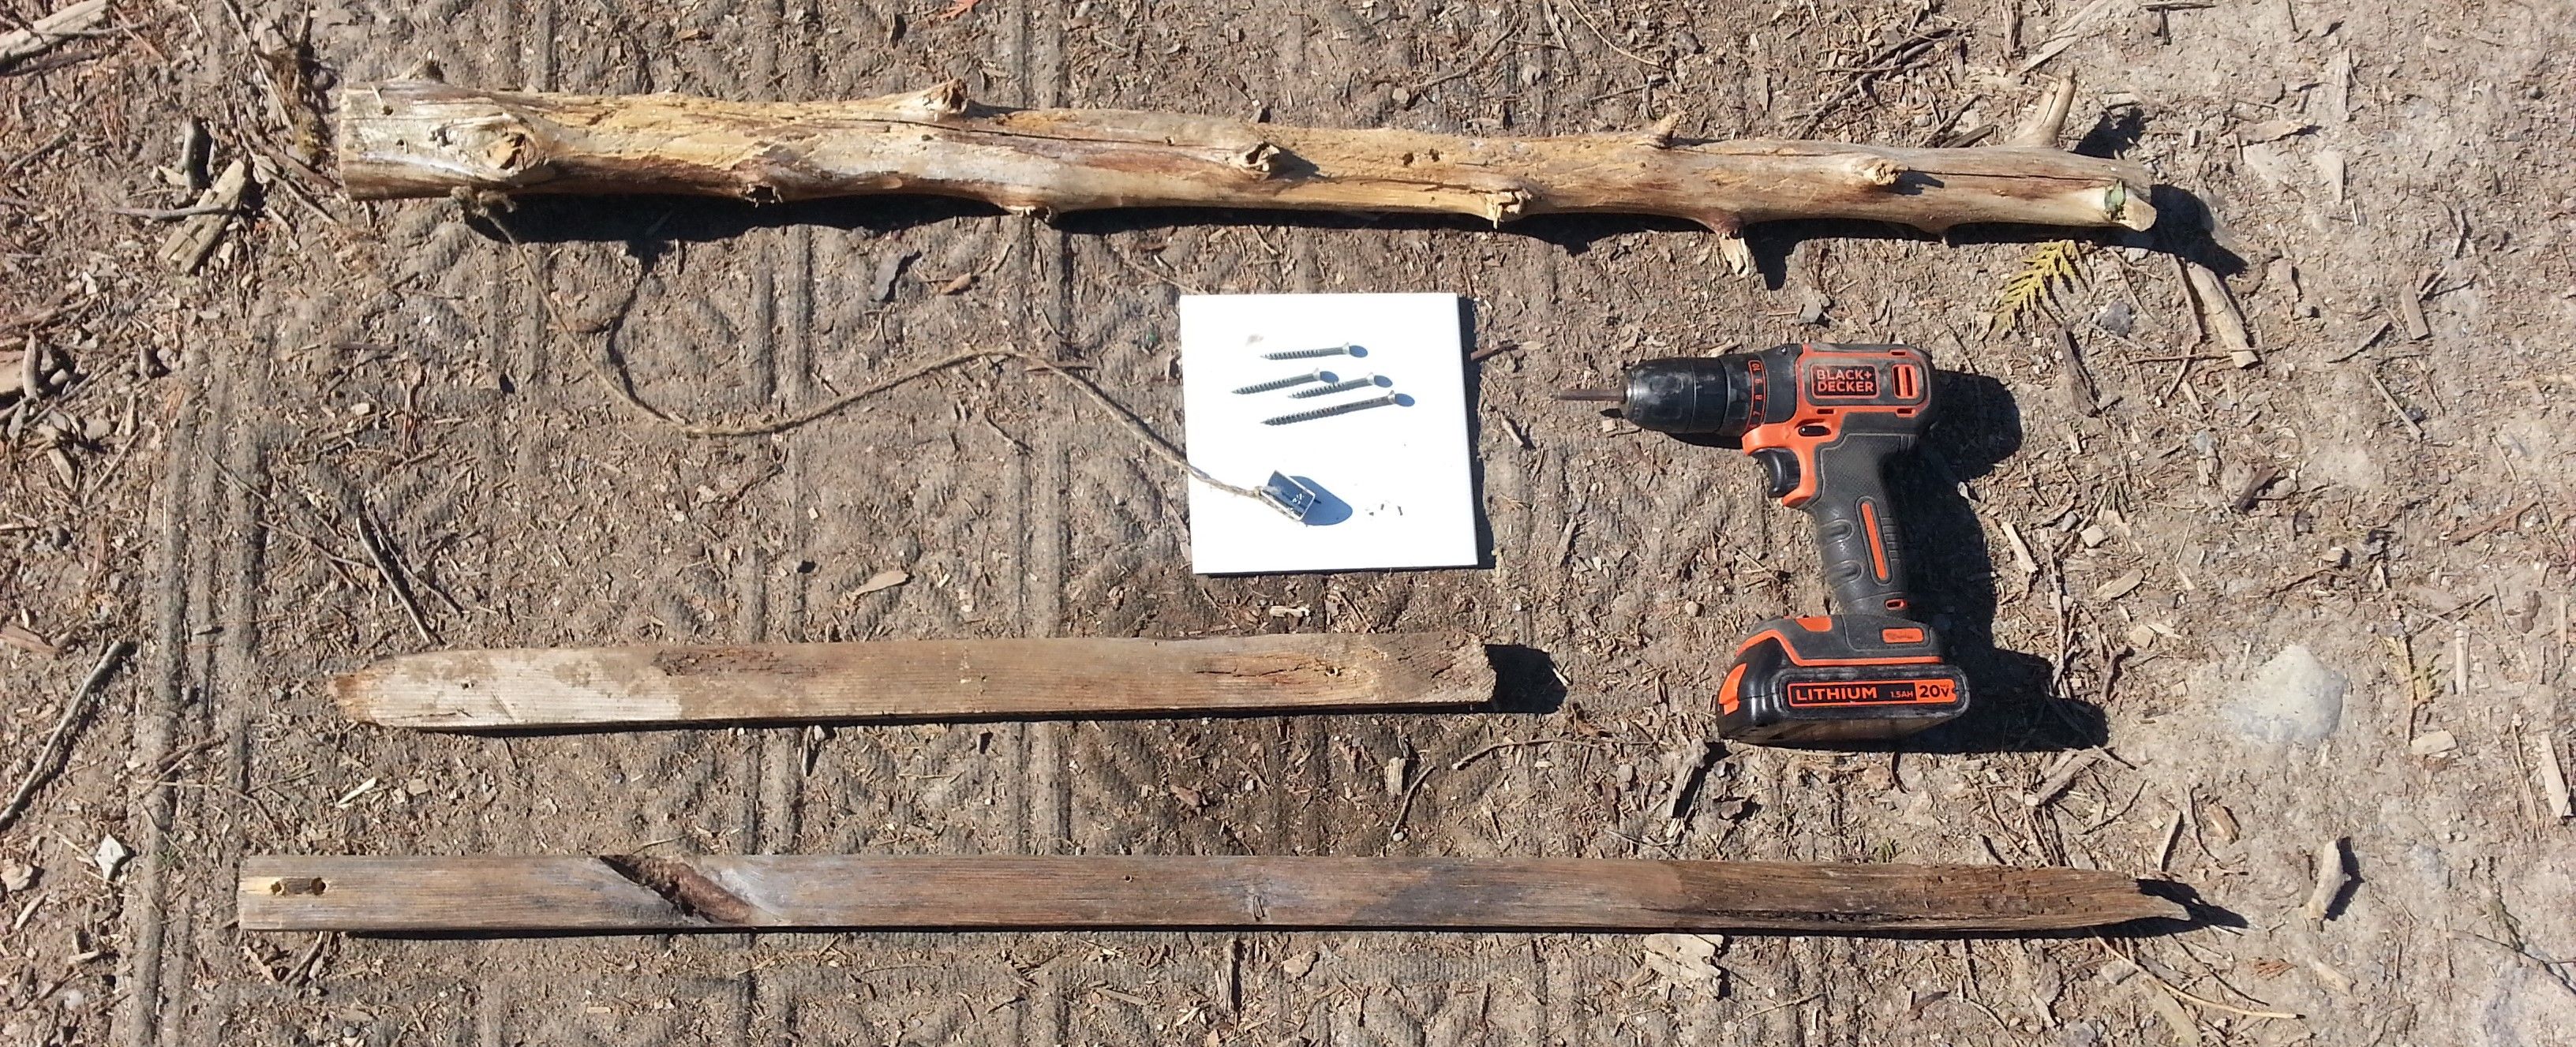
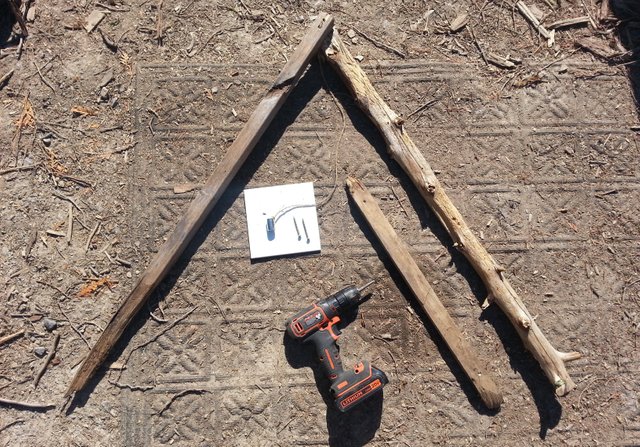
Tools and Materials to Make an A-frame Level
- 2 equal length wooden sticks for the legs of the A-frame. The longer the legs, the longer the span between the contour line stakes.
- 1 wooden stick for the shelf of the A-frame. Preferably with at least one flat side, and just a little shorter than the legs. Any excess length can be easily sawed off later if needed.
- 5 screws, or very good rope lashing skills.
- Enough twine or string to be used as the plumb line. Long enough to hang below the A-frame shelf, but not so long that it touches the ground.
- A weight that can be tied to a string to be the plumb bob or plummet. I used an extra ratchet socket.
- Screw Driver or Power Drill.
- A saw if wooden stick lengths need to be adjusted.
- Pencil and Marker or Pen for final A-frame calibration.
- Position the A-frame leg ends to form an upside down V. Screw them together with 2 screws. The angle of the V is not as important for leveling, but more has to do with the distance from one stake to the next. If the angle is too narrow, it may be more difficult to get an accurate A-frame reading.
- Screw the A-frame shelf onto the legs to make a capital A shape. Try to make the shelf as level as you can, but any imperfections will be worked out with the calibration.
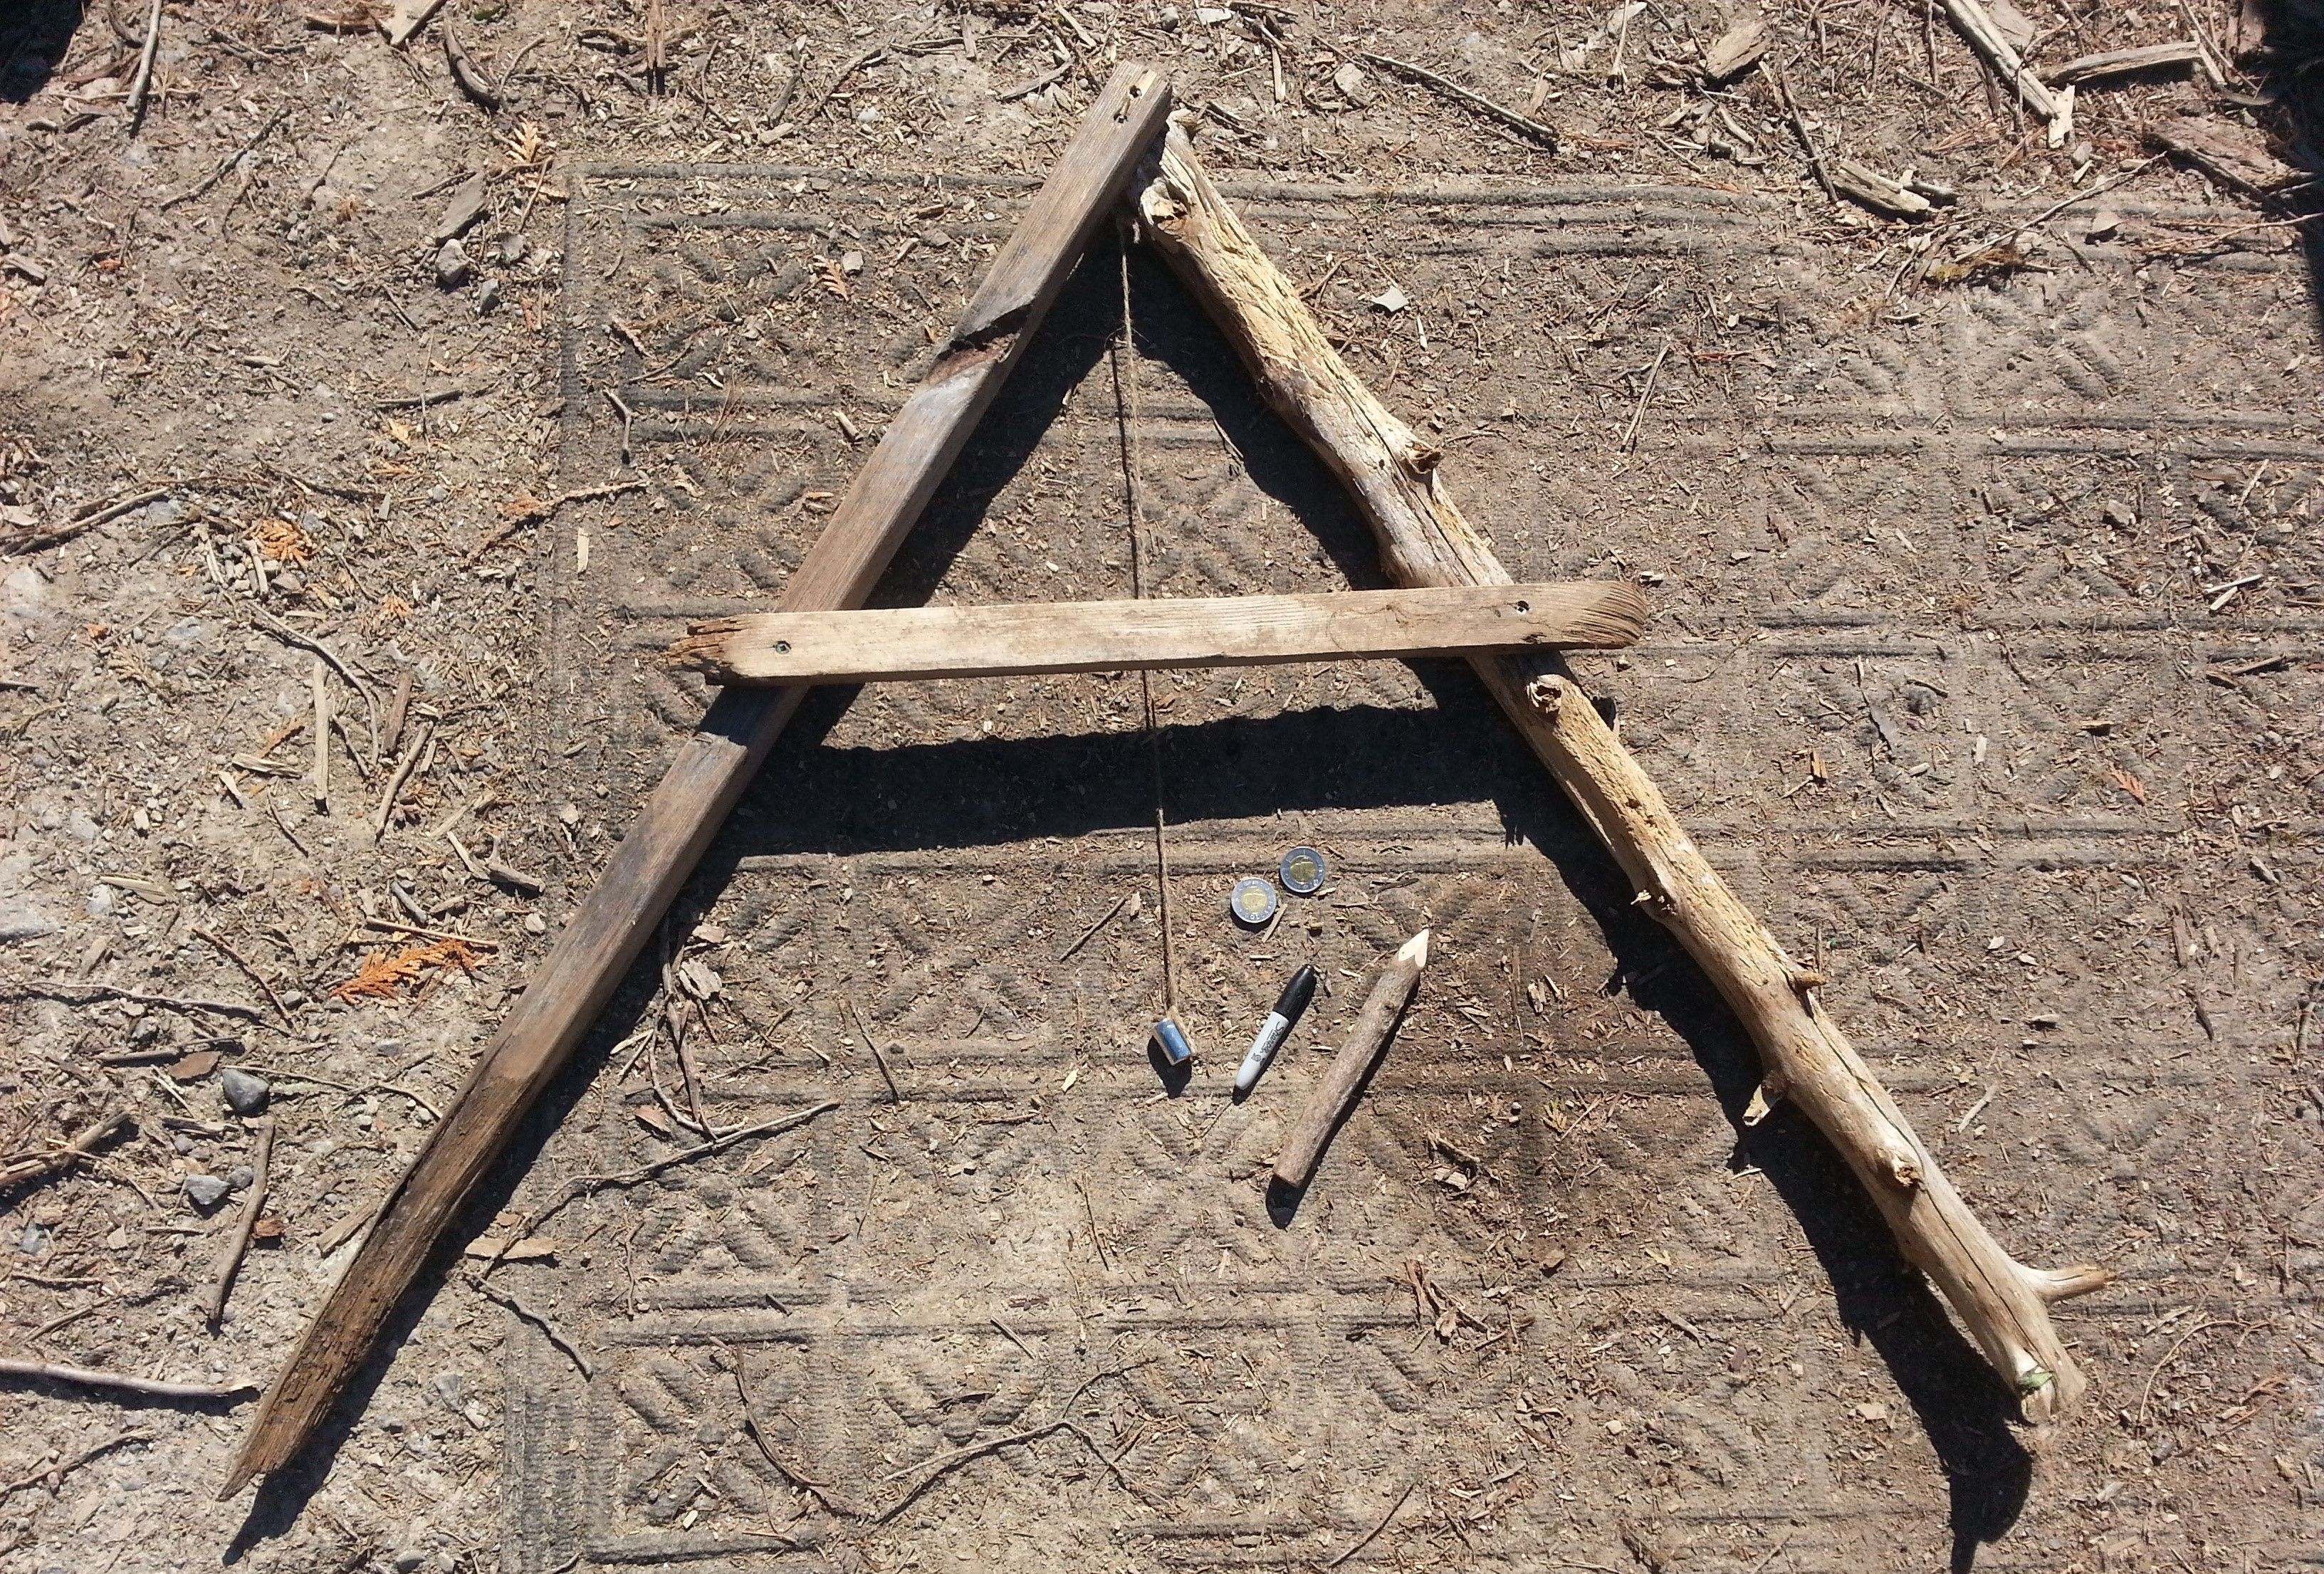
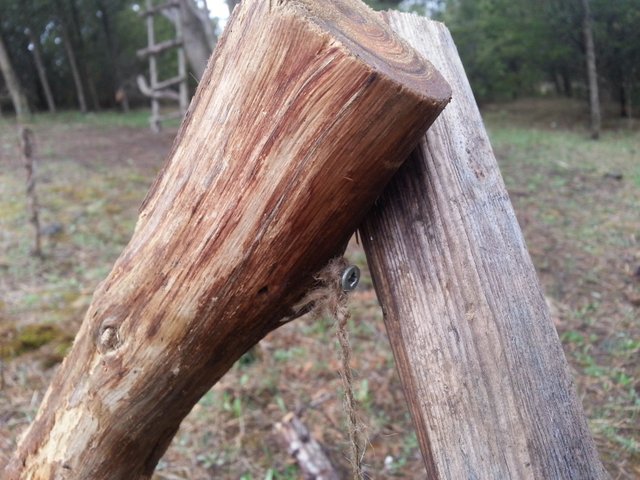
- Attach the plumb line twine or string with a screw. The string should hang down from the center of the V that the two attached A-frame legs make.
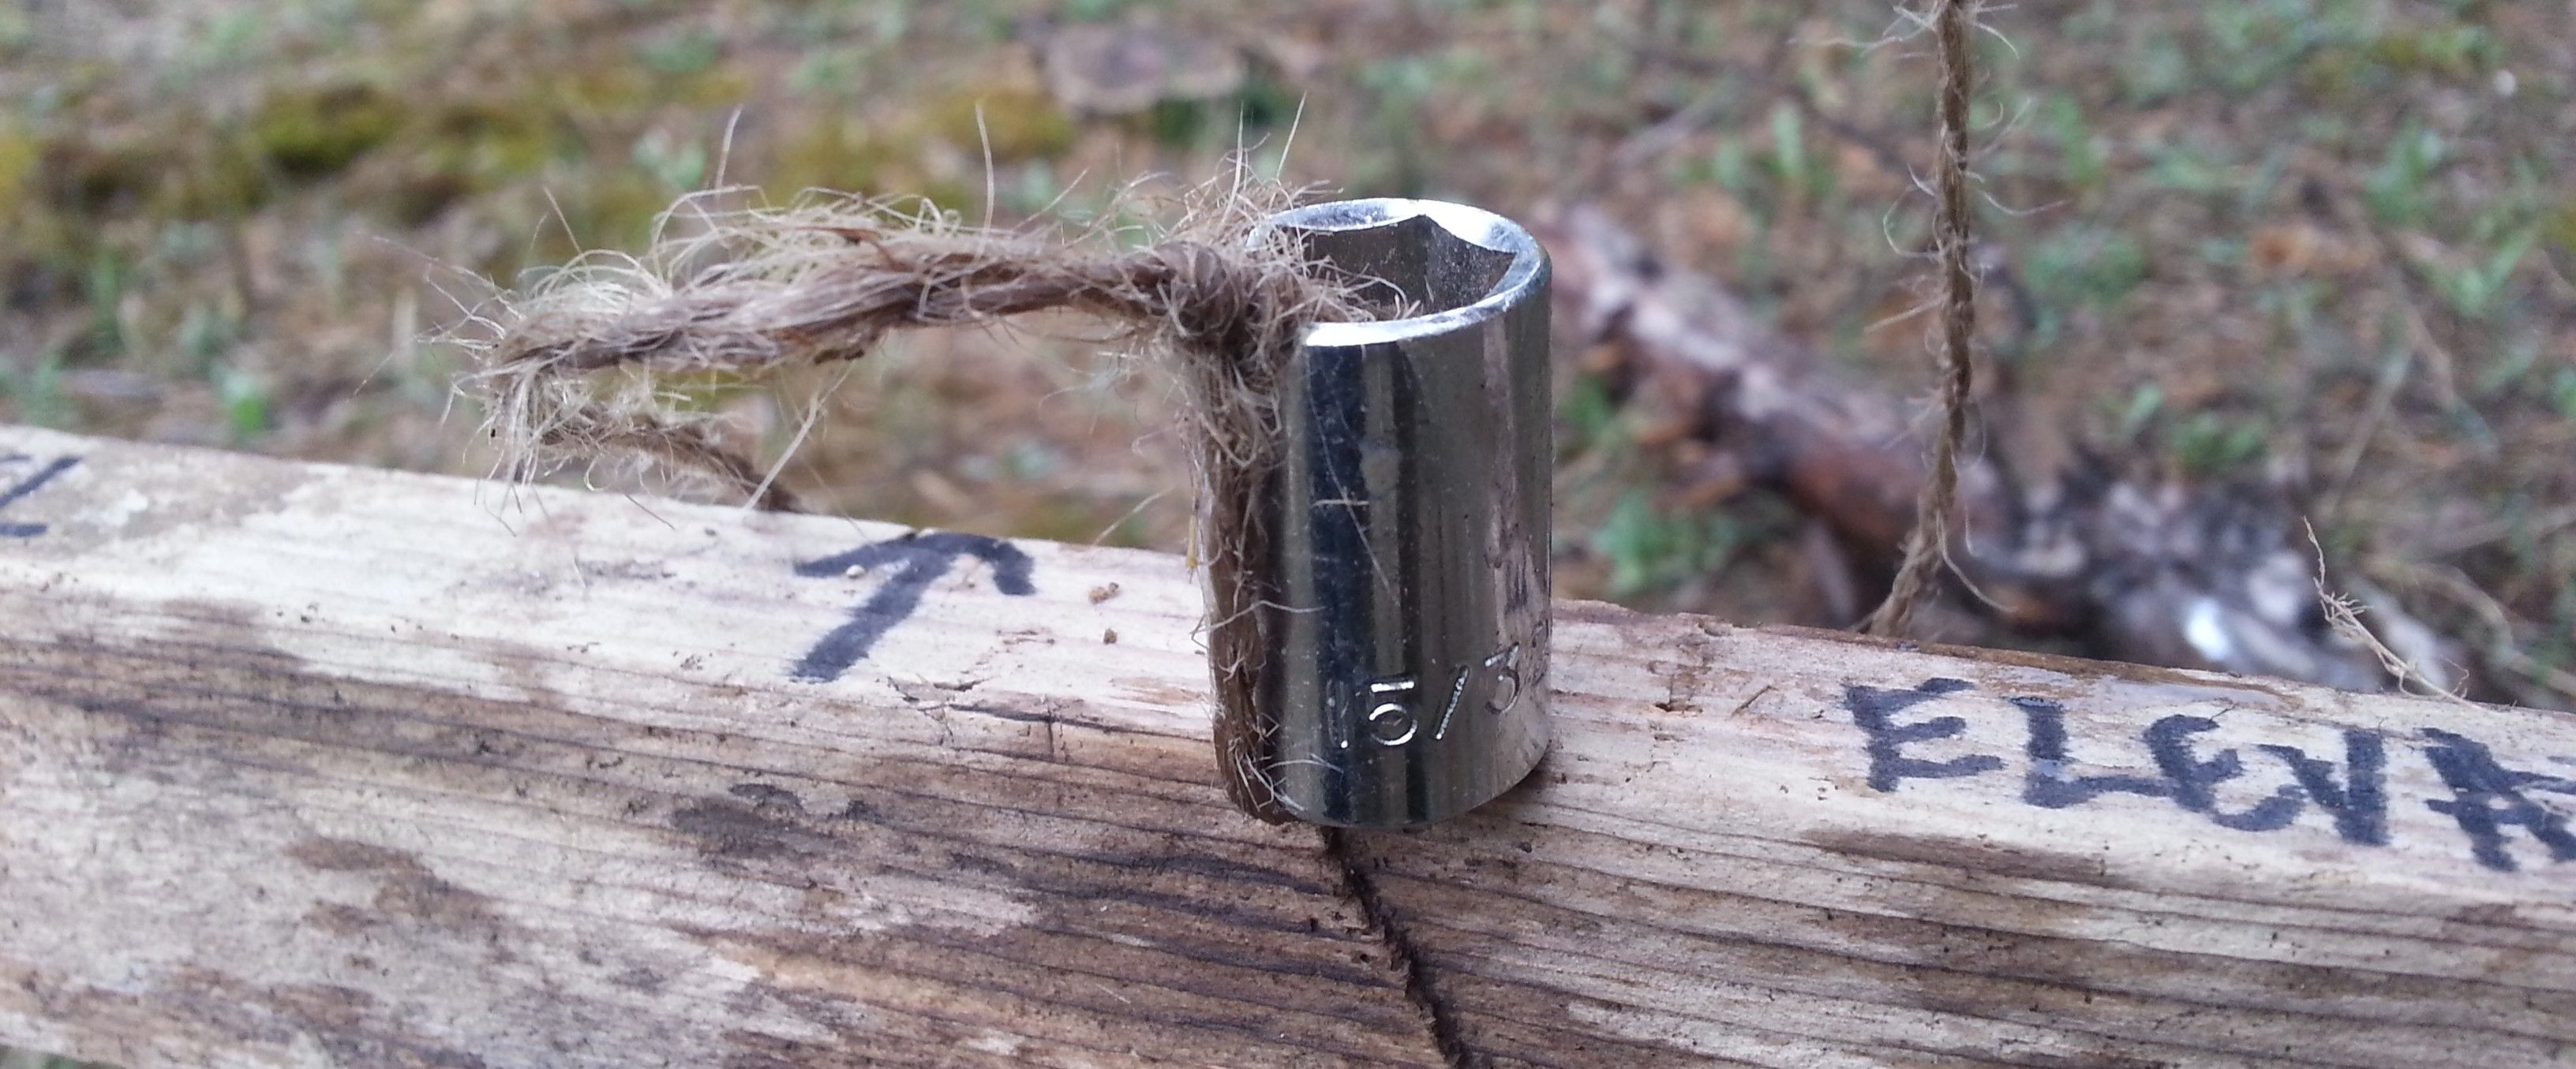
- Tie the plumb bob or plummet to the other end of the plumb line so that it hangs below the A-frame shelf, and does not touch the ground. Gravity will pull the plumb line down to be perpendicular to Level.
A-Frame Level One-Time Alignment
For the one time alignment of the A-frame level, precise construction or level ground is not required.
- The A-frame is stood up with the points where the A-frame legs touch the ground marked with a pair of coins or other spot marking objects.
- The position of the plumb line - after it has settled - on the A-frame shelf is marked with a pencil.
- The A-frame is picked up and turned 180 degrees with the A-frame legs now placed on the opposite coins or markers.
- The position of the plumb line - after it has settled - on the A-frame shelf is marked with a pencil.
- With a Marker, mark the point on the shelf that is exactly in between the two pencil marks. This is your Level point.
When the plumb line rests on the Level point, where the two legs touch the ground is on the same level or elevation.
A-frame Calibration Demonstration Video
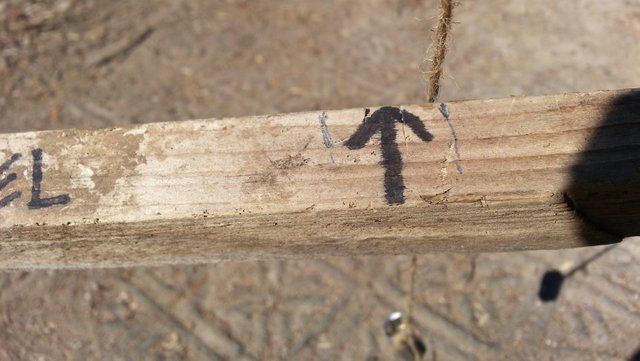
In the picture below you can see the 2 calibration pencil marks and the permanent marker arrow at the center point between the 2 pencil marks. The arrow is the Level Point for the plumb line to line up with when the two legs of the A-frame are on level ground.
The Planned Garden Terrace
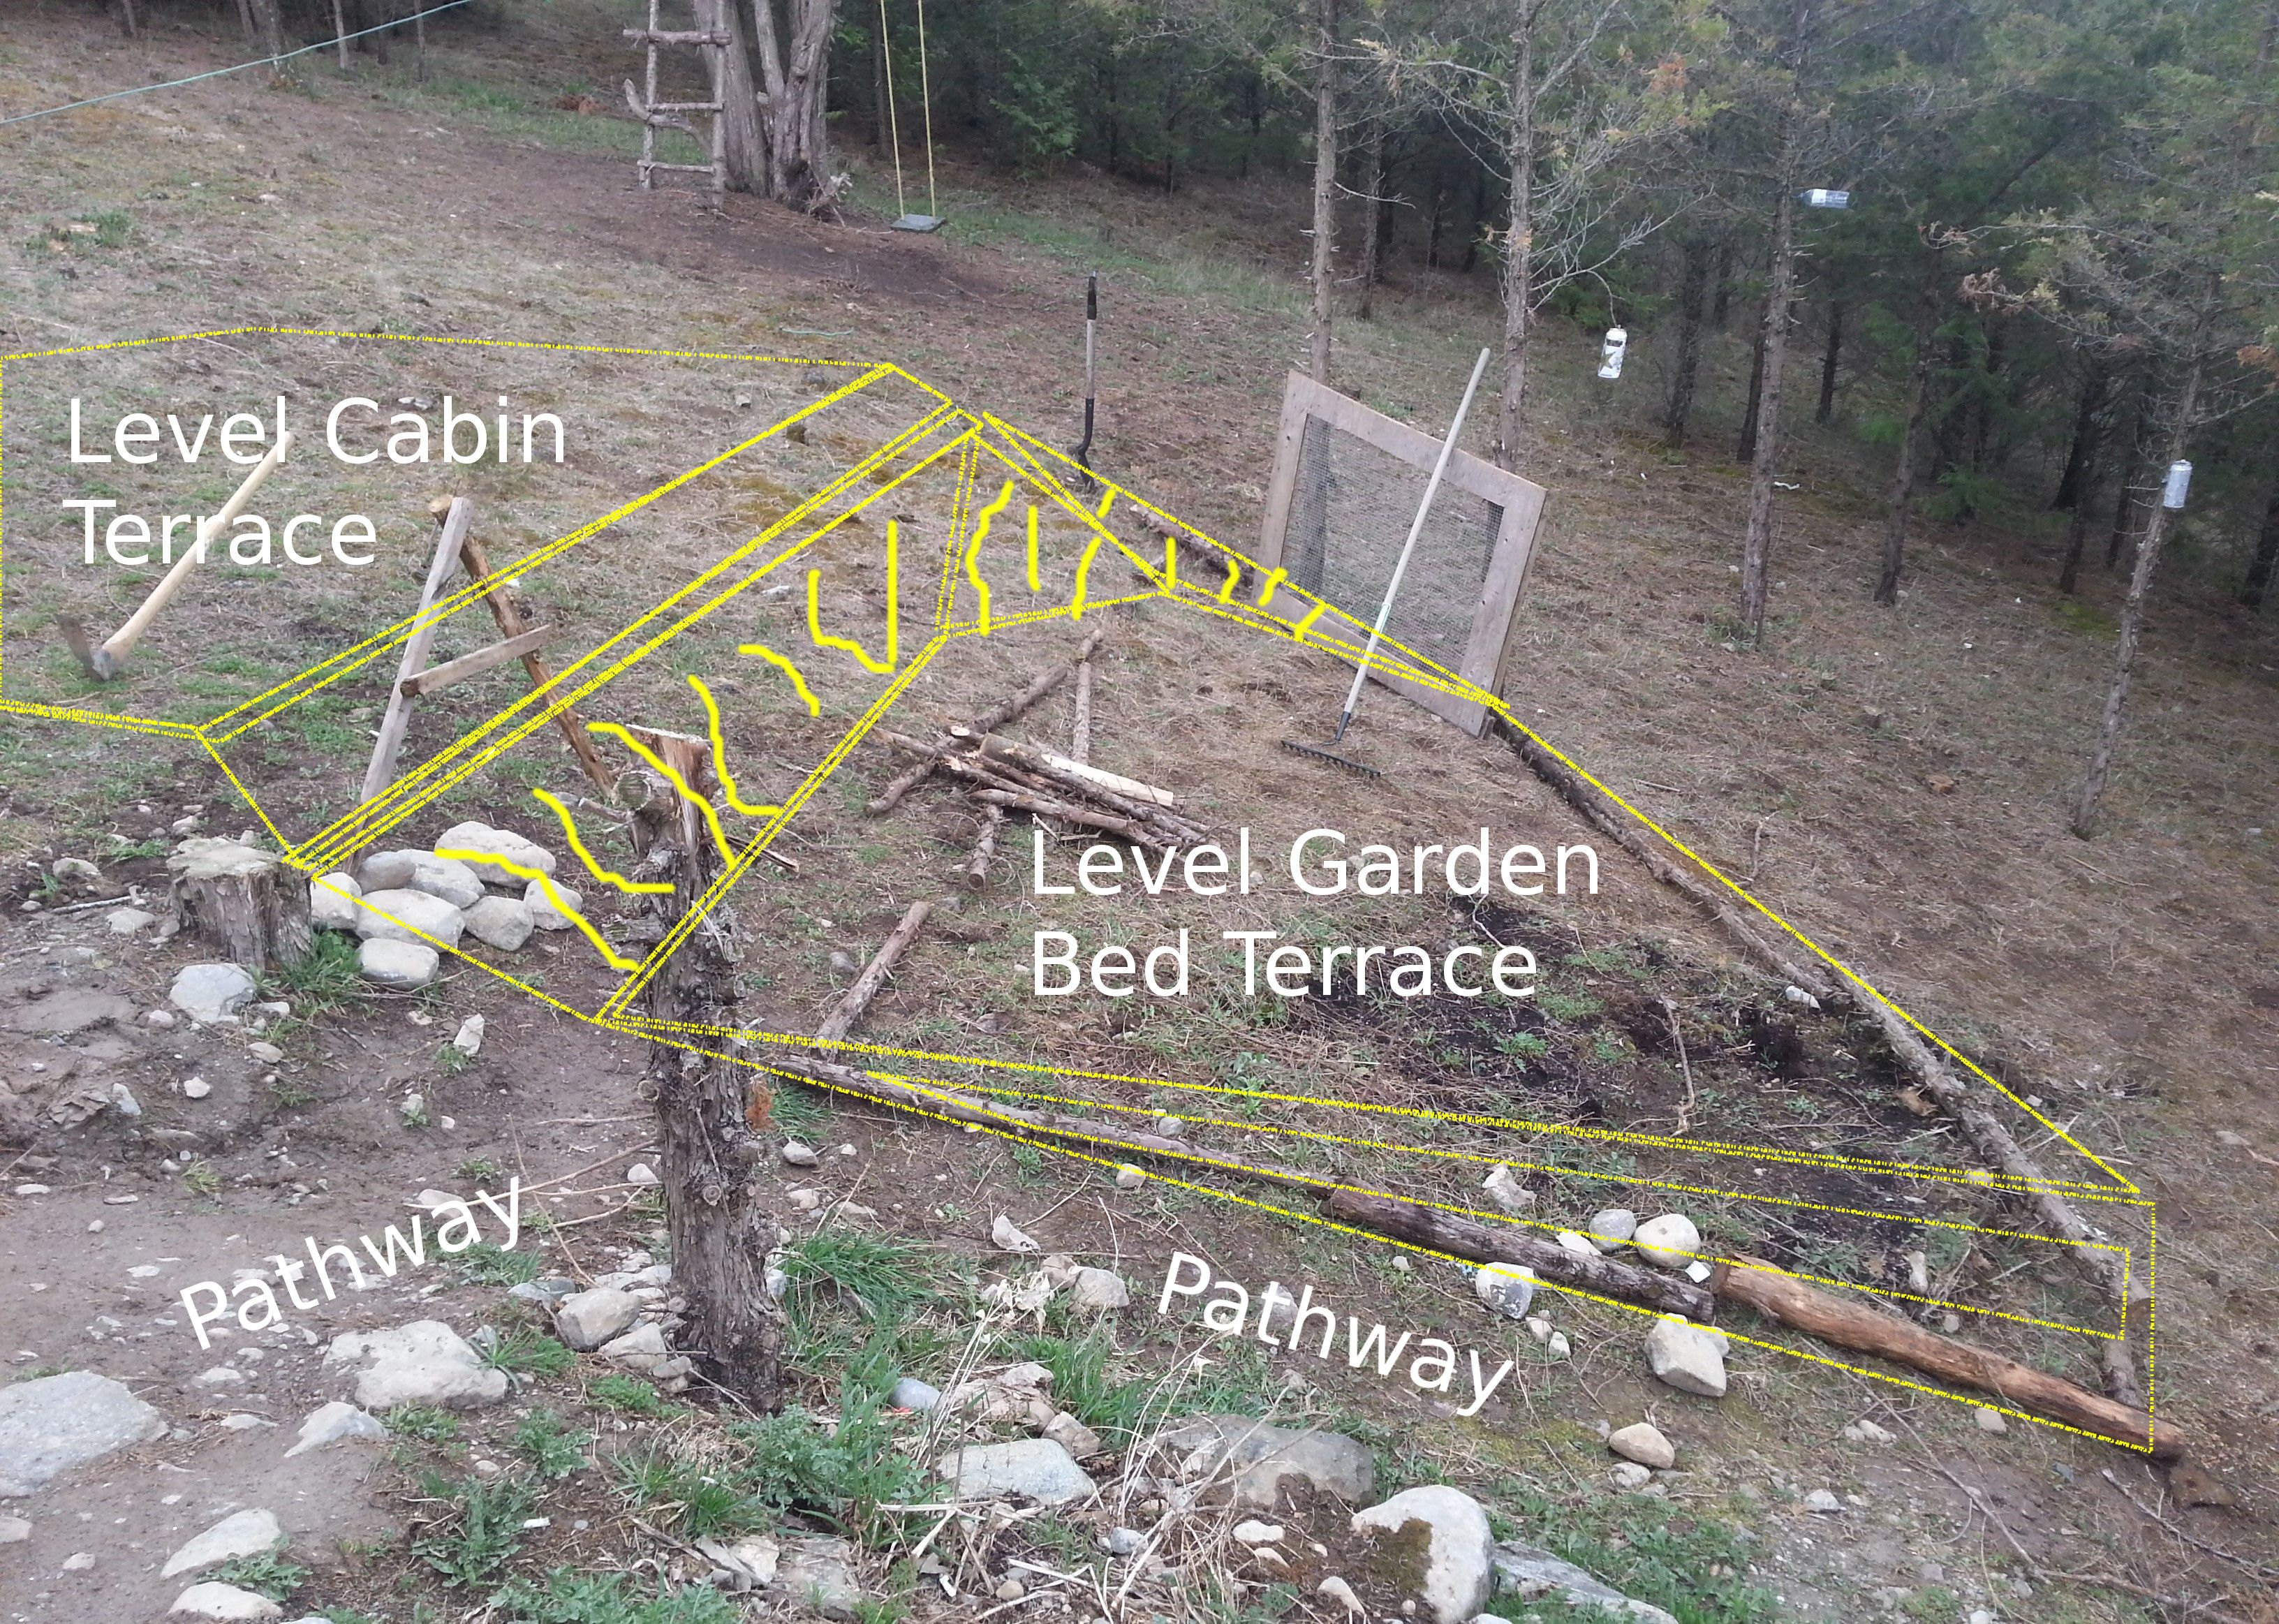
Below is a picture of the planned garden terrace location with some sketches over top if it - to help show why I am staking this contour line. The contour line will be at the top of the terrace's upper retaining wall.
Tools and Supplies for Staking a Contour Line
- A-frame
- Stakes
- Mallet or Hammer
A-Frame Level Staking Procedure:
- Position a leg leg of the A-frame where the contour line will start.
- Pivot the A-frame until the other leg is in a position that lines up the Level Point on the shelf with the settled plumb line.
- Place the stakes just above the A-frame legs where they touch the ground.
- Move the A-frame out of the way, pound the two stakes into the ground with the Mallet or Hammer.
Lining Up the Plumb Line Demonstration Video
- Pivot or move the A-frame in the direction that the contour line is headed, keeping one A-frame leg on the last stake.
- Pivot until the plumb line is lined up with the level point.
- Place stake just above where the A-frame leg meets the ground.
- Move A-frame out of the way, pound the new stake into the ground.
- Repeat for how long you would like the contour line to be.
A-Frame Level - Stake Full Row Video
Below is a video of of me staking the full contour line.
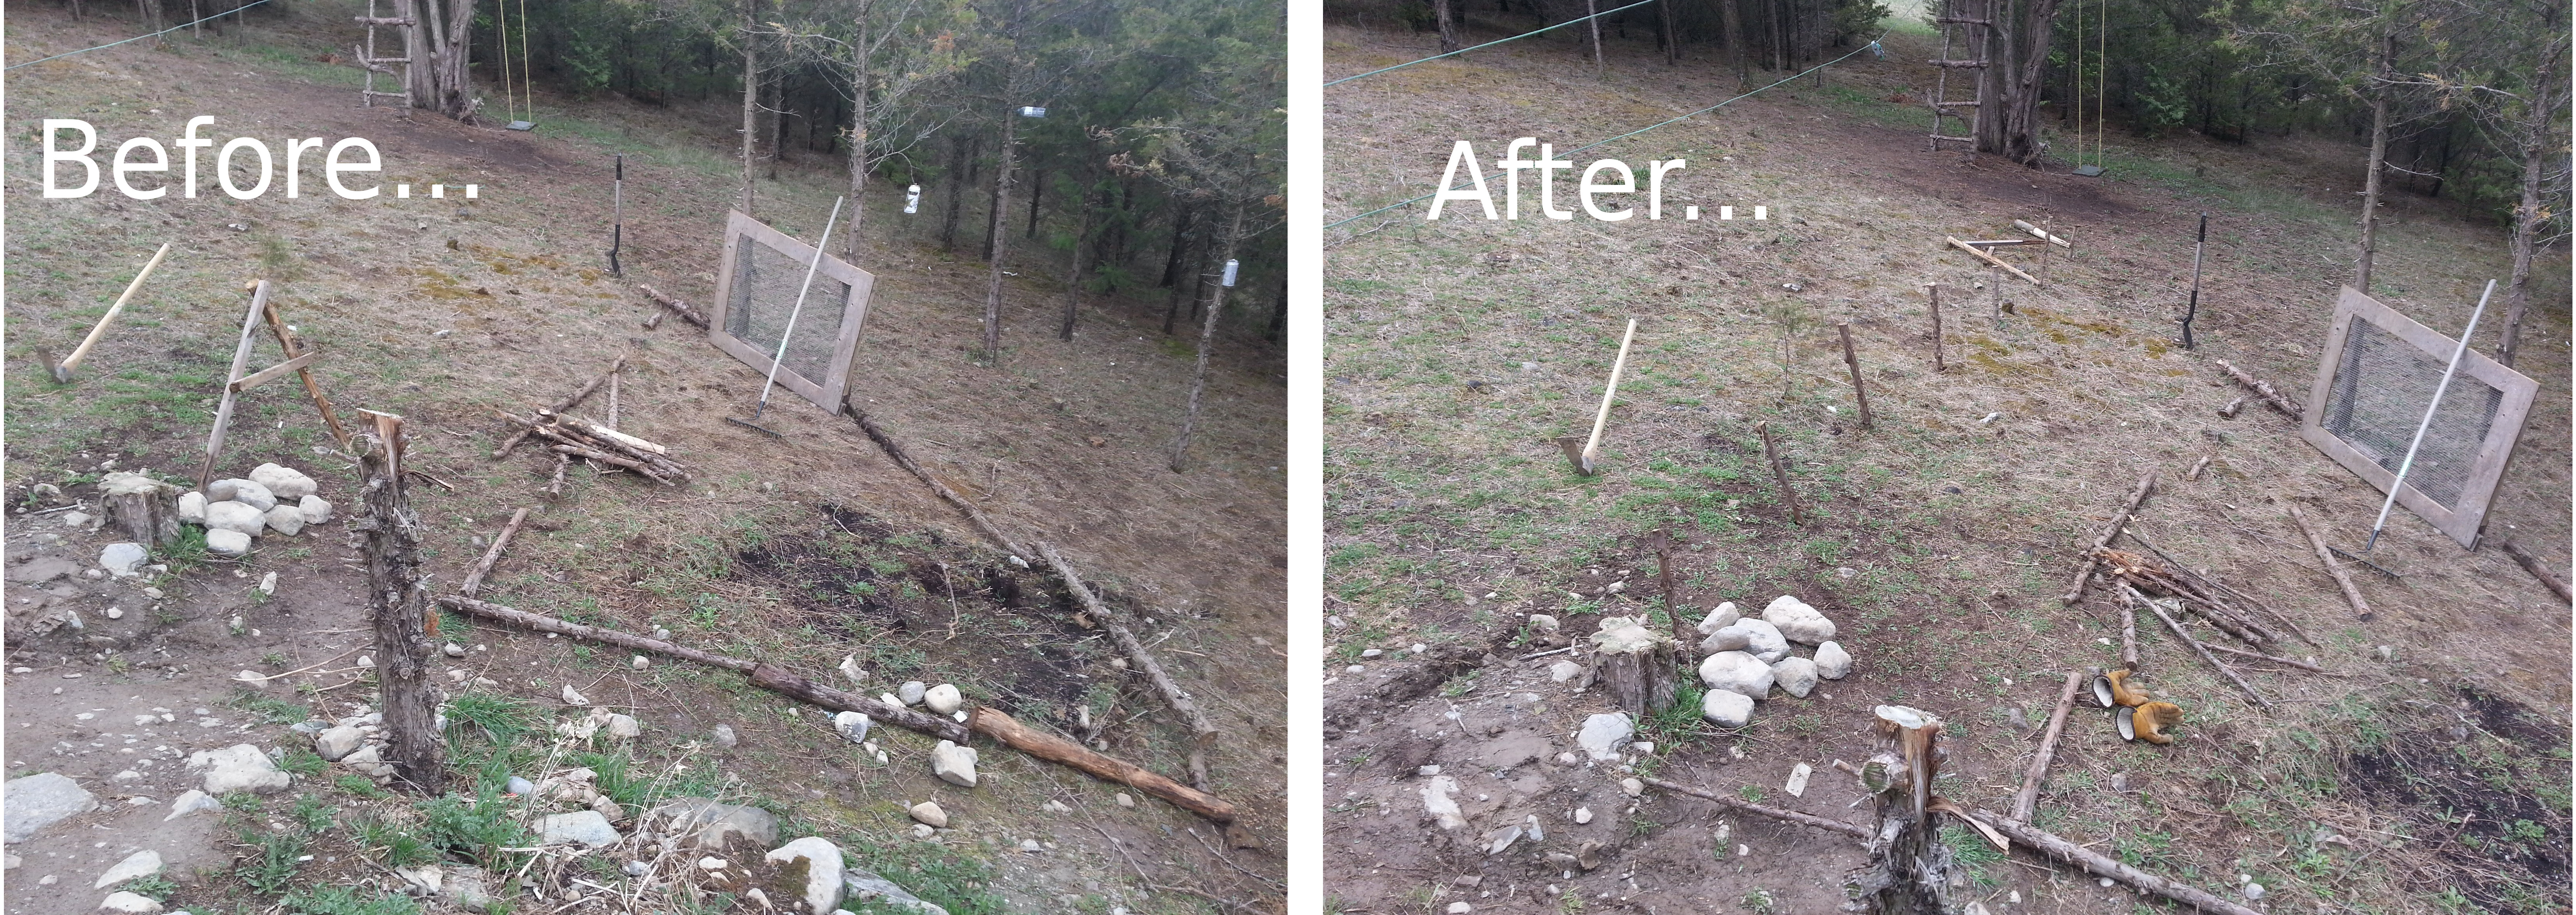
The picture below is the Before and After contour line staking.
I'll go into detailed retaining wall and terrace construction with the next update of the Garden Terrace project.
Have a great day!
That’s a plum bob! Or what my dad says is one 😊
Congratulations @jackdub! You have completed some achievement on Steemit and have been rewarded with new badge(s) :
Click on any badge to view your own Board of Honor on SteemitBoard.
For more information about SteemitBoard, click here
If you no longer want to receive notifications, reply to this comment with the word
STOPOh man... I didn't realize it was that easy to make the A frame level!!!! I thought you needed your triangle to be a perfect 90° and the shelf exactly perpendicular to that angle...
I recently found out about A Frane levels and eanted to look inyo how to build one, so thank you, this is really great!
Can't wait to see the final product on your terraces!
Ps: where are all the dandelions flowers...? I see their leaves everywhere. Making dandelion honey are you?