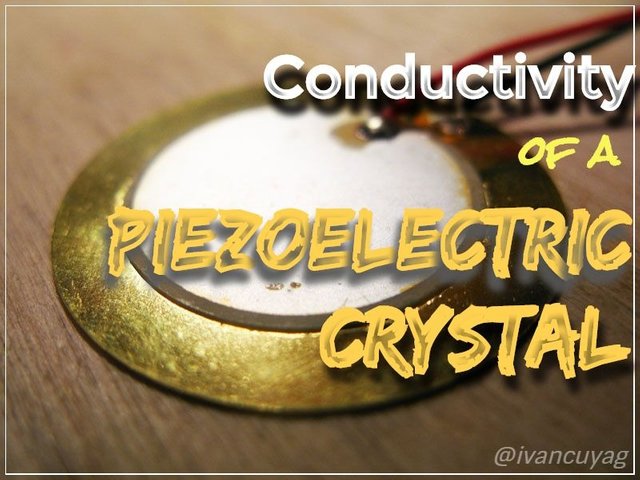
CONDUCTIVITY OF A PIEZOELECTRIC CRYSTAL
Since then, we always knew about lighting up a light bulb using a battery and making a buzzer sound when we are going to connect it to a power source. In our home, we just directly plug into the outlet our different appliances such as the television, the refrigerator, the rice cookers, air conditioning units and many more. Our outlet voltages usually ranges up to 220 V ~ 240 V depending on the voltage rating of a particular source. Voltages can be of two types, the Alternating current (AC) Voltage, which is usually utilized by the electricity in our houses, and the Direct Current (DC) Voltage, which is the typical voltage type for batteries. Some AC voltages are usually generated from powerplants such as hydropower, nuclear power, wind mills, thermal power and coal power plants. DC Voltages on the other hand are generated from chemical elements like Mercury, Nickel Cadmium, Lead, Lithium and Lithium Polymers but the other elements were already prohibited due to their hazardous effect to the environment and to humans.
But do we know that a certain crystal placed between two metallic plates can be a source of voltage also?
Let's find out on this blog how are we going to know the principle of this crystal known and how does this thing produce voltage.
THE PIEZOELECTRIC CRYSTAL AND ITS PRINCIPLE
According to @whatis.techtarget.com:
Piezoelectricity, also called the piezoelectric effect, is the ability of certain materials to generate an AC (alternating current) voltage when subjected to mechanical stress or vibration, or to vibrate when subjected to an AC voltage, or both. The most common piezoelectric material is quartz. Certain ceramics, Rochelle salts, and various other solids also exhibit this effect.
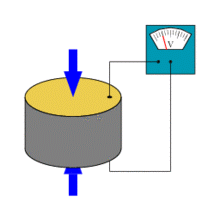
A piezoelectric transducer comprises a "crystal" sandwiched between two metal plates. When a sound wave strikes one or both of the plates, the plates vibrate. The crystal picks up this vibration, which it translates into a weak AC voltage. Therefore, an AC voltage arises between the two metal plates, with a waveform similar to that of the sound waves. Conversely, if an AC signal is applied to the plates, it causes the crystal to vibrate in sync with the signal voltage. As a result, the metal plates vibrate also, producing an acoustic disturbance.
So having known the principle and theory already, let us discover how this theory be feasible and reliable by showing you the experiment later on. Now let's find out!
THE EXPERIMENT WITH PIEZOELECTRIC CRYSTAL OR PIEZOELECTIC TRANSDUCER
This experiment primarily aims to justify a piezoelectic crystal's ability on producing voltage.
A. MATERIALS AND EQUIPMENTS
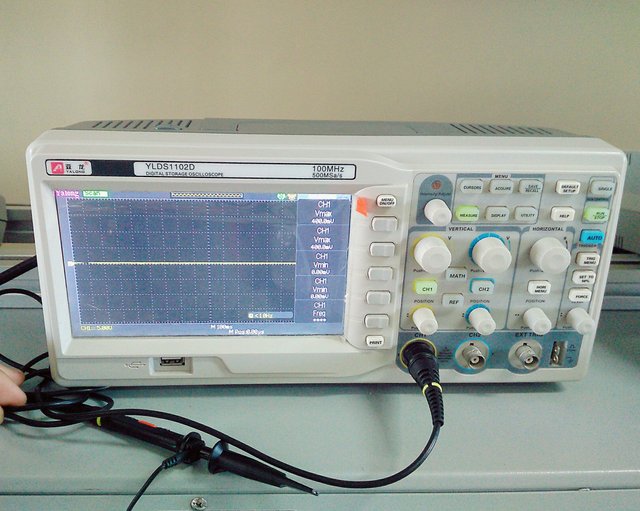
Oscilloscope - this is an equipment wherein we can see an electrical quantity which can be displayed on its screen. We can see the fluctuations of this quantity by seeing a wave as a signal which enters or is produced from the material that we need to test. Right at this experiment, we will be quantifying the voltage produced by the piezoelectic crystal.

Oscilloscope Probe- this is used to touch a thing needed to be tested in an oscilloscope which connects the oscilloscope to the material. In this experiment, we'll touch the piezoelectic crystal using this probe.
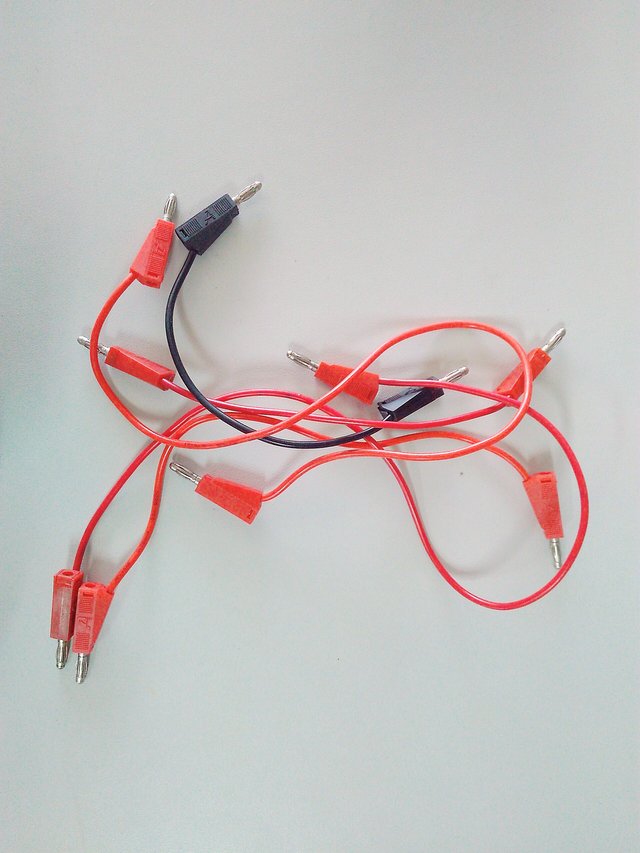
Testing Wires / Wires - serves as a means for connecting the LED to the piezoelectic crystal.
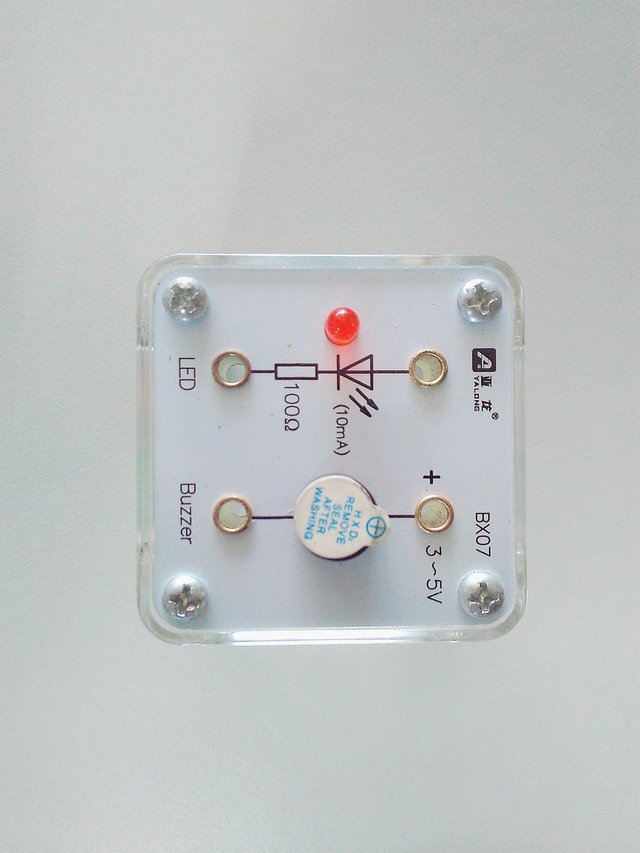
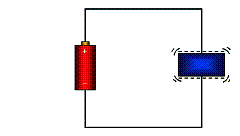
An LED and a Buzzer - in this experiment, we will be using output component such as an LED to know if the piezoelectic crystal is really producing voltage. So the LED will serve as our load.
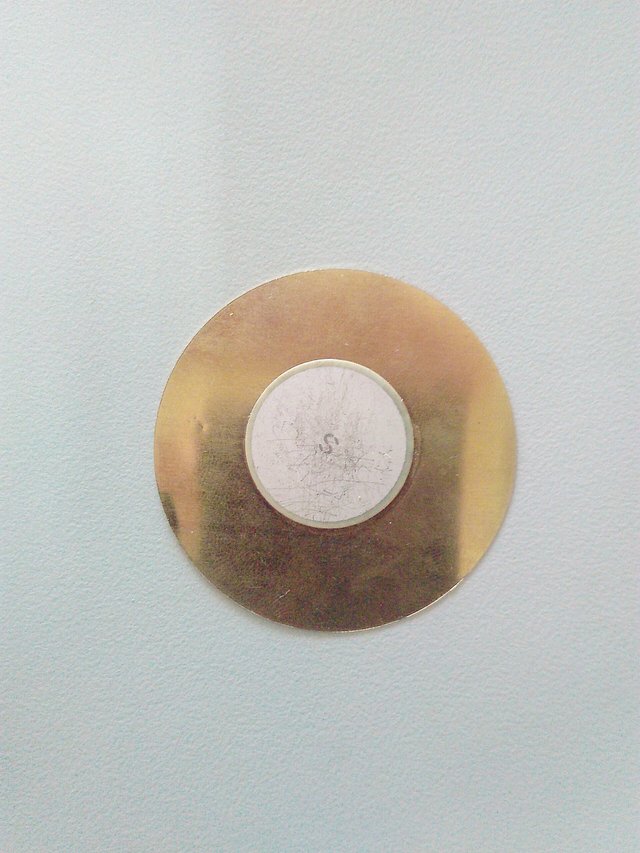

- Piezoelectic crsytal
B. FEASIBILITY OF THE EXPERIMENT
B.1. Testing for a Voltage
The following wiring diagrams are simulated in Proteus 8 Professional
These are the wiring diagrams:
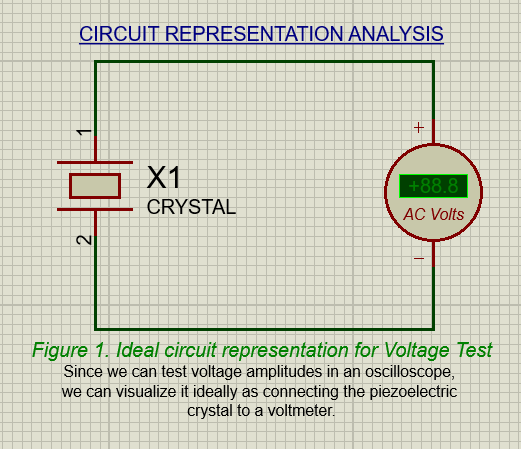
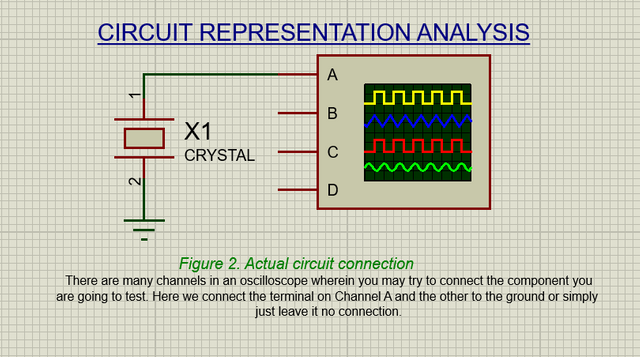
- Connect the probe to the oscilloscope.
- By touching the two terminals of the probes- one to the gold-colored metal and the other to the center where the crystal is in its inside located, we can test for a produced voltage.
- By applying pressure to its center, we can see the fluctuations of voltage produced through the display screen.
So to summarize, I have prepared a video for you. Here it is!
B.2. Testing for an Output
Here is the wiring diagram:
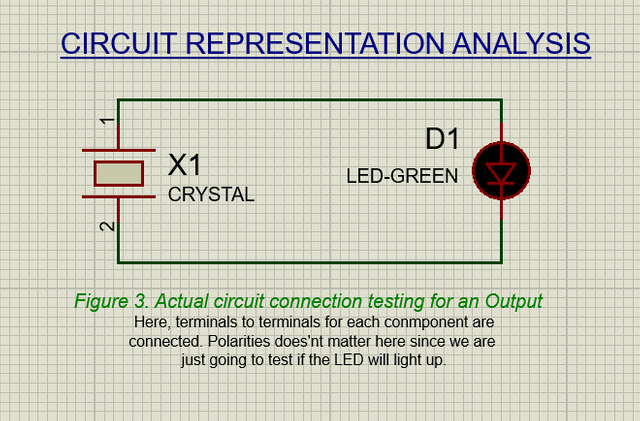
Since we already saw that voltage is really produced by just applying a pressure or vibrations to the center of the piezoelectic crystal, it's time for us to test it with an LED and let's see if it will really light up!
Same procedures but this time, instead of using the probes, we will now be using another pieces of wires for better connections. So here how it goes:
C. LIMITATIONS OF THE EXPERIMENT
As you can see, the LED blinks while we add pressure on to the piezoelectic crsytal. But the duration of the blinking wasn't really long because the voltage produced depends upon the constancy of the pressure applied. Yet, we also need to be careful and considerate for the pressure applied since it could damage the piezoelectic crystal. Excessive pressure could lead to damaging it resulting to its inability to produce optimal voltage.
D. MODIFICATIONS FOR THE EXPERIMENT

While we know that piezoelectic crystal produces voltage, we can also modify the experiment and instead of using the produced voltage as to lighting a bulb or making a buzzer to sound (or anything which can use up the voltage), we can also try to store the produced voltage using a supercapacitor. Since a capacitor is an electronic component which is used to store voltages- AC Voltage in particular, it is possible that all the voltage generated will go and be stored in the supercapacitor. As supercapacitor is analagous to a rechargable battery, it may be that we can also charge our battery using the piezoelectic crystal.
E. OTHER INFORMATION ABOUT THE PIEZOELECTRIC CRYSTAL
Piezoelectic Crystal produces voltage which is an Alternating Current (AC) Voltage. And we can see it on the video as displayed on the screen of the oscilloscope. Initially, there is measured voltage but very minimum until we added pressure to its center and see that everytime we apply vibrations, a sudden rise up of voltage spike on the screen is displayed.
It is said to be an AC Voltage because the voltage graph has spikes and if we are going to zoom in the graph we can see that it is forming a sine wave. Although not a perfect sine wave, but the fact that it generates a wave is already an evidence to say that it is really an AC Voltage.
Direct Current (DC) Voltages usually if shown in a graphical analysis, we can see that its graph is a horizontal line.
So that's it guys! I hope you enjoyed this blog and learned something new. I would love to know what's your thoughts about this. You may share it with me and drop a comment below. I will surely appreciate it that much! Well then, God bless!
This is @ivancuyag!
See you on my next blogs!

Congratulations! This post has been upvoted by SteemMakers. We are a community based project that aims to support makers and DIYers on the blockchain in every way possible. Find out more about us on our website: www.steemmakers.com.
If you like our work, please consider upvoting this comment to support the growth of our community. Thank you.