SOLDERING AND DESOLDERING BASICS
Introduction
In practical electronics, the art of connecting and removing connections is absolutely an essential process. Without the aid of these essential processes, any circuits could be built in a very intricate manner. This blog offers you an information about how electronic technicians do and apply these procedures to circuit boards and any other interconnecting boards. Thus, it will provide you an overview about how these certain processes are done and applied safely in a workplace. With proper precautionary measures, you couldn't just work effectively but efficiently as well.
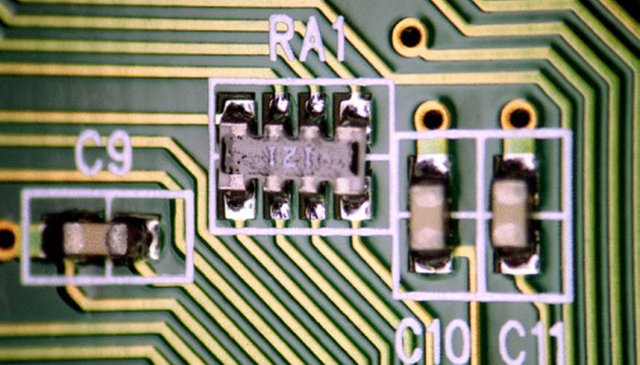
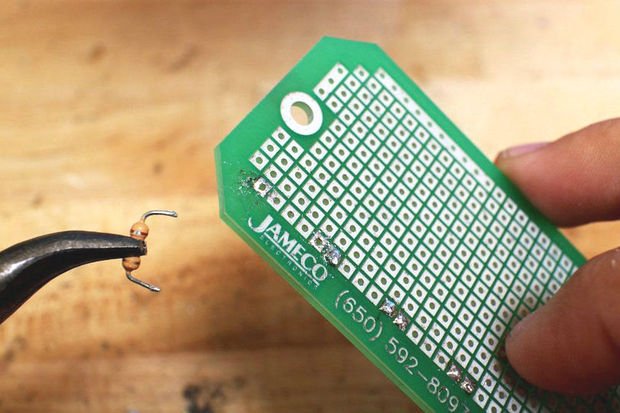
A typical printed circuit board, or PCB, contains a large number of electronic components. These components are held on the board by solder flux that creates a strong bond between the pins of a component and their corresponding pads on the board. However, the main purpose of this solder is to provide electrical connectivity. Soldering and desoldering is performed to install a component on a PCB or to remove it from the board.
SOLDERING
Soldering is a skill anyone working or experimenting in electronics needs to know. Proper soldering takes practice, patience, and persistence. Solder is a metallic “glue” that holds the parts together and forms a connection that allows electrical current to flow.
- Soldering is a process in which two or more metal items are joined together by melting and then flowing a filler metal into the joint—the filler metal having a relatively low melting point.
- Soldering is used to form a permanent connection between electronic components.
- The metal to be soldered is heated with a soldering iron and then solder is melted into the connection.
- Only the solder melts, not the parts that are being soldered.
Soldering Basics
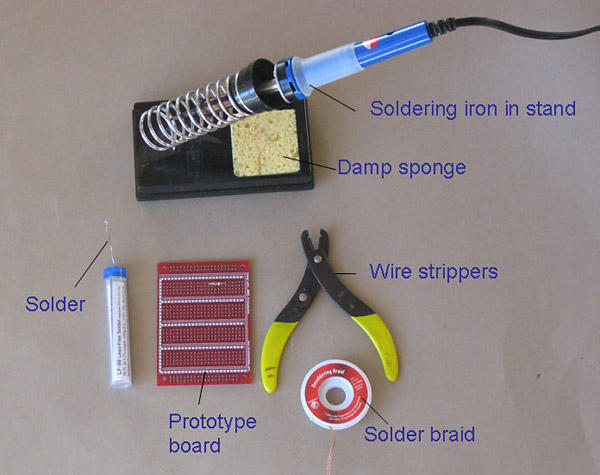
Materials Needed for Soldering
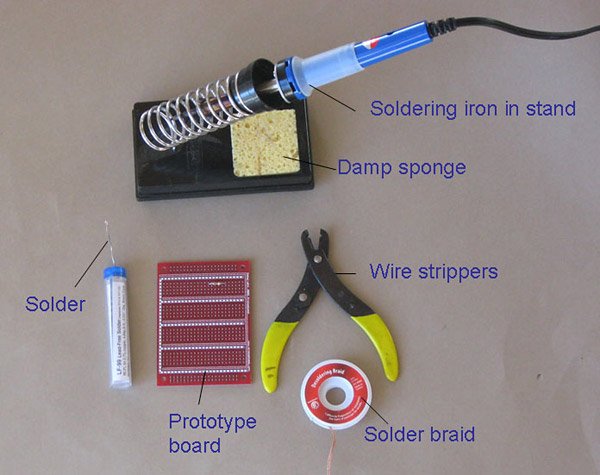
A. Soldering Iron
- A soldering iron is used to heat the connections to be soldered.
- For electronic circuits, you should use a 25- to 40-watt (W) soldering iron.
- Higher wattage soldering irons are not necessarily hotter; they are just able to heat larger components.
- A 40-W soldering iron makes joints faster than a 25-W soldering iron does.
B. Solder/Soldering Lead ( Rosin Core Solder)
- Solder has a lower melting point than the metals that are being connected do. The solder melts when it is heated by the soldering iron, but the metals being joined will not melt.
- The rosin core acts as a flux. It prevents oxidation of the metals that are being connected, and enhances the ability of the solder to "wet" the surfaces that are being joined.
- Solder that is used to join copper pipes has an acid core, which is appropriate for pipes, but will corrode electronic connections. Use solder that has a rosin core.
- For most electronics work, a solder with a diameter of 0.75 millimeters (mm) to 1.0 mm is best.
- Thicker solder might make soldering small joints difficult and also increases the chances of creating solder bridges between copper pads that are not meant to be connected.
- An alloy of 60/40 (60% tin, 40% lead) is used for most electronics work, but lead-free solders are available as well.
C. Soldering Stand
- There are a variety of stands available. It is important to always keep the hot iron in its stand when not in use.
D. Sponge
- The damp sponge is used to clean the tip of the iron.
E. Solder Braid
- This is used to remove solder.
- To use the braid, place it over the solder to be removed and heat it from above with the iron. The solder will flow into the braid.
- Solder braid is used to extract an electronic component that is soldered onto a board.
- It is also used to reduce the amount of solder on a connection.
F. Prototype Board
- A prototype board is used to assemble the circuit.
- Prototype boards have copper tracks or pads for connecting components.
G. Steel wool or Fine Sandpaper
- This is used to clean connections prior to soldering.
- Solder will not flow over a dirty connection.
Soldering Process

1. Solder needs a clean surface on which to adhere.
- Buff the copper foil of a PC board with steel wool before soldering.
- Remove any oil, paint, wax, etc. with a solvent, steel wool, or fine sandpaper.
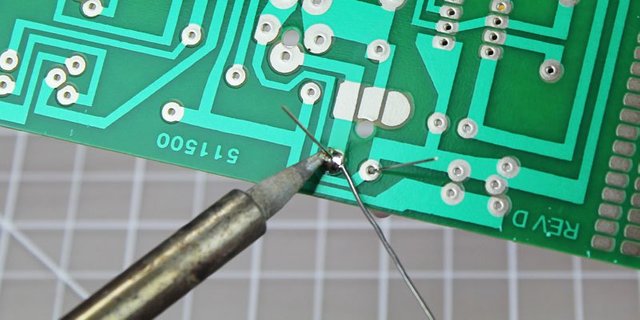
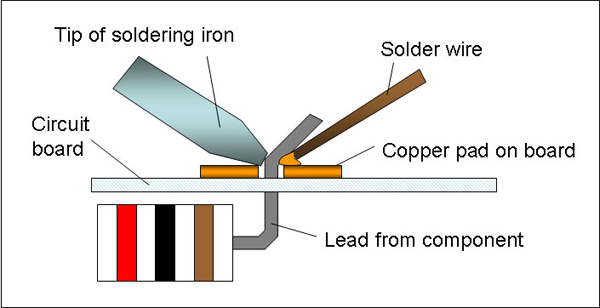
2. To solder, heat the connection with the tip of the soldering iron for a few seconds, then apply the solder.
- Heat the connection, not the solder.
- Hold the soldering iron like a pen, near the base of the handle.
- Both parts that are being soldered have to be hot to form a good connection.
3. Keep the soldering tip on the connection as the solder is applied.
- Solder will flow into and around well-heated connections.
- Use just enough solder to form a strong connection.
4. Remove the tip from the connection as soon as the solder has flowed where you want it to be. Remove the solder, then the iron.
5. Don't move the connection while the solder is cooling.
6. Don't overheat the connection, as this might damage the electrical component you are soldering.
- Transistors and some other components can be damaged by heat when soldering. A crocodile clip can be used as a heat sink to protect these components.

7. Soldering a connection should take just a few seconds.
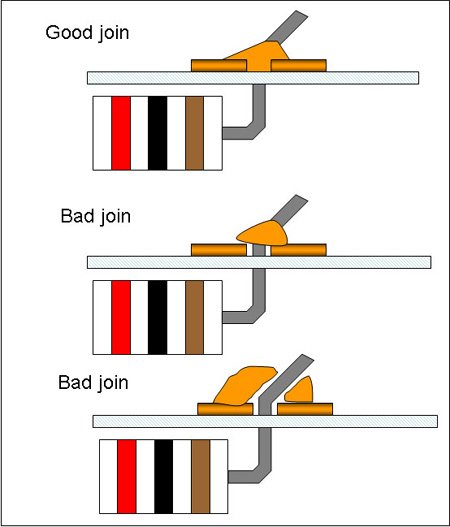
8. Inspect the joint closely. It should look shiny.
- If you are soldering a wire (called the lead) onto a PC board (on the track), it should have a volcano shape.
- If the connection looks bad, reheat it and try again.
9. Wipe the tip of the iron on a damp sponge to clean it. The tip should now be shiny.
10. Unplug the soldering iron when it is not in use.
DESOLDERING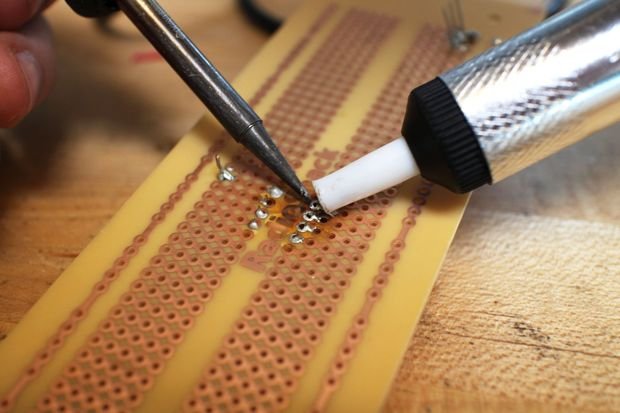
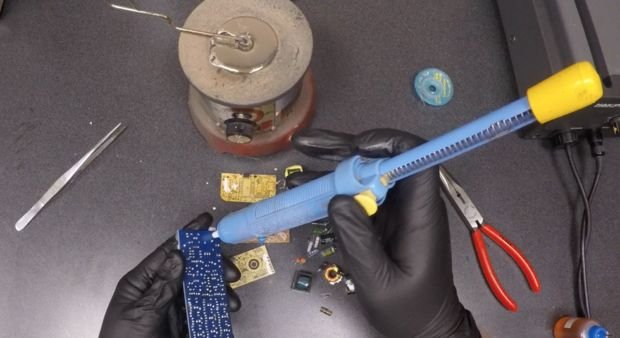
From using desoldering irons to sketchily knocking breadboard components off on the side of a table, there are tons of ways to remove components from a circuit board. Desoldering is an important skill to learn once you've gotten the hang of soldering, because messing up a soldering job isn't improbable.
- This process is the removal of solder and components from a circuit board for troubleshooting, repair, replacement, and salvage.
- It is the reverse process of soldering.
- It is a process of removal of solder and components mounted on circuit boards.
- The soldered joint is removed by the process of desoldering. For this purpose a small vacuum pump is used to remove solder from the plated through holes.
- The lead over which the desoldering tip was placed is moved in a circular motion for rounded leads and back and forth for flat leads
Desoldering Basics
Materials Needed for Desoldering
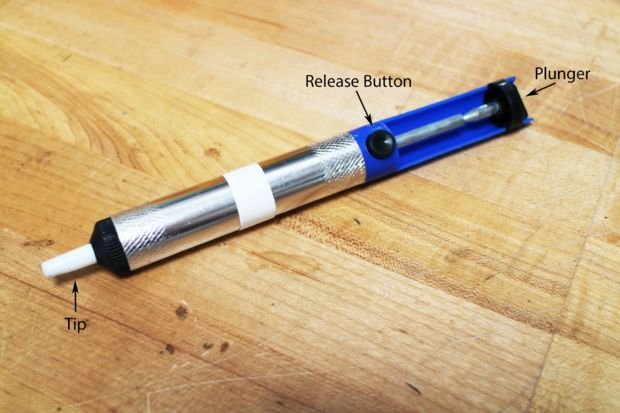
a. Solder Sucker/ Desoldering Pump
The most commonly used and convenient equipment needed for desoldering is the desoldering pump. A good manual solder sucker like this one works pretty well for selectively removing through holes parts from a PCB. Cheaper and smaller units do not work as well. They're marketed as compact but they don't works as well due to the limited stroke length and smaller cylinders.
Desoldering Process
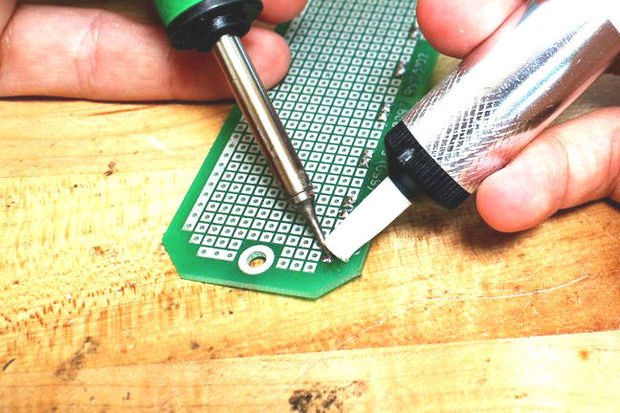
One of the nicest ways to desolder a component involves using a desoldering pump. A desoldering pump is essentially a small, high pressure vacuum. After heating up the solder, you can use the desoldering pump to suck the solder up and out of the way. Here are the basic steps for using a hand-powered desoldering pump:
1. Heat up the solder you want to remove with a soldering iron (some desoldering pumps also come with attached irons).
2. Press down on the plunger (If your pump has a bulb, just squeeze the bulb).
3. Once the solder is molten, place the tip of the desoldering pump against the solder that you want to remove.
4. Release the plunger or bulb. Some desoldering pumps have a release button so that you don't have to hold it the whole time.
5. Remove free component.
6. Repeat steps 1-4 to remove any excess solder.
7. Dispose of the solder inside the pump by repeatedly pressing down and releasing the plunger.
References:
- https://sciencing.com/soldering-desoldering-techniques-8288017.html
- https://www.maxbotix.com/tutorials2/132-proper-soldering-desoldering-techniques-of-a-maxbotix-inc-sensor.htm
- https://www.sciencebuddies.org/science-fair-projects/references/how-to-solder
- https://en.wikibooks.org/wiki/Practical_Electronics/Desoldering
- https://www.engineersgarage.com/definitions/what-is-desoldering
- https://en.wikipedia.org/wiki/Desoldering
- http://www.instructables.com/id/The-Ultimate-Guide-to-Desoldering/
Image Sources:
Introduction
Soldering
Soldering Materials
Soldering Process_1
Soldering Process_2
Soldering Process_3
Desoldering
Desoldering Material
Desoldering Process_1
Desoldering Process_2
Desoldering Process_3

Thank you very much for this post :) This Helps!! Resteemed :)
Youre welcome bay!
Very interesting post. Keep steeming and sharing your ideas
Very cool. Another thing that really makes soldering a lot easier is buying a pair of helping hands to hold the board (Like the ones you can buy on amazon or ebay).
A very useful tips for beginners.
Thank you for some information. I know how to soldering and desoldering also. Keep it up.
Haha! We really must have to know the basics of Electronics.
Hahaha. Yeah!