EOS Nation Utility guide - How to use Scatter!

The EOS Nation Utility Guide for Scatter is finally out for you, community members!
Here, you will find a complete walkthrough on how to interact with Scatter Web Interface application. From creating a new account to how to set up new identities, this utility guide will guide you step by step through everything you need to know right from the start. If you have any question or suggestion, we invite you to leave us a comment at the end of this post.
HOW TO SET UP YOUR SCATTER ACCOUNT
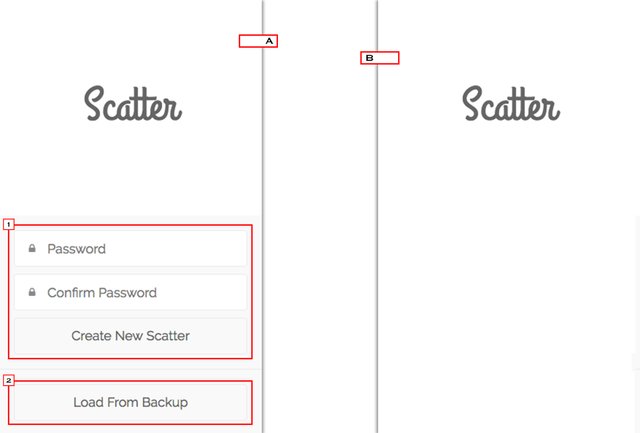
A
1- Write and confirm your new password to create a new Scatter account
2- Click on Load From Backup if you want to load from a backup Scatter Key
B
1- Write down your Seed code to have access to your Scatter account
2- Write your Seed code in the registration area to have access to your Scatter account
SCATTER MAIN MENU
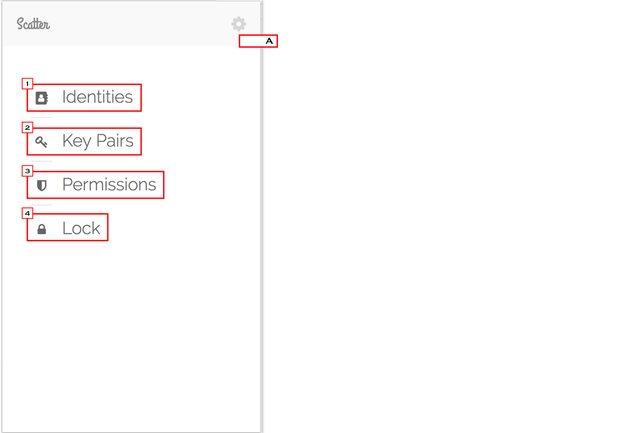
A
1- The identities section give you access to set up and manage your identities
2- The key pair section give you access to set up and manage your key pair linked to a private key
3- The permission section give you access to manage all the permissions you gave over time to some application that you have interacted with
4- The lock section can lock your account. You will need to reenter your password to have access to your Scatter account
HOW TO SET UP YOUR KEY PAIRS
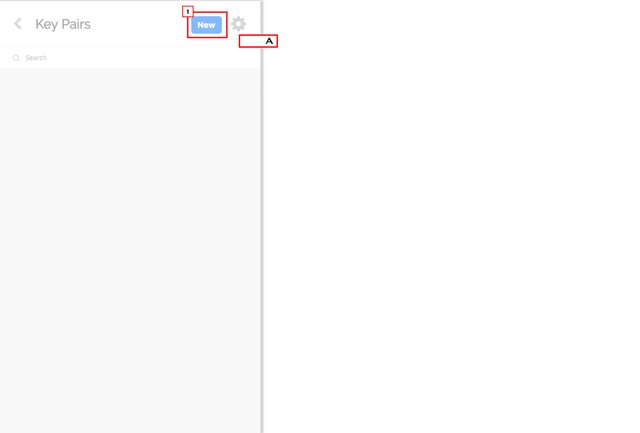
1- Press the NEW button to create a new key pair
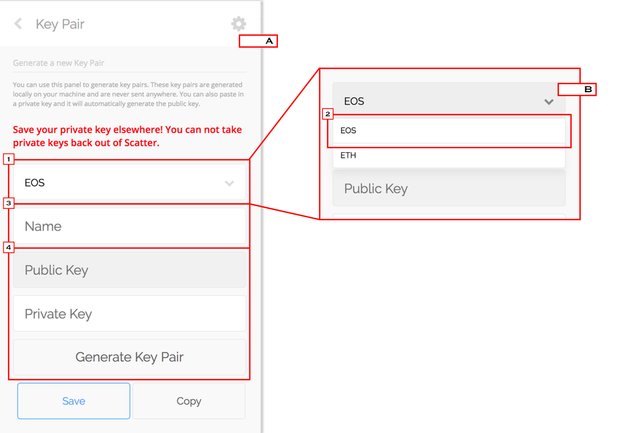
A
1- This section give you access to choose on which network you want to key pair your Scatter with
2- Choose EOS as the main network
3- Insert the name you want to attribute to this key pair
4- Insert your private key to generate a new key pair or click on generate a new key pair if you don't currently have a private key
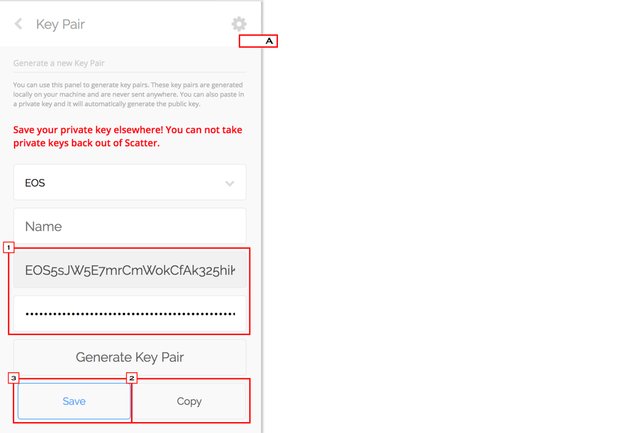
A
1- Associated EOS public key to your private key
2- Click on Copy to copy your private key and your public key. Store both of them in a secure place
3- Click on Save to save your new key pair
HOW TO SET UP YOUR IDENTITIES

A
1- Press the NEW button to create a new identities
B
2- This will be your random generated identity name that the Scatter application will give you
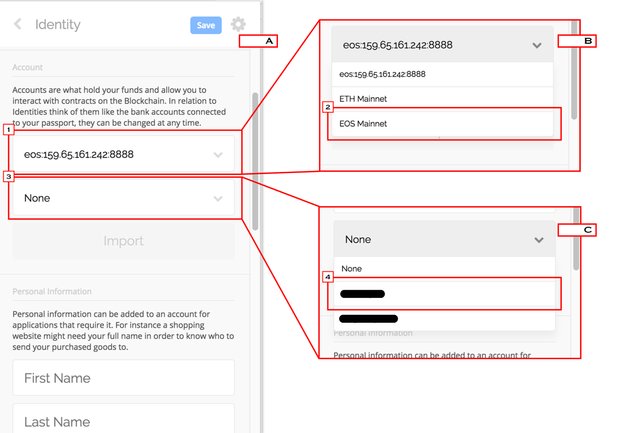
A
1- Click here to select the network you want to join
2- Select the EOS Mainnet network
3- Click here to select the key pair you want to associate with this identity
4- Select your key pair you want to associate with this identity
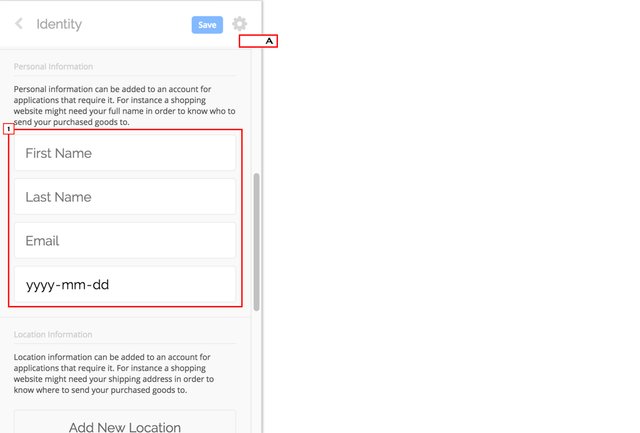
A
1- Fill up all your personal information related with this identity
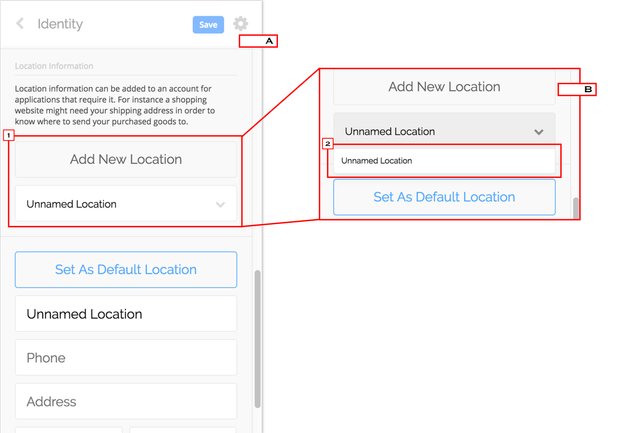
A
1- Add new/multiple location to be associated with your Scatter account
2- Choose the location you want to associate with your identity
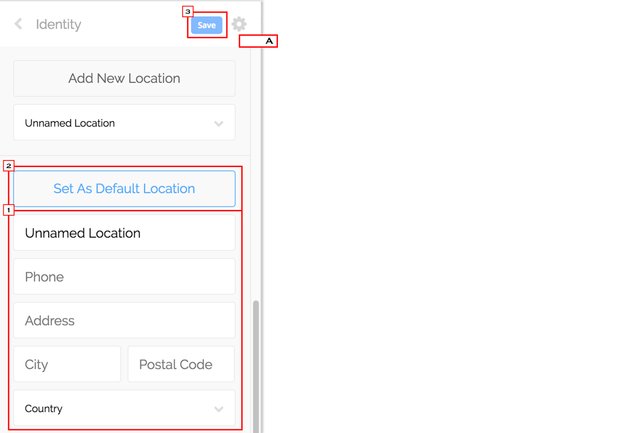
A
1- Write down your location
2- Set it as Default Location for this identity
3- Click on the SAVE button
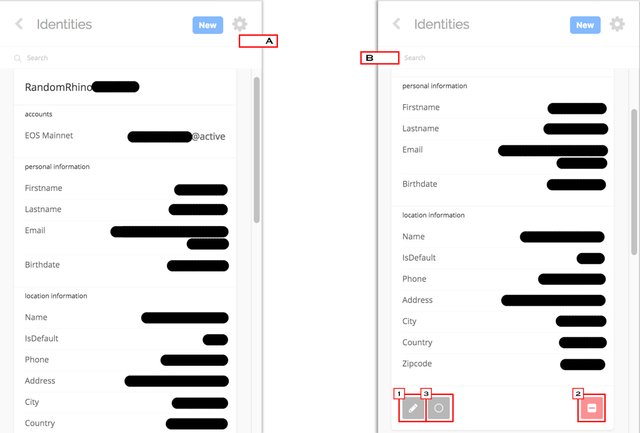
B
1- You can edit any time all the info you have written in this identity
2- You can delete the identity by clicking on this button
3- You can view your current balance on your identity attached to your key pair
HOW TO INTERACT WITH SCATTER
IDENTITY REQUEST
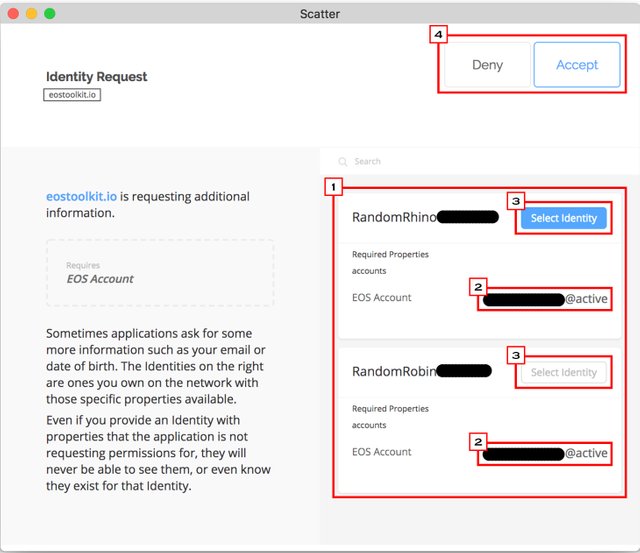
1- All your identities associated with your Scatter account will be listed here
2- Look at the account with which you want to interact the blockchain with
3- Select the identity with which you want to interact the blockchain with
4- The Accept and Deny transaction action button
ACTION REQUEST
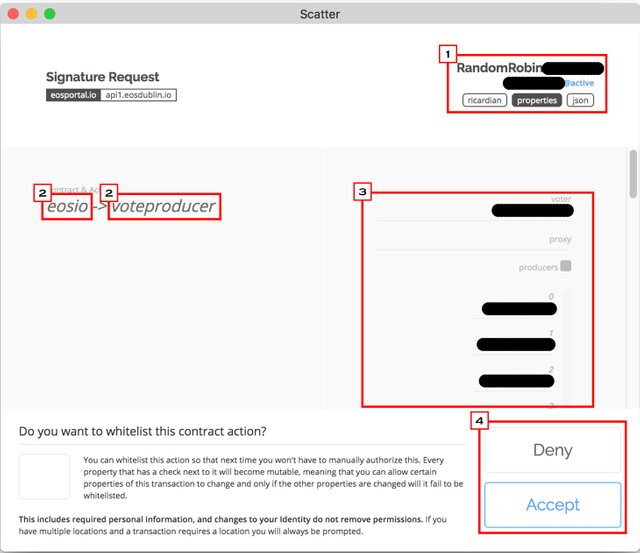
1- This show you with which identity and which EOS account that you are currently interacting the blockchain with. It also indicate that we are on the Properties page.
2- The system contract with the action you are going to perform
3- A detailed list of action that is currently going to be processed
4- The Accept and Deny transaction action button
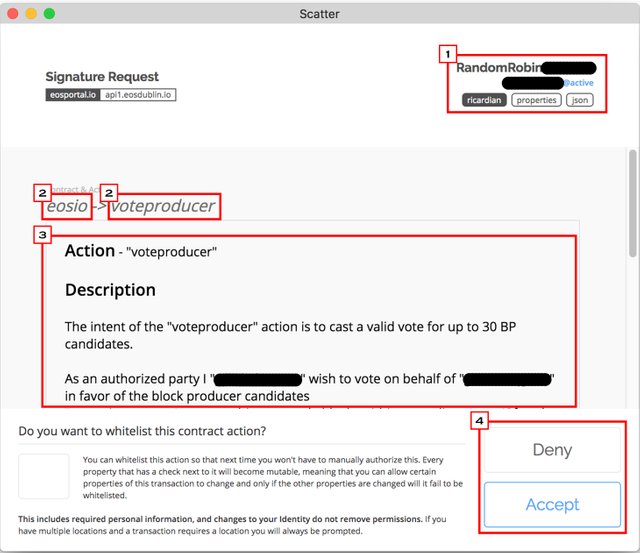
1- This show you with which identity and which EOS account that you are currently interacting the blockchain with. It also indicate that we are on the Ricardian page.
2- The system contract with the action you are going to perform
3- The Ricardian contract associated with the action that is going to be performed on chain
4- The Accept and Deny transaction action button
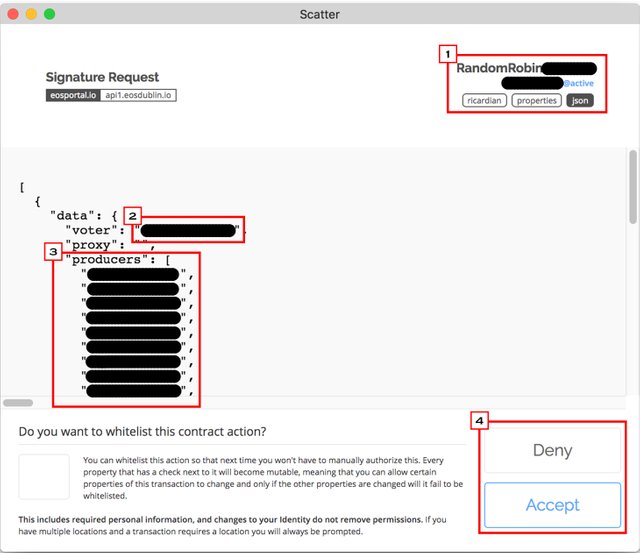
1- This show you with which identity and which EOS account that you are currently interacting the blockchain with. It also indicate that we are on the Json file page.
2- The account name that will perform the voting action
3- The entity to who the action will be applied to
4- The Accept and Deny transaction action button
EXEMPLE OF SIGNATURE REQUEST FOR TRANSFER
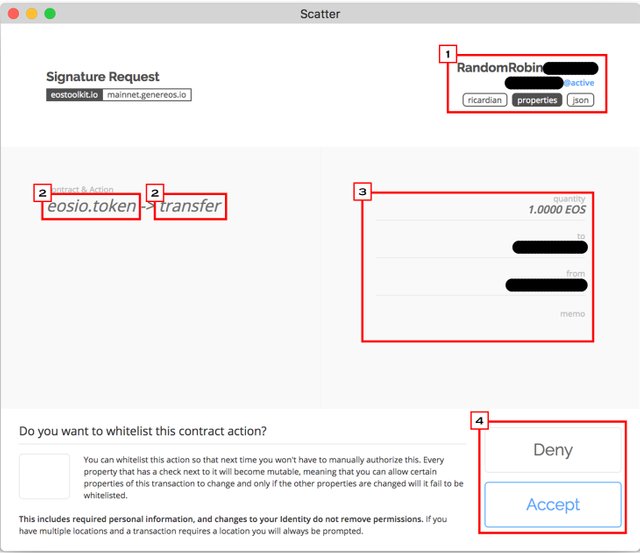
1- This show you with which identity and which EOS account that you are currently interacting the blockchain with. It also indicate that we are on the Properties page.
2- The system contract with the action you are going to perform
3- A detailed list of action that is currently going to be processed
4- The Accept and Deny transaction action button
HOW TO MANAGE YOUR PERMISSIONS
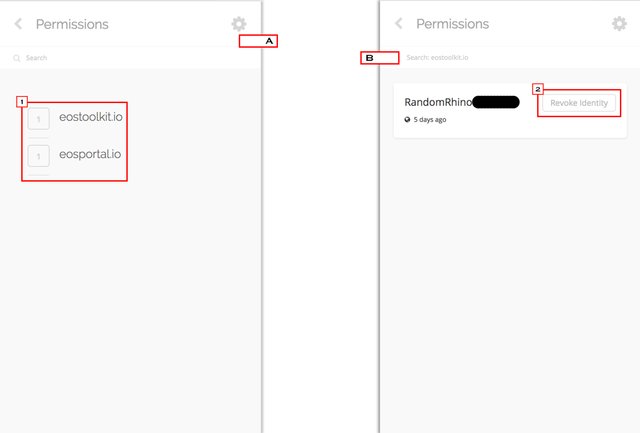
A
1- The permission that you allowed and interacted with
B
2- You can revoke at any time your identity from a website/application that you gave access to by clicking here

Facebook | Steemit | Twitter | Telegram