How To Make Your Own Keg-A-Cue (Beer Keg BBQ)
First let me start by telling you the reason this Keg-A-Cue came to be.
I was on a work trip (Royal Marines) to Newbury (We are based in Scotland) in the middle of July and there happened to be a heat wave blasting through the area (something unheard of up in Scotland).
Between us we all planned to have a BBQ and some drinks on our day of as we were confined to within an hour of this army base, however the to the strict rules in place we were not allowed to purchase a BBQ. (Fire hazard. Health and Safety gone mad).
We did, however, find an old beer keg left by the bins and simultaneously we all had the same idea. The Keg-A-Cue!
Step 1: Safety
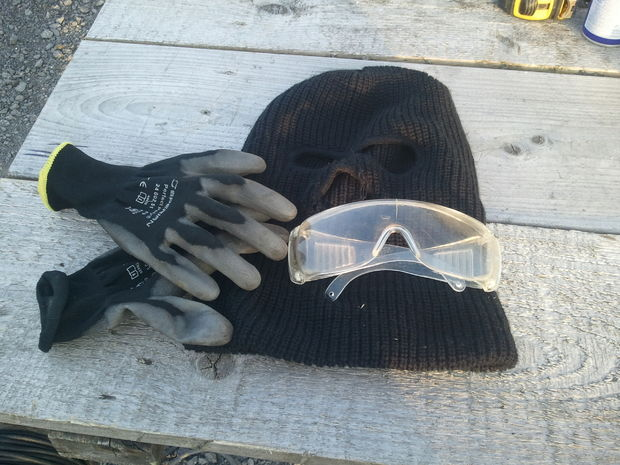
You will be working with drills and saws, safety is a must. There will be sharp edges, sparks and there is a possibility of shrapnel.
Step 2: Cutting The Keg

Most kegs have a small valve to release the pressure. If your keg doesn't have one then drill a small hole in the bottom.
Once you've cut the keg in half use a file to smooth off all the sharp edges.
Step 3: Burn the inside
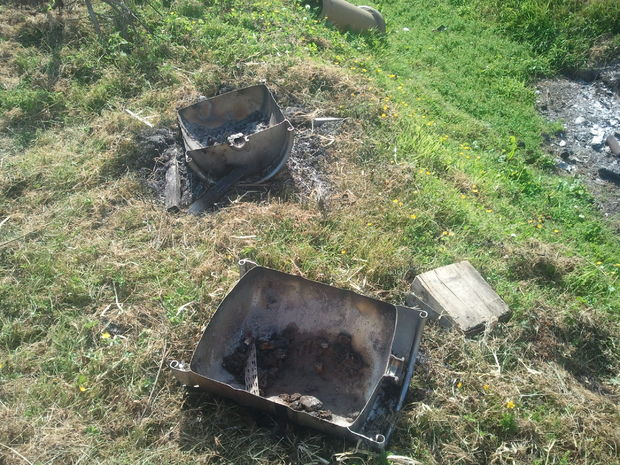
Light a fire inside both halves of the keg to kill any nasty stuff that could be lurking. The last thing you want to do is poison your guests at your first Keg-A-Cue party. The steel will get extremely hot so allow it a few hours to cool down.
Step 4: Attaching the hinges
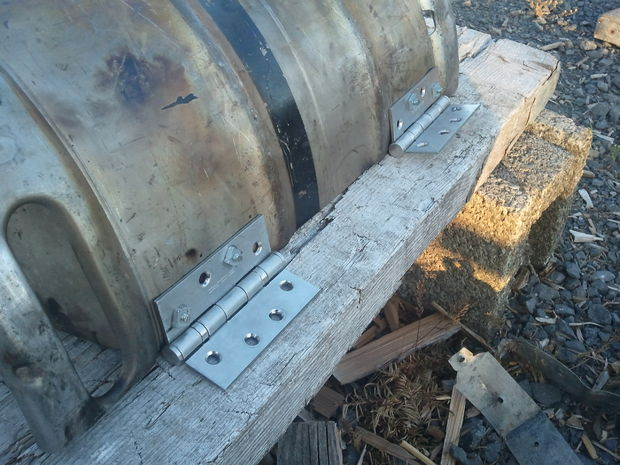
Use stainless steel hinges, Make sure you line the holes up correctly (this is easier with two people).
Step 5: Grate and Grill
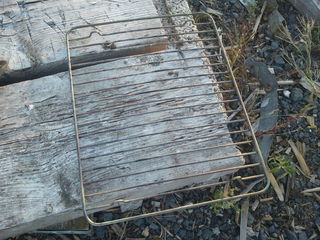

For the grill you'll have to use your imagination, you could use the sides of an old industrial sink. Alternatively you could buy one for about (£20) from a local hardware store and cutting to size.
The grate can be any sheet of metal with holes in to allow the coals to sit on so they arent on the bottom of the keg.
Step 6: The Handle
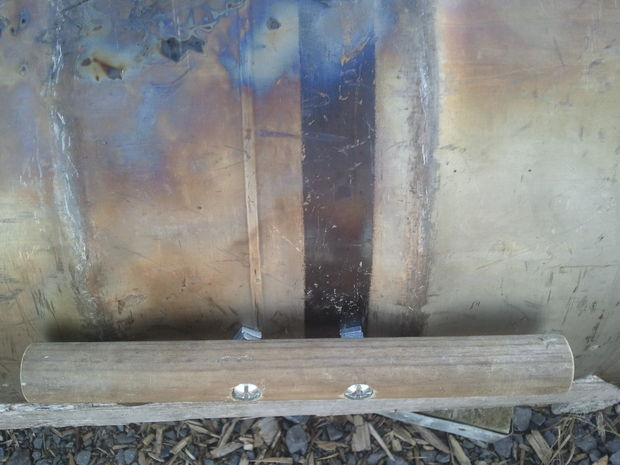
You can't use anything that will burn or get hot when cooking, ideally the handle from an old shovel cut to size. Bolt the handle on with nuts. Put a few extra on both sides to stop it from wobbling.
Step 7: Keg finished


You can attach some loops to one side for a chain so that it doesn't open all the way. Or attach a lever that the lid rests on so that you can keep it open hands free without letting all the heat out.
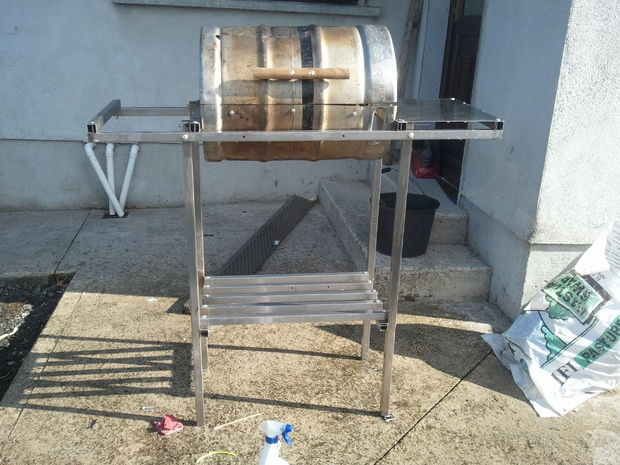
Step 8: Stand
Here you can be as artistic as you like, it all comes down to how DIY savvy you are.
You could go for a simple x-frame 
Quite easy to make yourself with some salvaged steel.
Or something a bit more creative 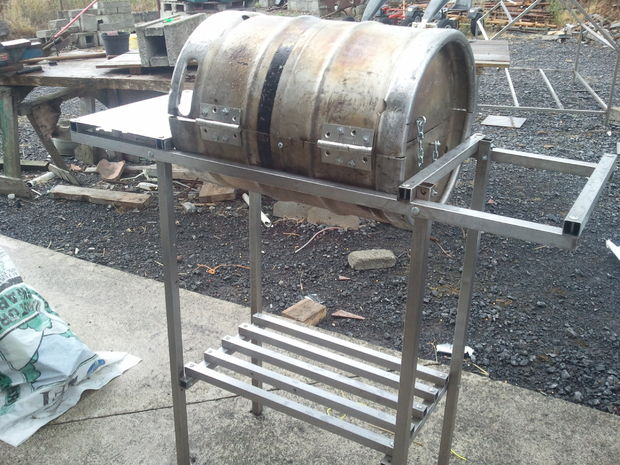
It all depends on how much work you're willing to put in and how much money you're willing to spend on this project.
Stp 9: Enjoy!
This is a fun idea. I wish i had more followers to share this with but i just started on Steemit today, my new blog is going to be following my family's journey of learning what we need to know to live off grid and have a small homestead.
That's great. I'll be sure to keep an eye out. I will be doing similar stuff so feel free to share on your blog if you find something you like :)
reSteemed