Building A Very Budget Gaming PC for an 11 Year Old kid - PC Tech - Part 52.
When a kid is telling you that PC gaming is the future of gaming, you have to shut up and listen.
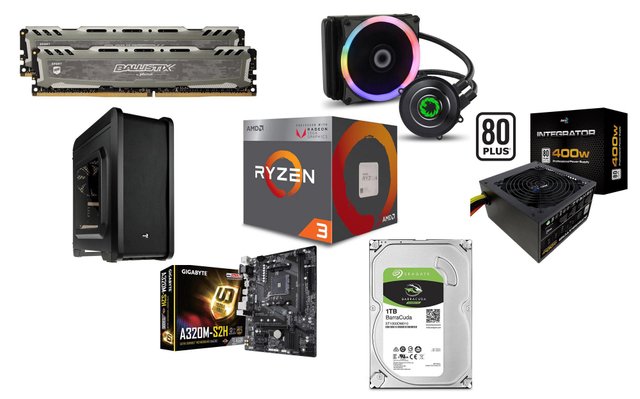
In the Last PC Tech post, i went through the exact spec that was chosen for this PC. Basically an 11 year old kid, that has been saving his allowance for over a year, wanted a custom gaming PC that could play games like Fortnite and CS:GO with ease, and judging from some of the results i have been getting today, this budget PC can deliver some impressive numbers when it comes to gaming.

The Build.
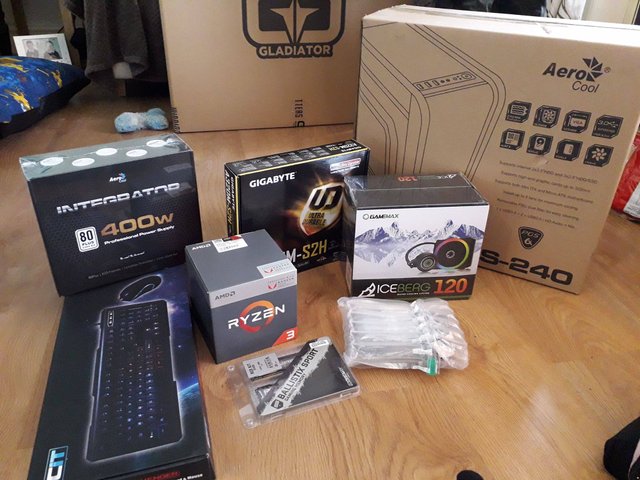
With any PC I build, I start by doing a checklist of all the components needed to have a fully working PC. Do I have the CPU?.. Do I have the Memory?.. Do I have a 3/4pin PWM fan hub? no... shit.... one of the first problems I encountered and didn't plan for was having a fan hub to power the three SP120 Corsair RGB fans I gave the kid. (I had them sat around doing nothing) because the PC case I currently use, it comes complete with a 10 port fan hub, and it was a similar situation with the previous case I use, as well as the other 3 PC's in this house. So I simply forgot about needing a fan hub. Because this is an extremely budget orientated build, the case that was chosen was very cheap. And cheap cases tend to not have all the functionality and features that come with mid to high tier ones. But one quick trip to a local, overpriced PC shop later, I got a cheap Molex adapter that did the job nicely.
The first step was to build the PC outside of the case, this would help with any troubleshooting if there are any problems. Fortunately this build was trouble free.
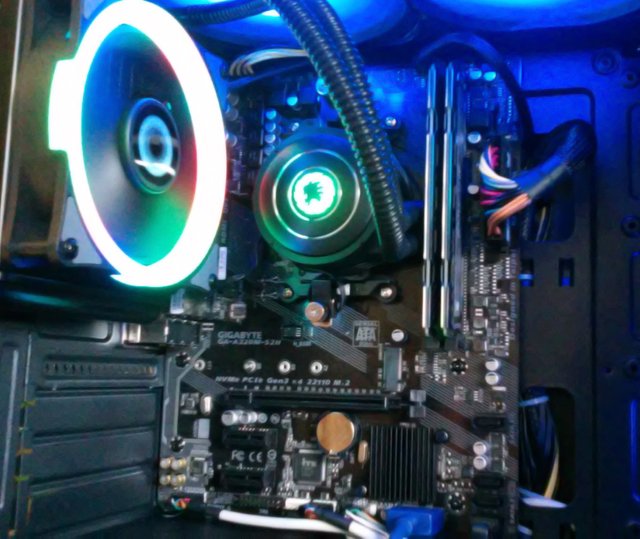
I was slightly concerned with using the Ryzen 3 2200G APU, which is a current gen CPU, with a last gen motherboard, namely the Gigabyte A320M. I do have a spare Ryzen 3 1300X CPU which is the same gen as the board, but thankfully the Bios on the motherboard was the latest version and I did not need to use the 1300X to update the Bios so the newer 2200G chip would work.
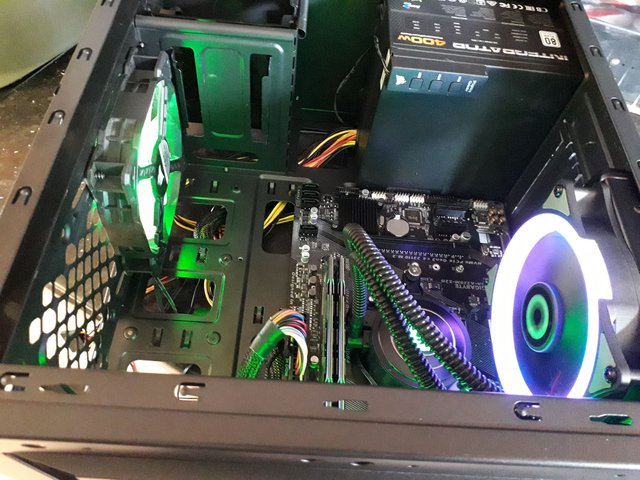
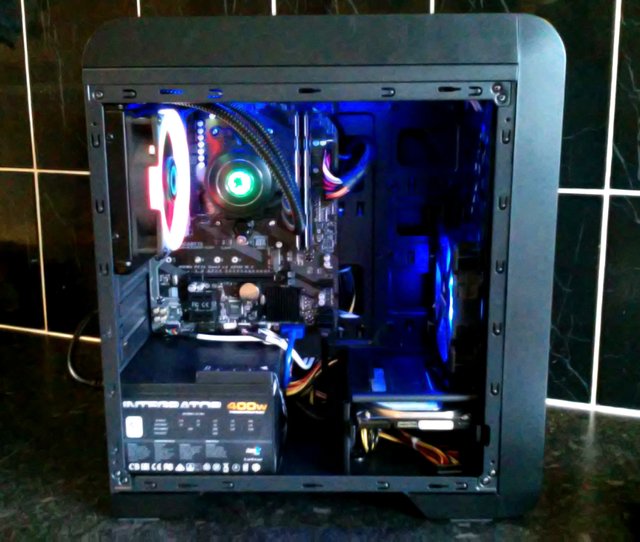
Once all built up and everything worked, it was a simple case of tidying everything up with some cable management which makes all the difference with the look of the PC. Yes I had to use ketchup and mustard coloured PSU cables, but once tidied up, it looked pretty damn good.
Another issue was the fact that the PSU is non modular. This means that all the cables are connected directly and can not be removed like a modular PSU. So some improvisation had to be done to hide the excess cables. I achieved this by zip-tying the unused cables together in a bunch and hiding them under the HDD tray.
The case itself is not very friendly to cable management as there are not that many options for routing cables, so there are a few exposed cables at the front, but they are neat and tidy.
Overclocking.
As my research into the motherboard I used predicted, there are no adjustments available for overclocking the GPU part of the APU, however despite this, I did overclock the CPU side of the APU to above the boost clock on all cores at 3.8Ghz while maintaining a peak temperature of about 58*c when at full load. There is still head room available to increase that clock speed up to about 3.95 – 4.05Ghz. Even at the 3.8Ghz mark on all cores was enough to boost the performance of the CPU by about 4-6% in game.
The memory was another part that got some overclocking love. The base frequency of the memory is set at 2666Mhz (1333 split between 2 modules). I managed to not only increase the frequency to 2966Mhz, but I also tightened up the timings on the modules too from 16/18/18/36 down to 15/16/16/32, the voltage for the DRAM is quite high at 1.55V, but well within the 1.8V limit. This increase in speed and tighter timings resulted in a further 2-3% increase in average frame rates when in game.
The Ryzen architecture is designed in such a way that it works better with faster memory speeds. So when combining the overclock on the CPU and Memory, the increase in gaming performance is increased by up to 10%. Now a game that ran at 60fps on stock speeds, can now run at up to 66fps, or 60fps with higher graphical quality.
With this being primarily a PC for gaming, the overclock will produce a better experience for the user. There is still more performance to be gained out of the APU and memory, but considering this PC was paid for by an 11 year old kid, it was a reasonable compromise between longevity of the system over the potential performance gains. If I did push the system to its limit, there is a good chance that it will run into instability issues down the road, whether that be from dust build up preventing the system to cool itself properly, or deterioration in the APU architecture from running at such a high temperature for such a long time.
Thoughts.
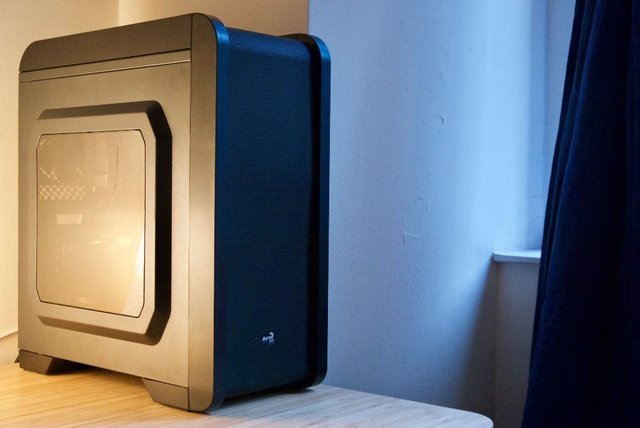
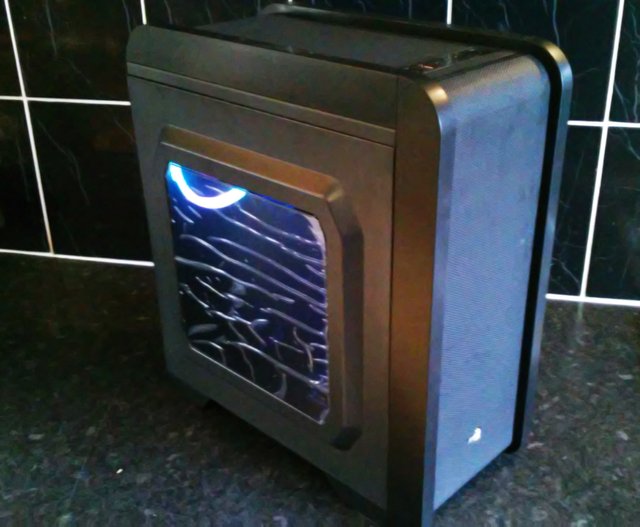
For a PC that cost less that £350 ($460US), it is a lot of PC for the money. The hardware is as basic as it gets, but I am impressed non the less. The case looks very sleek and sexy, even if it was only £30. the mesh on the face and top looks awesome, and it can accommodate twin 240mm radiators in a push/pull configuration, something I never expected to see on a case this cheap. The 2200G chip performs much better than I previously expected. This is more down to the fact I have very little hands on experience with APU chips. Only having the AMD A10 and Intel G APUS for reference. This new Vega graphics infused APU blows any previous APU out of the water by a huge margin and is very comparable to budget Discreet graphics cards like the Nvidia GT 1030, or an even older mid tier GPU like the GTX 650. So when it comes to gaming performance, it will indeed play most modern titles with ease. Sure you will have to use lower graphical settings, but you will be able to maintain a playable framerate.
I was also surprised to see the motherboard have the socket for an M.2 drive. The 3.5” mechanical drive is OK, but with the industry as a whole moving forward with SSD and NVME based storage that is slowly becoming cheaper, it is now the slowest part of the PC. There is nothing wrong with it, it just takes longer for data to be processed, so you have to wait longer for games and applications to load, not to mention the time it takes for the PC to boot up. So its nice to see that the option is there should the kid decide to upgrade to faster storage.
The PC is very basic, there is no doubt there, but as is the nature with PC's, there is always room for upgrades to be made. Should the kid decide he wants better graphical performance, he can simply buy a discreet/stand-alone GPU, bypassing the APU's integrated graphics, or when AMD releases there 3000 series APU's, that will have better processing power and increased gaming performance, he can simply slot it in, and enjoy a better gaming experience.
There is huge potential in upgrades available on this system that the kid can take advantage of. Hopefully he will want to upgrade components in the future, and I would be happy to show him exactly how to do it.
Here are some ''Glamour'' shots of the system....

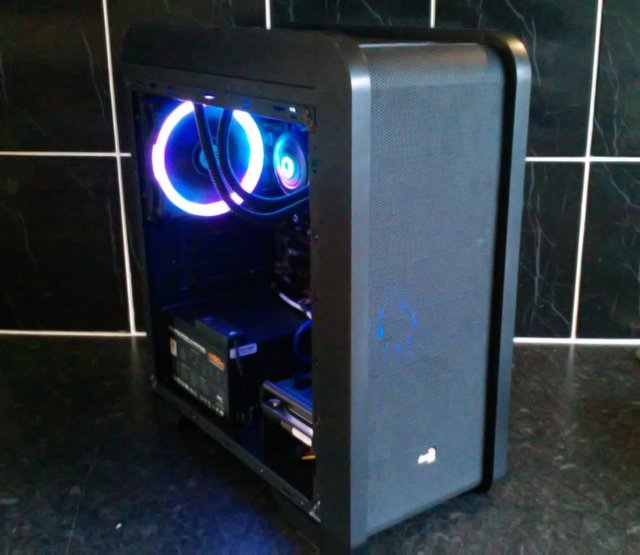

I am currently benchmarking this system so I can compare it to a similarly specced PC, an older PC and a higher grade one, to see what sort of performance gains/losses you will gain with a system like this. And so far, the numbers are better than you would think.
What did you think of this build? Would you build one like it?
Let us know in the comments below.
Thanks for reading.
Stu @TechMojo

Join the chat TechMojo Discord Channel Follow us TechMojo Dlive Channel Like us TechMojo Facebook Page Follow us TechMojo Twitter Follow us TechMojo OnG Social Page
@TechMojo Recommended Blogs you should follow.
@Deeviras @Gaming-Stuff @retro-room @gamesociety @Rerez @C0ff33a @Free999Enigma @NegativeSpace @SteemGC @GamingStation @XR-HammerGaming @Enjar If you want to apper here, then contact us via our Discord Channel!


Interesting read. I think in much cases it can be much cheaper and better to build your own pc for the things you want to use it for. But most people can work with software, and don't have a clue about hardware. Good job! And I think your kid is very grateful for his pc ...
he has not been off it since i finished building it.
This is a great article, and could come in very handy for everyone who is on budget, and wants a good gaming pc without paying thousands of dollars. Great work!
thank you very much
Whahou this is pretty impressive!You gave some really good details and photos but i think i will never have the patience to do it:) How long did it took you to build it?
about 3 hours build time, then another 3-5 installing windows with its ample updates and to install steam and several games to get benchmarks. this also got the PC ready so all the kid had to do was plug it in and turn it on.
Sorry for the late reply, been working double shifts and not had time to check, let alone write up a new post for the past couple of days..
Dope man. I want to build a PC too for mining alt coins. I gotta take down some notes and get with you
sure thing dude. just jump onto the techmojo discord and i can help you out.
Hi techmojo,
Visit curiesteem.com or join the Curie Discord community to learn more.
I was always kinda of interested in seeing a build and this was particularly interesting because it was done on a budget keeping in mind maximum performance. Well done! thanks for sharing!
thank yo for the kind words.
I never knew you build PCs all these while. Custom Pcs have a very distinctive advantage, infinite upgrades. But there's something I don't understand and I will like you to explain
The last picture, the complete build, is it attached to a PC or what because it looks like a box or something
last image? this one?
that is the final build. this is the base unit/tower/case of the PC with all the hardware inside. i took the side panel of the case. no monitor or peripherals attached. this is what i built and set up.
Wow okay. I now understand. You did a good job man
This kid is passionate enough about gaming,for an 11year old to save that money.
I loved those pc specifications, the memory, the cpu, all are good.
I personally love games, and I usually play with friends at the caffe. We spend one day there, and have fun.
But I think I need to own one computer that we can do all that staff home any time.
Ooh this appeals to my neat-freak, ocd love of packing things beautifully. You've done such a beautiful job - especially considering the limitations you mentioned regarding the casing. I'm impressed that a system that can deal with the majority of modern gaming can be built for such a relatively reasonable price (and even more impressed that an 11 year old managed to save up to get one put together specially!)
Congrats on the Curie- brilliant post.
E x
well it was a co-op build, i advised, the kid chose the parts. and he is already saving up for a discreet graphics card and a solid state drive.
thanks for the kind words buddy. appreciate it.
Hey thanks for sharing! I just built one and spent about double, I am embarrassed to say that I don't know anything about over-clocking. Should I do it, and do you have a handy guide for me?
Thanks for sharing, going to ask you next time before I build ;p
i would say if you are going to do it. reaserch as much as you can about the hardware you have chosen and the specific bios version you intend on overclocking on.
as for GPU overclocking, it is slightly more universal. i did a guide on how to this a while back HERE which will give you a general idea on how to do it.
if you want more specific help. you can join the Tech Mojo discord and either myself, a member of my team or the community can help you further.
Thank you techmojo, I didn't even know you had a discord!
Steem on!