||Paper carft: Make easy simple and attractive Ideas with Paper make by isfatema

in Hindwhale Community24 days ago (edited)
Assalamualaikum, all of my friends. How are you all? I hope you are all well. I'm fine too. My name is Isfat Hasan EMA . Today I come to hear in the "Hindwhale Community" community to draw a nice picture this is papercraft . This morning I draw this beautiful scene so much free time and now present to you:

IMG_20240428_212536.jpg

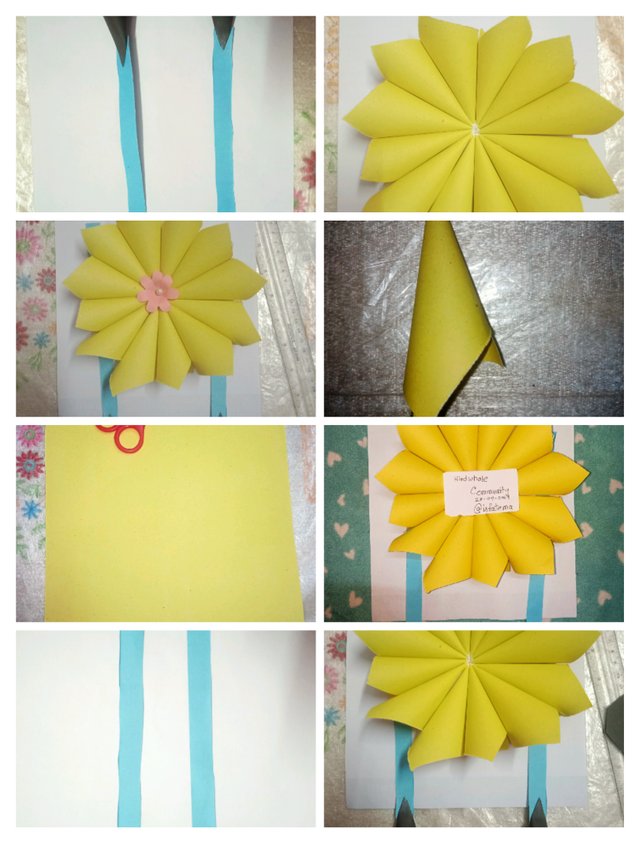
Photo taken by my OPPO A-12 mobile

DiHLrjiPetHt6ciV9azim9NPHuTMQ59H51nYE8xqo83cHxoWjkEXJT9iFny5FDK6V87zhnX5kJcSGE6ahn1RouZuijdX8aHZSZuNzNLrHLCesrYQeLFEN3XWqtzgug...5JkLh48hmSy2Vocb8Q1ZmVRFSQE6pKeyXuZTkTt2EgzjyyZw14xbJEQeSpMhQGMsjfy2JgnjmiZATtiTZUt9hdaNJ5oWr4DTthVH964jvSwCVZQRoyCX3KLi6i.png

Materials for drawing picture

• Ruler.

• Pencil.

• Eras.

• Cut the pencil.

• A4 size art paper.
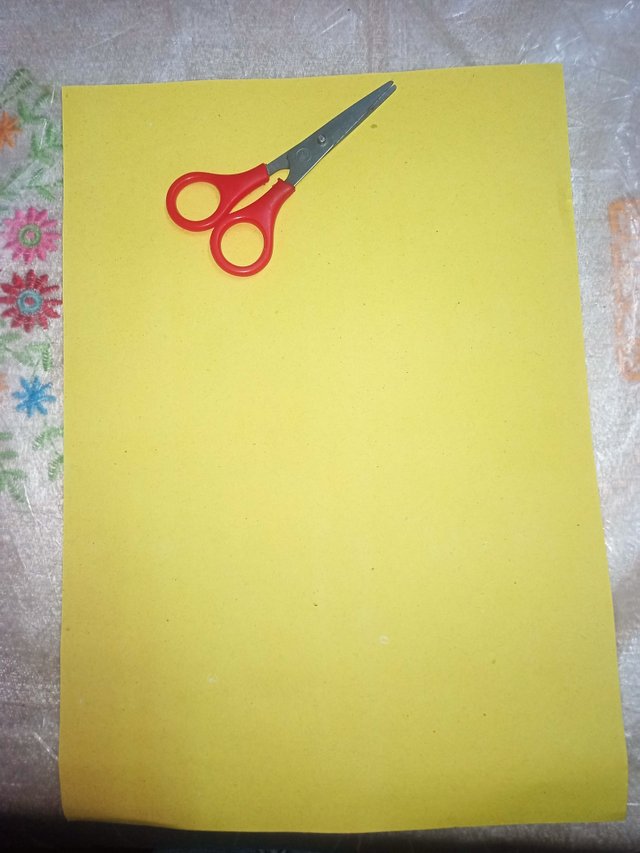
• Scissors.

• Paper gulu.

• puthi.

Let's Start
Step-1

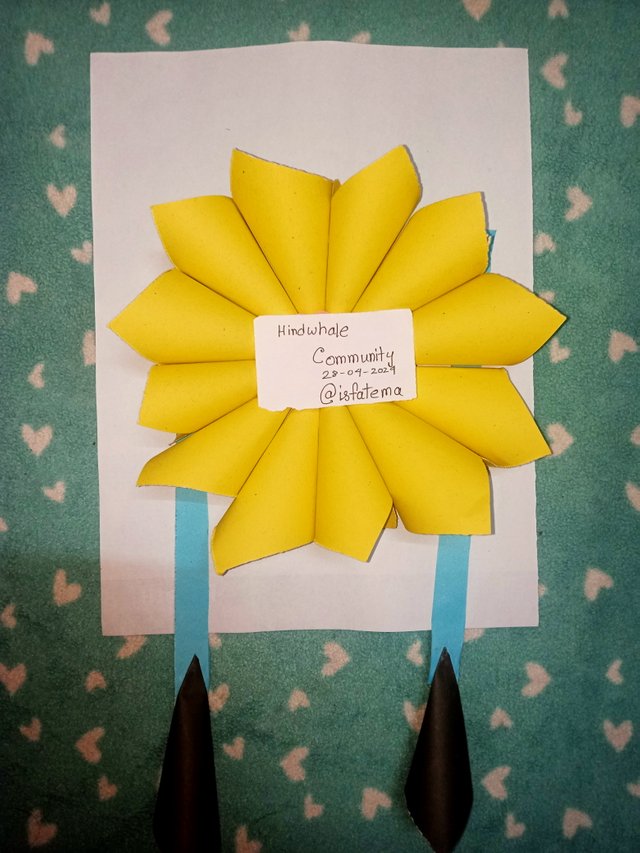
First take a yellow colored paper and scissors. Then cut the paper with those scissors. This completes step one.

IMG20240419102938.jpg

DiHLrjiPetHt6ciV9azim9NPHuTMQ59H51nYE8xqo83cHxoWjkEXJT9iFny5FDK6V87zhnX5kJcSGE6ahn1RouZuijdX8aHZSZuNzNLrHLCesrYQeLFEN3XWqtzgug...5JkLh48hmSy2Vocb8Q1ZmVRFSQE6pKeyXuZTkTt2EgzjyyZw14xbJEQeSpMhQGMsjfy2JgnjmiZATtiTZUt9hdaNJ5oWr4DTthVH964jvSwCVZQRoyCX3KLi6i.png

Step-2

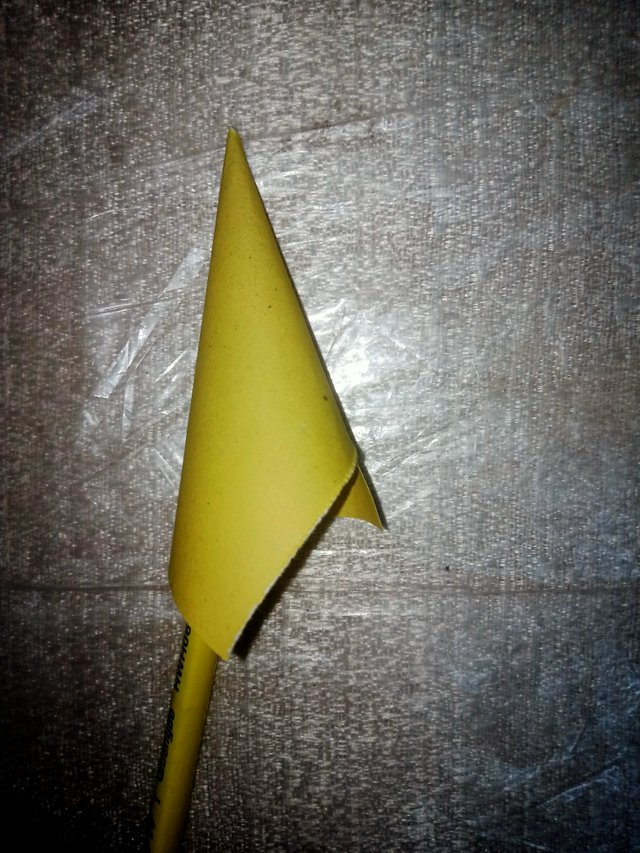
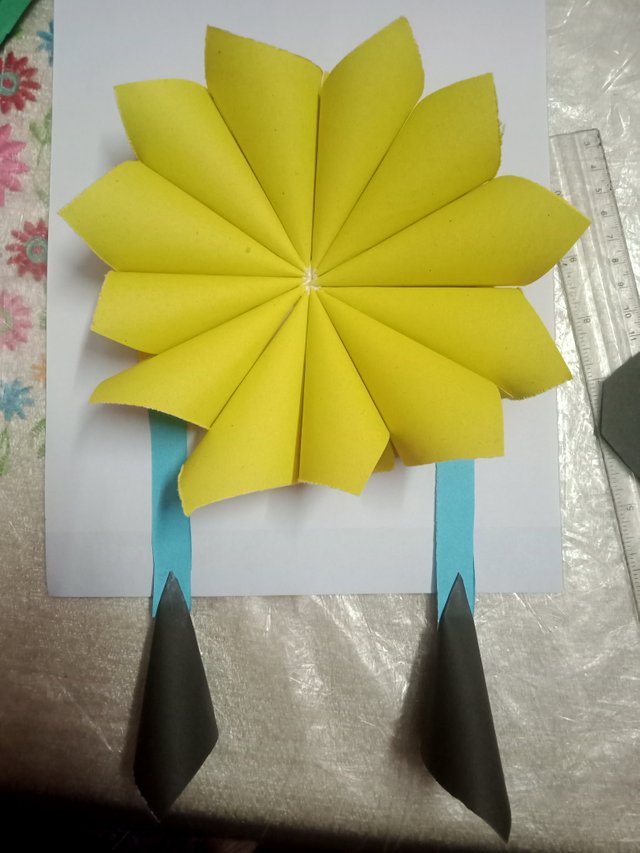
After completing step 1 come to step 2. Here a white paper put some amount of glue on it. Now step by step I cut the paper into pieces and use the scissors to eat those papers and make some type of ice cream. Then make one cone and place the cone head on the white paper dough. This completes this step.

IMG20240419103322.jpg

DiHLrjiPetHt6ciV9azim9NPHuTMQ59H51nYE8xqo83cHxoWjkEXJT9iFny5FDK6V87zhnX5kJcSGE6ahn1RouZuijdX8aHZSZuNzNLrHLCesrYQeLFEN3XWqtzgug...5JkLh48hmSy2Vocb8Q1ZmVRFSQE6pKeyXuZTkTt2EgzjyyZw14xbJEQeSpMhQGMsjfy2JgnjmiZATtiTZUt9hdaNJ5oWr4DTthVH964jvSwCVZQRoyCX3KLi6i.png

Step-3

After completing step 2, come to step 3Place the 12 cones that I made nicely. This completes step three.

IMG20240419105437.jpg

DiHLrjiPetHt6ciV9azim9NPHuTMQ59H51nYE8xqo83cHxoWjkEXJT9iFny5FDK6V87zhnX5kJcSGE6ahn1RouZuijdX8aHZSZuNzNLrHLCesrYQeLFEN3XWqtzgug...5JkLh48hmSy2Vocb8Q1ZmVRFSQE6pKeyXuZTkTt2EgzjyyZw14xbJEQeSpMhQGMsjfy2JgnjmiZATtiTZUt9hdaNJ5oWr4DTthVH964jvSwCVZQRoyCX3KLi6i.png

Step-4

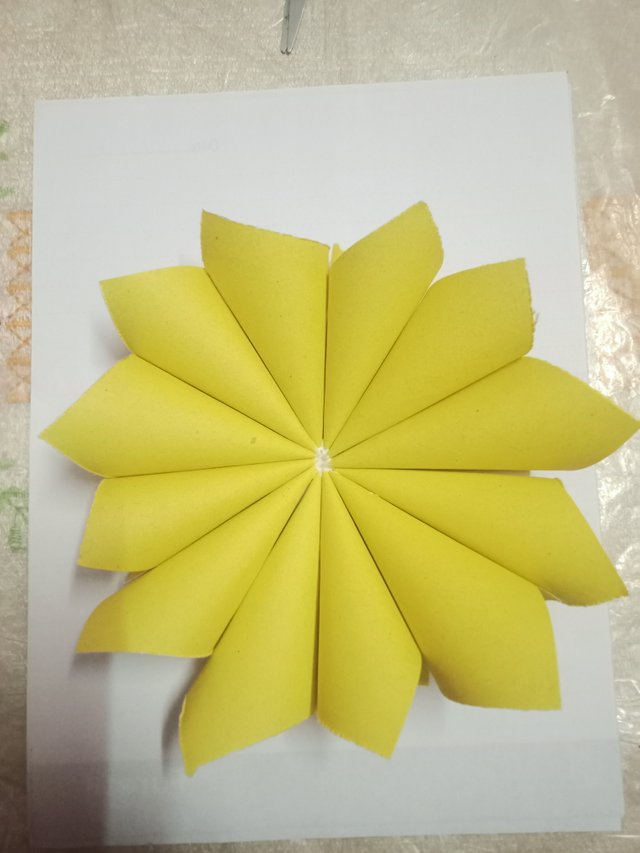
After completing step 3, come to step 4.
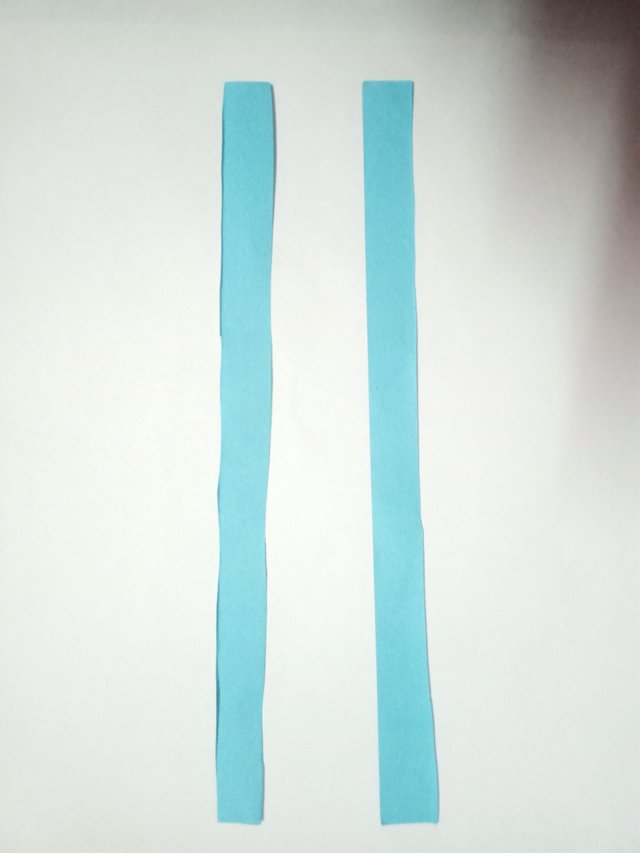
Now take the blue colored paper and cut two long pieces of the same size from that paper with scissors. This completes this step.

IMG20240419111714.jpg

DiHLrjiPetHt6ciV9azim9NPHuTMQ59H51nYE8xqo83cHxoWjkEXJT9iFny5FDK6V87zhnX5kJcSGE6ahn1RouZuijdX8aHZSZuNzNLrHLCesrYQeLFEN3XWqtzgug...5JkLh48hmSy2Vocb8Q1ZmVRFSQE6pKeyXuZTkTt2EgzjyyZw14xbJEQeSpMhQGMsjfy2JgnjmiZATtiTZUt9hdaNJ5oWr4DTthVH964jvSwCVZQRoyCX3KLi6i.png

Step-5

After completing step 4, come to step 5Now take the black colored paper and make two corners on this black colored paper like the yellow colored one and stick the two corners of the blue colored paper that I had cut down on the paper. Thus this step also ends.

IMG20240419111829.jpg

DiHLrjiPetHt6ciV9azim9NPHuTMQ59H51nYE8xqo83cHxoWjkEXJT9iFny5FDK6V87zhnX5kJcSGE6ahn1RouZuijdX8aHZSZuNzNLrHLCesrYQeLFEN3XWqtzgug...5JkLh48hmSy2Vocb8Q1ZmVRFSQE6pKeyXuZTkTt2EgzjyyZw14xbJEQeSpMhQGMsjfy2JgnjmiZATtiTZUt9hdaNJ5oWr4DTthVH964jvSwCVZQRoyCX3KLi6i.png

Step-6

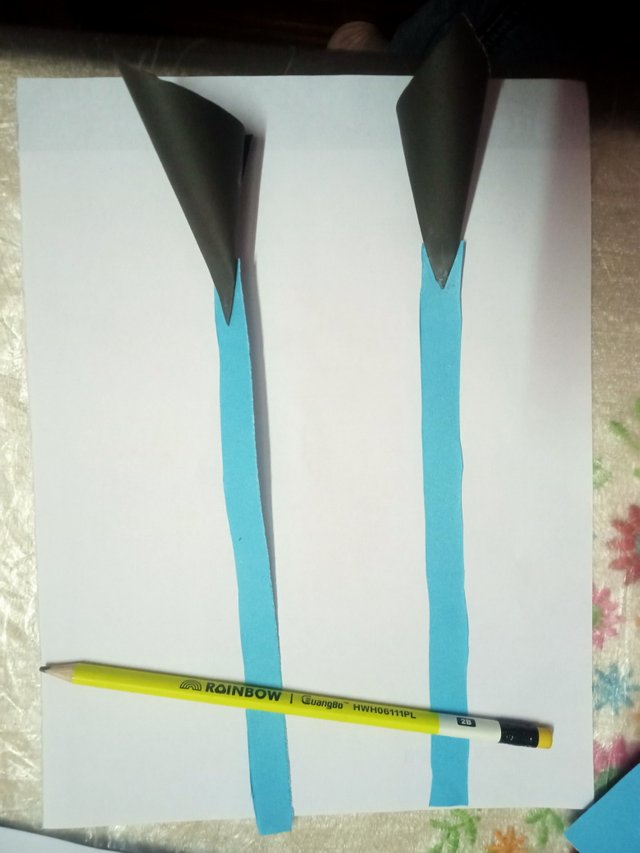
After completing step 5, come to step 6That is, I made a piece of white cloth and put the blue paper head on both sides with glue under the two corners. This completes this step.

IMG20240419112136.jpg

DiHLrjiPetHt6ciV9azim9NPHuTMQ59H51nYE8xqo83cHxoWjkEXJT9iFny5FDK6V87zhnX5kJcSGE6ahn1RouZuijdX8aHZSZuNzNLrHLCesrYQeLFEN3XWqtzgug...5JkLh48hmSy2Vocb8Q1ZmVRFSQE6pKeyXuZTkTt2EgzjyyZw14xbJEQeSpMhQGMsjfy2JgnjmiZATtiTZUt9hdaNJ5oWr4DTthVH964jvSwCVZQRoyCX3KLi6i.png

Step-7

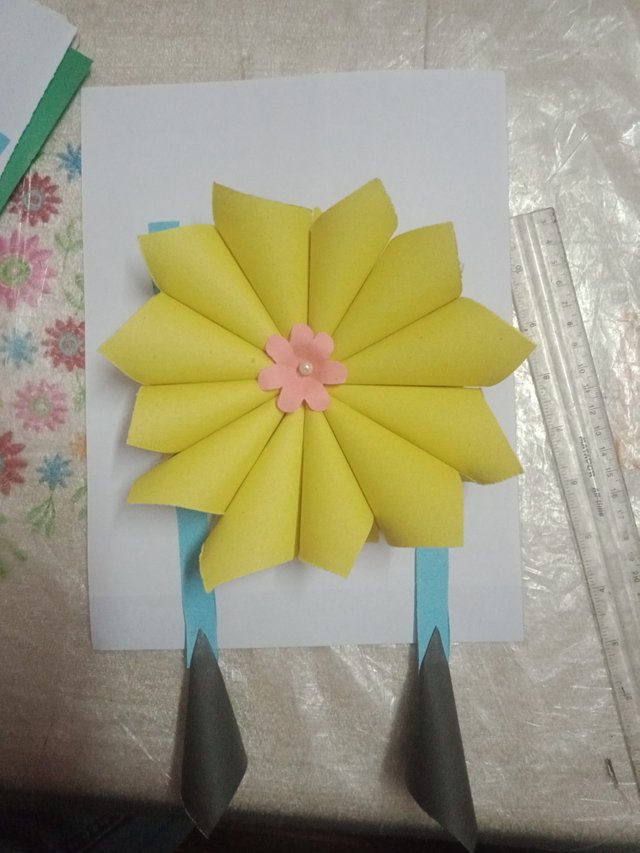
After completing step 7, come to step 8Now take this pink colored paper and cut the amount of paper from the pink colored paper with scissors and divide the paper into flower shape and cut the paper into flower shape with scissors. When the cut is finished, cut from the middle of the flower and attach it with glue, the flower looks a little puffy. Then glue the back of the flower and place it in the middle of the yellow color. This completes this step. The paper crafts I made today ended up being finished with Ore methods and mediums.

IMG20240419112348.jpgIMG20240428212327.jpg

DiHLrjiPetHt6ciV9azim9NPHuTMQ59H51nYE8xqo83cHxoWjkEXJT9iFny5FDK6V87zhnX5kJcSGE6ahn1RouZuijdX8aHZSZuNzNLrHLCesrYQeLFEN3XWqtzgug...5JkLh48hmSy2Vocb8Q1ZmVRFSQE6pKeyXuZTkTt2EgzjyyZw14xbJEQeSpMhQGMsjfy2JgnjmiZATtiTZUt9hdaNJ5oWr4DTthVH964jvSwCVZQRoyCX3KLi6i.png

Thank you reading my post
AB
Photography@isfatema
DeviceOppo A-12

Sort:  

Thank you, friend!
I'm @steem.history, who is steem witness.
Thank you for witnessvoting for me.
image.png
please click it!
image.png
(Go to https://steemit.com/~witnesses and type fbslo at the bottom of the page)

The weight is reduced because of the lack of Voting Power. If you vote for me as a witness, you can get my little vote.

 23 days ago 

Really so attractive and beautiful diy post. I like it. You share step by step. Thanks for sharing friend

 23 days ago 

Thank you for your comment.

Loading...

Coin Marketplace

STEEM 0.28
TRX 0.12
JST 0.033
BTC 69450.75
ETH 3678.92
USDT 1.00
SBD 3.81