How to Construct a Travel Chick Brooder
I wanted to share our most recent project because I frequently get questions through my Rooster Hooch blog about the best way to raise chicks. This projects is a travel brooder for our purposes, but it would work just fine as a standard brooder box for a couple of chicks or a transport cage for a larger bird.

I won't get into too many details about who Baby Maggie is, that is a story for another time, suffice to say she is a single little chick that does not have a momma hen or any siblings. Maggie is now my little companion. She has never known the company of anyone but humans, so when we decided to take a long weekend trip to visit family a few hundred miles away, there was no choice but to bring Maggie with us. Up to this point in her life, Maggie had lived in a plastic Sterilite storage bin, with her radiant heat brooder, covered with a towel. While sufficient for days in the living room and nights on a table beside my bed, she needed something safer and more secure for travel. Not just the ride in the truck, but also the days and nights we would be staying in someone else's home where there were curious pets to worry about. So for her safety, and my peace of mind, we started designing a travel brooder box for Baby Maggie.
I rolled around a few different ideas in my head as to the best way to accomplish the task at hand. I considered building a whole new cage out of wood and hardware cloth. While a structurally sound and visually attractive idea, it did not offer the protection from drafts that small chicks need and it promised to be much heavier to move around. I then considered modifying an existing small rabbit cage that we have to offer her draft protection, but this idea was full of small technical design issues that would need to be solved before it was viable. I finally settled on the idea of modifying the top to her existing plastic storage bin. It made sense for a number of reasons. One important reason being that Maggie was already accustomed to her bin and would feel safe in it. She had lived in it since she was just hours old. The locking handles meant that the existing lid to the bin would offer the security she needed. But most importantly, it was something that we could accomplish inside of the 2 days before we left on our trip. So...off to the workshop we went...
We started by using a small cut off wheel on the handheld Dremel tool and cut an opening in the lid. We cut along the existing insert edges of the lid so that we had an easy line to follow.

Once we had the opening cut out we used a bit of sandpaper to clean up the rough edges.

The next thing we needed to do was measure and cut a piece of hardware cloth big enough to cover the opening and overlap the plastic enough that we could secure it to the lid with wood strips. It would have been easier to cut the hardware cloth if we had a scrap piece large enough. Since we didn't, I pieced two scraps together with J clips. I used a pair of diagonal wire cutters to cut the 2 pieces of hardware cloth that we needed. I tried to cut it in such a way that there would be a clean edge so that there was nothing sharp left.
After the two pieces were cut and ready, I overlapped it one row for stability and J Clipped the 2 pieces together. Obviously when I measured I took into account the extra width I would need in the hardware cloth to accommodate the overlap. I love J clips. We use them on the farm a lot. Anytime we need to join 2 pieces of fencing on our cages, we use these. It can take a little bit to get the hang of using the tool, but I don't even remember how we functioned without it.

Once we had the piece of hardware cloth the size we needed it, we laid it on the plastic top to make sure the fit was right.

The next thing we needed was strips of wood. The hardware cloth we used has 1/2 inch openings, so 1.5 inch wide strips would cover 3 rows of openings on the hardware cloth, this allowed us to center our bolt holes side to side. As you can see from the picture, that is the perfect amount for the lid of this bin. We used some laminate flooring scraps that we had from our last floor install, but you could easily use pine trim or even wooden yard sticks. The width of the wood strip is not critical, it's easy to use what you have on hand.

First we cut 2 pieces of the 1.5 wide wood to the same length as the hardware cloth on the long side of the lid.

Once those 2 pieces were cut to length, we attached them to the lid. We took a piece of scrap lumber and put it under the edge of the lid so that it didn't flex too much when we drilled the holes. I marked 3 holes, evenly spaced along the length of the strip, being careful that we placed the holes so that we didn't hit the wire of the hardware cloth as we drilled. I firmly held everything in place so that it didn't shift while my husband drilled through the wood strip and all the way through the plastic lid.

After the holes were drilled, we placed the a bolt through the hole from the top side. The bolts we used were some we had on hand. They only needed to be long enough to go through the wood, hardware cloth and plastic with enough length left to add a washer and a nut. I held everything together so that it didn't shift and my husband added the washer and then the nut on the bolt and hand tightened it. Tightening it too much could crack the plastic, so no special tools were required.

We then repeated this process on the opposite side of the lid.

Once both long sides were installed on the lid, we measured the short sides. When we did this, we measured, cut and installed one end before measuring the other end to ensure it would be a tight fit when we were done.

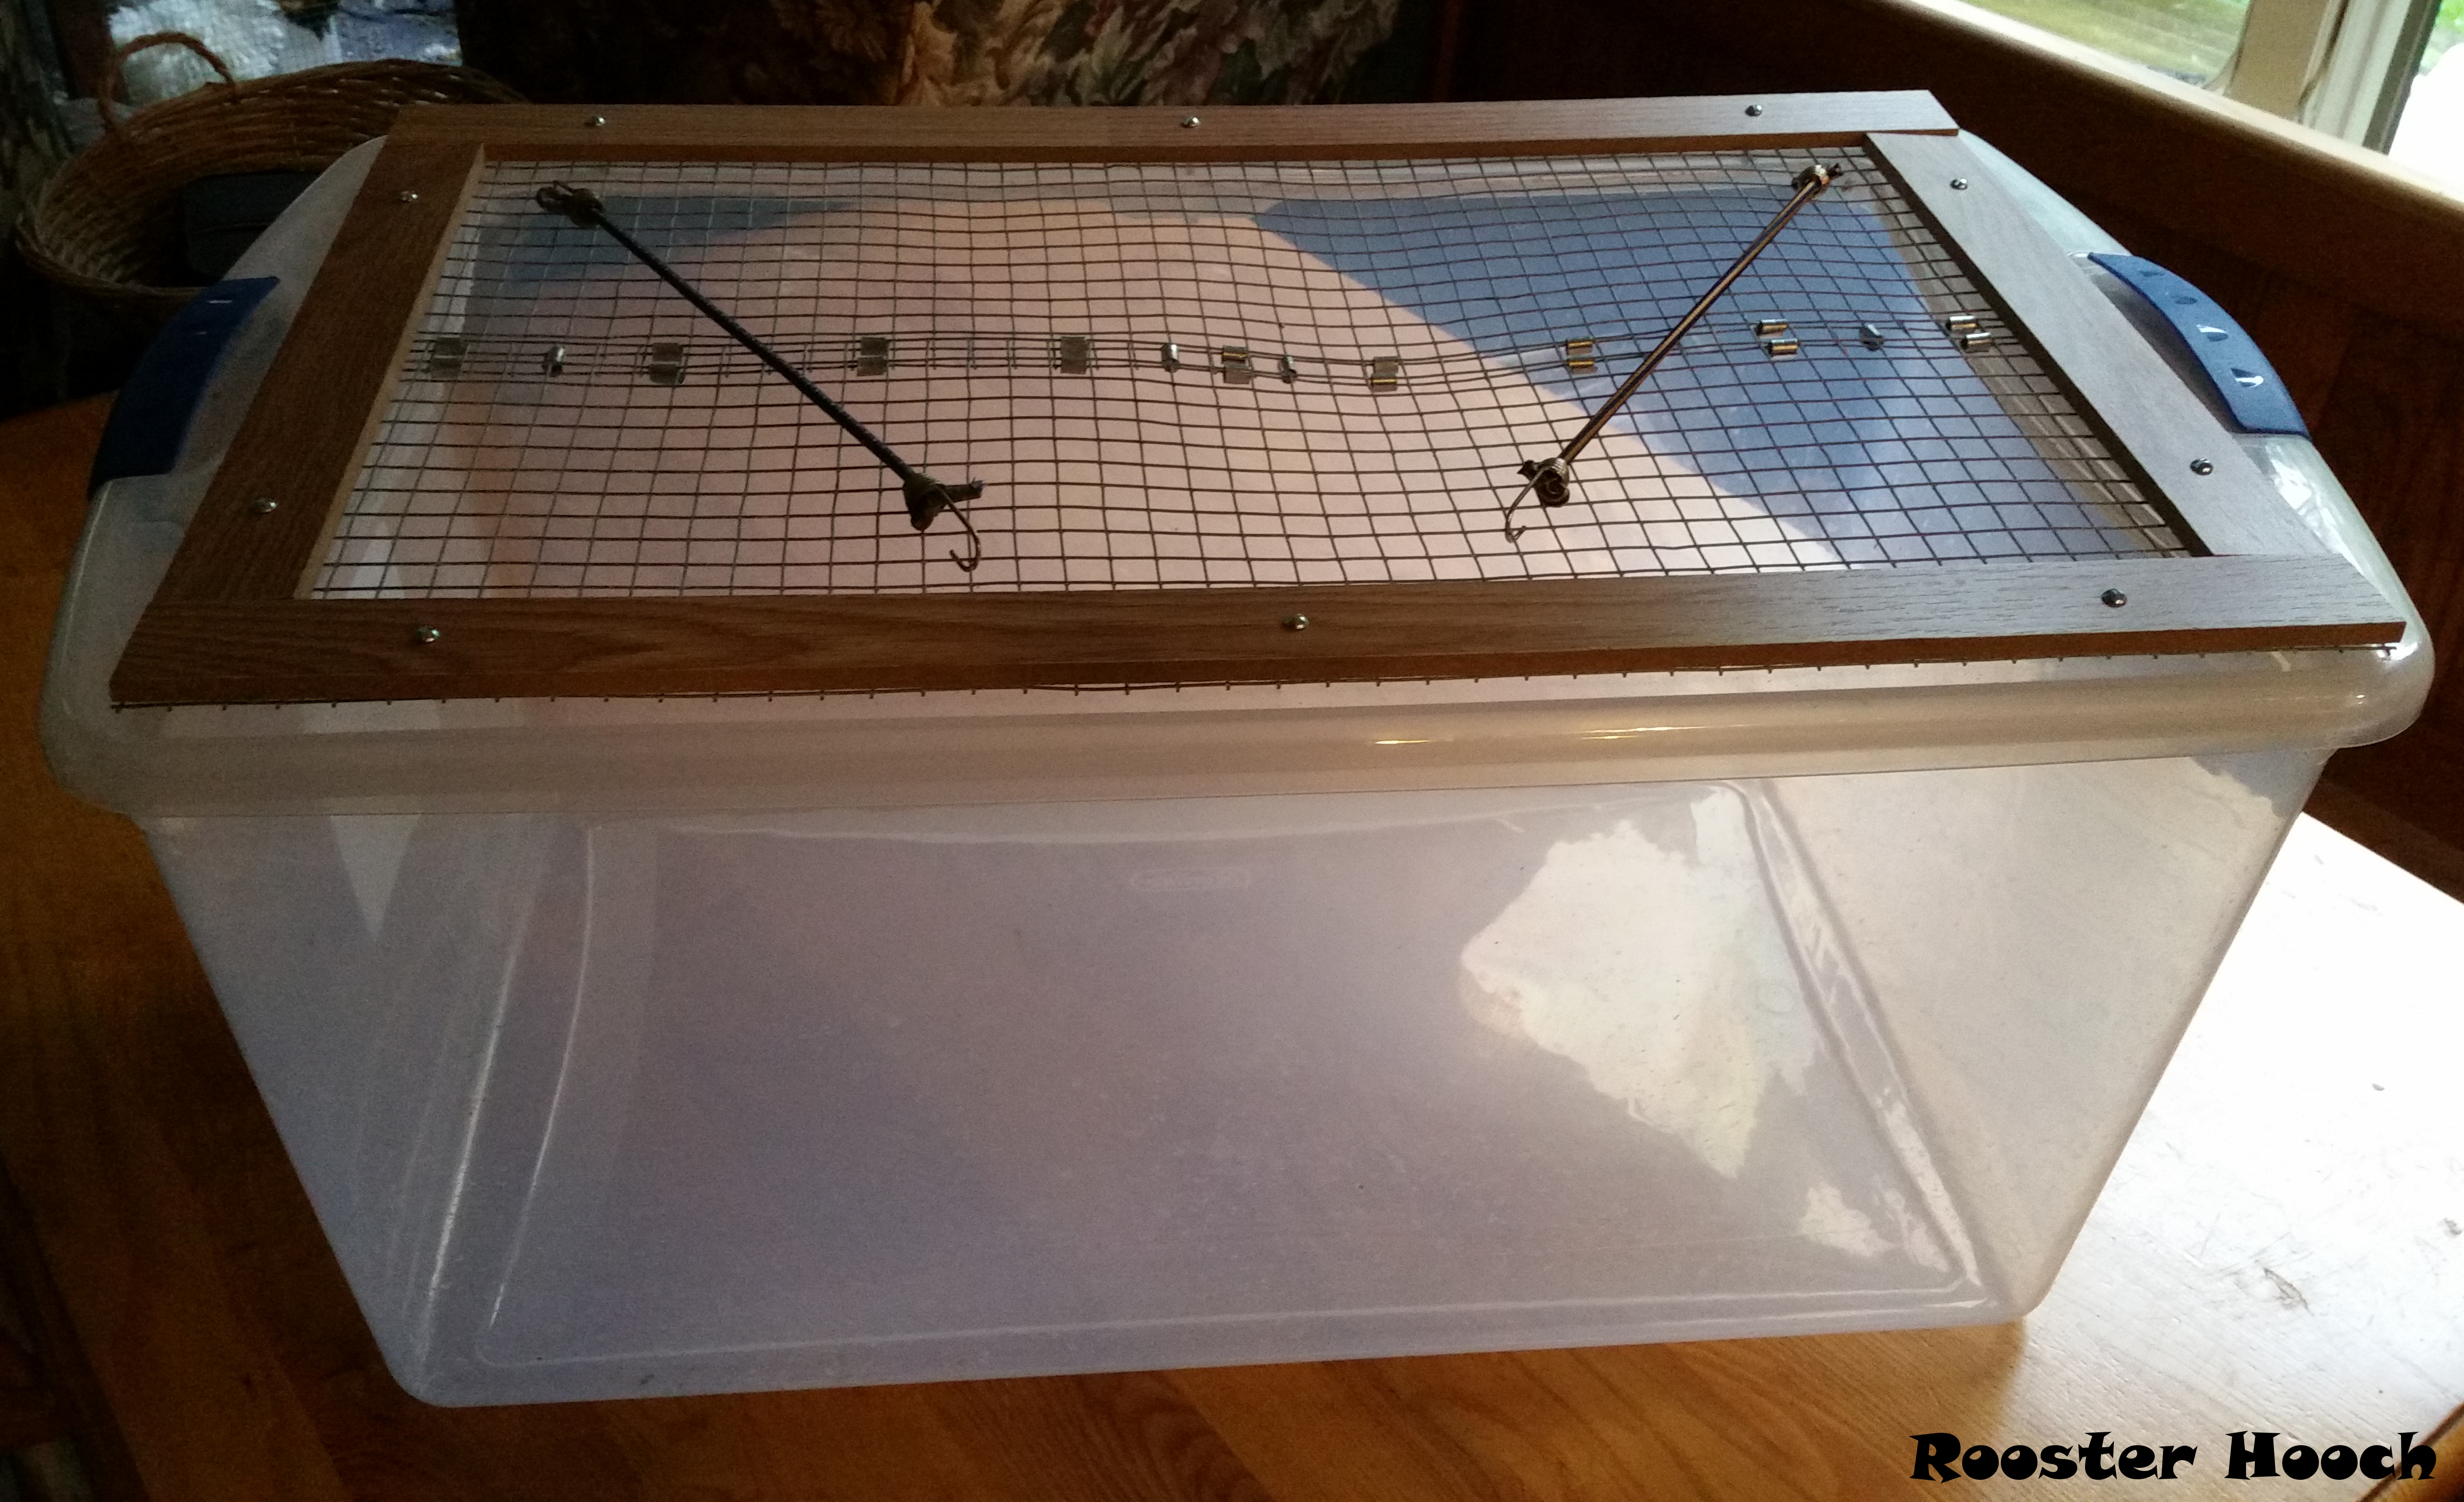
The short sides were drilled and bolted the same way as the long sides with one exception. Only 2 bolts were necessary on each short side. Once it was all together, Baby Maggie was ready for her first road trip! Here you can see her set up on the dresser beside the bed where we stayed.

The locking plastic handles were probably sufficient to deter curious pets and inquisitive young hands, but I added small bungee cords. They hooked underneath the handles and joined across the top of the bin for a little added protection.
If you would like to learn more about our farm Rooster Hooch Farm and Vineyard, the birds in our sanctuary and information on poultry in general, visit our website www.roosterhooch.com
Hi elsbeth-upton,
LEARN MORE: Join Curie on Discord chat and check the pinned notes (pushpin icon, upper right) for Curie Whitepaper, FAQ and most recent guidelines.
Congratulations @elsbeth-upton! You have completed some achievement on Steemit and have been rewarded with new badge(s) :
Click on the badge to view your Board of Honor.
If you no longer want to receive notifications, reply to this comment with the word
STOPTo support your work, I also upvoted your post!