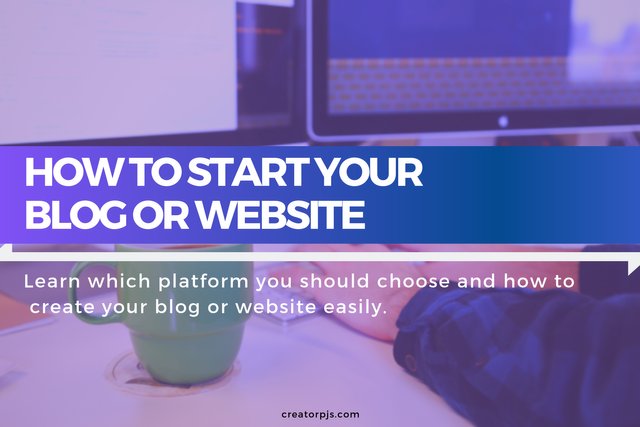
How to start a blog or a website ?
How to start a blog or a website? You would like to start your own website but you are wondering how to do it?
Nowadays, there are so many platforms where you can start your blog that makes it confusing.

When you are searching via Google, you'll probably find a lot of platforms offer you to start your blog or website for FREE.
For example, you will see some advertisements for Medium, Wordpress.com, Wix...
[myaccordion label_id="toc" label="Table of contents" open="true"]
[toc title="" title_tag="strong"]
[/myaccordion]
Before you start your blog or website
Before you jump on any platform, here some things you probably want to know.
All platforms might not be suitable for your project.
For example, some of them are more oriented "personal diary like" website, others can offer features like e-commerce (shopping website), allow to create a professional portal website, create a portfolio for your photography...
Also, you have to make the distinction between the free plan and paid plan based platforms.
They have major differences in features and flexibility.
Keep in mind that "free platform" means that you don't really own the content you are publishing on it.
Your content is owned by the company who runs the free platform.
- If you want to start your new brand, a serious project (portal for your business, profitable blog), I highly recommend you to opt for a paid service.
- If you just want to create a blog about your daily life without big ambitions, create a free blog is totally fine.
How to start a blog or a website
Now that you know the important points before starting a website, let's see how to start yours.1. Choose the name of your website

source: tenor.com
First, you must choose a name for your website.
Use words that give the main idea of your website.
Try to be simple and make it easy to remember.
Finally, check if the name you chose is not already used by another person.
If it's already taken, I recommend you to think for another name.
If you still want to use the same name, make sure that your concurrence's audience is irrelevant enough.
Because you certainly don't want to confuse your new audience and bring some indirect traffic to your concurrent.
2. Choose a platform
As I said earlier, you have a large choice of platforms for starting your blog or website.
First, you have to decide if you choose a free platform or pay for a web hosting service.
2a. Free platform
If you really want to start a free blog, here someplace:
- Wordpress.com: It's a platform that using the Wordpress CMS but with some restrictions (we will see more in detail what is Wordpress CMS below).
- Medium: It's a blog platform based on minimalistic design.
- Blogger.com: Also called Blogspot, it's a personal diary-like a platform owned by Google.
- Wix: A multipurpose platform to build pro like website.
- Weebly: Another multipurpose platform to build all kind of website.
- Jimdo: Lesser known platform, but allow you to build a homepage and e-commerce website.
2b. Host your website by paying a Web host
If you decide to subscribe to a web hosting service, you might be afraid to create a website from scratch.But don't worry, nowadays, it's really easy to install your blog or website by using software (framework) like Wordpress, Drupal, Joomla, Ghost or else.
I personally recommend you to use Wordpress, it's the more popular and powers 30% of websites on the internet.
2b.1 WordPress CMS (Content Management System)
The Wordpress (CMS) is a full Content Management System written in PHP (a programming language).
Basically, it allows you to create some posts, group them by categories or tags, upload some Media like images to illustrate your posts.
You can customize it like a truly professional blog/website by installing some templates and plugins.
Some of the web hosts already have Wordpress pre-installed.
But to get Wordpress, you can download the zip file from the official website :

2b.2 Buy a domain name
Before creating your website, you will need a domain name.A domain name is like a "postal address" but on the internet.
If you have difficulties to choose the right domain name, check my post: How to choose your domain name?
There's a lot of domain registrar services where you can buy your domain name like Godaddy, Name.com, Hostgator...
But I recommend you to buy yours on Namecheap :

2b.3 Choose a Host server
Once you have bought your domain name, you have to choose a Host server.There's a lot choice out there.
Most of the Webhost services are also selling domain name with their host plans, but I don't recommend you to buy that kind of products.
It will ties you to them.
And it will be very tedious if you are not happy with them and you want to switch to another service.
The best choice concerning Host Server is a Virtual Private Server (VPS), but it requires some technical knowledge to install it.
For those who just want a fast and operational Webhost, I generally recommend to my business clients :
They are very reliable, they will prevent you from hackers and security attacks that other popular web hosts don't (ex: Godaddy).But for flexibility, if you can, I highly recommend you to go for a VPS like :

The VPS allows you to install many websites on one server for the same subscription without paying extra money.
And what is interesting is that you can add your own software, scripts to automate your business...
2b.4 Point your domain to your web host
At this point, your domain name and the web host are not linked yet.
You will have to point your domain to your web host.
It will redirect your domain name to the web host when someone is typing it on a browser (ex: Chrome).
Technically, you will have to set your DNS records from your Domain registrar account (ex: Namecheap).
- Delete the current DNS records
- Add 2 Type A record with the host field as "@" and "www". Then value as the IP address given by your Web host.

2b.4 Install Wordpress
If your host server already has Wordpress pre-installed you will not have to install it (you can skip this step).For those who need to install it:
2b.4.1 Install a database
First, you will need a database to store Wordpress' data.
For that, go into your Web host account management panel.
You will generally find a menu with PhpMyAdmin.

- Create a database and a user and password.
2b.4.2 Upload Wordpress on your server
Second, you will need to copy all the files from the WordPress zip file downloaded in 2b.1 and send them to your Web host.To do that, you will need an FTP client program (ex: Filezilla).
- Install Filezilla on your computer.
- Open Filezilla and add a "New Site".
- Enter your FTP credentials (Host, Port, User, Password) you can find on your Web host account.

- Click connect.
- Unzip the WordPress zip file on your computer.
- Select all files (index.php, wp-admin, wp-content, wp-includes...) inside the WordPress folder.
- Drag them to your Filezilla FTP client, directly under your server's root directory.

It might take a few minutes to upload all the files.
2b.4.3 Installing Wordpress from your browser
When you access your domain name from your browser, you should see a Wordpress installation page who ask you to select a language.
- Select your language (ex: English).
- Fill the information for the database that you have created in 2b.4.1: Database name, Username, and Password

After you submitted the information, you will be asked to set the name of your website and login/password for your website.
- Choose the name of your website and login/password for the administration dashboard (backend) of your website.
3. Write your first blog post
When your website is online, you can start to write your first blog post.- For that, go back to your WordPress administration dashboard.
You will be able to log in and access to your administration dashboard from it.
- Go to Post, Add New, and start to write!

This post contains some affiliate links. An affiliate link means that I may earn a little referral commission if you purchase through my link. It can give you a discount and won't cost you extra fees. You are totally free to use it or not. Thank you for your understanding and support my blog.

 Posted from my blog (Creator in pyjamas), check the original article here : https://www.creatorpjs.com/how-to-start-a-blog-website.html