La scimmia appesa al filo #1 (ITA\ENG)
ITA VERSION
(English version follows)
Ciao ragazzi,
partiamo con una nuova avventura in questo mondo accantonato per troppo tempo!
Oggi partiamo con una serie di post dove presenterò la mia "arte" ovvero quadri realizzato con chiodi e fili colorati.. più difficile da spiegare che da realizzare forse, anzi no anche la realizzazione richiede parecchia manualità ma soprattutto pazienza :).
Partiamo da un quadro che ho incominciato da poco, quadro per il mio amico Frà.
Parlando con lui abbiamo scelto l'immagine, ovvero una scimmietta un pò allucinata :), la scelta è caduta su questa perchè gli ricorda i suoi primi passi sul web più precisamente da Banano.
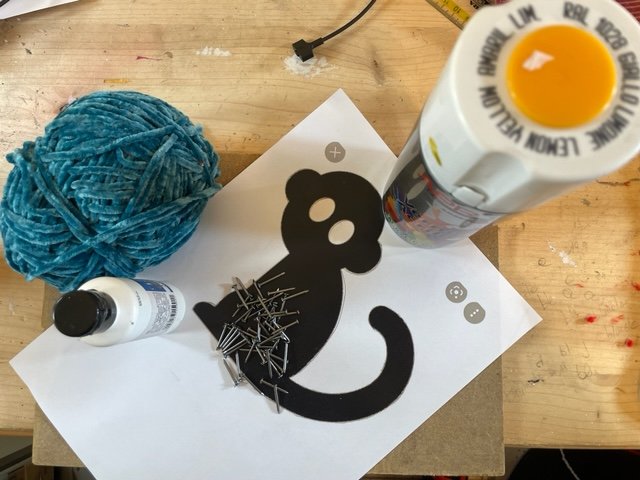
Per procedere alla lavorazione ho stampato l'immagine su un foglio bianco (immagine presa da web) in modo da poterla ricalcare sulla tavola che utilizzeremo per il quadro, procediamo a STEP partendo dai materiali utilizzati:
MATERIALE:
- Tavola in legno 29 cm x 22 cm
- Chiodi
- Spago Verde/Blu
- Vernice Arancione
- Vernice protettiva Lucida
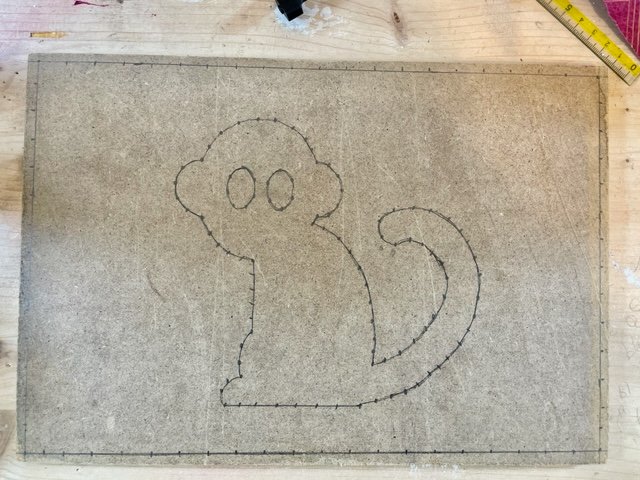
STEP 1
- Il primo passo è quello di riprodurre l'immagine sulla tavoletta in legno e per questa operazione mi sono aiutato con un foglio di cartacarbone in modo da poter ricalcare perfettamente l'immagine.
Dove posizionare l'immagine va a gusti e in questo caso l'ho centrata nella tavola. - Oltre al disegno della scimmia ho tracciato una cornice stando a mezzo centimetro dal bordo della tavola, stare troppo vicino al bordo si rischia di romperla una volta che procederemo con i chiodi, stare a mezzo centimetro è più che sufficiente per salvaguardare la tavola.
- Una volta ottenuto tutti i nostri tracciati iniziamo a fare dei puntini a matita sul disegno e cornice stando a un centimetro circa tra un punto all'altro, questi ci servono per tracciare dove verranno piantati i chiodi in modo da averli più o meno equidistanti tra di loro.
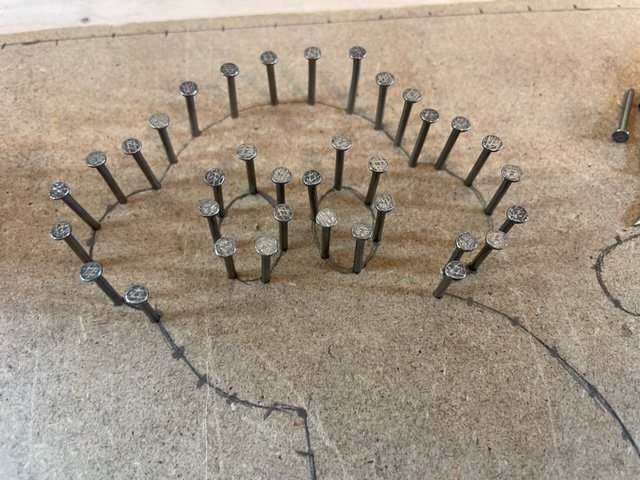
STEP 2
Una volta finito con la matita è ora di impugnare il martello e iniziare a piantare un chiodo su ogni punto a matita realizzato precedentemente.
Per questa operazione state molto attenti alle dita in caso vogliate provare a replicare il quadro!
Io sto ancora piangendo per il mio pollice hahaha.
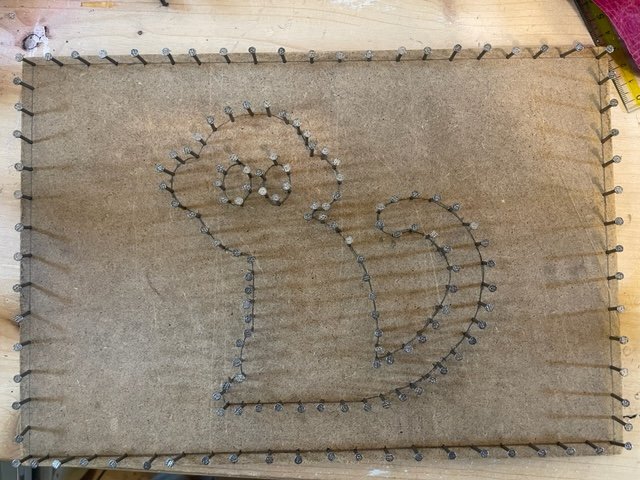
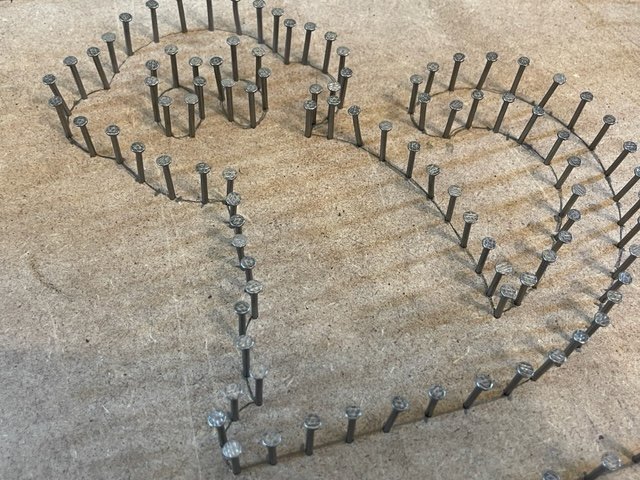
Ecco la foto di come è il lavoro finito con i chiodi.
STEP 3
Finito con i chiodi diamo una base di colore al quadro, io ho scelto il giallo, parliamo di scimmie e quindi ho optato per un bel giallo banana :), diamo una prima mano e poi in caso sia necessario una volta asciugato si può dare una seconda verniciata stando attenti soprattutto alla cornice dal momento che l'interno verrà quasi ricoperto completamente dai fili.
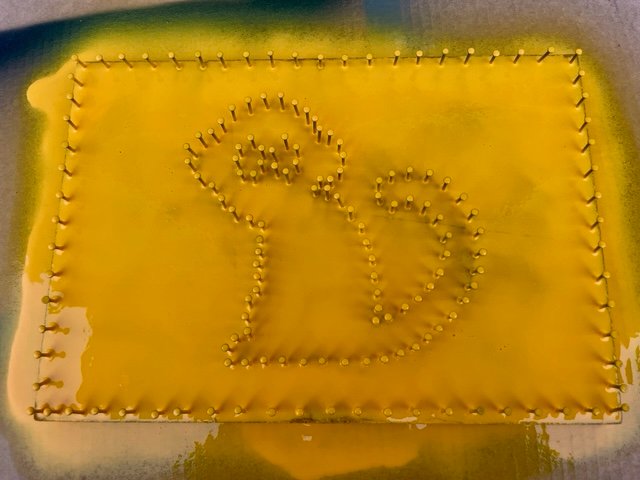
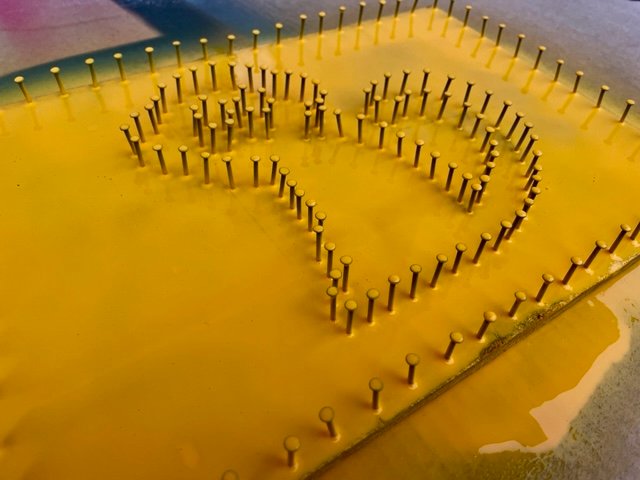
Ecco la nostra scimmia riverniciata di giallo.
Per il momento ci fermiamo qui! e nei prossimi giorni vi mostrerò gli ultimi passaggi da svolgere e il lavoro finito!
Questi tipi di lavoro richiedono molto tempo, passaggi molto lunghi e tempistiche da rispettare con la vernice ma il risultato finale, salvo errori, è sempre apprezzabile o meglio chi ha visto o ricevuto un mio lavoro è sempre rimasto entusiasta... e di conseguenza io felice! :)
Ciao ragazzi, a presto!.
Le foto sono di proprietà dell'autore.
ENG VERSION
Hello guys,
let's start with a new adventure in this world set aside for too long!
Today we start with a series of posts where I will present my "art" or paintings made with nails and coloured threads .. more difficult to explain than to realize perhaps, indeed not even the realization requires a lot of manual skills but above all patience :).
Let's start with a painting that I just started, a painting for my friend Frà.
Speaking with him we chose the image, which is a little bit hallucinated monkey :), the choice fell on this one because it reminds him of his first steps on the web more precisely from Banano.
To proceed with the processing I printed the image on a white sheet (image taken from the web) so that it can be traced on the table that we will use for the painting, let's proceed to STEP starting from the materials used:
** MATERIAL: **
- Wooden board 29 cm x 22 cm
- Nails
- Green / Blue Twine
- Orange paint
- Glossy protective varnish
STEP 1
- The first step is to reproduce the image on the wooden board and for this operation, I helped myself with a sheet of carbon paper to perfectly trace the image.
Where to place the image goes to taste and in this case, I centred it on the table. - In addition to the drawing of the monkey I drew a frame standing half a centimetre from the edge of the board, staying too close to the edge could break it once we proceed with the nails, staying half a centimetre is more than enough to safeguard the board.
- Once we have all our traces, we begin to make pencil dots on the drawing and frame, staying at about one centimetre between one point to another, we need to trace where the nails will be planted to have them more or less equidistant between of them.
STEP 2
Once you're done with the pencil it's time to grab the hammer and start driving a nail into each pencil point you made earlier.
** For this operation, be very careful with your fingers in case you want to try to replicate the painting!
I'm still crying for my thumb hahaha. **
Here is the photo of what the finished work with nails looks like.
STEP 3
Finished with the nails we give a base of colour to the painting, I chose the yellow, we are talking about monkeys and then I opted for a nice banana yellow :), we give the first coat and then if it is necessary, once dried, we can give a second painted paying particular attention to the frame since the inside will be almost completely covered by the wires.
Here is our monkey repainted in yellow.
For the moment we stop here! and in the next few days, I will show you the last steps to be carried out and the finished work!
These types of work require a lot of time, very long steps and timing to respect with the paint but the final result, except for errors, is always appreciable or rather those who have seen or received my work have always been enthusiastic ... and consequently I happy! :)
Hi guys, see you soon !.
The photos are the property of the author.
Wow, un altro tuo bel lavoro, complimenti, caro amico mio, hai proprio le mani d'oro...
Grazie mad... manii d'oro proprio no ma ci ho preso decisamente la mano quando non me le martello :)