CREATING A TIC-TAC-TOE GAME WITH JAVA.
In the previous tutorial, where we created a simple text pad, we learnt how to set up the IDE, create the main class and also create the GUI and in case you missed it, you can check it out HERE.
So today we would be creating our own tic-tac-toe game using Java.
REQUIREMENTS.
A laptop with netbeans installed on it.
BASIC STARTING STEPS.
- Set up your IDE.
- Create a new main class and name it "TicTacToe"
- Create a gui under the main class and name it "tictactoeGUI"
- Connect your gui to the main class.
N.B: all the steps written above has been described in details in the first tutorial.
SETTING UP THE GUI LAYOUT.
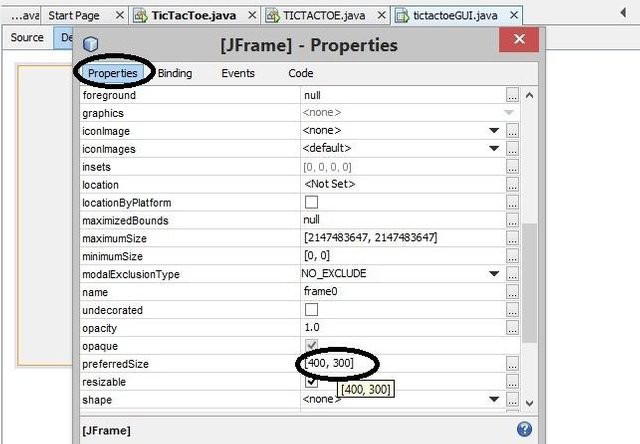
1a. Resize the gui space, I would be using 500x500 and you can easily change it by right clicking the layout and clicking “properties”.
1b. On the properties option, scroll down and look for preferred size and adjust as shown in the picture above, press enter after adjusting.
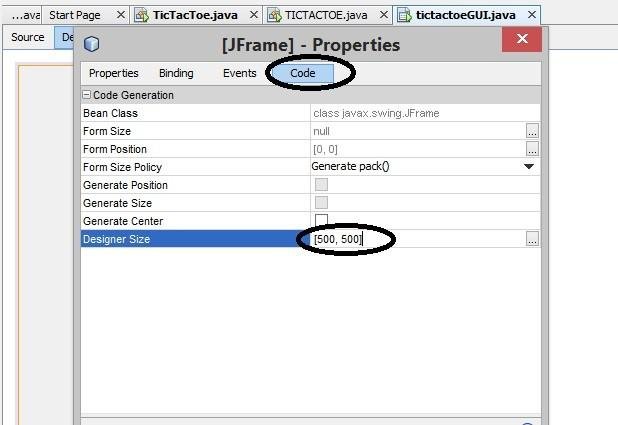
1c. Also at the top, you would see four icons, click the last one named “code” and change the “designer size” as shown below and don’t forget to save it by clicking enter.
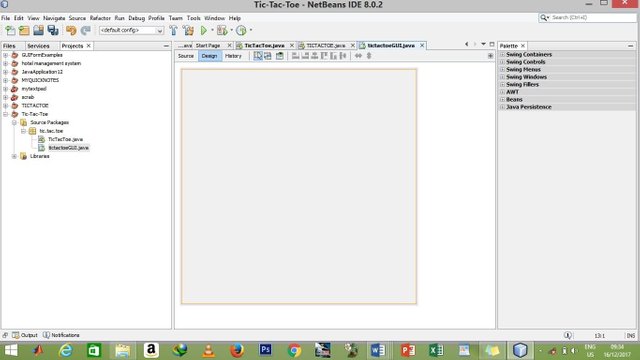
1d. Then you can close the page, the layout should look like the picture below.
Now that the space is ready, right click it and set layout as “borderlayout”.
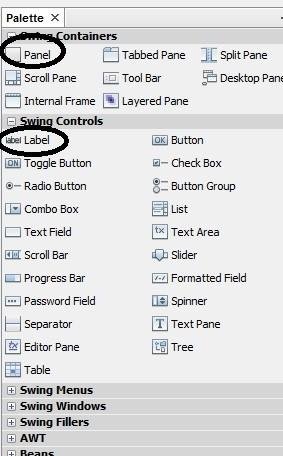
Add a panel. You can do this by clicking the first icon from the group of six icons on the right side of the page as shown below.
Add a “jlabel” on the top of the layout. Do this by clicking the second group of six icons and click the “label” as shown in the picture above in 3.
Rename the “jlabel” by right-clicking it, click edit text and name it “MY TIC-TAC-TOE GAME.”
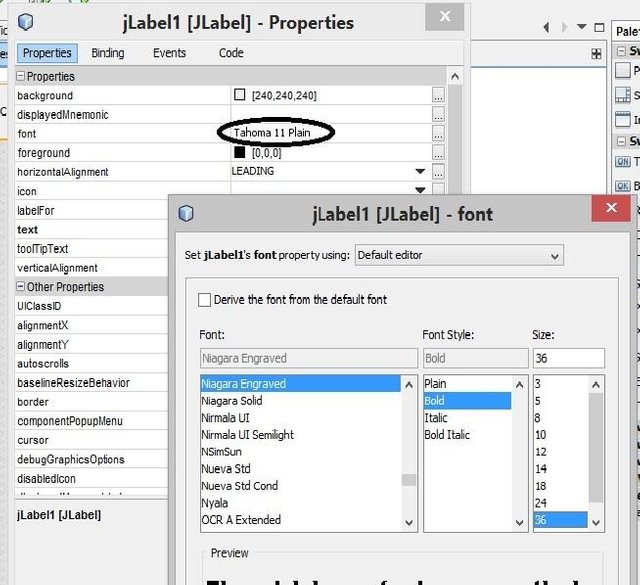
Resize and make the text attractive by right-clicking, selecting properties and changing the font like the picture below.
Add another panel to fit the remaining space on the layout like we did in the third step then right click the panel and set layout to grid layout.
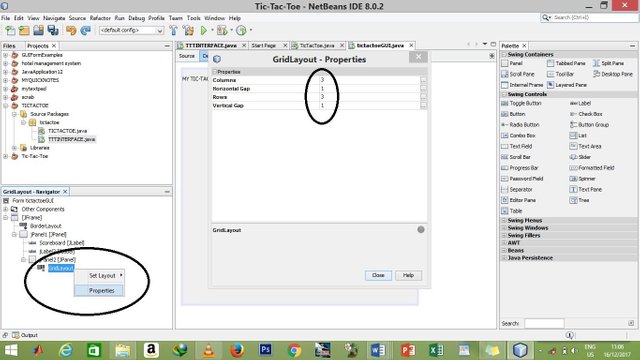
Now we want to create the tic-tac toe board. We would be creating a 3x3 grid. Right click the grid layout icon and click properties, the edit it as show in the picture below.
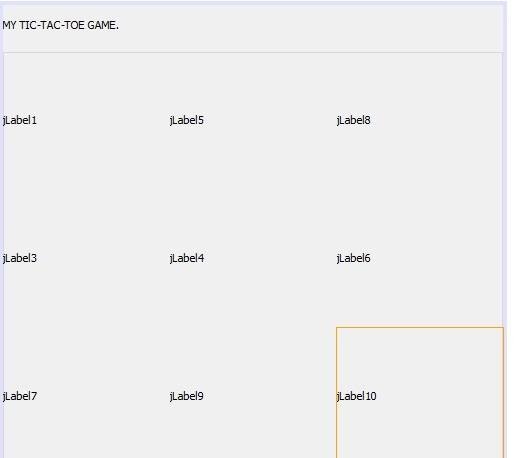
- Notice that even after saving by pressing enter, the grid is still invisible, to make this visible, drag 9 jlabels like we did in step 4 into the grid. As shown below, the result should look like this.
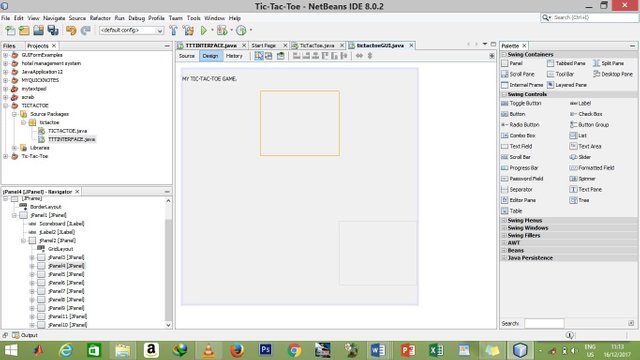
- Our next step is to add a panel to each grid, then delete the next grid.
N.B: once you add a jpanel to the first grid, the number of grids automatically increases, so to balance it up, delete the next grid once you add a jpanel. At the end of this step the result should look like this.
Next thing to do is set the layout of all the panels to border layout like we did in step 3.
Add buttons from the second group of icons on the right hand side of the IDE.
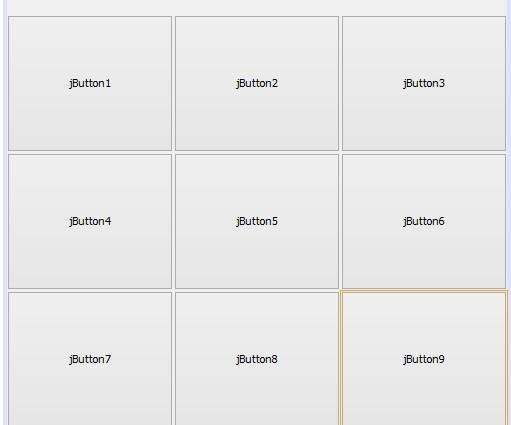
Your result should look like the picture below. Make sure the buttons are arranged numerically as shown in the picture.
- Clear the names on the button now. By right clicking each button and clicking edit text, then clear it.
MAKING THE APPLICATION WORK.
In this step we are going to be determining:
- When it’s the turn of a player
- How to reset the game.
- What happens when a player wins?
- How to win
- What each button would do
I would be using the numbers on the side of the IDE to ensure better understanding.
TO DETERMINE THE PLAYER’S TURN.
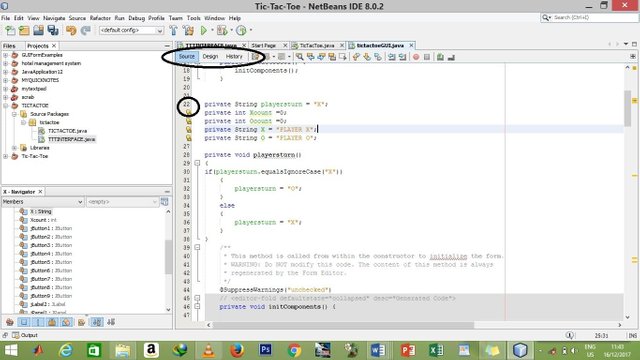
Click on source at the top as shown below, it would take you to a new environment.
Add the following lines of code from line “22” as shown in the picture above.
“_private String playersturn = "X";
private String X = "PLAYER X";
private String O = "PLAYER O";
private void playersturn()
{
if(playersturn.equalsIgnoreCase("X"))
{
playersturn = "O";
}
else
{
playersturn = "X";
}
}_”
These code are used to declare the variables of the players and also determine whose turn it is.
RESETTING THE GAME.
To reset the game, we would love to clear the the grid to prepare for a new round. To do this simply add these lines of code to line “41”
“ _private void resetgame()
{
jButton1.setText("");
jButton2.setText("");
jButton3.setText("");
jButton4.setText("");
jButton5.setText("");
jButton6.setText("");
jButton7.setText("");
jButton8.setText("");
jButton9.setText("");
} _“
WHAT HAPPENS WHEN PLAYER X WINS?
When a player wins, we want a message to display showing that the player has won and immediately after that the game would automatically reset itself. To implement this, add these lines of code to line “56”
FOR PLAYER X.
“ _private void playerXwins()
{
JOptionPane.showMessageDialog(this, "CONGRATS! \n PLAYER X WINS!", "WINNER",
JOptionPane.INFORMATION_MESSAGE);
resetgame();
} _”
FOR PLAYER O TOO.
To implement the same thing, add the same codes above and change “X” to “O”
Be sure to add imports for JOptionpane by clicking the yellow bulb and selecting the first option.
DETERMINING HOW TO WIN.
In this game there are only eight possible ways of winning.
According to our grid layout in the design, you can win when you have the same letter on
Grid 1, grid 2, grid 3
Grid 1, grid 4, grid 7
Grid 1, grid 5, grid 9
Grid 2, grid 5, grid 8
Grid 3, grid 6, grid 9
Grid 4, grid 5, grid 6
Grid 7, grid 8, grid 9
Grid 3, grid 5, grid 7
To implement the winning conditions, add these lines of code on line “73”.
“ _private void winner()
{
String jbutton1 = jButton1.getText();
String jbutton2 = jButton2.getText();
String jbutton3 = jButton3.getText();
String jbutton4 = jButton4.getText();
String jbutton5 = jButton5.getText();
String jbutton6 = jButton6.getText();
String jbutton7 = jButton7.getText();
String jbutton8 = jButton8.getText();
String jbutton9 = jButton9.getText(); _”
FOR PLAYER X.
The winning condition for Player X is that one of all the possible ways for winning must be found. To implement this, add the following lines of code immediately after the code above.
“_if(jbutton1=="X" && jbutton2 == "X" && jbutton3 == "X")
{
playerXwins();
resetgame();
}
if(jbutton4=="X" && jbutton5 == "X" && jbutton6 == "X")
{
playerXwins();
resetgame();
}
if(jbutton7=="X" && jbutton8 == "X" && jbutton9 == "X")
{
playerXwins();
resetgame();
}
if(jbutton1 == "X" && jbutton5 == "X" && jbutton9 == "X")
{
playerXwins();
resetgame();
}
if(jbutton2=="X" && jbutton5 == "X" && jbutton8 == "X")
{
playerXwins();
resetgame();
}
if(jbutton3=="X" && jbutton6 == "X" && jbutton9 == "X")
{
playerXwins();
resetgame();
}
if(jbutton1=="X" && jbutton4 == "X" && jbutton7 == "X")
{
playerXwins();
resetgame();
}
if(jbutton1=="X" && jbutton5 == "X" && jbutton9 == "X")
{
playerXwins();
resetgame();
}
if(jbutton3=="X" && jbutton5 == "X" && jbutton7== "X")
{
playerXwins();
resetgame();
} _“
FOR PLAYER O.
Repeat the code above and wherever you see “X” replace with “O” and then close the whole code by adding a curly bracket to the next line.
i.e on the next line add “}”.
MAKING THE CODE WORK WITH THE DESIGN.
- Go back to the design by clicking design at the top like we did before.
- For each jbutton, right-click, then select “event” then “action” then “actionperformed” as shown in the picture below. It would bring you back to a space on the source page.
- For the first button, add these lines of code
“_jButton1.setText(playersturn);
playersturn();
winner(); _“
Repeat the three instructions for all the buttons (grids) and when adding the lines of code, make sure to keep changing the first line of code to correspond with the number of grid.
I.e next line of code would be jbutton2.setT....,jbutton3.set...
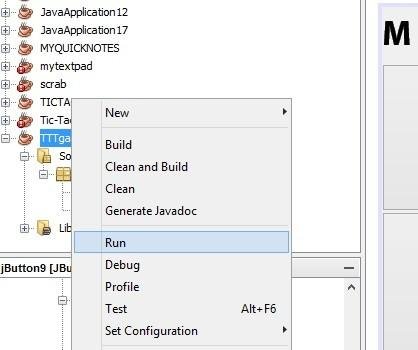
Now save all your hard work and proceed to run the program as shown in the picture below.
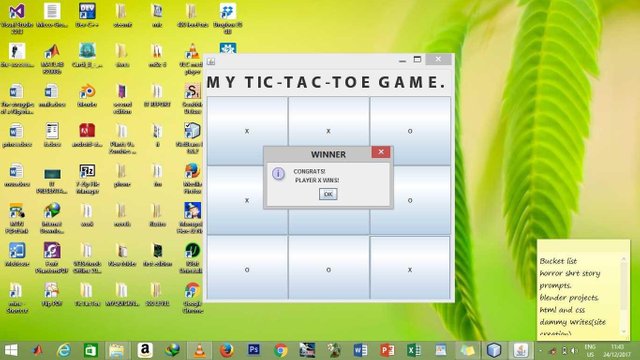
Test the program, see what happens when you play the game and the message it displays when a player wins.
The video below shows me testing the game and doing a quick run-down of what the tutorial entailed.
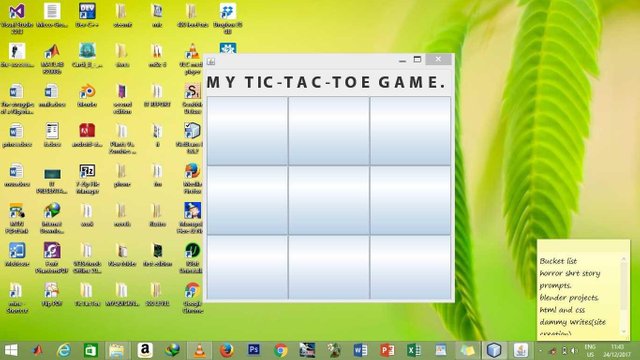
The pictures below shows me working on the tutorial. I hope you had as much fun as I had doing this tutorial.
Hurray!!! You just completed your second java application with me. Enjoy your new game!!!
NOTE:
All the pictures used in this tutorial are screenshots from my laptop and all the editing I did on the pictures were done using paint.
All the codes used in this tutorial were copied from my netbeans IDE and pasted here.
This post is original and 100% authored by me.




You did great...i love java but not easy to code in java..count yourself special
Thank you @omodara for the compliment. You just have to put your mind to it that's all.
Thanks,i will give it a trial when im done with html and css
Nice work @soorefunmi
Finally u decided not to reach me programming
Lol, I think you can start from here too
Here goes my girl... 👏👏👏👏👏
My sweet programmer
Awwnn, thank you @ttopswag
Your girl....young man be careful
😒😒😒
Our girl .... Sorry
😎😎😎😎
You've got skills @soorefunmi. Nice 101 session on java.
Thank you very much @rickie
Congratulations @soorefunmi, this post is the most rewarded post (based on pending payouts) in the last 12 hours written by a Newbie account holder (accounts that hold between 0.01 and 0.1 Mega Vests). The total number of posts by newbie account holders during this period was 3861 and the total pending payments to posts in this category was $2026.36. To see the full list of highest paid posts across all accounts categories, click here.
If you do not wish to receive these messages in future, please reply stop to this comment.