Making AirCrete For The First Time. Alternative Building Material! (Video Added To Bottom Of Post!)
We are planning on building with AirCrete, so we made our first batch as a test batch to see if we got the recipe right. Yes, I did say recipe, it has to have everything just right to have the strength to build with. So we are in that process now. Here is the equipment we used and the "recipe" we used. We got most of the things we needed to make AirCrete from this website.
http://www.domegaia.com/tools.html
They have the Little Dragon, the foam generator, and the mixer you will need and also other things you might need and lots of information on AirCrete. They will also give you some ideas on which soap to use to make AirCrete and places to get things you might need. If you go over there and order something tell them in the memo that Basics To Living sent you.
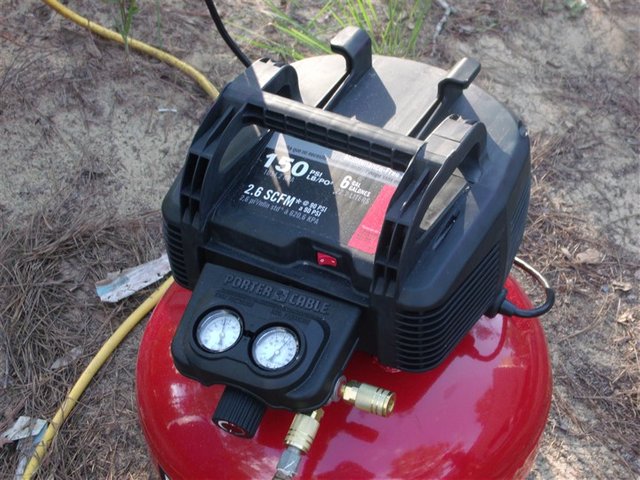
You will need a compressor to make the foam with the Little Dragon Foam Generator. This is the compressor we used, as the bigger one we had took a crap on us a few days before when working on putting trim in the bathroom of the small house.
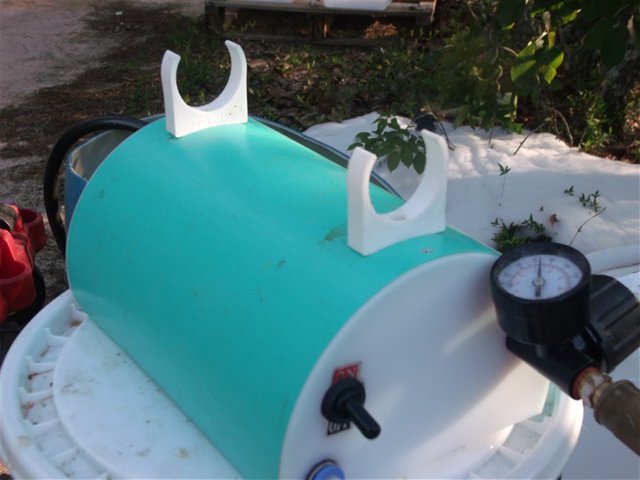
Here is the Little Dragon we purchased from Domegaia. There are several options available on that website. You can order the kit and put it together yourself and save some money.

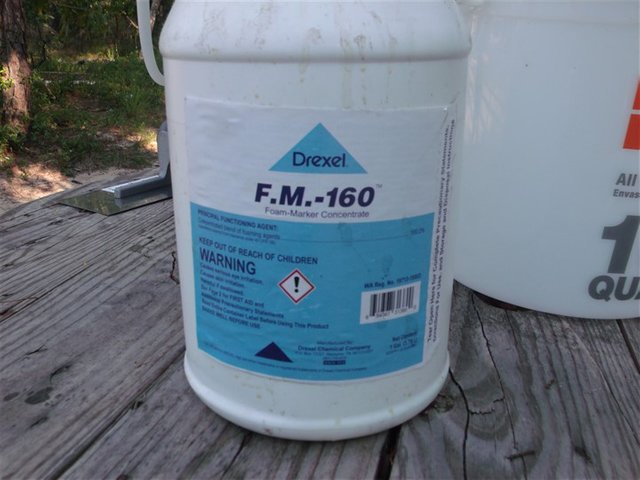
You will need a 5-gallon bucket to snap the lid on and you will have to get the soap you want to use to make the foam. We used Drexel, mixed 4 ounces to 5-gallons of water.
You can experiment with other soap. We have tried Dawn dishwashing liquid and also Joy. We found that Seventh Generation dishwashing liquid really works well also. Just really find something that works for you. It takes 2 cups of those in 5-gallons of water to do what 4 ounces of Drexel will do in 5-gallons of water.
Hook up to the compressor and you are ready to make foam for AirCrete. We ordered the Drexel from Rural King online, as we do not have on in our area. There are other soaps you can use and there will be a list of them on the Domegaia website.
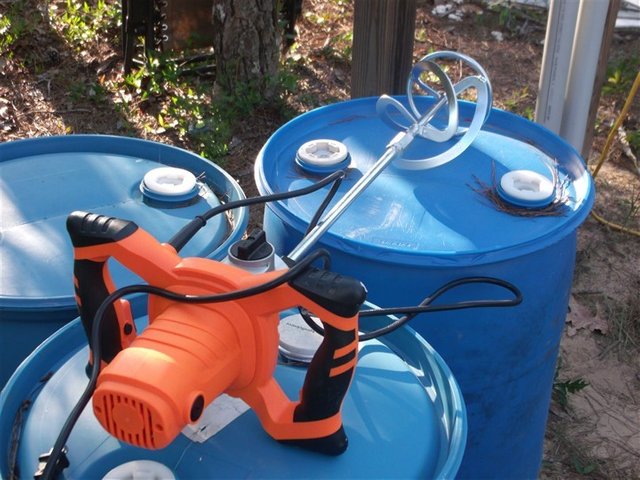
We used this mixer to make our AirCrete with. It also came from Domegaia.
We are using containers we got for the first test run of AirCrete and we set them up on pallets so they were off the ground. We took some vegetable oil in a spray bottle and sprayed to sides and the bottom of the containers down so we had a good coating on them. Hopefully, when I come time to take out the blocks it will release and come out without much of a problem.
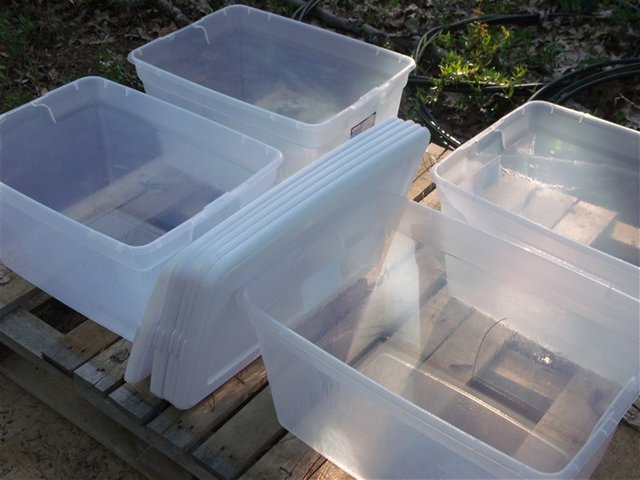
We will put the lids on then to keep out animals and to keep the dew off of them.
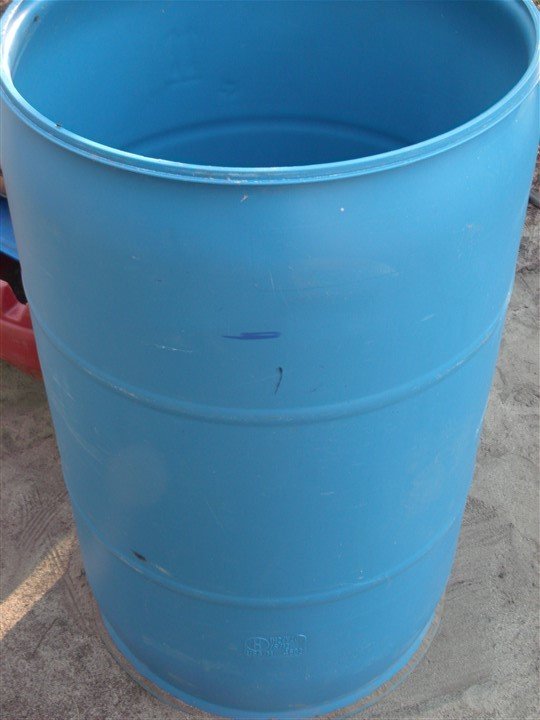
So here is our first time making AirCrete. We used a 55-gallon drum to mix in, we will be making about 45 gallons of AirCrete. I measured 30 inches from the bottom of the drum and made a mark to where I wanted to fill it too. (The Blue Line) Will have to figure out a better way to mark the fill to point in the future. Marked on the inside and the outside but it is still hard to judge.
We did several tests on making our foam to get it where we wanted it. You will need a quart container and a kitchen scale to get your weight of foam right. It needs to weigh 3 ounces per quart. It will take some doing getting the pressure set right on the compressor and also the Little Dragon, it has a pressure regulator on it to help with this. We had the pressure on the Little Dragon at 70 PSI and the compressor goes up to 150 PSI. We had the pressure at 120 PSI on the compressor. The foam weighed 3.1 ounces to the quart. We found out the higher the pressure on the compressor and the lower the pressure was on the Little Dragon made a better density soap foam. We will continue to play with this until we find just the right spot for both of them.
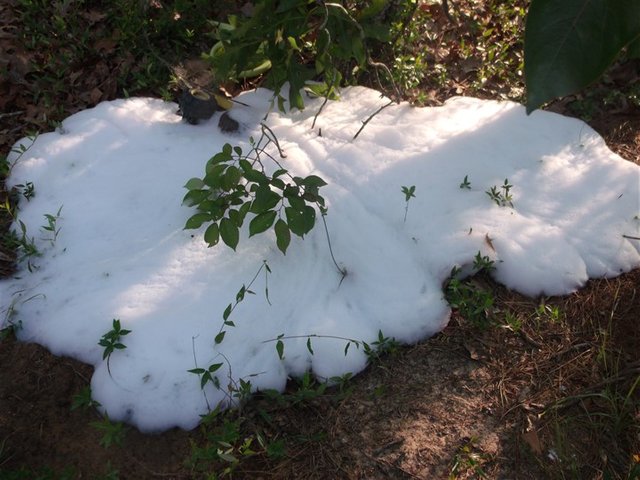
We dumped the first container we were using, just a small barrel, and continued till we got it right. It may sound hard but it really is not, this can really be fun and the grandkids loved the soap foam and played with it. Grab a handful and rub your hands together rinse it off and clean hands. LOL
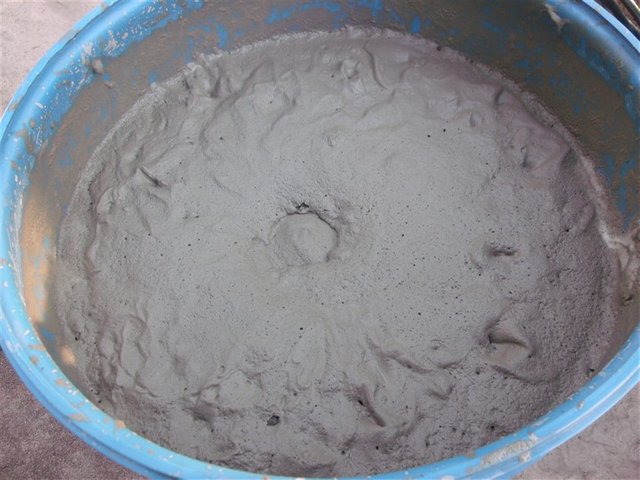
Now that we have the foam generator making the foam we need, we get to work making the AirCrete. We put 7 gallons of water in the barrel and then we added one bag of Portland Cement (94 LB Bag). We learned that if you run the mixer as you pour the Portland Cement in it will be easier to mix (we did not do this at first and it was a pain to mix it all in) and make sure all the clumps are gone and you have a slurry. We used a trowel to scrape the sides and the bottom to make sure all the Portland Cement was mixed thoroughly. You start adding the foam until you get to the 45-gallon mark on your barrel. We choose to just use the Portland Cement and the foam for this batch as you can add what you want to the mixture. We will be doing another one adding PVA fibers to it the next time we do this. We want to see what will make the strongest block and use that "recipe" to build our houses.
Then you have AirCrete, We are pouring it in the containers we found for our molds for this run to see how it comes out. We took a five-gallon bucket and dipped the AirCrete out of the barrel and then poured it into the containers.
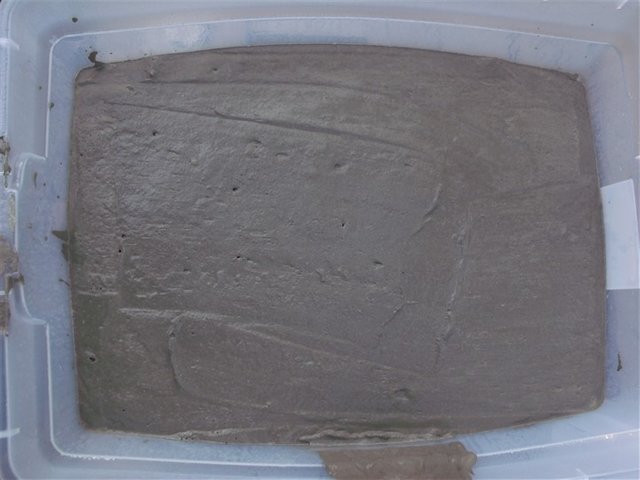
Those five gallon buckets were not heavy at all and it was a breeze to dip them and fill them up and easy to pour into these containers. I took a small trowel and smoothed them out and tried to make them look pretty. These are 56-quart containers and it only took four of them for this first batch of AirCrete.
When we pull the blocks from the containers we will make a post and let you all know how they came out. Hopefully, it will be a good post but we all know with these things, sometimes it is a failure but we will keep trying if it is and keep you updated on how this goes. With AirCrete you can make things that are only limited by your imagination. Get out and have some fun and find something you would use this for, pavers for a patio around a firepit or building a house with AirCrete blocks.
I hope everyone has a great day/night, whatever it is in your neck of the woods. Thanks for taking the time to read our posts. This means a lot to us and we hope you learn something and try to do this yourself and have some fun with it.
I have been getting lots of complaints that DTube video is not working. I was trying it again to see if it would work better but it is not. So I will place that video here for you to see.


@steemitbloggers
STOPYou make me want to do this!! Even though I dont really need it for anything right now! Very impressive!!!
This is fun to do. I am thinking that some of the test pieces we are making will be great for making a firepit. Thank You!
Congratulations! This post has been upvoted from the communal account, @minnowsupport, by Basics To Living from the Minnow Support Project. It's a witness project run by aggroed, ausbitbank, teamsteem, theprophet0, someguy123, neoxian, followbtcnews, and netuoso. The goal is to help Steemit grow by supporting Minnows. Please find us at the Peace, Abundance, and Liberty Network (PALnet) Discord Channel. It's a completely public and open space to all members of the Steemit community who voluntarily choose to be there.
If you would like to delegate to the Minnow Support Project you can do so by clicking on the following links: 50SP, 100SP, 250SP, 500SP, 1000SP, 5000SP.
Be sure to leave at least 50SP undelegated on your account.
Very informative and does sound very easy. For future attempts you could also try vaseline on your molds, I have had good luck using that as a concrete release agent.
I was thinking of that as I use it to keep ants out of some of the electrical stuff around the homestead. I wanted to try vegetable first. With the plastic containers, I think it will work pretty well. I was going to pull them today but started raining here again.
That looks like a lot of fun. How will you mold the blocks when you go to start using this to build a house? Are you going to make them cinder-block sized, brick sized, etc?
The great thing about AirCrete is they can be cut with woodworking tools. You can pour a slab and cut them to size. You can make them any size you want to and a solid block is the best. I will be showing that when I get the blocks I made out of the molds we used. That is still in the discussion stage, we want to use as big of a block as possible. Makes it easier to build.
I'm adding this to my list of "gotta try this!" I can always find something to do with lighter blocks of Aircrete
Oh, Just so you know they will float also! Just another fun fact for you.
It sounds like just the thing to make rectangular containers for flowers and bulbs. Easily movable and durable.
Yes, there are many uses for AirCrete! They are only limited by your imagination.
This is SO intriguing! I can't believe i haven't heard of this stuff yet. Awesome post! I can't wait to see how it turns out as you go.
It is going to be an interesting build. I will post as much as possible as we go through the building process.
Congratulations, your post has been selected to be included in my weekly Sustainability Curation Digest for the Minnow Support Project.
Host of The Alternative Lifestyle Show on MSP Waves Radio.
Editor of the Weekly Schedule of Steem Radio Shows.
Founder of the A Dollar A Day charitable giving project.