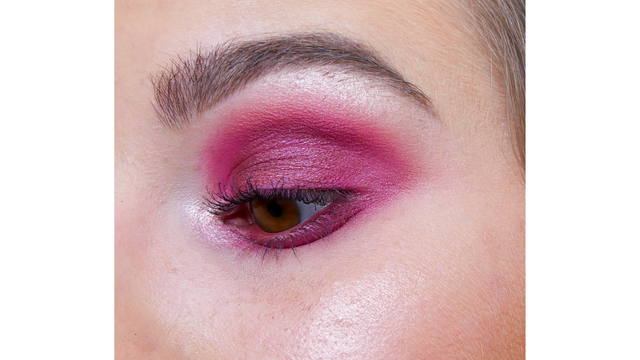
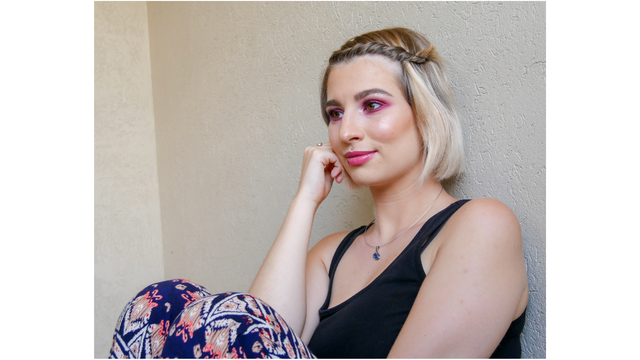
Bright Color Smokey Eye In Steps For Beginners 2018 With Pictures
If you’ve watched the video tutorial version and you couldn’t really follow the steps because I went too fast then here you have the opportunity to reread and have a look at the pictures in your own time and move forward to the next step when you are ready.
I specifically recreated the look for you in a pictorial about the bright color smokey eye. Now I don’t want to talk too much about the article so, let’s just start:
If you are looking for a good pigmentated shadow, for example, a matte bright pink shadow, then I would recommend you going into a makeup store, doesn’t matter which one, and start swatching all the pink shadows. Normally, they should have testers for all the makeup products so, just swatch the pink shadows on your hand or arm and the one that has the best pigmentation and gave you the best swatch, that’s the one you are going to get. I’m talking about my personal experience because I don’t want to spend some money on a product that doesn’t give me the pigmentation that I need.
Moving on to the first step:
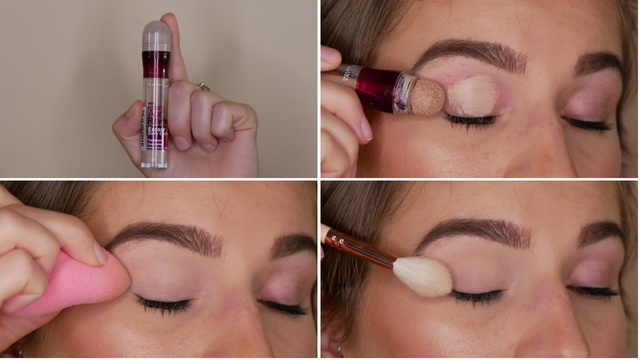
Step 1: Concealer.
Before we are starting off by applying some shadow onto to the lid to create the bright color smokey eye, we need to add a bit of concealer to the eyelid area to even out any discoloration. This will give you a clean canvas to work on and will lighten up the mobile lid area as well to make eyeshadow pop even more.
You can blend the concealer with a brush or a damp beauty sponge. Just make sure that it’s evenly blended.
After the blending, you can go ahead and dust some translucent powder on top to set the concealer. Use a fluffy eyeshadow or face brush for it.
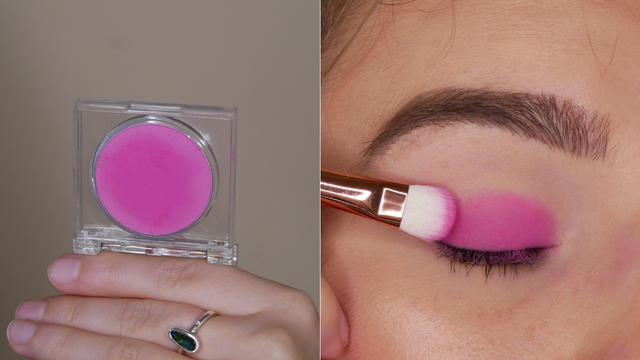
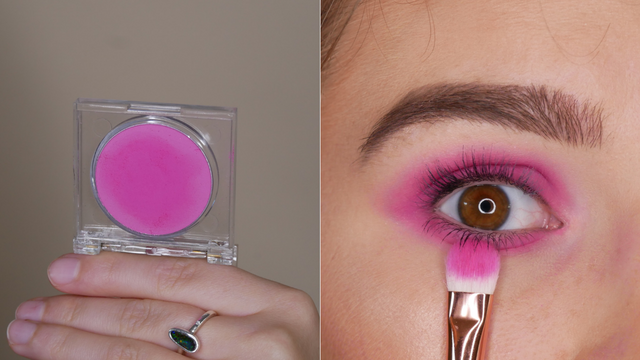
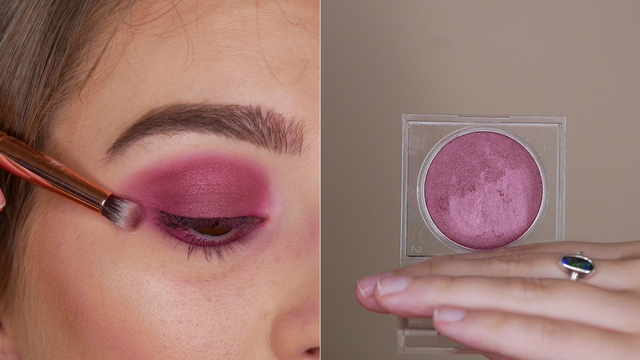
Step 2: Bright Pink.
I went for a bright pink eyeshadow for my version of the bright colored smokey eye. Of course, this technique will work for any other color as well.
Take a flat eyeshadow brush and dig into your color that you want to go for. In my case, I coated my brush with some of the pink shadows and placed it all over the main lid area. From the lash line until the crease.
Dabbing the shadow on will help you to keep the pigment and to round the edges a bit more, you can swipe the flat eyeshadow brush from one side to the other.
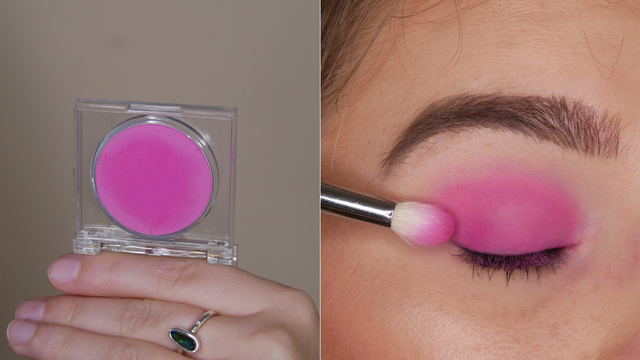
Step 3: Blend the Pink.
Go for a blending brush that’s not too fluffy but still a blending brush because you are going to go into the pink eyeshadow again to blend the shade even further.
From the main lid area on, blend the shade a bit higher, do not use too much product on the brush and build it up little by little so that you can control the right amount of product.
Go over your crease line until the shadow starts to get visible with your eyes open but do not touch the brows with it.
Take your time with blending because this is a bright color smokey eye so, if it isn’t working right away – It needs practice.
Step 4: Lower Lash Line Pink.
To bring the bright colored smokey eye into action, you need to add the same pink eyeshadow on the lower lash line as well and connect it with the upper outer corner. Use the flat eyeshadow brush from earlier again.
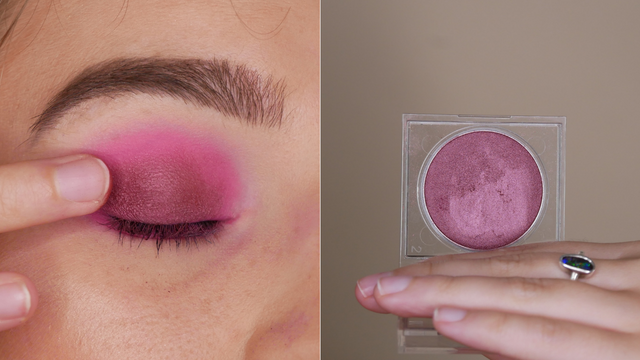
Step 5: Bright Plum.
The matte pink shadow was a base for the shade right now. Since it’s all about my version of the bright color smokey eye, shimmers are a must! Sometimes shimmers do not have a lot of coverage that’s why I added the pink underneath and to have a better blend later on.
When you apply any shade of shimmer to your eyelids, use your finger to apply it. It just gives you the best result. Don't try to add it in a complicated way, if you just need to use your finger.
Apply the bright plum shade on your main lid area until you reach the crease. You can blend the shade a bit with your finger as well.
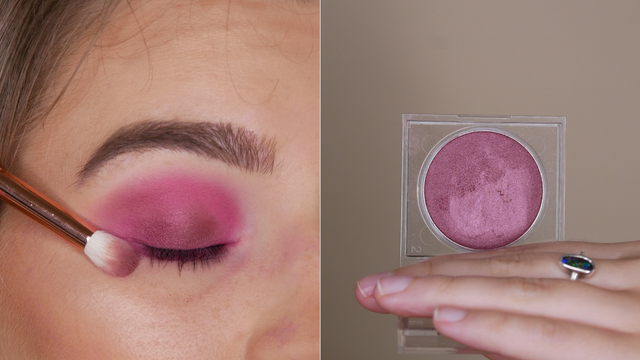
Step 6: Blend the Plum.
On a fresh clean blending brush, you can now go ahead and blend the plum shade as well a bit more into the pink. Make sure that the edges are soft and blended and are fading towards the brows but don't touch the brows.
Remember: take your time with blending because this is a bright color smokey eye if it isn’t working right away – It needs practice.
Try to blend in small circular motion and from the left to the right as well.
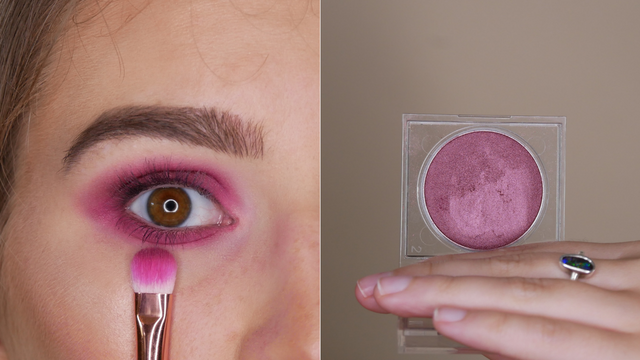
Step 7: Lower Lash Line Plum.
To bring the smokey eye into action just repeat step 4 and add the same plum eyeshadow on the lower lash line as well and connect it with the upper outer corner. Use the flat eyeshadow brush from earlier again.
Step 8: Outer Corner.
I did go back into the plum shade with a dense eyeshadow brush to really bring the plum shade at the outer corner as well because the bright colored smokey eye needs to be evenly blended. If you feel that you’ve missed an area or want to bring back the pigment, you always can reapply the shadow.
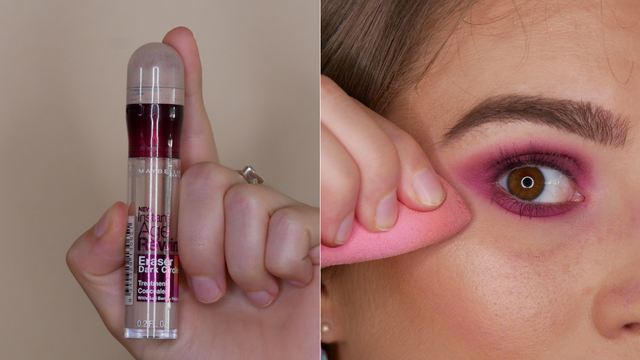
Step 9: Clean up.
Using a concealer brush or a damp makeup sponge with some concealer or foundation on it is a great way to clean up any fallout or to even out your colorful smokey eye.
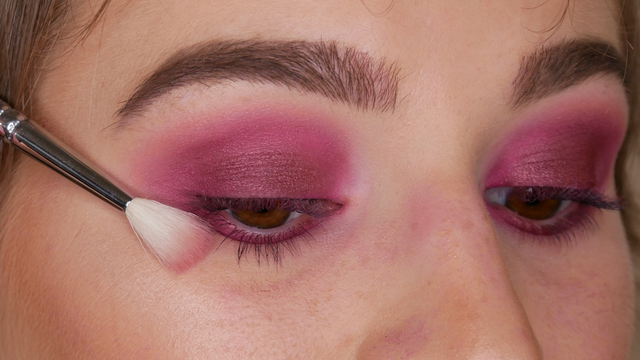
Step 10: Blend.
Take a clean fluffy blending brush with no eyeshadow on it at all and use it to really clean and soften the edges of the smokey eye. Don’t forget the lower lash line as well.
Remember: take your time with blending because this is a bright color smokey eye so, if it isn’t working right away – It needs practice.
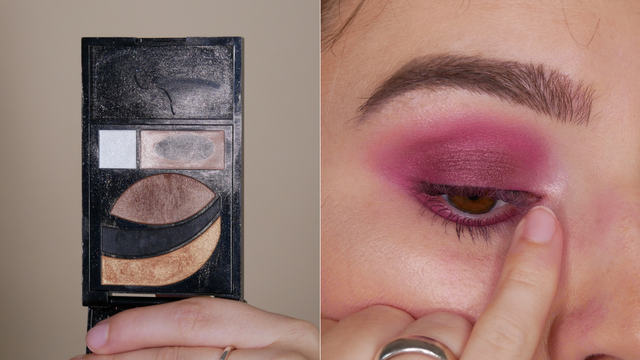
Step 11: Highlighter
Add some highlighter to match the bright colored smokey eye to the inner corner and underneath your brows. In my case, I went for a pinkish/ plum smokey eye and so I added some light pink highlighter to it.
Use your finger (pinkie) as the applicator. It's easier.
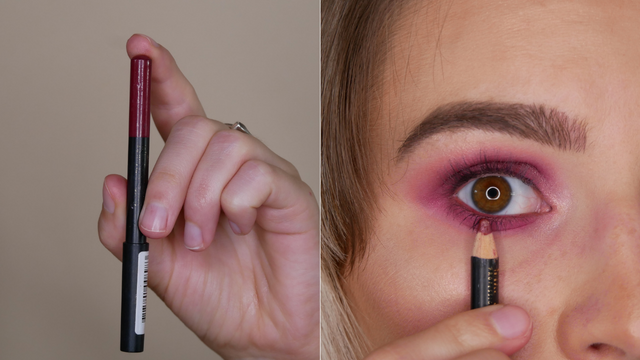
Step 12: Waterline.
To get rid of any skin that’s looking through, add some matching eyeliner pencil (a red/pink pencil) to the on to the lower and upper waterline to wrap the bright colored smokey eye up. You’ll see that this makes a huge difference.
Tip: Keep a smokey eye as dark as possible and do not let it distract from skin that’s looking through because this just can change the vibe of a smokey eye.
If you have troubles to add some pencil to the waterline, you can do it with some tips. Try to look (move the pupil) to the opposite direction where you are applying the pencil, this way you won’t see the pencil and it’s less scary.
For example, add the pencil to the inner part but look towards the outer corner and the other way around. It’s just so much easier to apply.
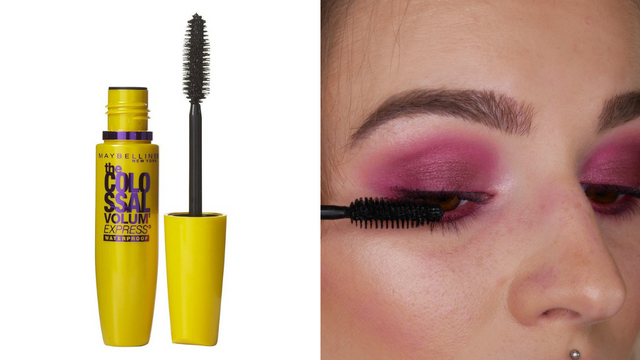
Step 13: Mascara.
Add a few coats of your favorite mascara to your lashes for the final touch for the bright color smokey eye.
Make sure that it's a mascara where you know that it will stay put during the day.
Step 14: Lips.
I went for a similar shade on the lips as the bright color smokey eye. I used a liquid lipstick in a soft pink shade that dries matte and added some clear lip gloss on top to let them shine.
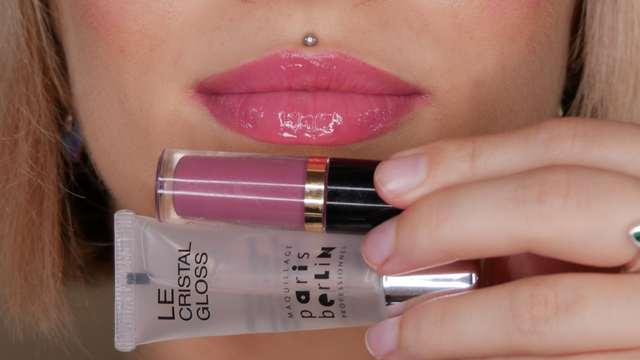
Shades that are closer to your natural lip color are easier to apply and look really natural.
Thank you,
xoxo, Melissa
Follow me on Twitter
Follow me on Facebook
Subscribe to my YouTube Channel
ALL MAKEUP GEEKS, feel free to RESTEEM this article! Let's keep spreading the word with real life everyday makeup application!


Smokey eyes! Thank you ;-)
Posted using Partiko iOS
@bjornb Thank you :)
Wonderful tutorial for my wife
@wanasoloben Thank you, she could try and wear it beautifully :)