Introduction to Geometry (Level 1)
Introduction to Geometry (Level 1)
Geometry is extremely useful for Engineers, architects, painters, carpenters, teachers, electricians, machinist homebuilders and many more. Geometric principles are important in the construction of buildings and roads, the design and use of machinery, the creation of three dimensional visuals and effects, and to better understand and unlock the secrets of the universe itself. Like any language and mathematics course, the important ideas in geometry must be developed gradually with understanding, practice and effort.
Alright let’s get started with the basics. The simplest figure studied in geometry is called a point. Although a point doesn’t have any size, it is often represented by a dot which does have some size. But keep in mind that for the most part they do not have a size; we use a dot to visually represent a figure that lacks size. We usually name points by using capital letters. For example the following five points are called point A, point B, point C, point D, and point E.

All Geometric figures consist of points. Another familiar geometric figure is called a line. Lines are made up of points and are straight. The arrows on the end of the figures show that the lines extend infinitely far in both directions they extend forever and ever. Although a picture of a line has some thickness, the line itself has no measurable thickness so keep that in mind unless it is explicitly stated lines have no thickness. The following figures are example of lines; there are two different ways we can name lines. The first way is by using a single lower case- letter such as line m. The alternative way to name lines is by using their points for example the line in the right contains the points A and B so we can call the line AB using symbols we can denote it like this:

AB with a line on top or as BA with a line on top both ways are acceptable but for the most part we denote the letters in alphabetical order so AB would be the typical way to denote this line.
To talk about the next geometric figure we need to remember a concept learned in algebra I. In algebra you learned that a number line is formed when a numerical value is assigned to each point on a line. For example the following line represents a number line and point A is located at -1, likewise point B is located at 1 and half or written another way as 1.5.

We need to understand number lines in order to understand line segments or simply segments. Like lines, segments are made up of points and are straight. What distinguishes them from lines is the fact that line segments have a definite beginning and end in other words they are measurable; they do not extend forever and ever in both directions like lines do. The following are examples of line segments the line segment on the left can be denoted as line segment AB or line segment BA notice that we add a segment on top of the letters in order to distinguish it from that of a line which contains arrows in both ends. Also notice that a segment is named in terms of its two ends points, because a segment has a definite beginning and end.

The figure in the right contains two line segments the vertical (up and down) segment can be called segment RS or segment SR or once again we usually denote them in alphabetical order. The horizontal (cross wise or left and right) can be named as segment ST or segment TS.

In the following number line the segment whose end point is located at a coordinate of -1 and 1 is denoted as segment BD or segment DB likewise a segment that has coordinate at -2 and 2 is denoted as segment AE or segment EA.


So we learned about lines which extend forever and ever in both directions and we learned about segments which have a definite length and do not go on forever and ever, is it possible to create a figure that contains both of these characteristics? The answer is yes, these hybrids are called rays. Rays like lines and segments, are made up of points and are straight. A ray differs from a line or segment in that it begins at an endpoint and then extends infinitely far in one direction only. Lines extend in two directions; rays extend in one direction only so make sure you keep that in mind. The following are examples of Rays, now when it comes to denoting them we actually need to be careful and make sure we start denoting a ray by naming its end point first, this way it becomes clear where the ray begins.

So the ray in the left is denoted as ray AB notice that we add a ray on top going from left to right this the appropriate way to denote rays it will be completely wrong to denote the ray as ray BA remember we want to start with the end point first. The ray in the right can be called ray RS or ray RT as long as the endpoint is given first, any other point on the ray can be used to denote the ray.
Now that we know about points, lines, segments and rays we can now talk about angles. In essence, an angle is made up of two rays with a common endpoint. This point is called the vertex of the angle. The rays are called sides of the angle. There are various ways that angles can be described and denoted for example if we place the number 1 inside the angle near the vertex like this we would denote this angle as follows:

The symbol that we use to denote angles is drawn as follows its essentially a picture of an angle.
If the angle only contains one letter in the vertex then you denote it as angle A, when you denote the angle using one letter make sure you name the point on the vertex.

An alternative way is needed if the angle is described in terms of three points, for example if this angle has a vertex labeled as A and the other points are B and C respectively then we need to denote the angle as follows: angle BAC or angle CAB notice that when we use three letters the vertex in this case A must be named in the middle, make sure you always do this.

If we take this same angle and draw another ray from point A and to point D we would end up with 3 new angles. Can you see them?

The first angle is formed by points BAD and is denoted as angle BAD or angle DAB.

The second angle is denoted as angle DAC or angle CAD.

The third angle is denoted as angle BAC or angle CAB.

Notice that if we try to denote any of the angles by using only 1 letter such as angle A we would be totally confused what angle we are referring to because all the angles share the same vertex so in these case it is really convenient to use three letters to name the angles.
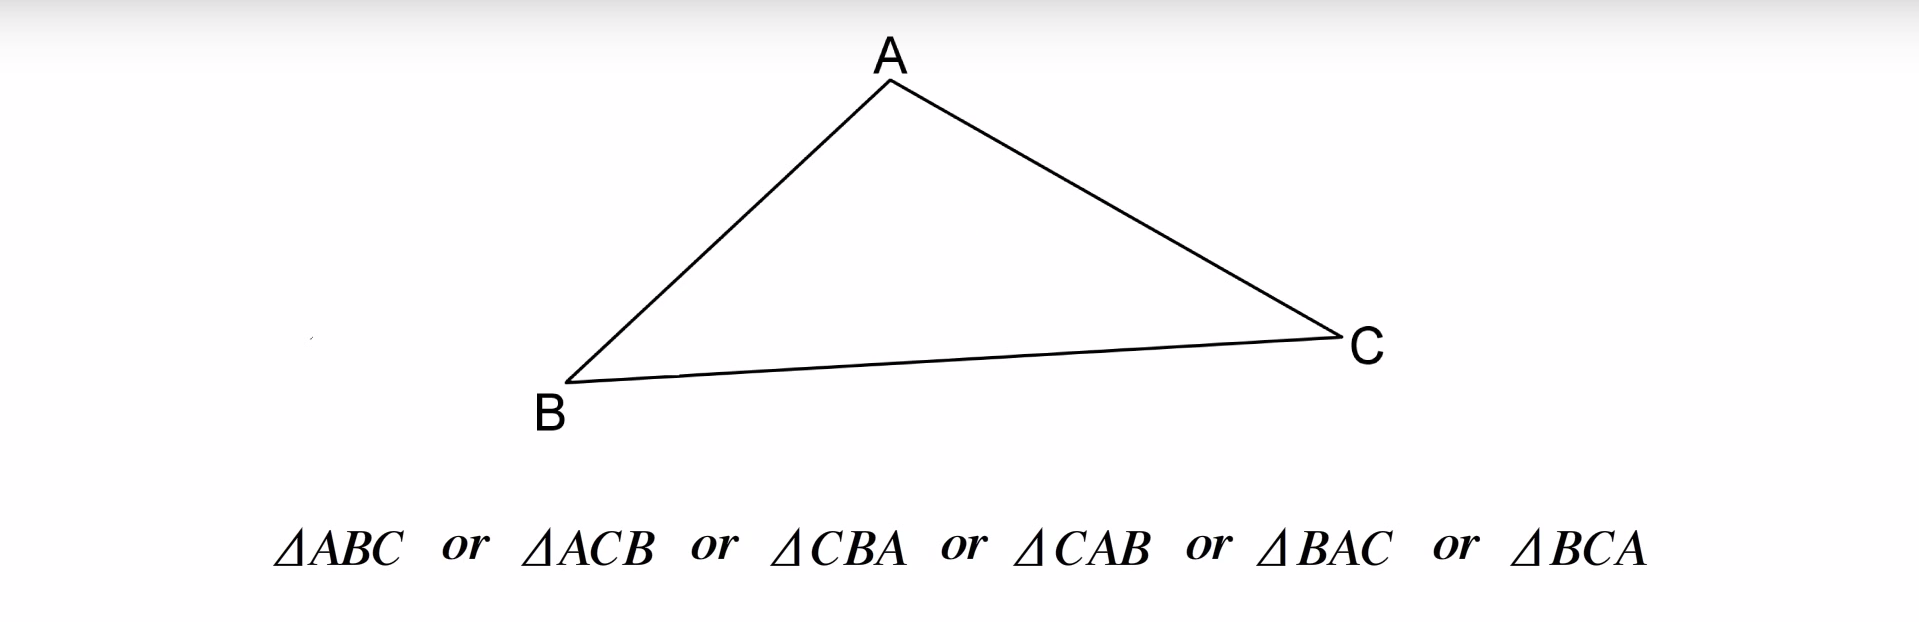
Alright the final figure we will talk about is formed by using three segments and combining them in the following way. The figure that was just created is called a triangle and we denote it as follows triangle ABC or triangle ACB or triangle CBA or triangle CAB or triangle BAC or triangle BCA notice that the letters need to start at one point and move either clockwise or counter clockwise when denoting them. The convenient way is once again by using letters that are in alphabetical order whenever possible so triangle ABC would be the best way to describe this triangle.

Notice that a triangle has three segments as its sides. Notice that there seems to be three angles but they contain no rays nevertheless this figure contains three angles they are: angle A, angle B and angle. If you recall from your algebra class we often talked about sets, well it turns out we can think of a triangle as being a union of three segments and can be denoted using set notation as follows:

Likewise the intersection of any two segments or sides forms the vertex of a triangle and can be denoted using set notation as follows:

Alright there you have it these are the basic building blocks of geometry and this is only the beginning, to recap we learned about points, which have no size but we draw a point to visually represent one. We also learned about lines which contain points and extend infinitely in both directions, this is represented by the arrows that point in both directions, we also learned about segments which have a definite length in other words they are measurable, as a consequence they have a beginning and an end which are called the end points of the segment, we also learned about rays which share the characteristics of a line and a segment, it contains an end point in one side and contains and arrow in the other side which extends infinitely in the direction it is facing. When we have two or more rays that share a common point called a vertex we form angles, and finally when we connect three line segments together forming three vertex we create a triangle.

Ok make sure you are familiar with all of these figures and the appropriate way to denote and name them, in our next post we will practice denoting and naming figures with various examples.
I really admire that you put in so much time to do this. I'll say don't relent, if your work hasn't already found its audience on this blockchain, it definitely will when the adoption goes mainstream and your immutable contribution to here gets a chance. I see @curie and her trail of voters have done their bit to reward your content. Quite an amazing community.
Very cool! Thanks!
Congratulations @mathfortress, this post is the second most rewarded post (based on pending payouts) in the last 12 hours written by a User account holder (accounts that hold between 0.1 and 1.0 Mega Vests). The total number of posts by User account holders during this period was 2374 and the total pending payments to posts in this category was $1885.31. To see the full list of highest paid posts across all accounts categories, click here.
If you do not wish to receive these messages in future, please reply stop to this comment.