Beginning Electronic Music Production: A Simple Guide using Free Tools
Hello all! I'm Shaun, and I've been using Digital Audio Workstations (DAWs for short) since I was 13 years old. These are the programs with which music producers record music, create sounds, and edit audio. Today, I'd like to help you begin your audio production journey using free tools and sounds. This will be a simple and accessible breakdown on how to get started without shelling out thousands of dollars! Once you have a solid understanding the tools, you'll be able to take that knowledge and work with virtually any DAW. You will need a computer running Windows 7 (64 Bit) or higher to use the tools we're going to learn with.
Make sure that your sound driver is up to date. If your speakers or headphones work, our software should work with it!
Installation: Downloading the Workstation
The DAW we're going to be using is called Cakewalk. Due to a shift in brand strategy, Cakewalk's parent company shut down production in 2017. The software was revived in 2018 after being bought by BandLab, and is now available for free! I was thrilled, because this DAW is (and always was) great for creating electronic music.
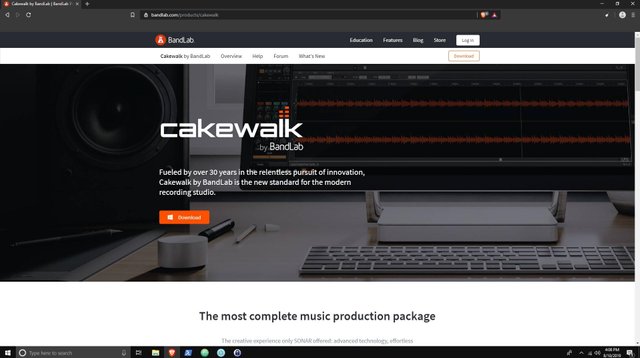
To download Cakewalk, head to https://www.bandlab.com/products/cakewalk, and you should see a screen that looks like this:
Once you've downloaded the file, run it, and you'll be prompted to create an account.
Note: a browser window will open once you've signed up. This allows you to set up a profile with BandLab, where you can network with other musicians, find free sounds, and do tons of other cool stuff. You don't have to have to be involved if you don't want to, but you might find it useful!
In the BandLab Assistant, click on "Apps", and then under Cakewalk, click "Install". When prompted, only select "Studio Instrument Suite" and "Drum Replacer" as additional packages. Keep everything at its default location...see you when it's done!
Tools
Now we're going to explore the tools available to us in Cakewalk. In the BandLab Assistant, click "Open". After it loads, you should see a screen like this:
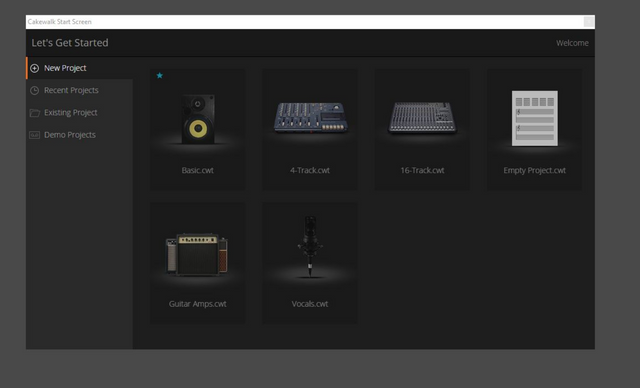
Click on "Empty Project", and you'll finally be facing your first test.
SO. MANY. BUTTONS.
Don't worry! You don't have to know what all of these do right now. We'll go over a few of them, but only as we begin to use them.
Note: I know we haven't discussed a style of music, and that's for good reason. You can make any style of electronically-generated music once you have the principles of production down. Sure, if you were producing Deep House, you wouldn't utilize the same sound library as you would for Drum n' Bass. However, right now we are tinkering with the tools that all producers will use.
Let's start with rhythm.
Over on the right-hand side of the screen, there's a small icon that says "Plugins". Right now, the orange box underneath says "Audio Effects". Click the piano icon two boxes over:
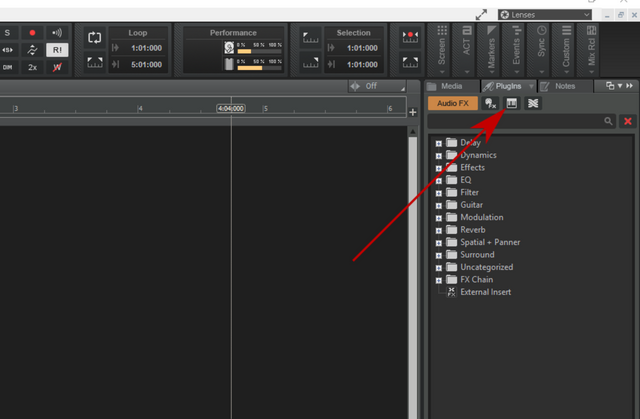
You're now looking at all your available VST Instruments. VSTs are a crucial part of audio production; they are miniature programs that run within your main program (Cakewalk) in order to produce or modify sound. We're going to work with a drum kit, so click "Drums", then drag and drop "SI-Drum Kit" over in the huge center window. When the dialog box pops up, just hit "Ok". You've just loaded your first VST Instrument into the project!
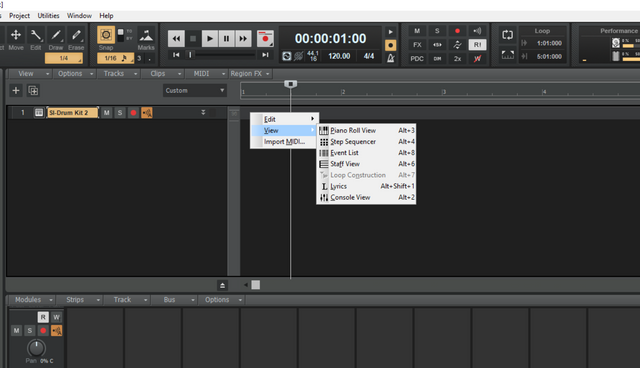
See how it added a long, horizontal rectangular bar across the top of the center window - in line with the "SI-Drum Kit 1" text? In that center window (which is called the Clips Pane), right click on the bar, click view, then click Step Sequencer:
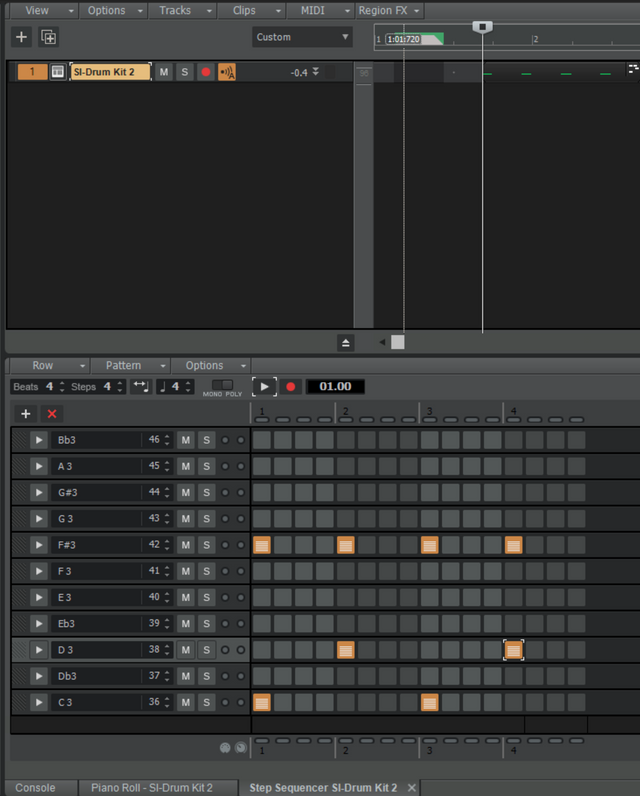
BOOM! Now we're about to make some noise. Each note (B 3, A 3, etc) represents a different drum sound. Each box, if activated, will trigger the drum sound. To fill a box, we left click; to erase, we right click. Then, in order to hear it, we hit the play button (next to the red record button) above the boxes. Try it out!
Here's the most basic 4/4 pattern:
And here's something more intricate:
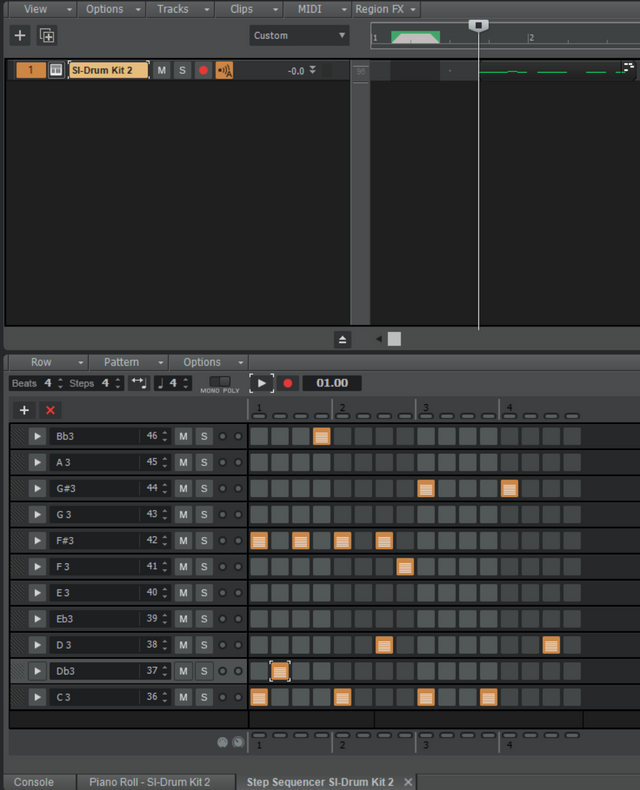
Play around with it and see what you come up with.
See how when you created the pattern, a clip emerged in the Clips Pane? This clip is the rectangular box with rounded edges containing the green lines. This is the drum pattern you just made. Hover the mouse over it until a four-directional arrow appears, then left click and drag back to the beginning.
After this, hover the mouse near the end of the clip until you get a horizontal arrow with a box below it. You can now drag to the right to repeat the clip as many times as you want! Let's make sure it repeats 4 times:
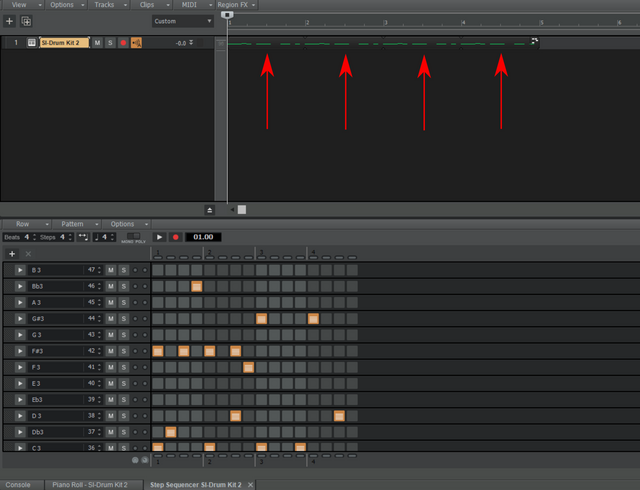
#Note: wherever you click in the Clips Pane, that's where the song will start from.
Now you can see how electronic music is usually put together - by taking various clips and repeating them however many times you want. Obviously, most music is far more complex than what we're building, but that complexity is achieved with this concept as a foundation. Right now, we just have drums, but let's add a melody using another plugin that simulates some string instruments.
Back in the VST plugin window, drag the "SI-String Section" plugin over to the left.
Right click on the horizontal bar again. This time, however, click on Piano Roll View. Piano roll is an awesome visual tool - available in most DAWs - which allows you to plot individual notes on a synthesizer. Don't worry if you don't have a knowledge of music theory, you can just copy the pattern I'll be providing for now. Later, feel free to experiment with different notes.
FIRST, find the Snap button to the left of the Play/Stop buttons up top. Make sure it's activated. You'll also see a fraction below - right click and press "Smart Grid". All this does is make it easier for the piano roll to calculate the length of your notes, which you're about to toy with.

See the piano keys? Starting near the beginning, click and and drag to the right. You'll see a note being drawn - you should hear the sound of the string, too! When you right click on the note, it will be deleted. Try drawing this pattern around the C4 region:
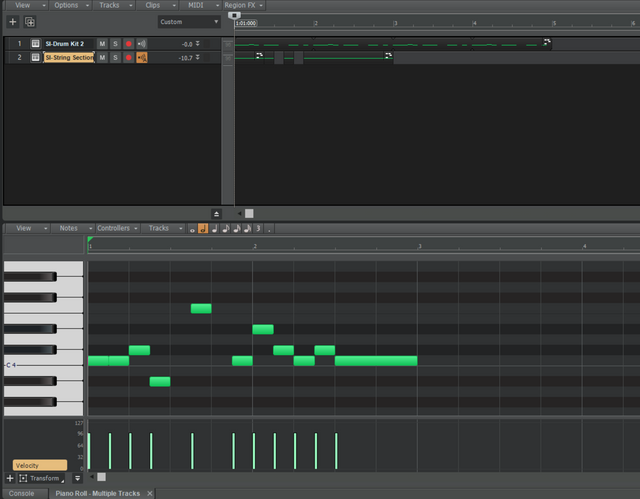
If you press play (or hit spacebar) you'll hear the drum clip on top of the strings. Nice.
We've got a couple things to fix, though. First - see how the clip for the strings is chopped up in the Clips Pane? Fix that by left clicking either end, holding the mouse button down, and dragging to select the whole sequence. Then right click on the sequence and select "Bounce to clips". Finally, right click again and select "Groove Clip Looping". This allows you to drag the clip to repeat it, like you did with the drums.
#Note: If you want to repeat (loop) a single section of your song, press the dual arrow button in the loop pane. Alternatively you can press "L" on the keyboard. Adjust the yellow line to loop whichever section you want.
You've learned how to use VST instruments to create sounds with the step sequencer and piano roll. You've learned how to create and repeat clips in the clips pane. Finally, it's time to apply FX to modify the sounds you've created.
Over in the Tracks Pane (to the left of the Clips Pane), in the SI-String Section track, click on the two downward arrows to open up an additional menu. You'll see a box called "FX". Right click, then -> Insert Audio FX -> Reverb -> BREVERB2 Cakewalk.
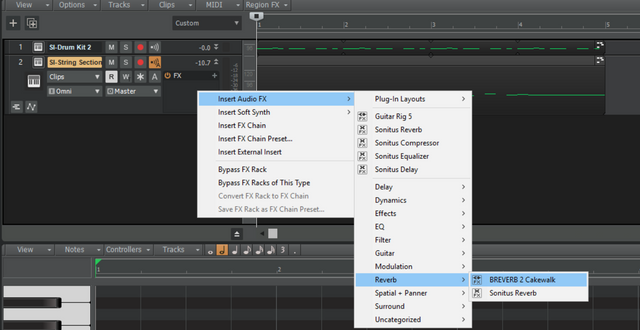
You'll see a window called "Presets" in the BREVERB2 plugin. Double click on "Cathedral", then press play and listen to the difference!
These are elementary concepts, not techniques. If you familiarize yourself with the tools first, rather than jumping ahead with a half-understanding, you will save yourself a lot of frustration in the future. Electronic music production is loaded with complicated tools, techniques, and theories. However, at the most fundamental level, it is:
- VST Instruments, which generate sound
- VST Effects, which modify sound
- Pattern design and replication
You can familiarize yourself with additional tools using the Help Module, as well as YouTube. Feel free to drop be a line in the comments below, as well!
Optional: Downloading and Installing Additional Plugins
Most likely, neither one of the synths used will create the kind of sound you're looking for. I primarily chose them because they were easily accessible and didn't require any additional instalations.
There are two free synthesizers I'd recommend: U-He's Podolski (for melodies) and Beatmaker's SL Drums 3. You can find the installation (and tutorials) for both by doing a quick Google search.
#Note: When installing either, make sure the default directory for 64 bit is C:\Program Files\Cakewalk\VstPlugins. For 32 bit, you might have to create a directory: I'd recommend C:\Program Files(x86)\VstPlugins.
Congratulations @creator-life! You have completed the following achievement on the Steem blockchain and have been rewarded with new badge(s) :
You can view your badges on your Steem Board and compare to others on the Steem Ranking
If you no longer want to receive notifications, reply to this comment with the word
STOPVote for @Steemitboard as a witness to get one more award and increased upvotes!