CUBASE TUTORIAL / THE BASICS OF HOME RECORDING / PART 1
People are asking me more and more about Cubase and how it works so I've decided to make a Cubase tutorial for everyone getting into home recording and production. Cubase is one of my favorite recording programs - it is simple to use, it doesn't have a lot of bugs, it's more or less stable and it's everything you need to start recording at home. So, here we go, CUBASE 101!

WHAT IS CUBASE?
Cubase is a music software product developed by German musical software and equipment company Steinberg (Steinberg Media Technologies GmbH) for music recording, arranging and editing as part of a digital audio workstation.
In other words, Cubase works as a digital version of what you would find in a real life studio. These days, digital recording is cheaper and more accessible than ever, it allows people to work at home and save the money usually spent on expensive pro studios. What Cubase does is mimics real life analog mixers and pre-amps, enabling you to create as many virtual tracks (and other virtual things such as EQ's, compressors, effects...) as you want. That is what makes digital recording very popular today - if you record things digitally, you don't need a space for all the hardware, it's fast, it's easy to edit and it can be done from your own living room.

WHERE TO GET CUBASE?
You can get the latest version of Cubase on the official Steinberg page steinberg.net
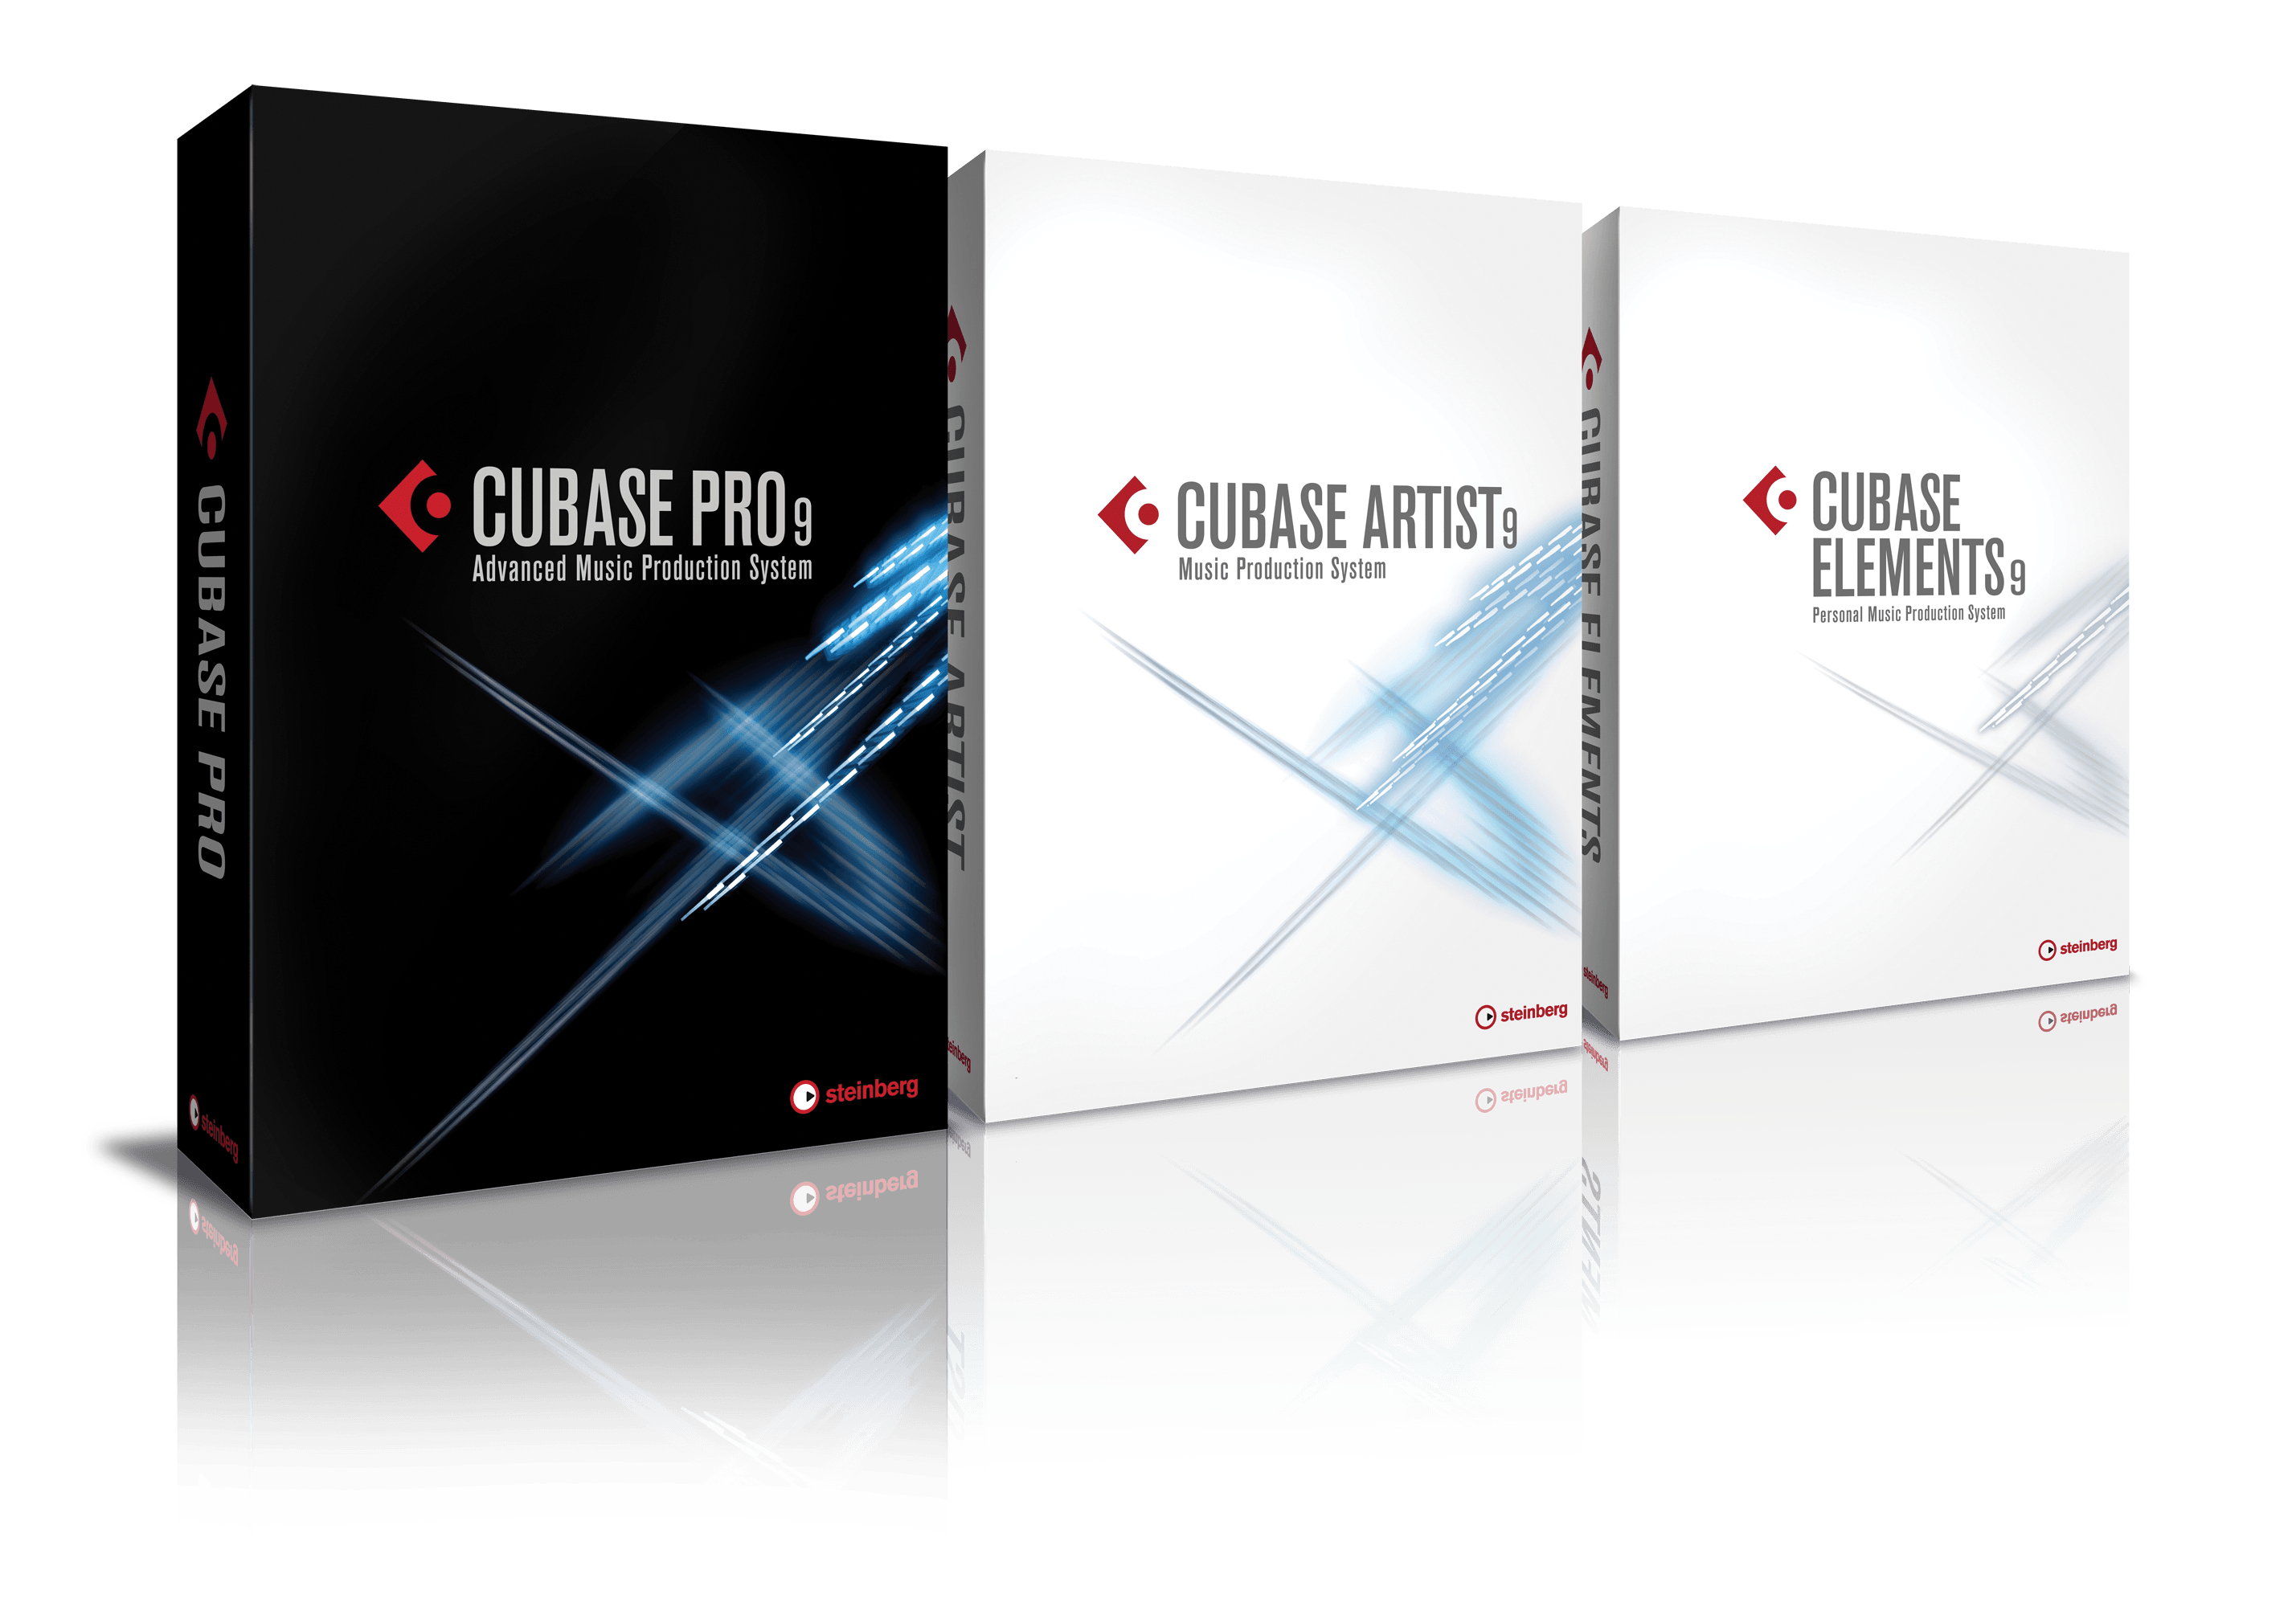
The latest version of Cubase is the Cubase 9.5. Basically, the older versions are not much different from the latest one. Cubase 9.5 looks prettier, has some cool new features, it's more user friendly and comes with better plug-ins but it mostly all comes down to the same principal. I'm using Cubase 5 and it works as good as the older versions and probably as good as the latest one. Cubase comes in different versions such as PRO, Artist or Elements but the basic version is enough for any beginner. The price of the original programe that you can get via steinberg.net is somewhere around 556$ but you can always download it from a torrent and get it to work (which I'm not telling you to do because I don't encourage illegal activity, wink wink)
HOW TO INSTALL?
Cubase is very easy to install. The .exe does everything itslef, you just click ''yes'' to whatever the question is (as you would normally do) and wait for a few minutes. It's important that you remember where you installed the program because you will eventually want to add some plug-ins to your work station and for that you will need to access the primary installation folder but more about that later. For now, just install the thing and you are ready to go. The programe will install everything it need to work and if it offers to install extra features such as Halion, just click ''yes'' because you might use that in the future and you can always remove it later. When the installation is complete, it should appear in your sound pannel.
WHAT DO DO FIRST?
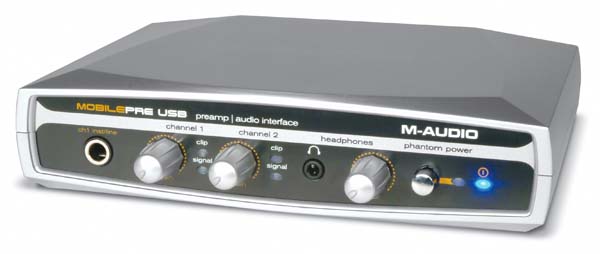
Before you start recording your music, you have to make sure that everything is properly set up within the program. This means you have to tell the program which sound devices to use, what's your input and what's your output... In other words, what to connect to what. You can use your computer's sound device but it's always better to have an external sound card for recording. The external sound card enables you to have better sound quality, it usually comes with both the classic jack inputs and XLR inputs (for microphones) and it has very low latency. Now, latency is a bitch. Latency is the time required for the computer to pick up the signal, decide what it is and then record it. If the latency is big, you will not be able to record because there will be a pause between what you play and the moment it is recorded. If you can't work in real time, you can't really work at all. The good thing is, sound cards are becoming cheaper everyday and you can probably find one for around a 100$. I use an M-Audio mobile pre USB card. It comes with two jack inputs and two XLR inputs and it has a stereo output (3,5mm) as well as individual standard jack outputs. It's also easy to install, it takes care of the latency and the sound quality is decent. I bought it some years ago for about 500$ dollars but the price went down drastically since then.
SETTING THE SOFTWARE UP
When you open Cubase, it will look like this:
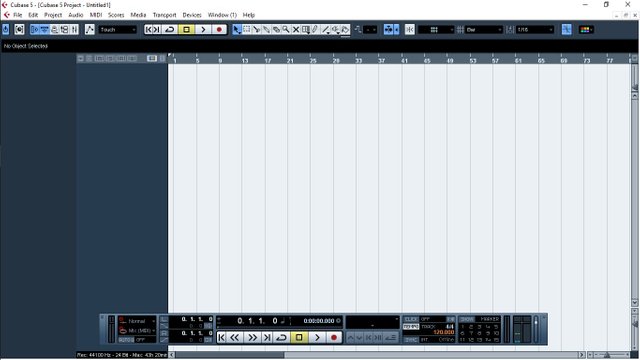
(this is the program's default layout)
After that, you need to go to DEVICES -> DEVICE SETUP -> VST AUDIO SYSTEMS
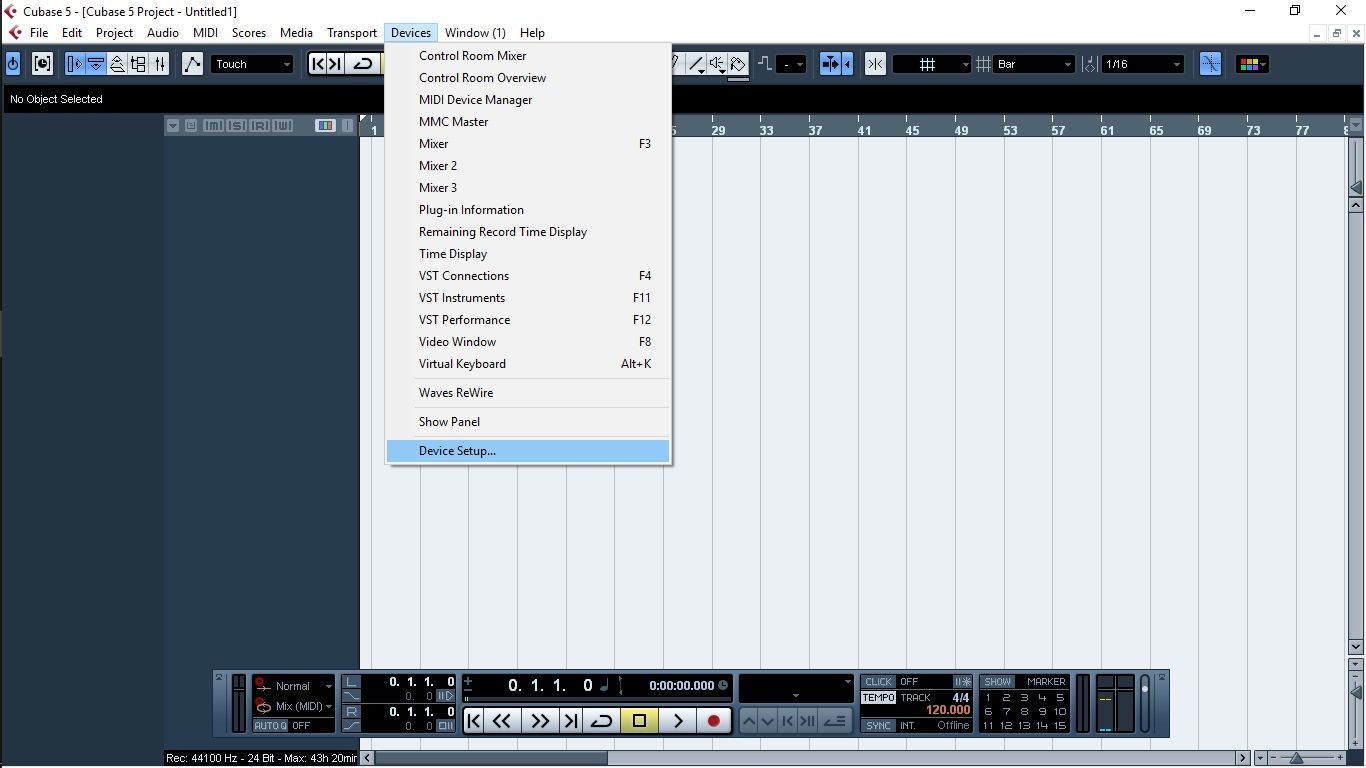

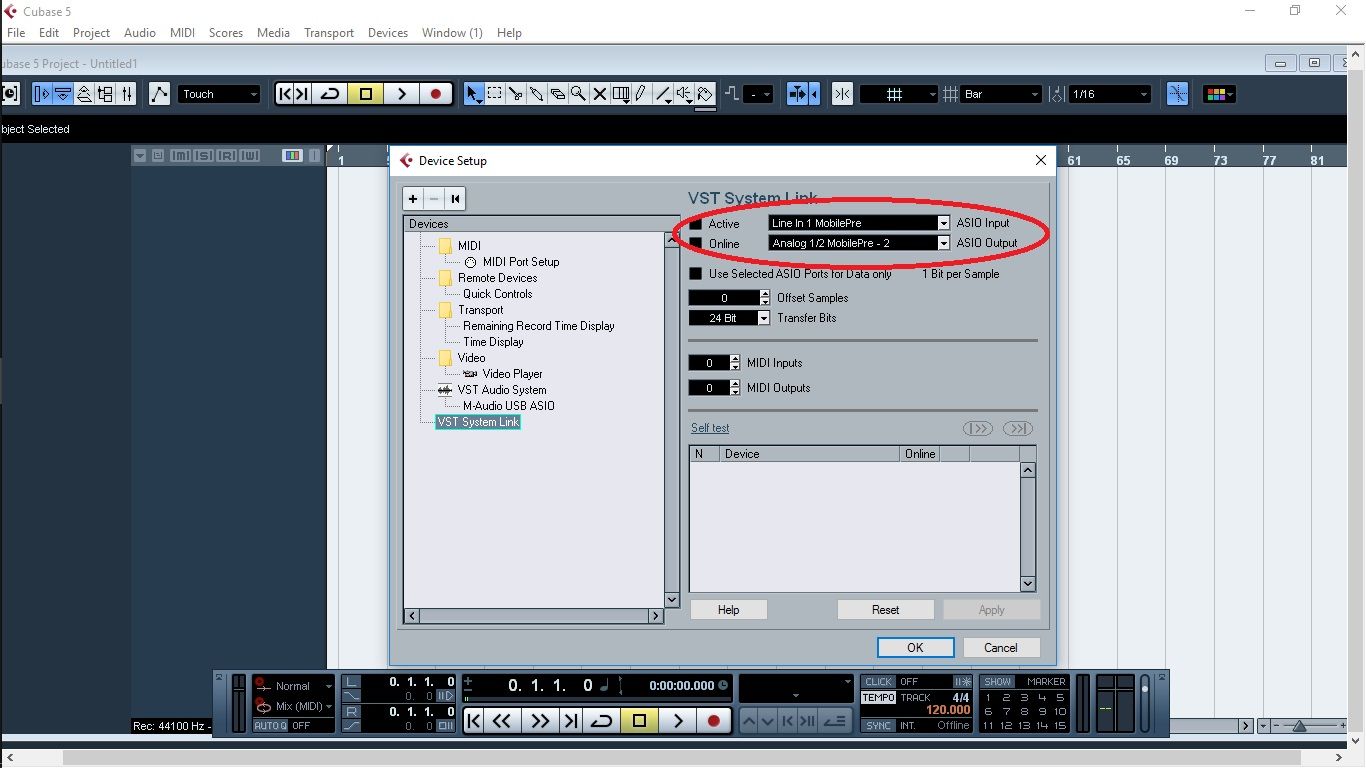
There you need to choose your sound recording device. Since I am using Mobile pre USB, I will choose that. Then you have to make sure that your INPUTS (where the signal goes in) and OUTPUST (where it comes out) are all selected and active.
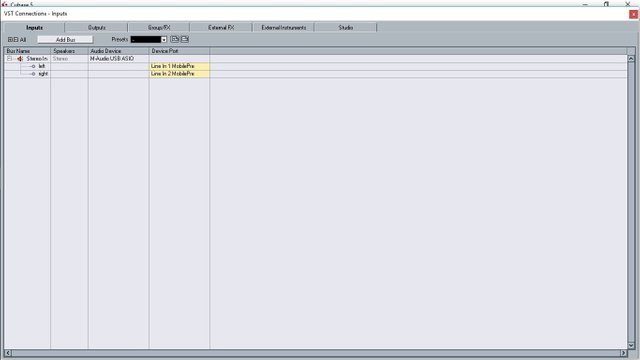
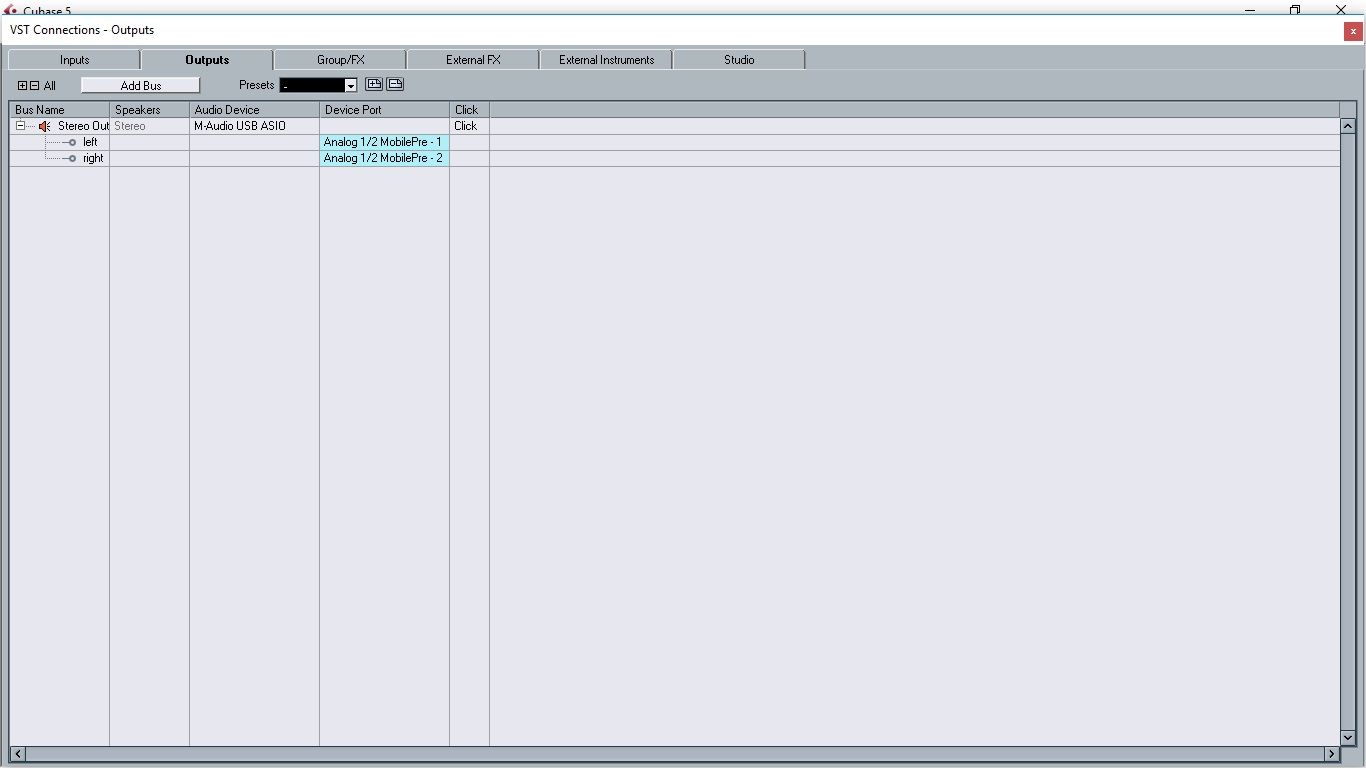
There is just one more step before you're set to record. You must check your VST Connections to make sure what you've selected in your device setup is actually working. So you just go to VST connections and see if it's there. If it's not (and it most likely will be), just clikc on ADD BUS and choose and select your device again.
RECORDING
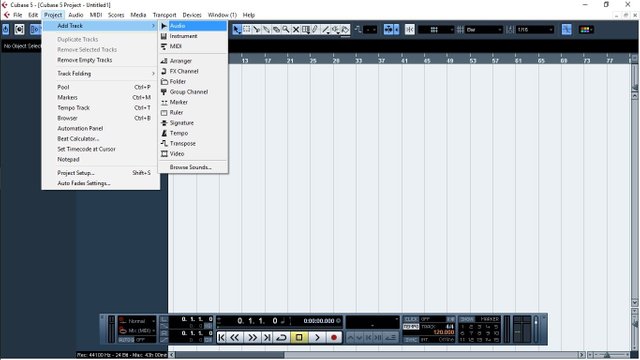
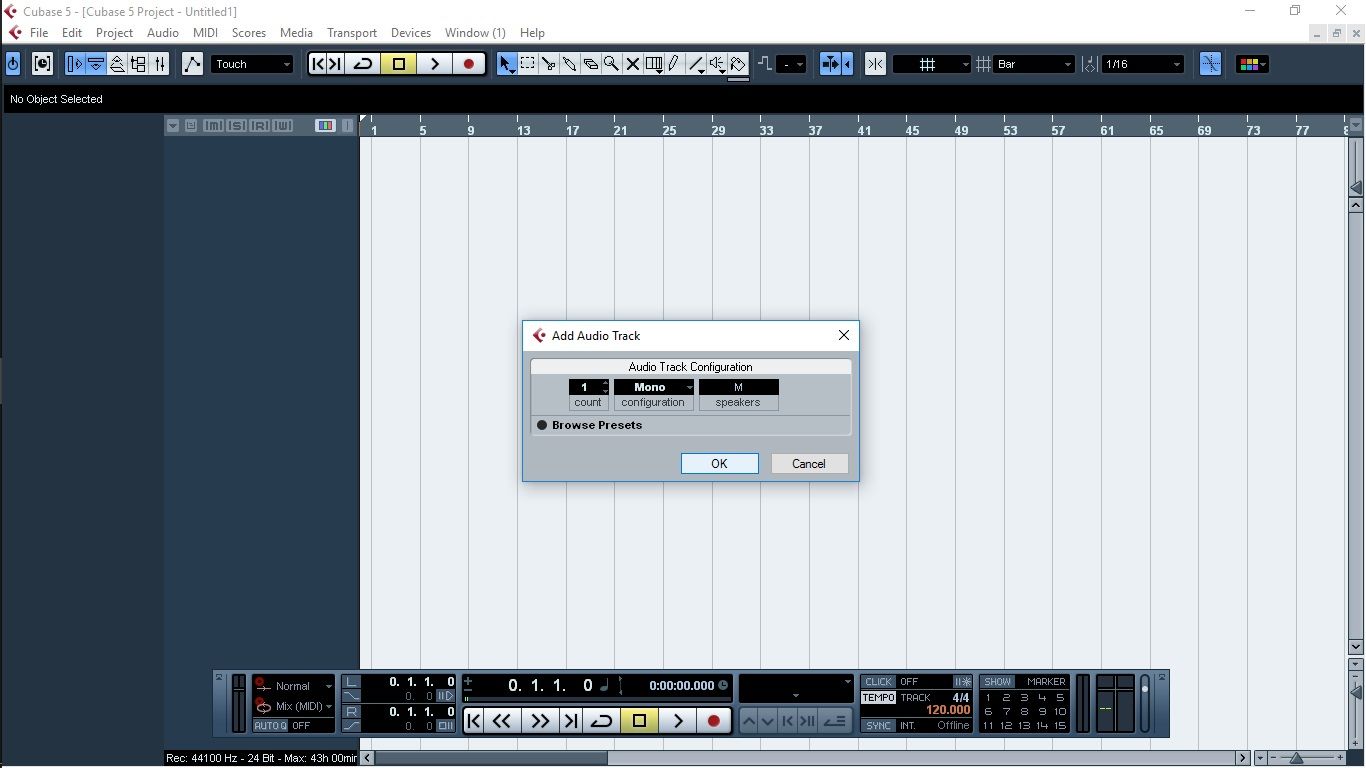
And now for the fun part. The recording. Many people say Ableto n is better than Cubase and they're both right and wrong. Ableton is a great tool but it's mostly used for making loops and editing the quality of the sound (that means using effects etc). If you're a beginner, Ableton can look really confusing, it's not user friendly, everything is layed out all over the place and you don't really know where to start. That's where Cubase beats Ableton. It's made really really simple and even if you've never even seen Cubase before, you would probably get the hang of it just by reading what it says in the menus you have. Cubase is also better for ''old school'' track by track recording, especially if you are recording real instruments and vocals using direct inputs or microphones. The visual representation of what you are doing is really good and all the other automatic stuff you need, such as setting the bars or the metronome tempo which will be in a separate tutorial, is really easy to find. Anyway, let's say you want to record a song using a guitar and your own voice. You want the guitar to have its own track so you can manipulate it independantly of the vocals and you want your vocal to be in its own track for the same reason. You simply plug your guitar into one of the inputs on your sound card (it's important to remeber if it's input 1 - usually it's called left) or 2 (right) and add a track. What you want to do is to assign that input to that particular track. If you're instrument is plugged in directly into your sound card or if you are recording it with only one microphone, go to PROJECT -> ADD TRACK -> AUDIO -> MONO. Simple as that.
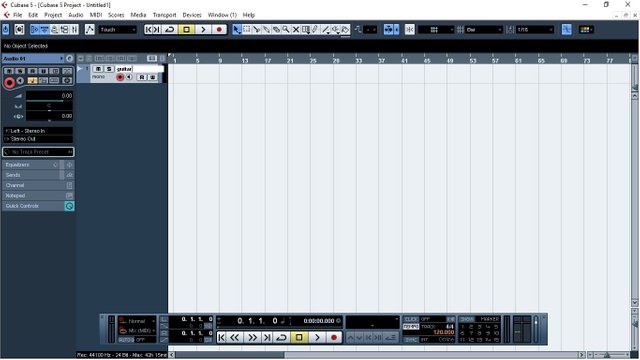
See that the left input is assigned to your track. Then see if the recording button on the track is on (it's on if it's red). If all of that is set up, see if you have a signal and start recording.

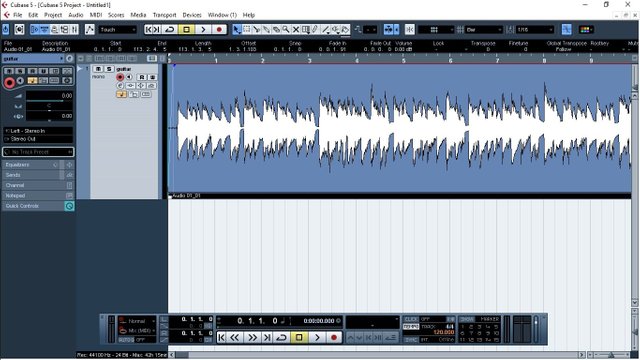
And that's it. You can start recording. If everything is okay, you will see a sound wave forming as you are recording. That sound wave is the music you are creating. You can later edit that signal any way you want and you can record as many sound waves you want, simply by adding more virtual audio tracks in the program. It looks like this:
That's it for this lesson. Make sure to try and set up the program a few times before you understand what it is you're setting up. I felt it is really important to make the first lesson deal with just configuring everything before we get into the recording process. Don't worry, I'll be talking more about the right amount of signal you need to have later, as well as other usefull beginners tips. For now, this should be enough to get you started with recording and experimenting around it. It's important to note that you can't get anything wrong and if you screw something up, you'll probably hear that something is wrong. Anyway, I'll try to make my screen record work so I can record a video of what I'm doing in Cubase and put my voice over it so you don't need to read a lot of text and look at pictures... We'll get there.
I hope you enjoyed this lesson and if you have any questions, feel free to leave it in the comments. Talk to you more tomorrow! Cheers everyone!
Looking forward to this tutorial. Learned FL Studio already and begin this leanring session when the finals are over
This post has received a 100% UpGoat from @shares. Send at least 0.1 SBD to @shares with a post link in the memo field.
To support our daily curation initiative, please donate 0.01 SBD or delegate Steem Power (SP) to @shares.
Support my owner. Please vote @Yehey as your Witness.
Good post. I like Cubase a lot, even though I mainly use it for MIDI, not recording. I’m currently trying out Reaper, just because it’ll be less money less often for more features, if it’s what I go with.
Reaper is great too but I think Cubase is great for beginners and it has a very clear visual representation of everything you are doing
I totally agree. I actually tried Reaper out once before--and while I'm not a pro, now, I'm certainly a lot more comfortable than I was then. Back then, sticking with Cubase was a no-brainer, but now that I have a better idea of how to harness some of the customization of Reaper, I'm excited to see what it can do.
True, Reaper is the best if you know what you're doing!