[CR] Creating Mike Wazowski - 3D Character Modelin
Hi @ntopaz
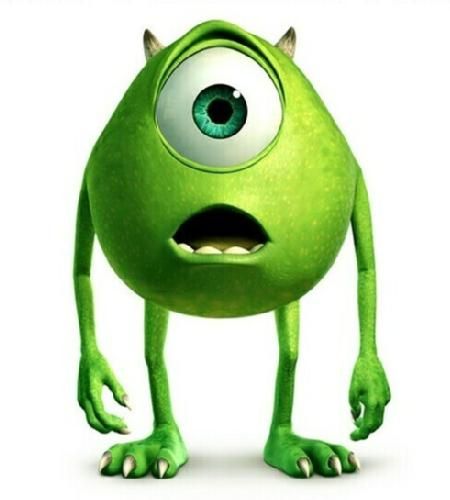
This time we will take as an example a very well-known character, we talk about Mike Wazowski, main character of the Monsters saga of Pixar Animation Studio movies, we will use a 3D modeling software very well known in the design communities, we talk about Blender, a free software of very good quality.
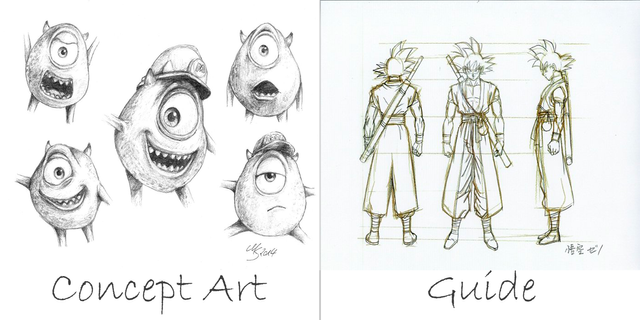
First of all, before taking a 3D model to creation you need references, to ensure an initial idea and defined proportions, we started with 2 types of sketches, a conceptual sketch, which would indicate how the model would look in 2D and the other that will be a guide sketch for modeling, which must have a frontal and lateral profile of the character as a minimum, which will have the same measures and proportions, this second will be used in the 3D software as a guide, in this example we do not need a sketch for 2 reasons, it is not the first time that this character is modeled, so there are 3D renders already made to use them as a guide and we do not want to complicate ourselves too much by a simple modeling.
Goku
As you know 3D models are based on a set of vertices that 2 or more form a border or edge, that 3 or more form a face, we will start to shape it from a cube, which has 8 vertices, 12 borders and 6 faces, then we divide it in half from top to bottom and use a tool called a mirror, this serves to give symmetry, ie create as its name says a mirror copy to be equal to both the right and left side. Then we make a series of subdivisions and move the vertices to generate a very polygonal figure but similar to the silhouette of our character (only the torso), then in the same way we extrude the arms and legs (always with the extremities extended).
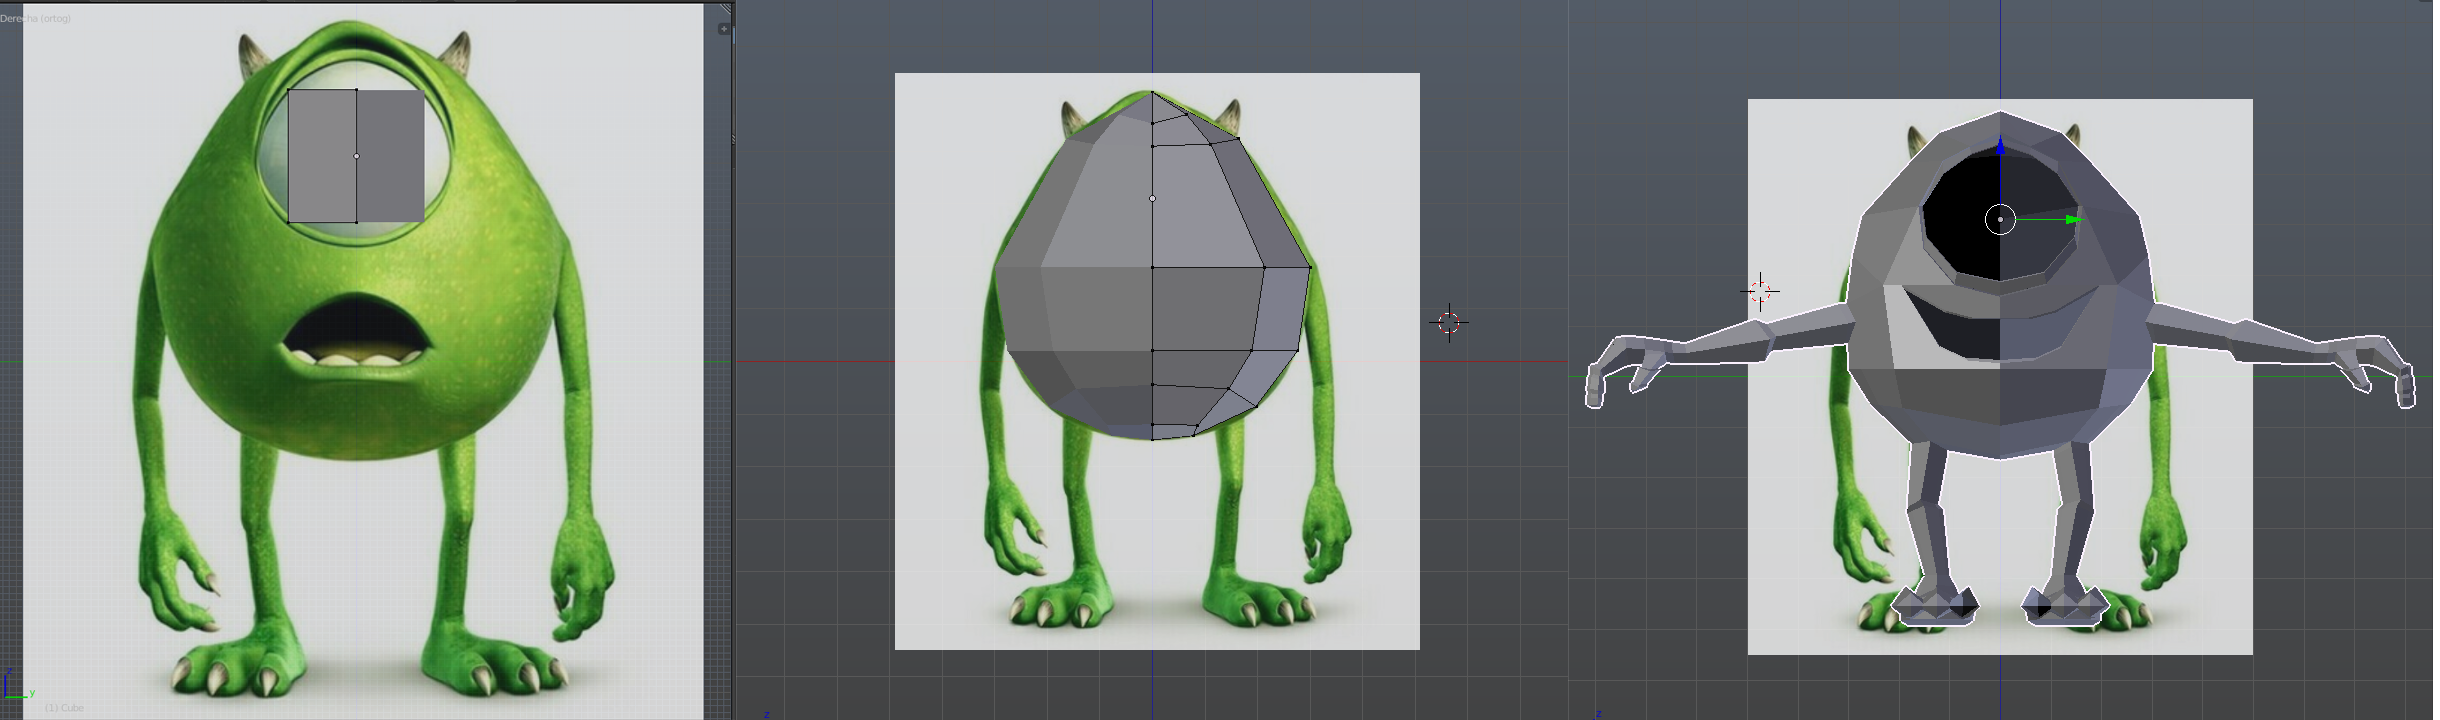
Since we have a basic but polygonal model the next step is to smooth it and add details, for that we will begin using a tool called "subdivide Surface" what it does is to subdivide the faces adding even more faces, and at the same time rounding the form of the object, for example if we subdivide many times a cube it will end up transforming into a sphere. Then we enter the sculpting mode, a tool that works like a chisel when sculpting a sculpture, as if it were miguel angel, this tool allows us to model in an inaccurate way but much more reasonable than doing it moving the vertices. Then we add additions, I mean his eye, claws, horns and teeth, are made with separate objects starting from a cube, is an easier process.
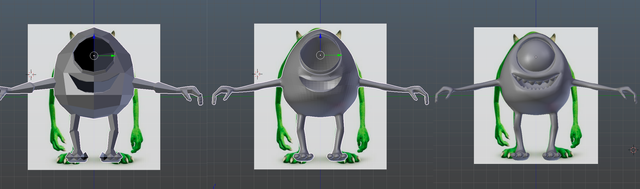
The Shaders in other words is the color, only a shader is not only a color based on the RGB spectrum (red, green, blue) not even on RGBα (which includes the Alpha or level of transparency), but also includes information on how the light will interact with that surface, giving from matte colors to reflective effects such as chrome, but do not stay there, with in complex system of nodes and textures, we can add images, we can give reliefs, convinacion of different tones of a thousand and a different forms, as well as to get to give with a single shader the effect of the burning lava of a volcano with areas ranging from the red and yellow of the flames to the black of the lava when petrified, which we have already shown you in previous post. first we will begin with some simple colors to differentiate the areas of color, and then if we are going to apply the nodes and give more complexity.
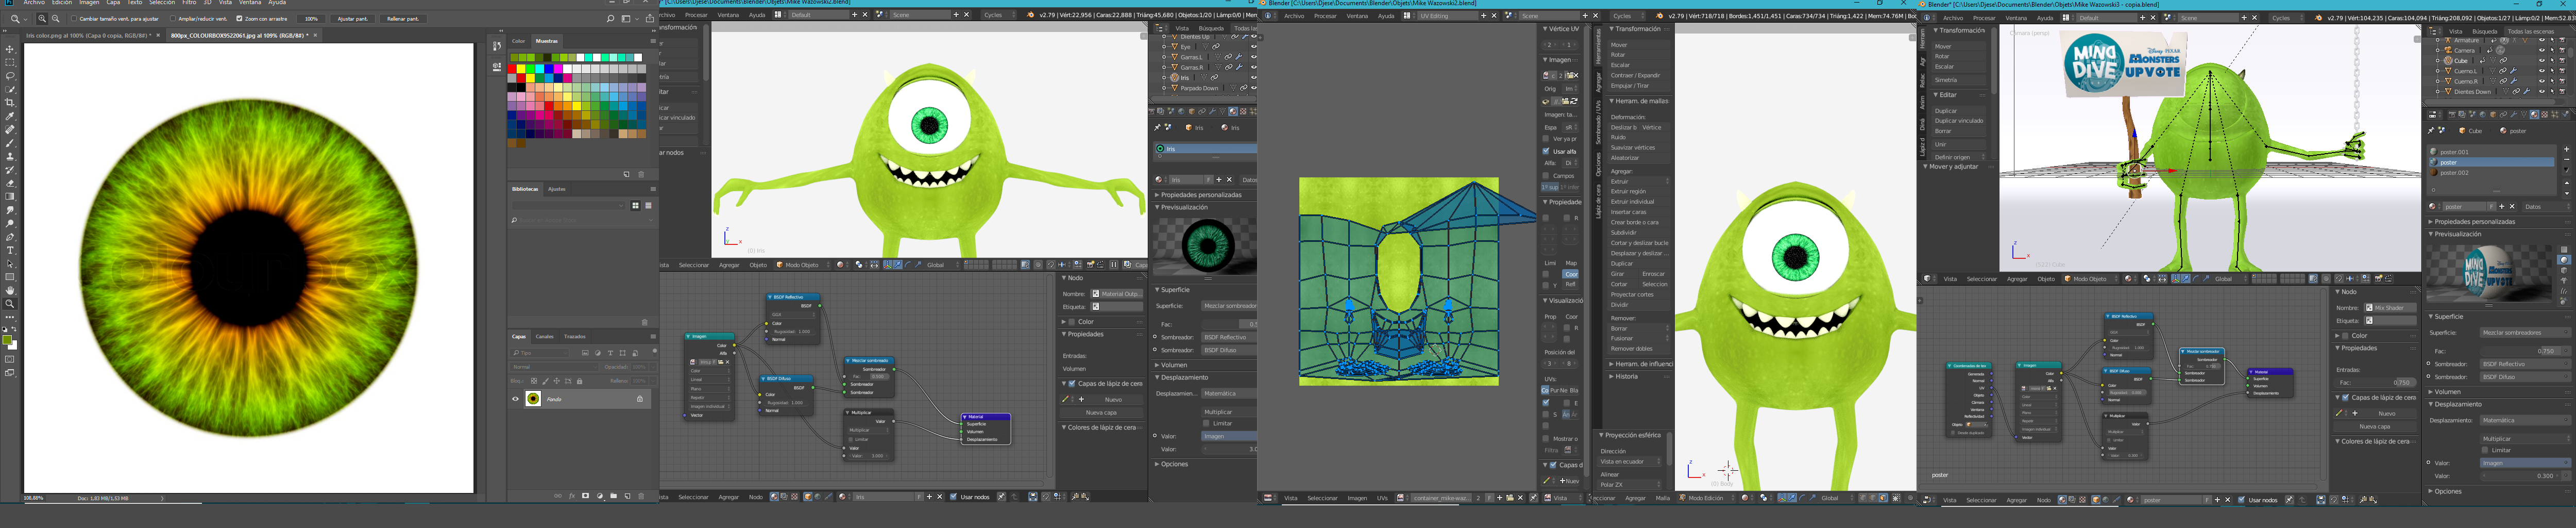
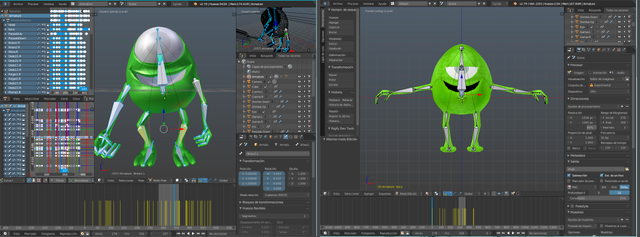
In order to animate a character you must make a rig or skeleton, which is a set of bones that do the same function as a real skeleton, define the articulated areas of a living being, in the case of 3D design, for the program to animate an object has to differentiate it, since the only perceives a character or any 3D model, as a set of Vertices, edges and faces, then by adding a skeleton we can link those Vertices, edges and faces to each bone, for example, we link the area of the head with a bone positioned right there, the area of the hand with a bone for the hand, fingers and so on, in fact the shape of the skeleton in the design is very similar to the biological anatomy, only that you always put some more bones to move other areas such as the face, eyelids, chest breathing, eyes, tongue, etc., since there are no muscles in those bones, does not work so but another bone can control that area. To each bone we can give a value of Rotation, scale and position, modifying them in order to animate them, it is positioned on the first frame of the scene and the bones are modified as we want the animation to begin, then we go from frame to frame (only those that represent important modifications), that is, if in frame 1 we put a box and we go to frame 30 and we move it 6 meters in the X axis, in the intermediate frames, soea from 2 to 5 this movement will be carried out, so if we go to frame 3 we will see that it has moved 3 meters) so on until finishing the animation.
This is the simplest step, the rendering is the process where the final result is generated, the photorealistic image is processed, so the software calculates the trajectory, intensity, color, dispersion and number of rebounds of each light in the scene, how it will interact with each shader and / or surface, resulting in a finished image, the designer must only configure the resolution, the format, amount of rebounds of the light, among other values, that's why it's the easiest step, however sometimes it's necessary to make some adjustments again, in the case of an animation the software has to render image by image (image = frame) until finished, then they are taken and passed to a video editor like Premiere, they are joined and exported as a video. While this process is simple for the animator, it is not for the computer unit, since it has to give all its effort, more than everything on the GPU (graphics card) the more powerful it is and / or better optimized this software for that card, faster rendering, is a very delayed process depending on the complexity of the design, for example, this animation that we will show you then take about 32 hours continuous to render completely, in other animation studios like Disney or Pixar where there are many frames and much more complex models, the movies last days or even months to be rendered in render farms that are rooms where there are thousands of computers with the best equipment to render as the new Nvidia Tesla V100 or the Nvidia Quadro P6000, for example each frame of the movie Cars lasted 15 hours to be rendered on one of these computers.
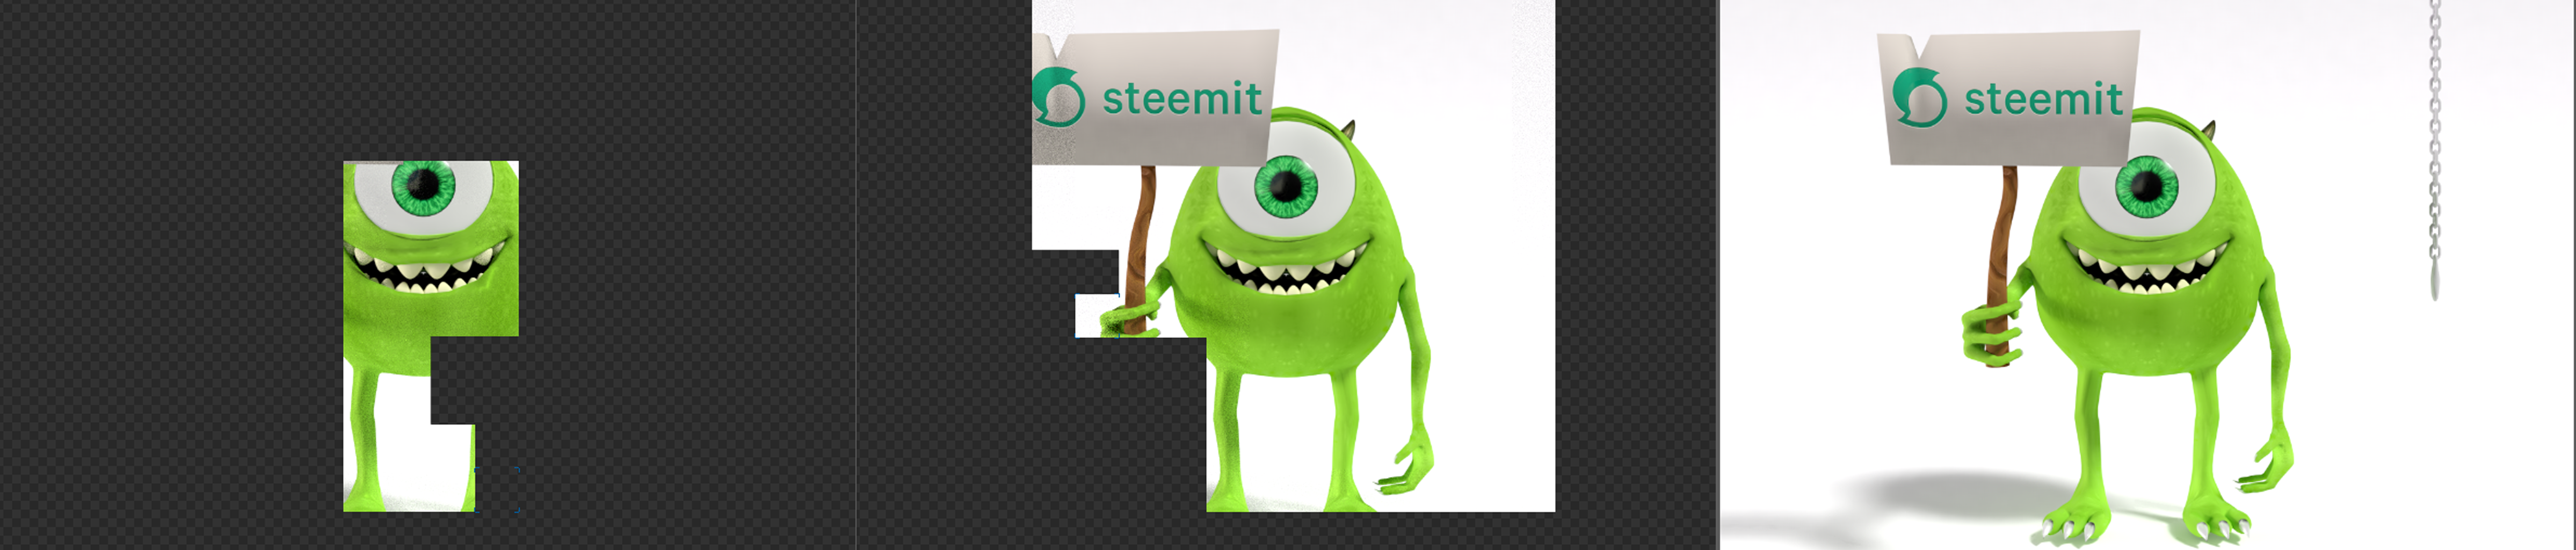

3D animation is a task that requires a lot of time and effort, the smallest animation or short film of 15 minutes is behind months or even years of development of a design team and every day there are advances in both design techniques and the power of the hardware that is used to look better and more photorealistic, animated better and more fluid with a shorter waiting time. specifically me, Daniel (also known as Jesel) one of the designers of Minddive Studio, took almost a month to develop this small animation that only for its rendering took about 32 hours continuous, was a process of much work, trial and error, an effort to bring them to you, if you like the post and animation I ask you to give us your vote, say it seemed or if you have any idea that we can develop and follow us in our social networks:

If you want me to make your own 3D animated separator or some other kind of design work you can contact me directly from my design instagram. @jesel_3design
If you want to know more about me


Thank you for reading and visiting my blog
See you in an upcoming publication

¡Feliz regreso a nTopaz! Me alegra que compartas nuevamente tus trabajos creativos con nosotros. Cualquier duda, contáctanos a través del discord. =)
Interesting model of this very iconic character :) Well done :)
@veryspider Thank You my Friend! My friend Manuel Ramos @manuelramos told me about @ntopaz and suggested that I publish my content here!
Ya que utiliza el servicio de hospedaje de WordPress de @reveur y el plugin de @steempress-io para publicar contenido en nuestro idioma, el #castellano, si deseas saber mas o formar parte, haz click en la imagen para entrar a nuestro discord.
Hello @minddive, thank you for sharing this creative work! We just stopped by to say that you've been upvoted by the @creativecrypto magazine. The Creative Crypto is all about art on the blockchain and learning from creatives like you. Looking forward to crossing paths again soon. Steem on!