📝Steps on How to Edit an I.D. Picture 📷
WELCOME TO MY WORKPLACE
It's been a while since I started working @ Lito Sy Studio Inc. here in Davao City and I have already learned a lot of things working inside the studio. I was taught by Lito Sy simself about how things go inside the studio and trust me when I say He truly is one good master in photography with over 26 years of experience in wedding and studio photography 👌

One of the common things done inside the studio is taking photos for ID pictures that are used for school, company, passport, visa, and a lot more. These ID pictures are easy to do and in this blog I will show everyone how it is done STEP BY STEP
Inside the studio we use various things like cameras, lights, reflector, and even a computer to edit the photos that will be printed.
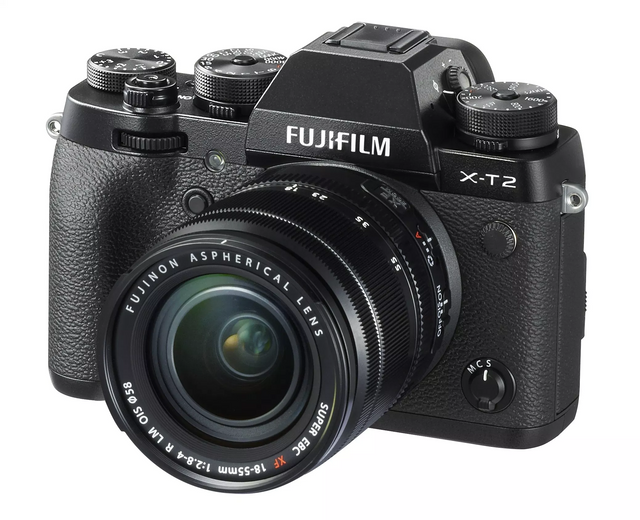
We are using Fujifilm X-T2 Camera with 16-55mm lens, Hensel and Genesis Professional Lighting System as the Main light, Fill in light, and Hair light as well with 2 yongnuo flash triggers. We use Photoshop to edit the photos.
Lets start!
First and for most we should consider the set up inside the studio as well as setting up the gadgets to get the best results. Our main light power ranges 1-10 and always set to 7 and 4 fill in light that has up to 800W/s. And we always make sure that we have a white cloth for editing purposes.
Here's what it looks like inside the studio with complete setup
So I set the camera to 5.6 F-stop, 1/100s shutter speed, and 100 iso. I also put the Kelvin to 3800 for fair skin tone appearance. Since we've been using 16-55mm lens, we make sure that we zoom it to 55mm so that there would be no distortion on the picture.
Here's the result
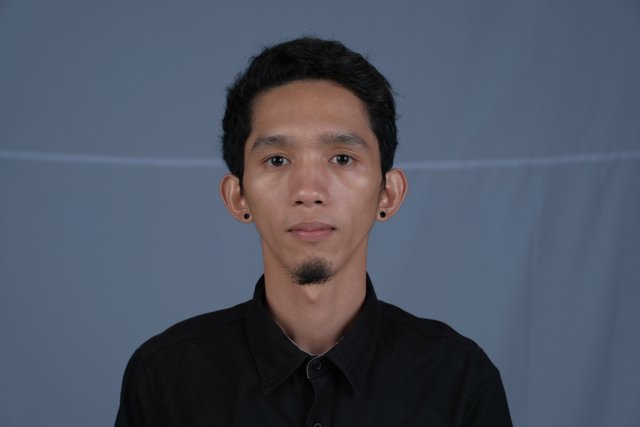
That face really looks haggard 😂
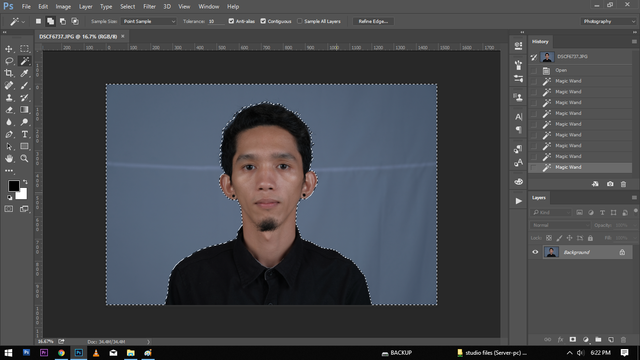
Moving forward. Open Photoshop app and on the app open the file/photo you want to edit. The first tool I prefer to use is the Magic Wand Tool. Can easily be found on the left side of the screen on the tool bar. Apply it all over the photo except the center or the subject of the photo. Make sure it would cover up all of the background for refining purposes. You can adjust its tolerance/sensitivity to control its flow. I decided to put it around 10 out of 100 for better results. After applying the magic wand tool it will make a certain selection. After everything on the background is covered press and hold Ctrl + Shift then press letter i to select inverse or just right click on the screen and press the option Refine Edge.
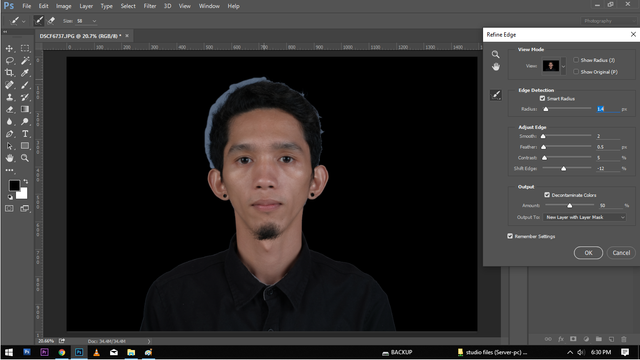
Once it is already in its inverse position right click on the screen so that it will give you options and click Refine Edge. This is very useful in changing the background so that the main subject would be separated on the background without using cut, erasure pen tool, or any other methods. This would help you to refine the hair so that the subject will separate evenly from the background. Refine edge has various settings for its sensitivity and appearance. On the photo below I have shown my settings for greater results. TAKE NOTE that the settings are meant for editing ID pictures in my perspective.
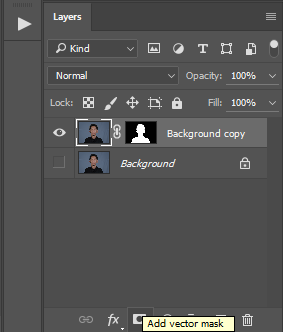
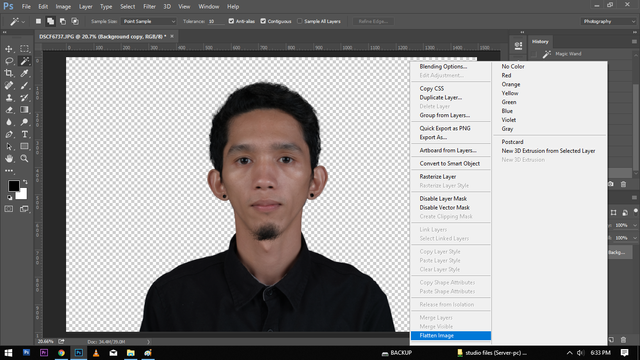
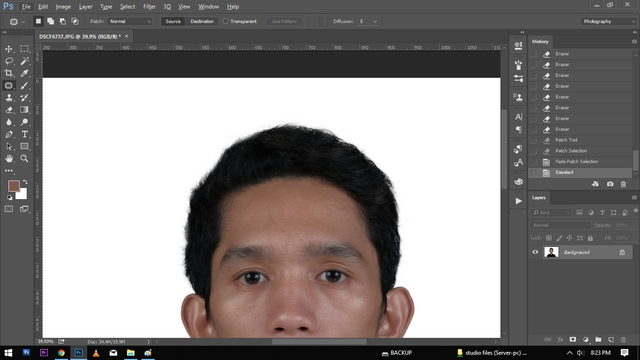
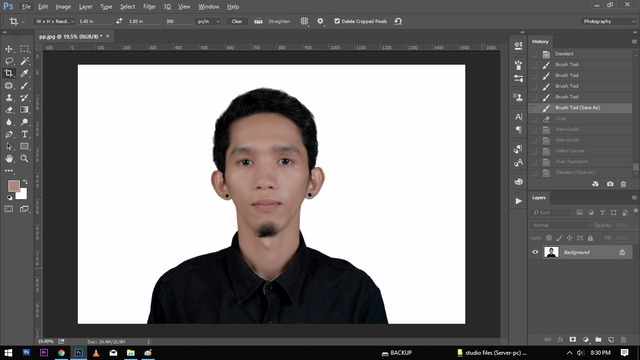
Once done refining the image proceed to adding vector mask found on the lower right of the app screen. Once vector mask is added, delete the layer Background. Then right click on the app screen the choose flatten image for the photo you are editing to have a plain white background. This way you are already done with the plain white background which is often times required for any usage of the ID picture. If you are seeing any little hair or baby hair on the photo you are editing you can just use the eraser with its radius reduced and opacity around 75%.
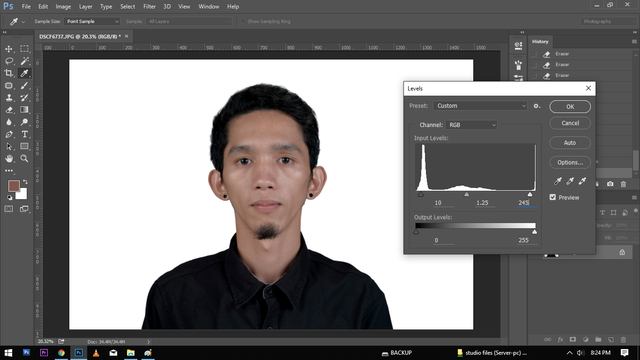
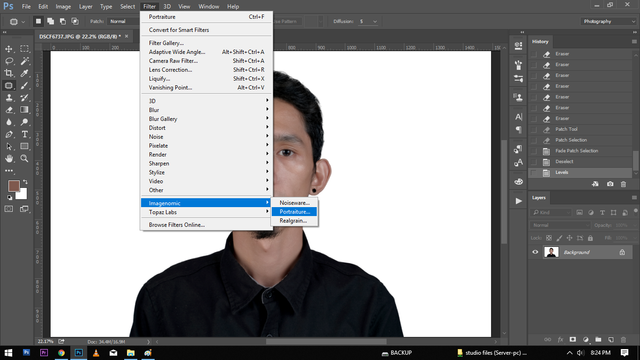
Now proceeding to the contrast of the photo you can adjust its levels by press holding Ctrl then press L. I always use the standard setup of the Level when it comes to this certain kind of skin tone. After applying the certain level of contrast I will always use portraiture for the face to be smoother. You can find the portraiture on the Filter part then click imagenomic and there you will fine the portraiture. The portraiture has various setup as well so it is up to you if how smooth or what your portraiture would look like.
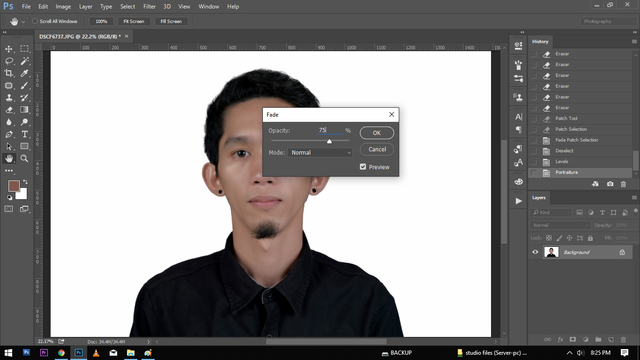
After applying portraiture I always apply fade effect to it which somehow serves as the opacity of the portraiture. Often times I place it around 75% so that it would not look a bit of flat. After applying the fade effect I always brush the dark parts to make it look lighter but not to the point it becomes flat. You can find the Brush tool on the tool bar on the left. The opacity I always use is around 10-15 when it comes to lightening up some parts.

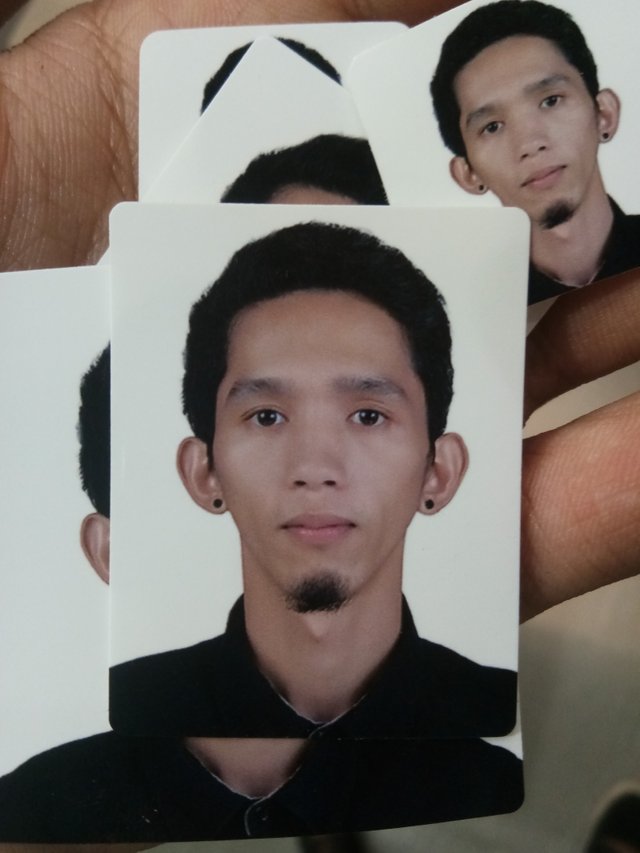
And once you are done editing you may now crop your photo with the desired size you want. This time I'm gonna crop the picture with passport, 2x2, and 1x1 sizes for different preference and usage. The face that once looked so haggard now looks lighter and cleaner with the use of photoshop and those easy procedures.
To spot the difference between the raw and edited try placing them side by side and see for yourself how useful this easy procedure is 😀
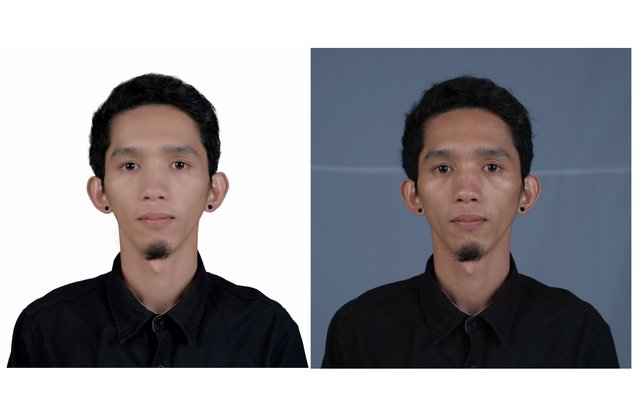
Sometimes I darken the photo a little bit so that it would depict a better hue/color once it is printed.
Here are the printed ones with different sizes 😀
Thanks for reading and I hope that this procedure has been more than useful for you.Next time I will try my best to make a blog about family/group picture and how we do it here inside the studio. Till next time.
✌Peace Out and Take a Leap👌
Congratulations @kennik! You have completed the following achievement on the Steem blockchain and have been rewarded with new badge(s) :
Click here to view your Board of Honor
If you no longer want to receive notifications, reply to this comment with the word
STOPCongratulations @kennik! You received a personal award!
You can view your badges on your Steem Board and compare to others on the Steem Ranking
Vote for @Steemitboard as a witness to get one more award and increased upvotes!