Tutorial: How to photograph a Solar Eclipse
Solar Eclipses are a rare event, and something that is worth photographing, but how do you do it? Here is the process I went through in order to photograph an eclipse back in 2015.
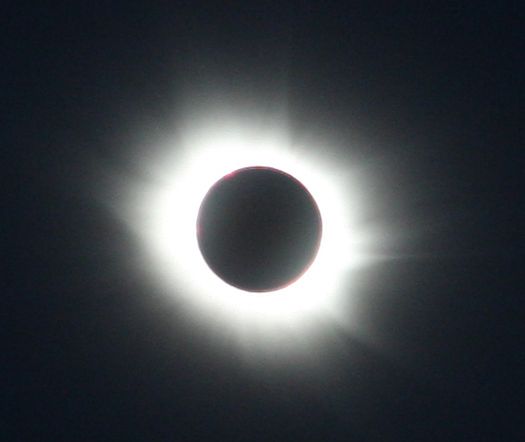
Solar Totality, University Centre in Svalbard - source
For me it went pretty well so I will share with you how I did it so you can try for yourself.
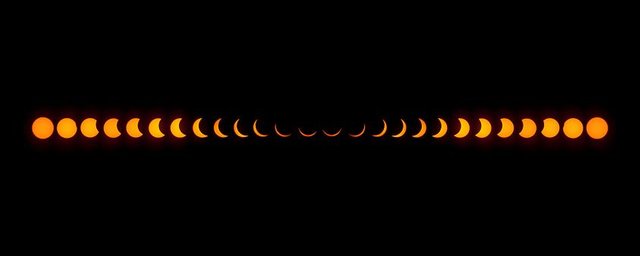
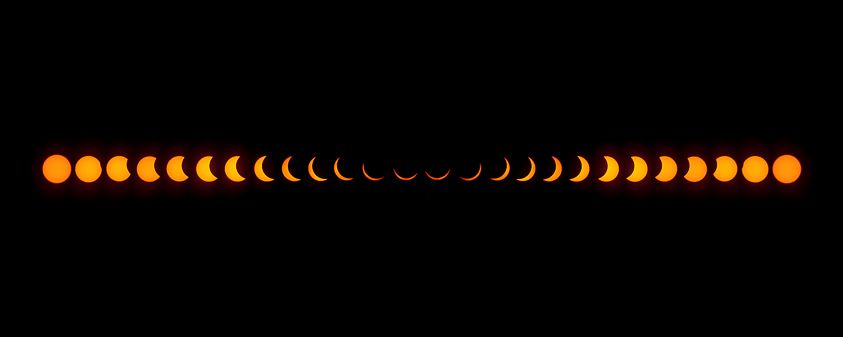
Full sequence from 2016 - high res version
This is a full sequence (start to finish) of the Solar Eclipse I photographed in 2015. I was lucky enough to be close to it when it happened, although to witness totality you had to be in the Faroe Islands (and they had completely overcast weather so didn’t get to see it at all).
So let’s get started:
Equipment
First thing you need to do is prepare you gear. There are a few things you need to pull this off:
- A tripod
- remote or cable shutter release
- A DSLR camera
- A long Telephoto lens - minimum 300mm
- A Solar Filter
- A scarf or a snood (I will explain this.. I will explain everything)
The Tripod
You want to keep the camera as still as possible, or you won’t get a clear image. This is critical.
The Remote or Cable Shutter Release
This will add to the tripod’s stability, the less you touch your camera when the shutter releases the better. Even pressing the shutter release on the camera can cause shake.
DSLR Camera
You could use a mirrorless system too, this is just what I have. Really and decent camera that you can attach a good long lens to and has decent manual control should do.
The Telephoto Lens
I used a 300mm lens. It was just about enough, but really if you can get something higher (unless you have a telescope) that would be better. If I could I think I would have preferred a 500mm lens for this.
The Solar Filter
You really really need this, without it you might fry your camera’s sensor. Its like a magnifying glass on an ant. Bad News. I bought this one [here]. It comes as a square sheet on its own. There is no way to attach it to anything, you are expected to have some thing to attach it to. I think its actually meant for serious people doing serious things with telescopes so they are expected to know what to do. So I had to make my own filter housing.
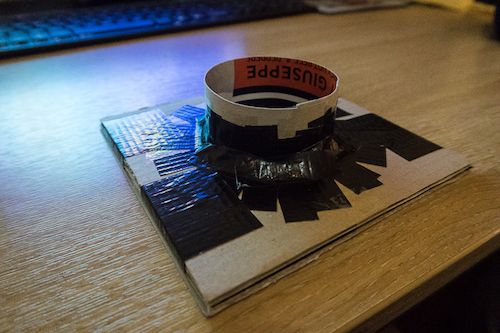
Unfortunately I didn’t document the build process, but here are some pictures to give you a hint of what you can do.
However, I can offer you a list of the materials I used. Its probably best if you come up with your own as your filter housing will need to be made to fit your camera. They key part is that there be no light leaking from the filter housing where it connects to the camera. or it will interfere with your exposure.
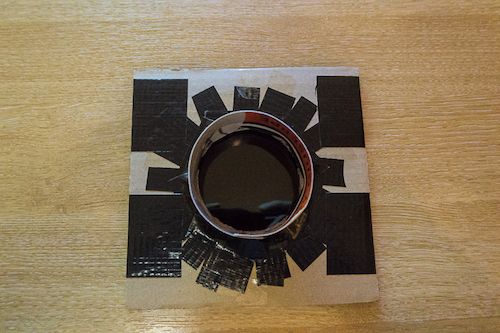
View of the top of the filter
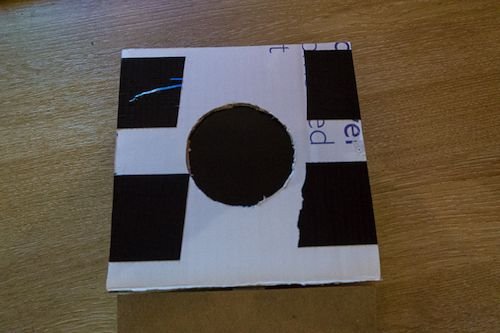
View of the bottom of the filter that connects to the lens
View from the side
The Scarf or Snood
Ok.. a snood is a neck warmer scarf type thing. Like a cloth tube like this (https://www.amazon.co.uk/7dayshop-Quality-220gsm-Fleece-Balaclava/dp/B01K7MM4RW/ref=sr_1_12?ie=UTF8&qid=1500917635&sr=8-12&keywords=neck+warmer)
You put it over the top and bottom of the camera at the back by the view screen so that you look through the snood at the screen. Why? because its like a mini darkroom and since you are staring at the sun you won’t be able to see you screen and see if your image is in focus etc. Trust me this was a lifesaver.
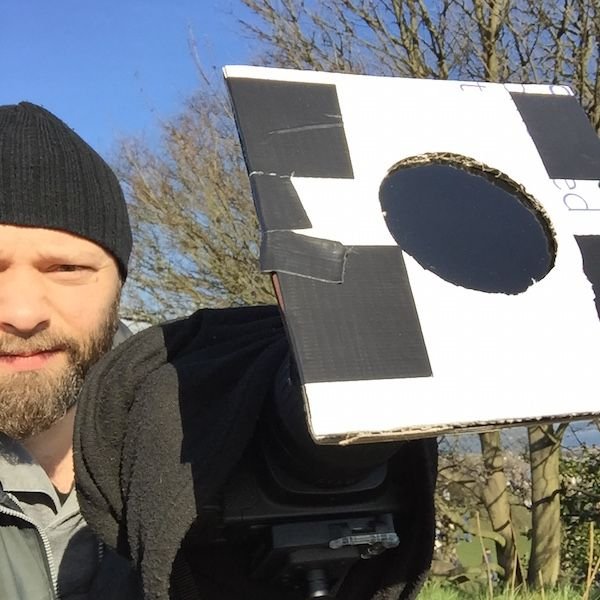
Here's my setup, you can see the snood hanging over the camera, and my filter attached to the lens
Camera Settings
So I kind of figured it out as I went. I got there about 30 minutes before it was due to start. I got setup and found the sun in my lens and adjusted my settings using the live view screen as well as ensuring everything is in focus. This is where the Snood came in handy.
I used an aperture of f/5.6, ISO 200 and 1/80 second @ 300mm to start.
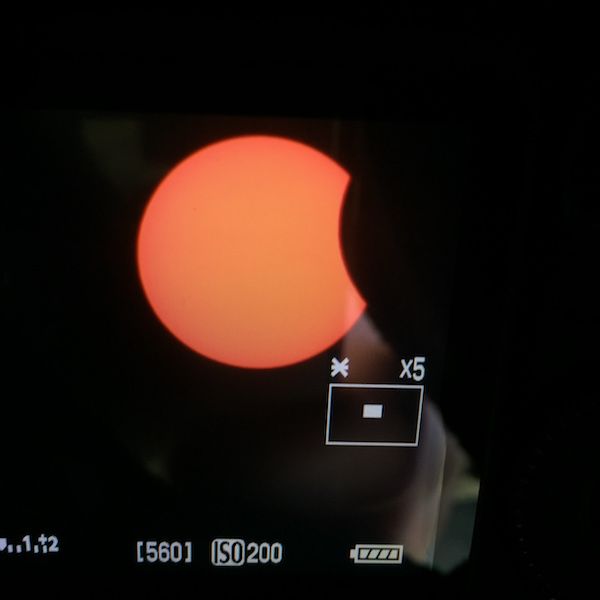
Screenshot from the live view screen on my camera
As the moon tracks across the sun and things start getting darker you need to adjust settings. I would gradually lower the exposure time and ISO settings leaving the aperture alone as you can see in the screen shots of my live view screen.
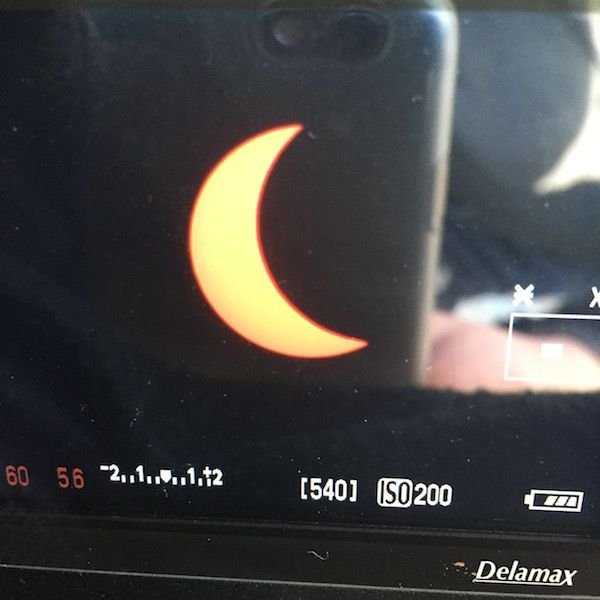
Screenshot from the live view screen on my camera
Take pictures of all the different stages and keep reviewing your shots in case you need to adjust your settings.
When its over and you’ve gotten back home you can review your images. I moved them all into photoshop and combined them to make this Solar Eclipse sequence.
Full sequence from 2016 - high res version
So there you go, that's how I shot a Solar Eclipse. Hopefully this guide will help you get started in trying it yourself. If after reading this you have any follow up questions please ask in the comments, I will be more than happy to answer as best I can. Good luck and if you go out and capture the Solar Eclipse make sure to share your pictures with the rest of us

Thanks for Looking.
Follow me and read more of my posts here: @fiftysixnorth


Amazing tut man! How about documenting the solar filter as well? Pleeease!
It will be kinda tough to document it after the fact but I will give it a try! I am on the road at the moment, but I get home next week.. I'll try and put something together for you then :) ... you might need to remind me though! ;)
Thanks man! This will also serve as a reminder :)
Thanks @pixresteemer :)
This post has been upvoted by @photomag and it's manual curation trail with a curie direct follow vote.
Vote for @markangeltrueman, the creator of @photomag as a witness here
Thank you! :)