🔼PHOTOGRAPHY COURSE | 6.4 Introducción al revelado químico | Introduction to chemical development
Photography course
6.4 Introducción al revelado químico | Introduction to chemical development
Fuente
Hola Steemian`s , este curso ya esta llegando a su cima, en la unidad de ayer repasamos lo que hemos visto y desarollado ya en el curso, también os comente que las unidades más troncales del curso serán desarrolladas en mini cursos mucho más especificos y especializados en su tematica.
Sin más dilación ( que me enrollo mucho con introducciones)
Hoy vamos a ver en esta unidad el Revelado quimico, he creido interesante a la vez que estudiamos gestión de color, y software de edición estudiar esta unidad basica en fotografia, para asi comprender que los software son una digitalización de lo que antes el laboratorio y nuestra ampliadora nos permitia.
¿ Que necesitamos para revelar ?
Ampliadora , Necesitamos una ampliadora que positive el negativo sobre el papel que escojamos. Las puedes encontrar de segunda mano bastante bien de precio, ( llevad cuidado con el estado de los filtros).
Cubetas – Minimo necesitamos unas 3 cubetas, de un tamaño superior al del papel sobre el que vayamos a positivar, en estas cubetas las fotografias recibiran los baños de paro, fijador y activador..
Papel – Recomiendo empezar trabajando siempre con el mismo papel, y en varios tamaños, recomiendo un papel Ilford, 1015 estandar de calidad para pruebas y uno bueno, de la misma marca un poquito más grande, 2030 por ejemplo.
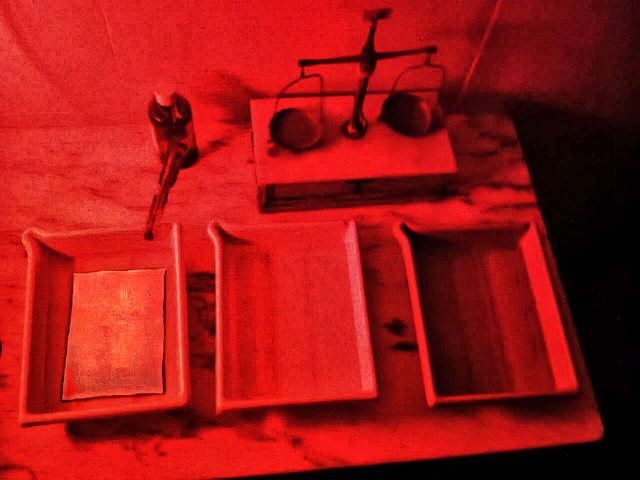
Accesorios – Necesitaremos, luz roja para tener algo de luz en el laboratorio y que no dañe los negativos y papel ; Pinzas para poder extraer de las cubetas las imagenes ; Guantes , la seguridad y limpieza en el revelado quimico es de vital importancia.

Fuente
- ¿ Ahora que?
Ahora , tenemos todo lo necesario a falta de localizar nuestra habitación o lugar donde colocar todo nuestro material de revelado.
- ¿ Como debe ser esa habitacion?
No necesitamos una gran superficie donde realizar todo esto, con una mesa standard tendremos suficiente, una mesa de un metro y medio aprox; Lo importante de nuestra habitacion debe ser, el agua corriente, es indispensable tener agua corriente para revelar, ya que entre baño y baño de quimico las fotografias se limpian con agua para no hacer interaccion entre quimicos ; 0% luz natural, no puede haber nada de luz cuando estemos tocando los papeles y los negativos, OJO muy importante nada de luz o se velaran ; Ventilación, los quimicos no son muy aversivos al sistema respiratorio, pero algo lo son, por lo que recomiendo una habitacion en la que podamos crear cierta ventilacion para aumentar nuestra comodidad ya que pasaremos periodos de grandes horas dentro del laboratorio ; Contando esto, recomiendo tambien un Wc , pero esto es un lujo ... Aunque dada la expriencia lo veo como necesidad...
Ya tenemos una introducción al revelado quimico, como os comente estoy preparando un laboratorio propio para poder traeros un curso de revelado quimico , tanto en formato blog, aquí en steemit, como en Dtube en video mucho más grafico para entender mejor todos los procesos.
English:
Hello Steemian`s, this course is already reaching its peak, in yesterday's unit we reviewed what we have seen and developed already in the course, I also tell you that the most main units of the course will be developed in much more specific mini-courses and specialized in its theme.
Without further delay (I roll up a lot with introductions)
Today we are going to see in this unit the Chemical Revelation, I thought it interesting while studying color management, and editing software to study this basic unit in photography, in order to understand that the software is a digitalization of what before the laboratory and our enlarger allowed us.
What do we need to reveal?
Enlarger, We need an enlarger that positive the negative on the paper we choose. You can find them second hand pretty well priced, (be careful with the state of the filters).
Buckets - Minimo we need about 3 buckets, of a larger size than the paper on which we are going to positivar, in these buckets the photos will receive the toilets of stop, fixer and activator.
Chemicals - The development process is divided into three phases, activating the paper, we put the paper in the bucket with activator, for a few seconds, we remove it by letting it drain for a few seconds, and we give it the stop bath, after the stoppage bath , direct to enlarger, fixer and let dry.
Paper - I recommend starting always working with the same paper, and in several sizes, I recommend an Ilford paper, 10 * 15 quality standards for tests and a good one, from the same brand a little bit bigger, 20 * 30 for example.
Accessories - We will need, red light to have some light in the laboratory and that does not damage the negatives and paper; Tweezers to be able to extract the images from the trays; Gloves, safety and cleanliness in chemical development is of vital importance.
- Now what?
Now, we have everything necessary in the absence of locating our room or place to place all our development material.
- How should that room be?
We do not need a large area to do all this, with a standard table we will have enough, a table of about one and a half meters; The important thing in our room should be, running water, it is essential to have running water to reveal, since between bath and chemical bath the photographs are cleaned with water to avoid interaction between chemicals; 0% natural light, there can be no light when we are touching the papers and the negatives, EYE very important no light or will be watched; Ventilation, the chemicals are not very aversive to the respiratory system, but something is, so I recommend a room where we can create some ventilation to increase our comfort as we will spend periods of great hours in the laboratory; Counting this, I also recommend a Wc, but this is a luxury ... Although given the experience I see it as a need ...
We already have an introduction to the chemical development, as I commented I am preparing a laboratory to bring you a course of chemical development, both in blog format, here in steemit, and in Dtube in much more graphic video to better understand all the processe
In case you are interested here I leave a list of some of the material I use:
Por si os interesa aquí os dejo una lista de parte del material que utilizo:
Nikon D500: https://amzn.to/2xKbSQN
Nikon D5: https://amzn.to/2Jcgchg
Nikon 28 mm F 1.8: https://amzn.to/2sx4x2c
Nikon 8- 15 mm F1,8: https://amzn.to/2swSDp4
Nikon 70-200 mm F 2.8: https://amzn.to/2sAd8Rz
Flash Profoto A1: https://amzn.to/2szhB77
Tripode that I use and totally reliable: https://amzn.to/2kNuzts
Safety straps that I use: https://amzn.to/2sAQEzO
Cleaning kit: https://amzn.to/2JiA0ey
- PREVIOUS POST :https://steemit.com/photography/@harmaa/photography-course-or-8-2-primeros-pasos-en-adobe-lightroom-or-first-steps-in-adobe-lightroom
- DIDACTICAL GUIDE: https://steemit.com/photography/@harmaa/frame-to-frame-informative-note-photography-course
- D-TUBE CHANNEL:
-SERVER DISCORD: https://discord.gg/ZKNCcZ

#Photography #art #FrameToFrame #artistcolective #authorphotography #beauty #creative #creativity #design #freedom #manoloelpescador #reydeuncastillodearena #wildnaturefeel #Audiovisual #cinema #film #production #sound #entertaiment #films #movies #doubleexposition #artistday #day #Documental #documentalphotography #documentalfilms #documentalaudiovisuals #spanishproductions #spanish #Histeemit #nikond500 #reviews
God bless you. https://steemit.com/@biblegateway
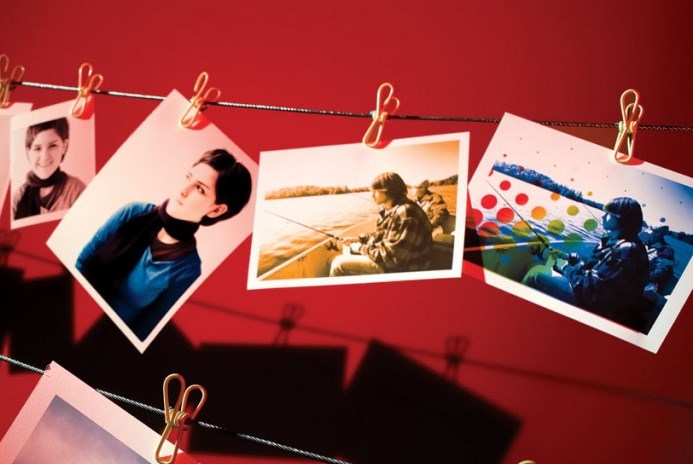
Guapísima las fotos ya colgadas con esa luz roja de fondo.