Photo Editing - Turning An Ordinary Photo Into An Epic One
Editing Your Photos
First of all, thank you to all my followers for... well.. following me. It's been great engaging with you and I hope the material I've put out so far have helped you all improve your photography results. I've been busy looking at your content and the content of other Steem photographers and I've noticed something that's surprisingly really common. A lot of people don't seem to want to edit their photos. A few of you have said it's because of the lack of software. Others have felt that it's too complicated and time consuming. You're all right. It's not easy to get good software thats inexpensive, and it can be time consuming sometimes. In saying that, you'd be surprised at what a few quick changes to your photograph can do for both your photo and your blog. In this article I'm going to go through some of my own photographs and go through how I went about editing them. There's a series of before and after shots so you can appreciate how much of a difference it can make.
I know some of you out there, and even some of my own friends, are what I like to call "purists". These are the people that whole heartedly believe that photography is the skill in how you use your camera and anything more is considered cheating. I'll be the first to admit, photography is hard. There are clearly a few things out of your control. You might have the perfect moment but the lighting conditions completely ruin your shot. Other times you'll have great lighting but the moment disappears before your snap. Editing brings back some of that control. It's a powerful tool that can turn an ordinary photo into something epic. In some ways this is one aspect that separates professional from amateur photographers. I think if you're starting to become serious about your photography, it would be worthwhile investing some time into learning how to edit your photos.
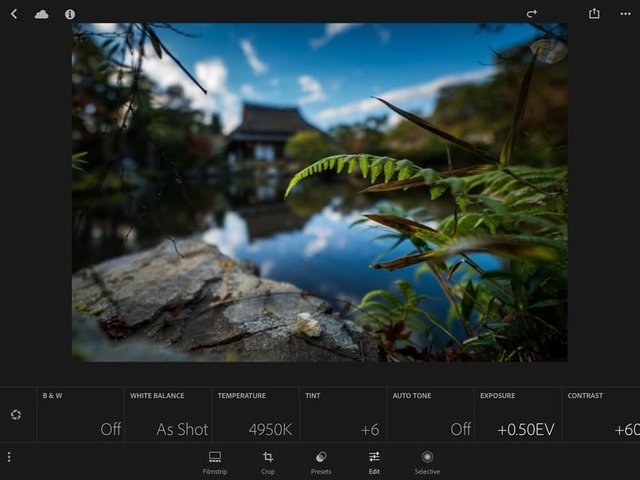
I edit my photos through adobe light room. It's pretty user friendly, especially if you use the tablet app version. It does come with a bit of a steep price where you'll have to spend a monthly subscription fee. This does however give you access to all the adobe products on every platform and provides plenty of cloud storage space. This means you can make fine tuning adjustments on your travels and then come home and continue editing photos on your desktop. The above is the edit menu on my iPad and it brings up different variables such as white balance, temperature, exposure, contrast, saturation, shadow and highlights. The way I learnt how to utilise these was through trial and error (a good philosophy for most things in life). Each variable comes with a slider you move up and down until you get results you're happy with. You also have the option of selecting part of the image to adjust the variables so it only effects part of the image. So with that, lets go through some examples. We'll start with the photo above.
Zen Garden
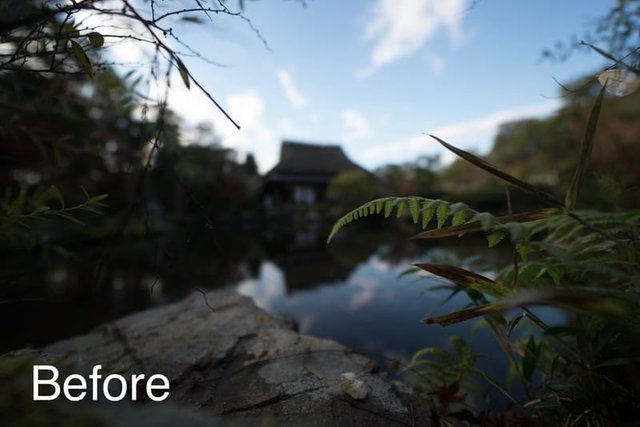
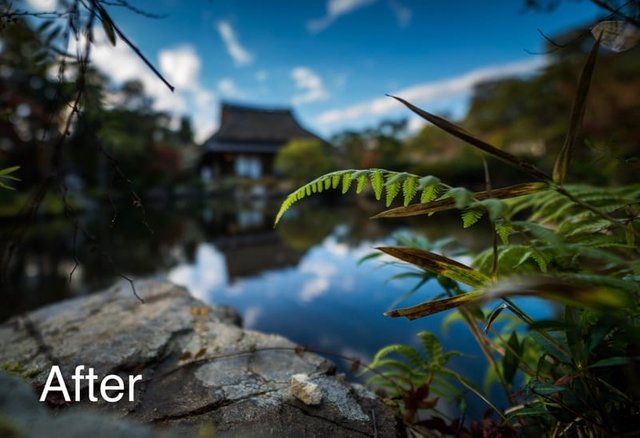
Here we have a relatively average picture. The lighting is soft and the colours are pretty dull. This was largely in part due to the weather that day. It was overcast and only stopped raining a short while before the shot was taken. So I took a few liberties and made a few adjustments.
- Cropped: so that the position of the house fit the rule of thirds
- Increased contrast and saturation: to bring out some of the colours to make it "pop"
- Reduced highlights: so the clouds retained some definition and took away some glare from the pond
- Changed the temperature: to make the sky and pond look more blue
Geisha
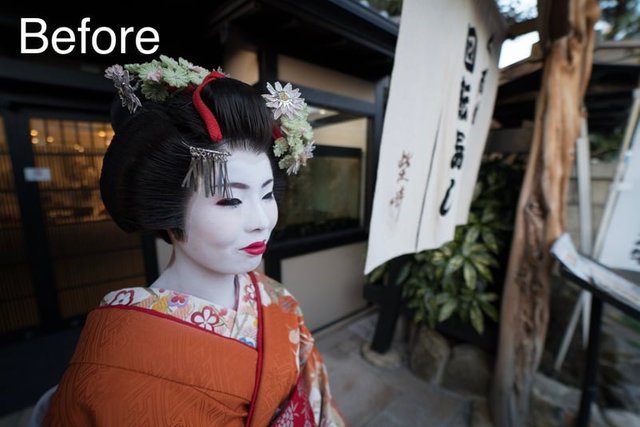
It doesn't have to be about cranking up your saturation or changing colours. You can take away colour and have just a dramatic effect on your photo. Here's a picture of a Geisha in Japan. The original shot had a fair amount of colour, but I also noticed that there was a lot of contrast between light and dark colours. Perfect for a black and white photo.
- Reduced saturation: to drain away the colour
- Changed the temperature: to make the photo slightly blue, gives it a unique black and white effect
- Increased contrast: to emphasise that difference
- Added a bit of vingetting: to draw the viewer to the subject

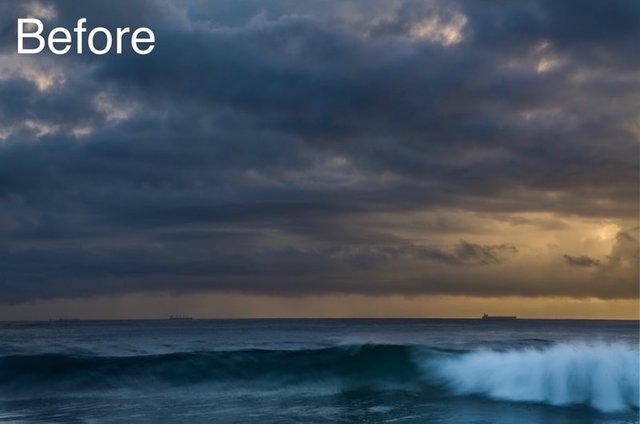
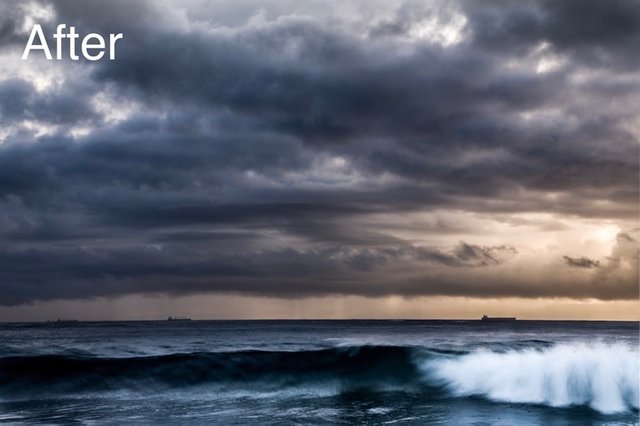
Tankers
Here's a HDR shot of a line of ocean tankers coasting on the horizon. I like to stack images of different exposures because it gives a greater variability in the dynamic elements of the photo. In this particular one, it dramatises the sky and gives a good contrast against the backdrop of the rising sun. Unfortunately the HDR image looks pretty flat and takes away from the sky. So I changed a few things.
- Reduced saturation: this helped create that stormy overcast atmosphere
- Increased highlights: which helped bring out the brighter elements of the sky and the sun
- Increased sharpness: which helped create a more defined horizon and had a glassy effect on the foreground wave
- Increased shadows: so that the darker elements remained dark
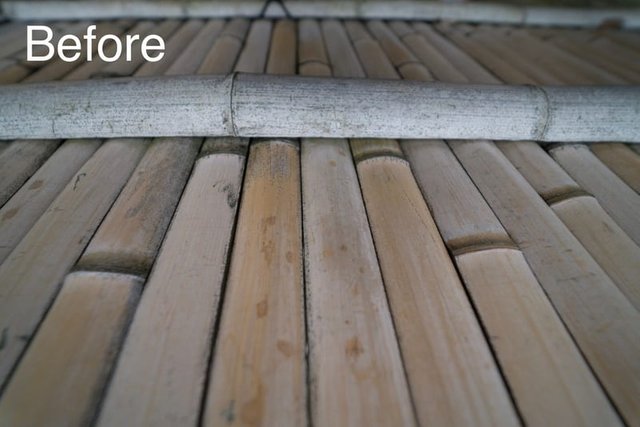
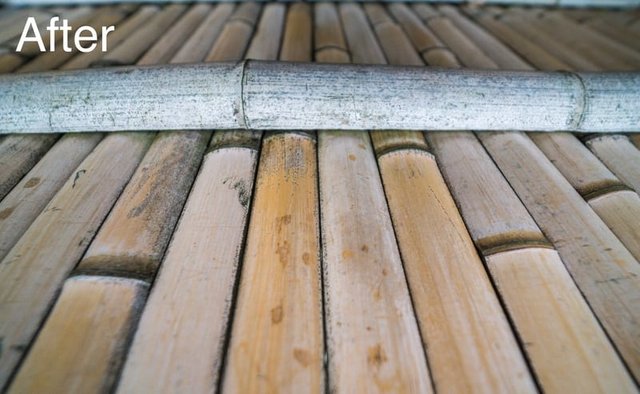
Bamboo Fence
Here's a photo of a bamboo fence. Again, the original image is lacking definition and overall looks flat. I wanted to bring out the characteristics of the bamboo in this one, so I made the following changes.
- Increased sharpness: brings out the imperfections of the bamboo texture
- Increased contrast: Also to emphasise the small imperfections throughout
- Increased exposure: To brighten up the image
- Selectively reduced noise: Selected the background where it's out of focus and softened it up more with a bit of noise reduction. It keeps out of focus areas nice and smooth.
- Changed the temperature: warmed up the image to bring out a bit of yellow.
You'll eventually get use to the different variables and how to adjust them to get what you want out of your photo. The main thing is that you make a conscious decision to start editing and get your fingers swiping on an app. Obviously if you have the ability to shoot in RAW, do this. It retains the greatest amount of data and provides you with the most amount of flexibility when editing your images. Now go back through your old photos and see how you can bring out different elements to make the photo work for you. The above is just my method of editing photos. You can use editing techniques to bring out elements of your photo to match your style of photography.
Let me know what kind of editing software you use for your photography. If you have had personal experience with an inexpensive or free app, share in the comments below.
If you enjoyed this post, be sure to UpVote, Resteem and Follow me @lenscape especially if you're into travel, photography and reading words online.
I think this is a great article for those who are new to editing or those who don't at all.... Meanwhile I enjoyed it as well, as I think everyone has their own 'style' of editing, and it is enlightening to see how others work! :) I use picasa which is free but unfortunately they have stopped updates.... sad! Thank you! Resteeming...
Thanks for Resteeming! I really appreciate it :) Yeah, I was just surprised at how very many people didn't edit. I guess I come from a very closed group of friends so assumed everyone did. What platform is Picasa on?
I use some of these techniques to post work my fractal art, good to see how you are using them in photo postwork!
You have some seriously great advice in here!
Thanks, @jamtaylor. Means a lot coming from a professional.
Congratulations! This post has been upvoted from the communal account, @minnowsupport, by rukiegamer from the Minnow Support Project. It's a witness project run by aggroed, ausbitbank, teamsteem, theprophet0, and someguy123. The goal is to help Steemit grow by supporting Minnows and creating a social network. Please find us in the Peace, Abundance, and Liberty Network (PALnet) Discord Channel. It's a completely public and open space to all members of the Steemit community who voluntarily choose to be there.
If you like what we're doing please upvote this comment so we can continue to build the community account that's supporting all members.
Thanks! Appreciate the support! Glad to have someone looking out for the little guys :P
Great post. I've never edited my photos before, might have a little play around now
That Gaomei Sunset is just dying to be edited!
Excellent write-up. The wave capture definitely came to life
Thanks @bkkjake
Love seeing these before and after. Thanks for the editing tips :)
Now go forth and take lovely shots of your crochet work for the world to see!
Thanks so much! That's the plan :)
Thanks for some examples. I've tried editing a few of my photos in windows 10 photo editor. Surprising how much a difference it can make :)
Thanks for resteeming! I look forward to seeing some of your photos online
Awesome post very useful for those new to photography and editing, and even though I have been doing it a while was a nice refresher for me thanks for taking the time
Thanks, yeah the article was mainly for those that haven't adopted the editing philosophy yet. I'm glad you got something out of it too. What software do you use?
I do a lot of HDr so I use Lightroom and Photomatix along with Photoshop
Nice, I personally didn't find the work flow for photoshop easy enough to do HDR so I've got the Raya Pro 2.0 plugin that really makes it so much quicker
I got Rayapro but never rally got used to it maybe because i had my workflow that worked for me I found it hard to adjust
Yeah, I pretty much went straight to raya pro, probably why I found it easier
Congratulations @lenscape! You have completed some achievement on Steemit and have been rewarded with new badge(s) :
Click on any badge to view your own Board of Honnor on SteemitBoard.
For more information about SteemitBoard, click here
If you no longer want to receive notifications, reply to this comment with the word
STOPBy upvoting this notification, you can help all Steemit users. Learn how here!