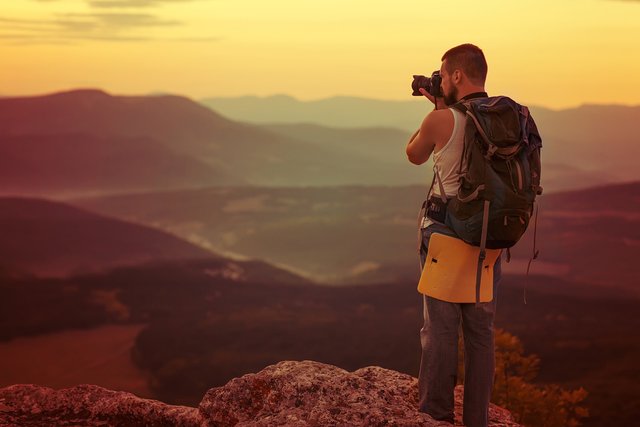
How to Capture a Perfect Photo
Decide on a clear center of attention:-
#Drawing the viewer’s attention to the main subject in your photographs will help them understand your story more clearly. If you have a busy scene with no clear focus point it will possibly give your viewers an overall idea of what you were photographing, but they may not scrutinize it for long. Adding a clear center of attention will help you create better storytelling images.
Particularly when you are photographing a locality with a lot going on you can seek to isolate or draw the viewer’s eye to one main subject within your composition. By using this technique, you can develop a style which may become easily recognizable in your photographs.
Remember that your eye has a better dynamic range than your camera:-
#Look at something other than your computer screen for a moment and take note of the world around you. You should notice bright highlights and dark shadow areas without much of a problem. Film and digital sensors do not see as well as you do. The shadows and highlights may be quantified as numbers that represent the luminance of any scene.

The standard measure of luminance is expressed as candelas per square meter or cd/m2. The luminance of the sun is expressed as a ratio of 1,000,000,000:1 or 1 billion candelas to 1 square meter. Other common expressions of luminance are:
Aperture control for DOF:-
#A basic definition of depth of field is: the zone of acceptable sharpness within a photo that will appear in focus. In every picture there is a certain area of your image in front of, and behind the subject that will appear in focus.
This zone will vary from photo to photo. Some images may have very small zones of focus which is called shallow depth of field.
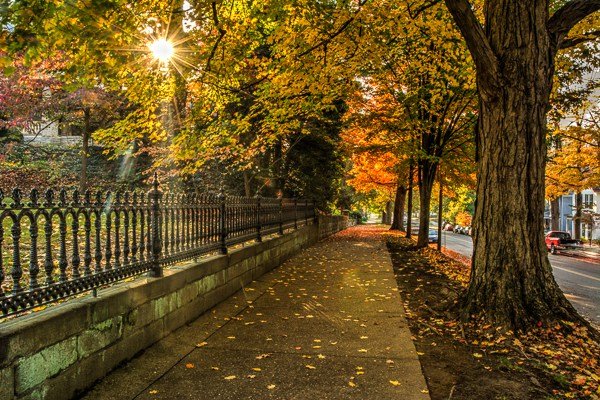
Here’s a series of images with very shallow depth of field.
Others may have a very large zone of focus which is called deep depth of field.
Here’s a collection of images with much deeper depths of field.
Three main factors that will affect how you control the depth of field of your images are: aperture (f-stop), distance from the subject to the camera, and focal length of the lens on your camera. Here are some explanations and answers to other common questions concerning depth of field.
Careful composition to either expand upon or contract the feel of the photo:-
#This technique will possibly have some of you shaking your heads in disgust, because I'm going to ask you to actually move your FEET while shooting. Many novice photographers rely far too heavily on the fact that their camera has a zoom, and sacrifice a whole range of composition possibilities because they refuse to move their feet to get closer to or farther away from their subject. Now don't get me wrong, I'm all in favor of using that fancy zoom you've got – but I want you to understand what it is doing. When you zoom in, you not only get the subject to appear larger, but you cut out much of the background that may possibly be part of what you wish to capture. Sometimes it is better to zoom farther out and move your feet closer to the subject. This will make your subject larger but capture more of the surroundings to better portray what your eye sees. The opposite is also true, of course. You can use your zoom to carefully decide what part of the background you want to have visible…Sometimes you'll need to zoom in on the subject but move farther away from them to get the composition you want.
Be ready – moments come and go quickly:-
Understand the exposure triangle:-
#No, the exposure triangle hasn’t suddenly become the exposure square. This is just a note about image stabilization: remember that it can help you get away with slower shutter speeds that allow you to use narrower apertures for more depth of field or lower ISOs for more detail. However, don’t make the mistake of confusing camera shake with subject motion. Image stabilization only helps with the first of these. It is ideal for static subjects. I very often see photographers with blurry photos because their shutter speed was too slow for their subject, but they thought image stabilization would save them.
Examples
Let’s take a look at some pictorial examples of the exposure triangle.
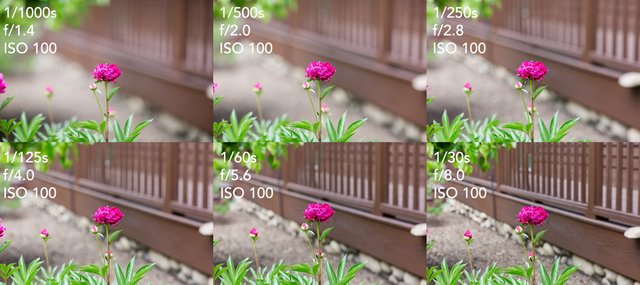
Notice how every time I reduced the aperture by one stop, I also decreased the shutter speed by one stop; thus, the overall exposure is the same in each shot. Nonetheless, the differences are quite noticeable. In the f/1.4 example, the flower in the center of the frame is quite prominent and isolated; the busy deck railing melts away rather nicely. By f/8, my depth of field is much bigger; the deck railing is much more prominent and it isn't clear what the focus of the image is. Also, in the last two images, I'm really beginning to risk camera shake by shooting at speeds slower than the reciprocal of my focal length (I tend to err on the conservative side of that classic rule anyway), 1/85s. Luckily, I've been working on reducing my caffeine intake, so my hands appear to be a bit steadier than in the past.
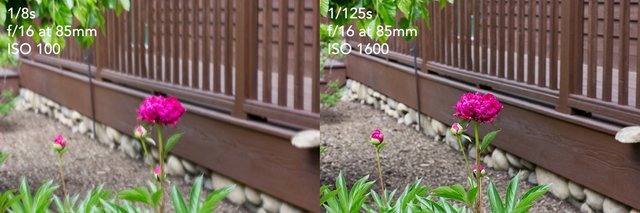
Notice how in this set, I simply couldn't keep the camera still enough for an exposure of 1/8s at 85mm. Even caffeine-free, that's tough to pull off. By increasing the shutter speed 4 stops to a reasonable speed for that focal length and compensating by increasing the ISO 4 stops, I was able to get a sharp image with a large depth of field. Remember, a high ISO, sharp image is always preferable to a low ISO, blurry image.
Knowing the exposure triangle is crucial to getting technically correct images and controlling your composition. Put you camera in manual mode and begin experimenting with the three variables. You'll have an intuitive grasp of them before you know it.
Pay attention to your light sources:-
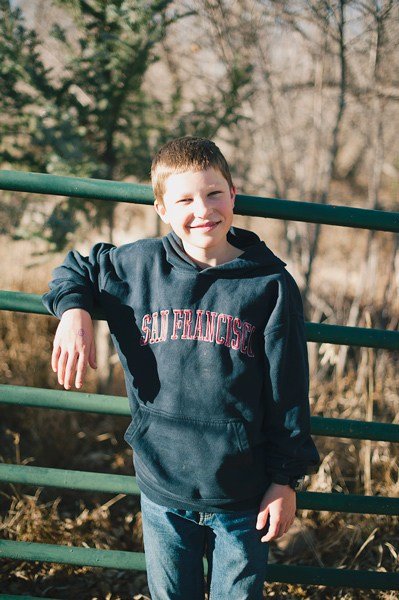
I see many amateur photographers take photos like the one above, with harsh light and shadows on the face. Most of the time they are paying more attention to a pretty background than the lighting. If the sunlight is very bright, such as midday, or early afternoon, this can be a big problem.
Sunlight is a beautiful light source, but you have to work with it, and position your subject in the correct place, since try as you might, you’re not going to be able to move the sun (unless you want to wait a couple of hours, and let it move itself).
#DO try backlighting
DO use backlighting at any time of day. You get different effects backlighting with the sun in different positions. It’s an effective tool to use even when the light is harsh, since it softens the light on your subject’s face, and helps them not to squint. It’s also an ideal tool to use when the sun is low, golden, and gorgeous.
DO move yourself around. Slight differences in angles can make a big difference in the look you get. I like to have the sun behind and slightly to the side of my subject (as you can see in the photo above). If the sun is directly facing your camera, you may get flare in your lens that can totally wipe out your subject. You can get beautiful lens flare effects if you find a spot somewhere in between the two. Experiment to find exactly the look you are going for.
Always check your camera settings:-
Practice!:-
You don’t have to do all of these photography techniques every single day. Do one thing at a time but keep doing it daily. You will soon familiarize yourself with your camera, it’s capabilities which will help you to manipulate it creatively to create stunning images. Practice only makes you perfect. So keep at it. Even if you fail to get good shots keep shooting with an intention of taking better picture than your last one. You will soon see a difference in the images that you are shooting now and those which you had shot earlier.