Star trail Photography Guide - Part 2
In the previous post, I talked why a typical star trail photo consists of a series of circles and I also showed how to find the celestial pole.
We have talked about the "why", let's now talk about the "how".
Composing your star trail photo
The classic star trail photo normally consists of a landscape scene with some interest in the foreground and then the sky filled with circles around the celestial pole. It is therefore important to place the celestial pole somewhere in the sky to create a balance between the features in the foreground and the circles around the celestial pole.
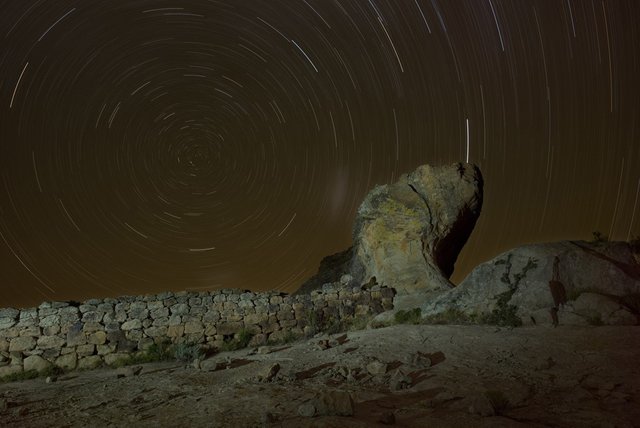
Ancient Ruin
(1 hour exposure with a 14mm lens on an APS-C sensor)
In the example above there is a good balance between the in the foreground rock and the circles in the sky, with some added interest created by the ancient stone wall in the foreground. I found that an ultra-wide angle lens works well for star trails, but don’t go too wide. On a full frame sensor, I will normally not go wider than 20 mm (14 mm on an APS-C size sensor). A wider field of view will result in distortion of the circles (the circles will take on an egg-shape!)
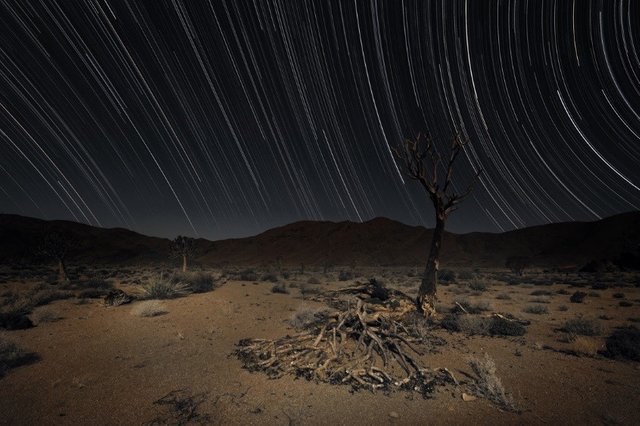
Due East
(3-hour exposure pointing the camera to the East. 14mm lens on a full frame sensor)
One may also opt for a composition that will not show the star trails as circles, but rather curved lines as shown in the example above. This is accomplished by setting your camera to point east or west. When composing the scene this way, I will normally go as wide as possible (even 12mm on a full frame sensor!) as this will give a much wider field of view and thus include the curves formed around the north, as well as the south celestial poles.
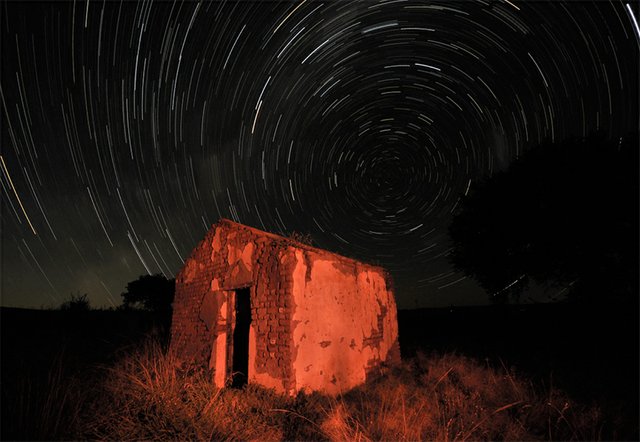
The Station Master's Office
(14mm lens on a full frame sensor)
Notice in the above photo how the circles become egg-shaped closer to the edge of the frame. This is the typical distortion found with ultra wide lenses and not desirable for star trail when including the celestial pole in your photo.
Remember the forground
In all the above examples you will notice that the foreground is quite visible. This is done by lighting up the foreground. I normally use a torch for this, and sometimes, like in "The Station Master's Office" add a colour gell in front of the torch to give it a different look.
To do this is quite easy but experimentation is normally the best way in this modern digital era we live in. Remember, you are busy with a very long exposure, so just switch on the torch and walk into the scene while lighting up the foreground subject (I normally walk from the one side to the other). Make sure that the torch does not point back towards the camera otherwise you will create light streaks on the photo. Because you will not stand still for a long time, your figure will not record on the sensor. I normally do a test run with a 2-3 minute exposure to see that I have the correct amount of light on the foreground (I normally only switch the torch on for about 30 seconds and never point it at one single spot for more than 5 seconds). Once I am happy with my lighting technique, I will start the real star trail exposure and then redo the lighting technique as tested.
The photograph "Due South" is an exception. Here I did not use a torch to light up the scene. I started the photo just as the moon was setting on the western horizon. The light on the foreground is thus that of the moon.
Sometimes, a silhouette scene is more interesting like the photo below where the silhouette rock formation looks like the profile of an old man's face.
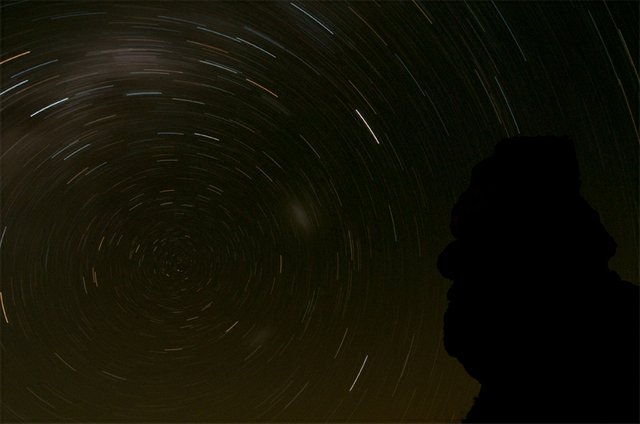
The Old Man
(45 minute exposure)
(Note that this tutorial was also posted today in my Weku Blog)
This post has been upvoted by @photomag and it's manual curation trail with a curie direct follow vote.
Vote for @markangeltrueman, the creator of @photomag as a witness here